
يوضّح هذا البرنامج التعليمي كيفية إنشاء تطبيق Google Chat يساعد مستخدمي Google Chat في إدارة جهات الاتصال الشخصية وجهات الاتصال الخاصة بالعمل. لجمع المعلومات، يطلب تطبيق Chat من المستخدمين ملء نموذج اتصال في رسائل البطاقات ومربّعات الحوار.
إليك طريقة عمل تطبيق Chat:
-
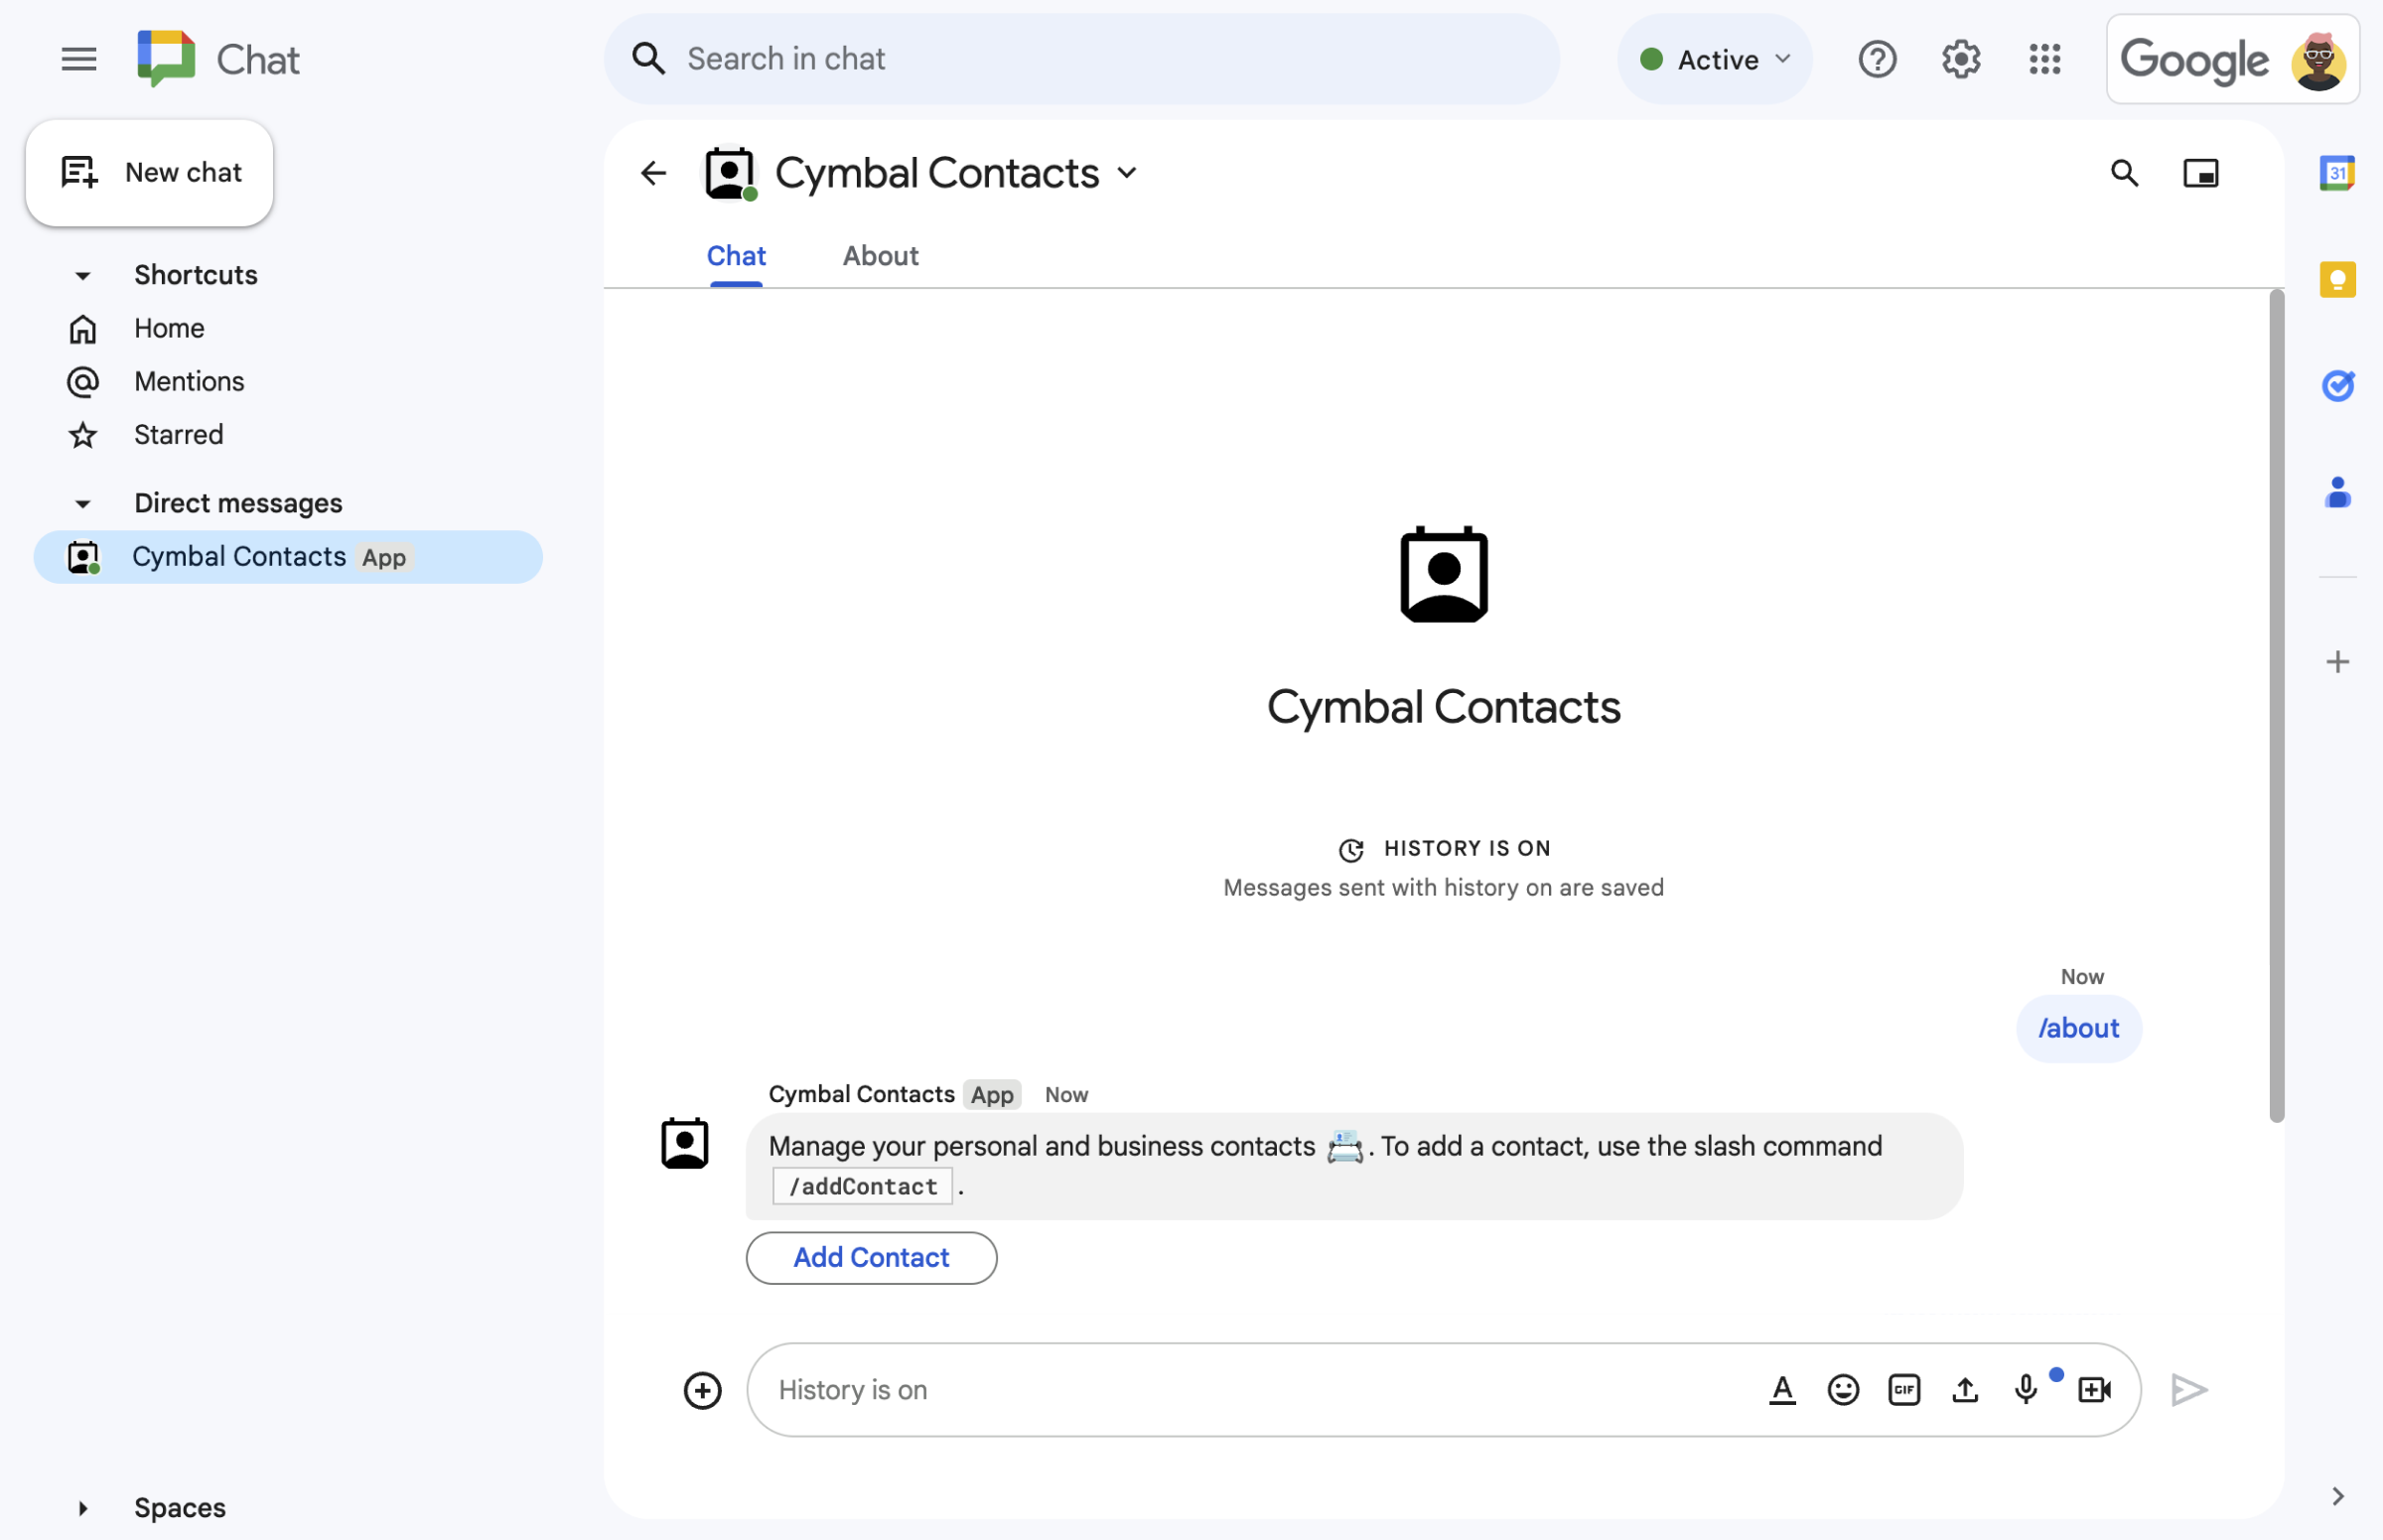
الشكل 1. يستجيب تطبيق Chat للأمر الذي يبدأ بشرطة مائلة /aboutبرسالة نصية وزر يفتح نموذج جهة اتصال. -
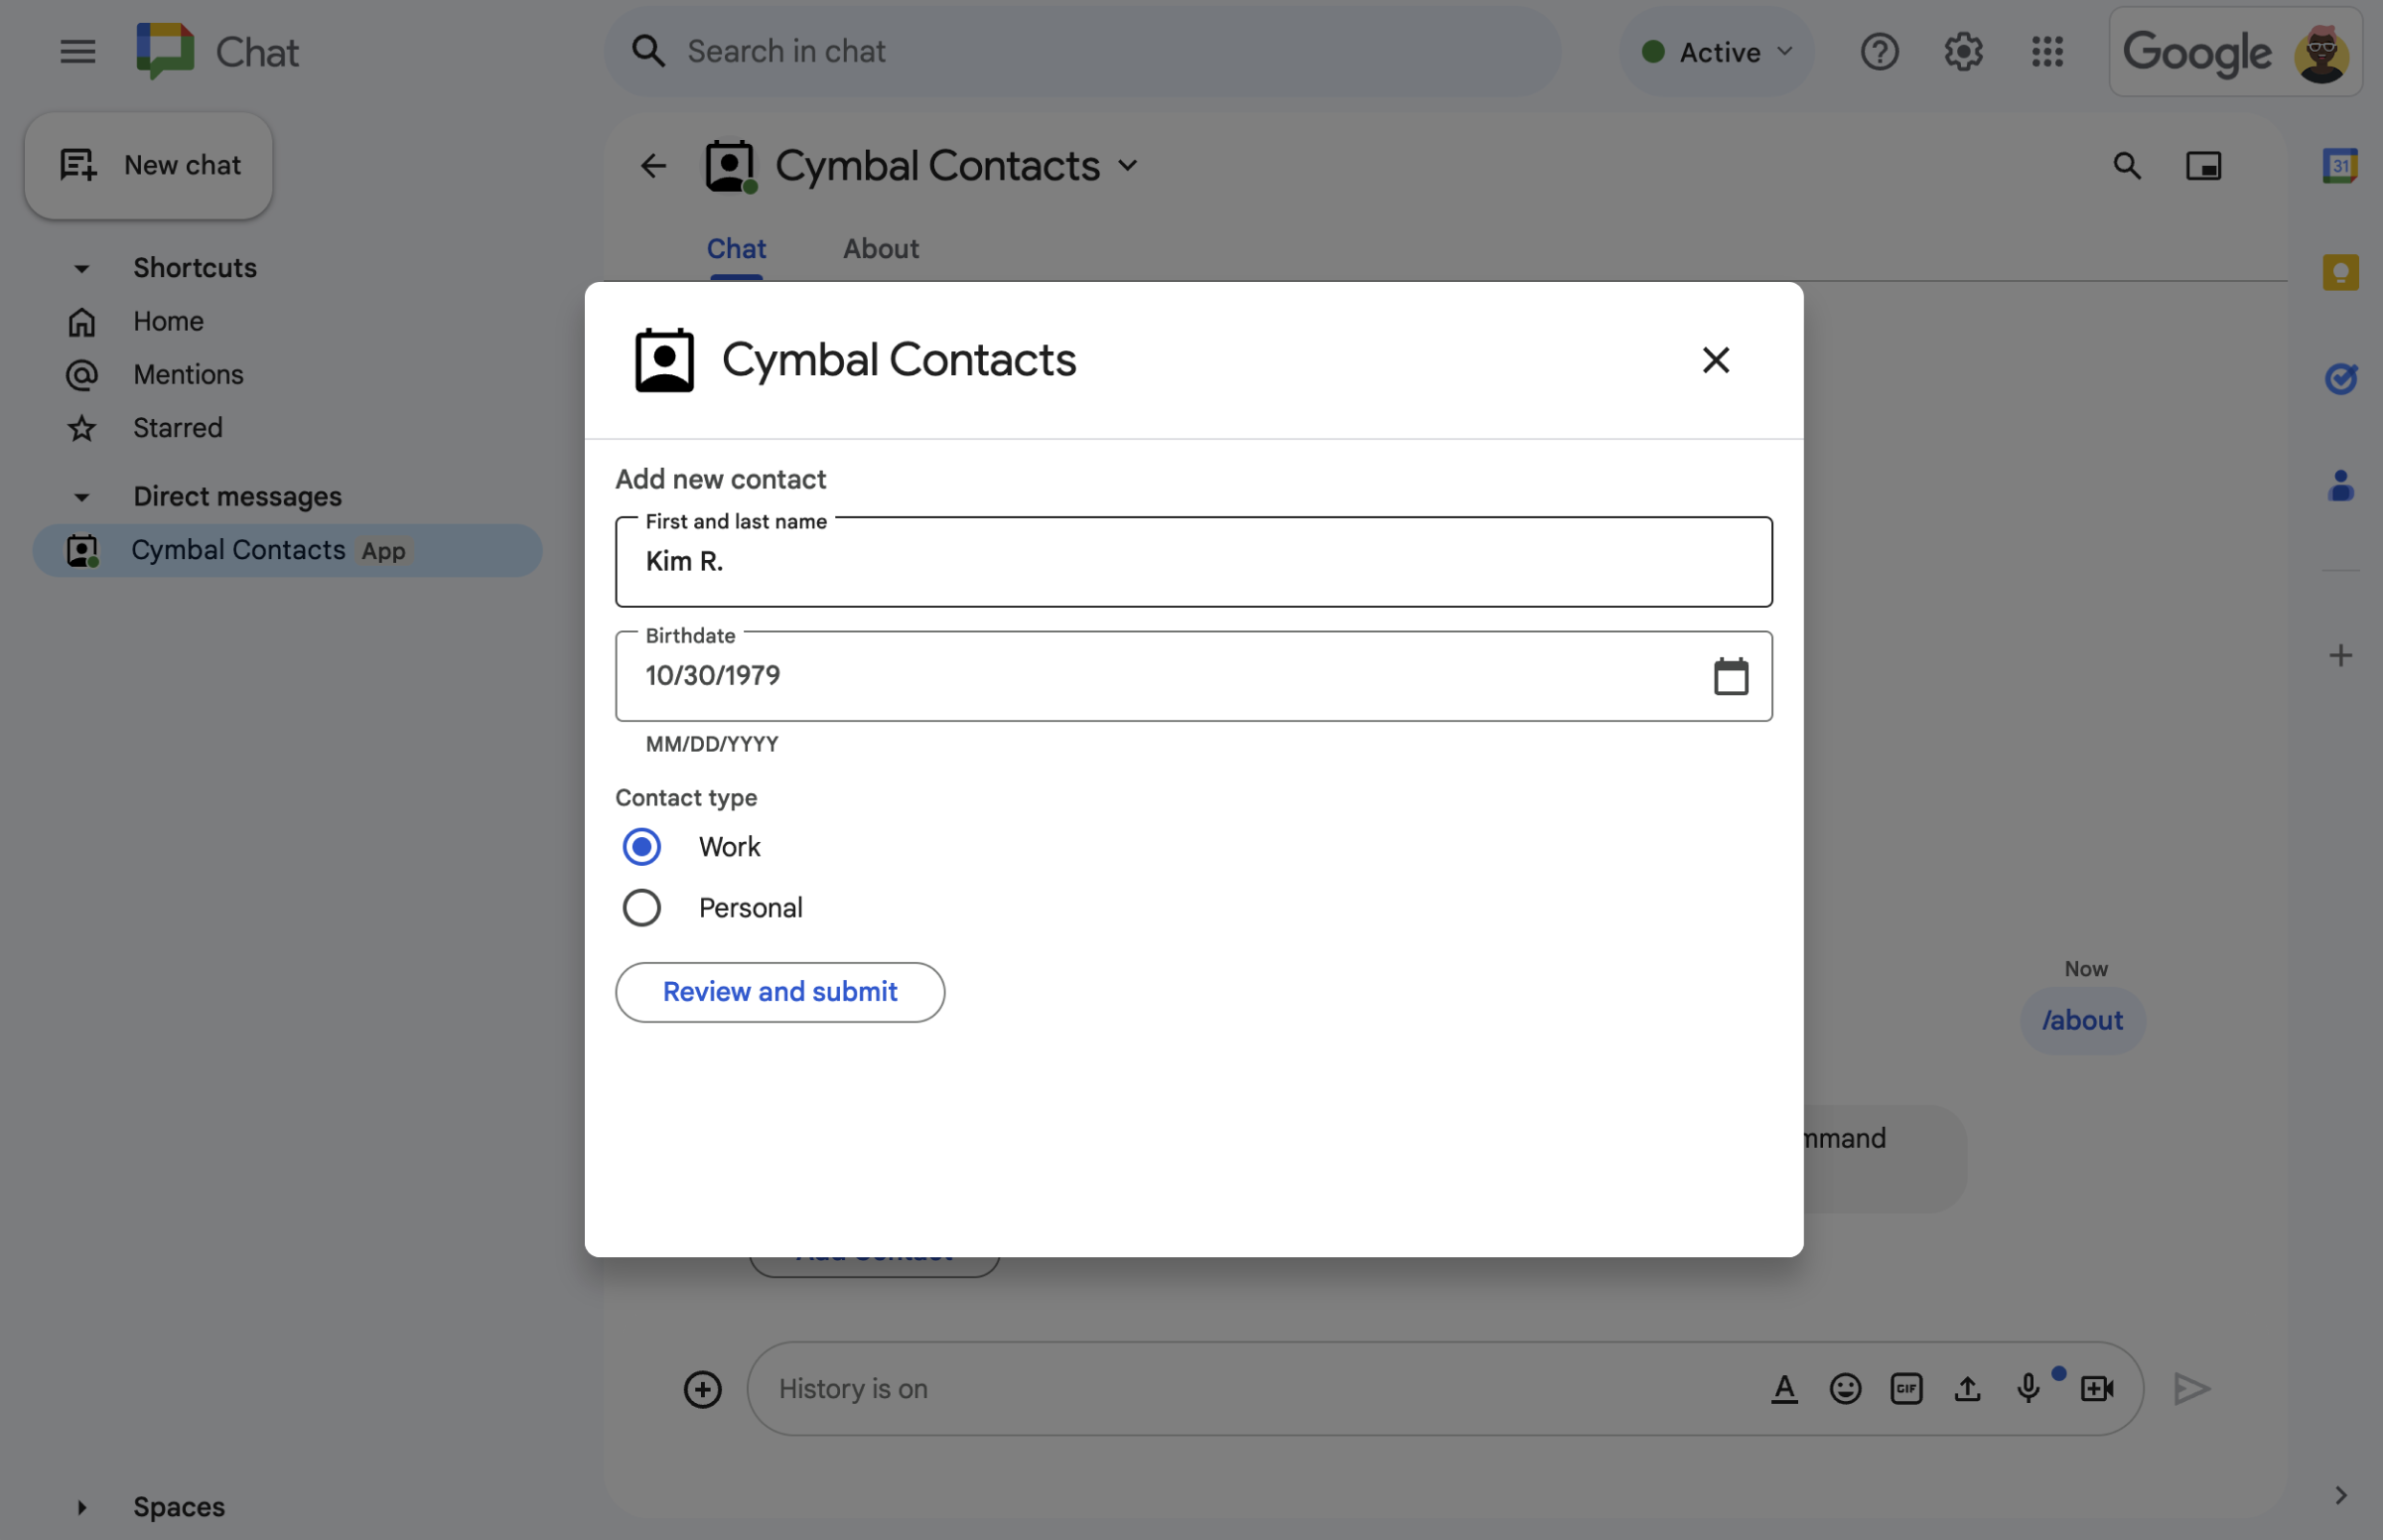
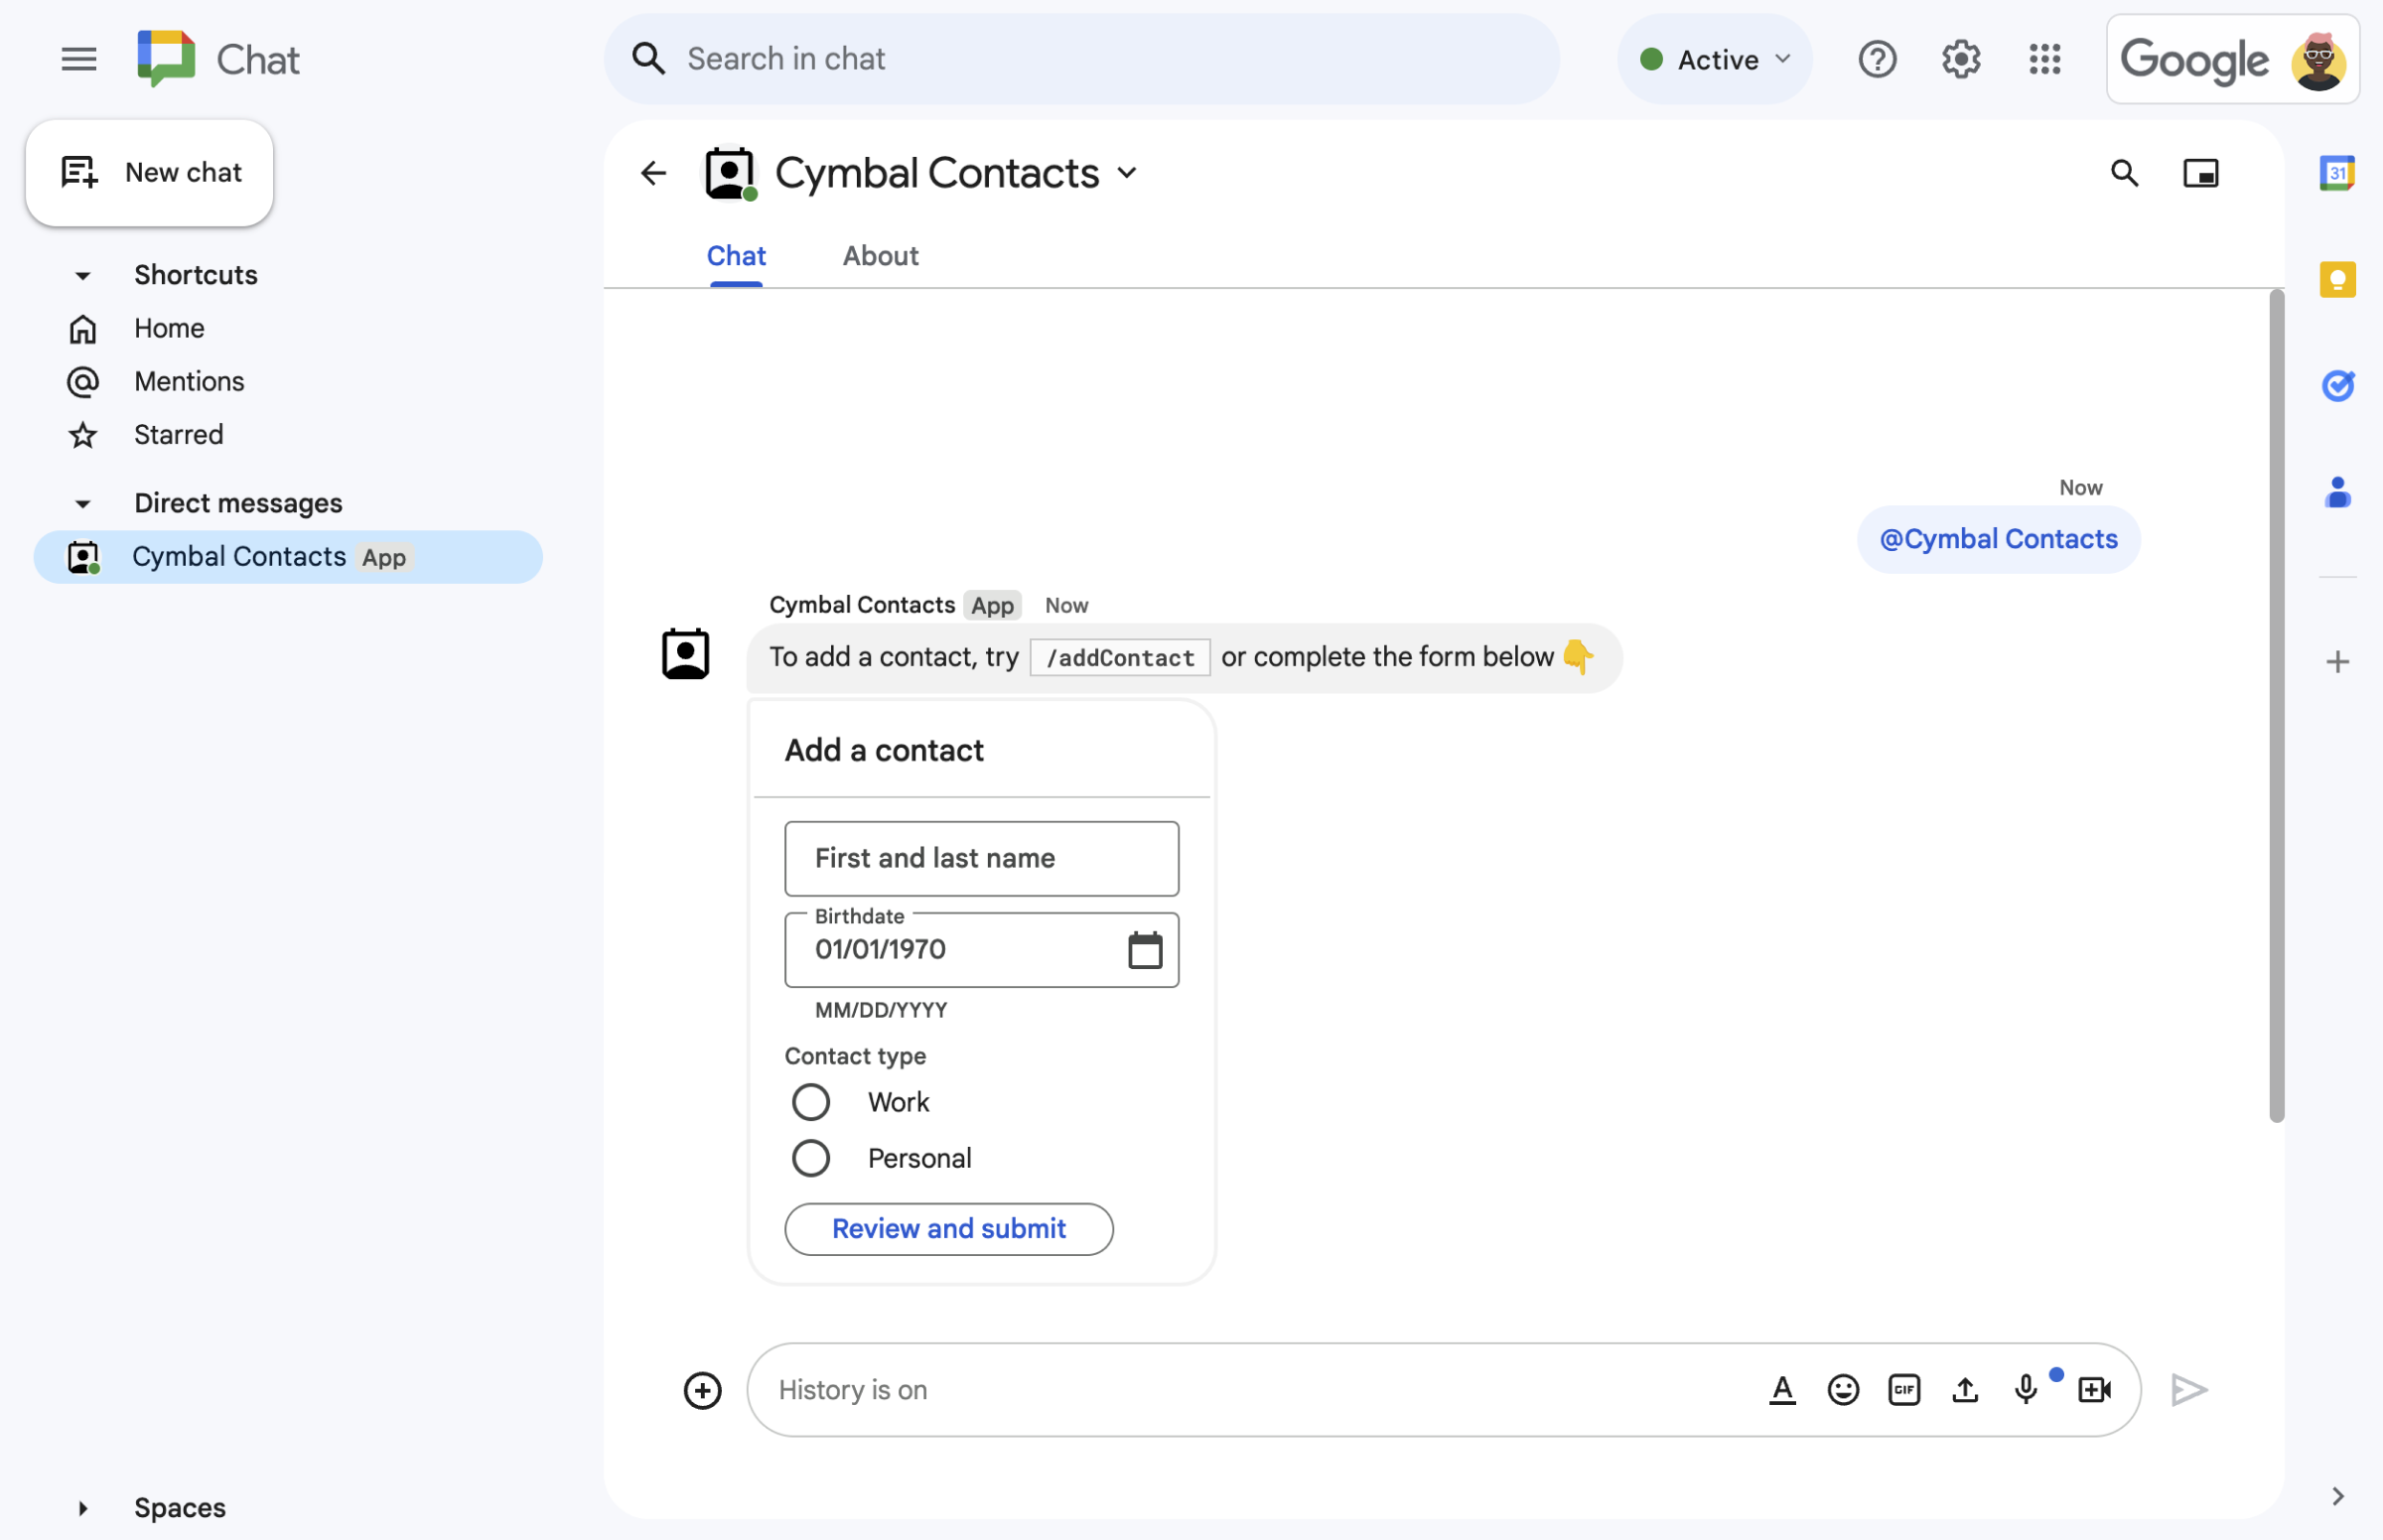
الشكل 2. يفتح تطبيق Chat مربّع حوار يمكن للمستخدمين من خلاله إدخال معلومات حول جهة اتصال. -
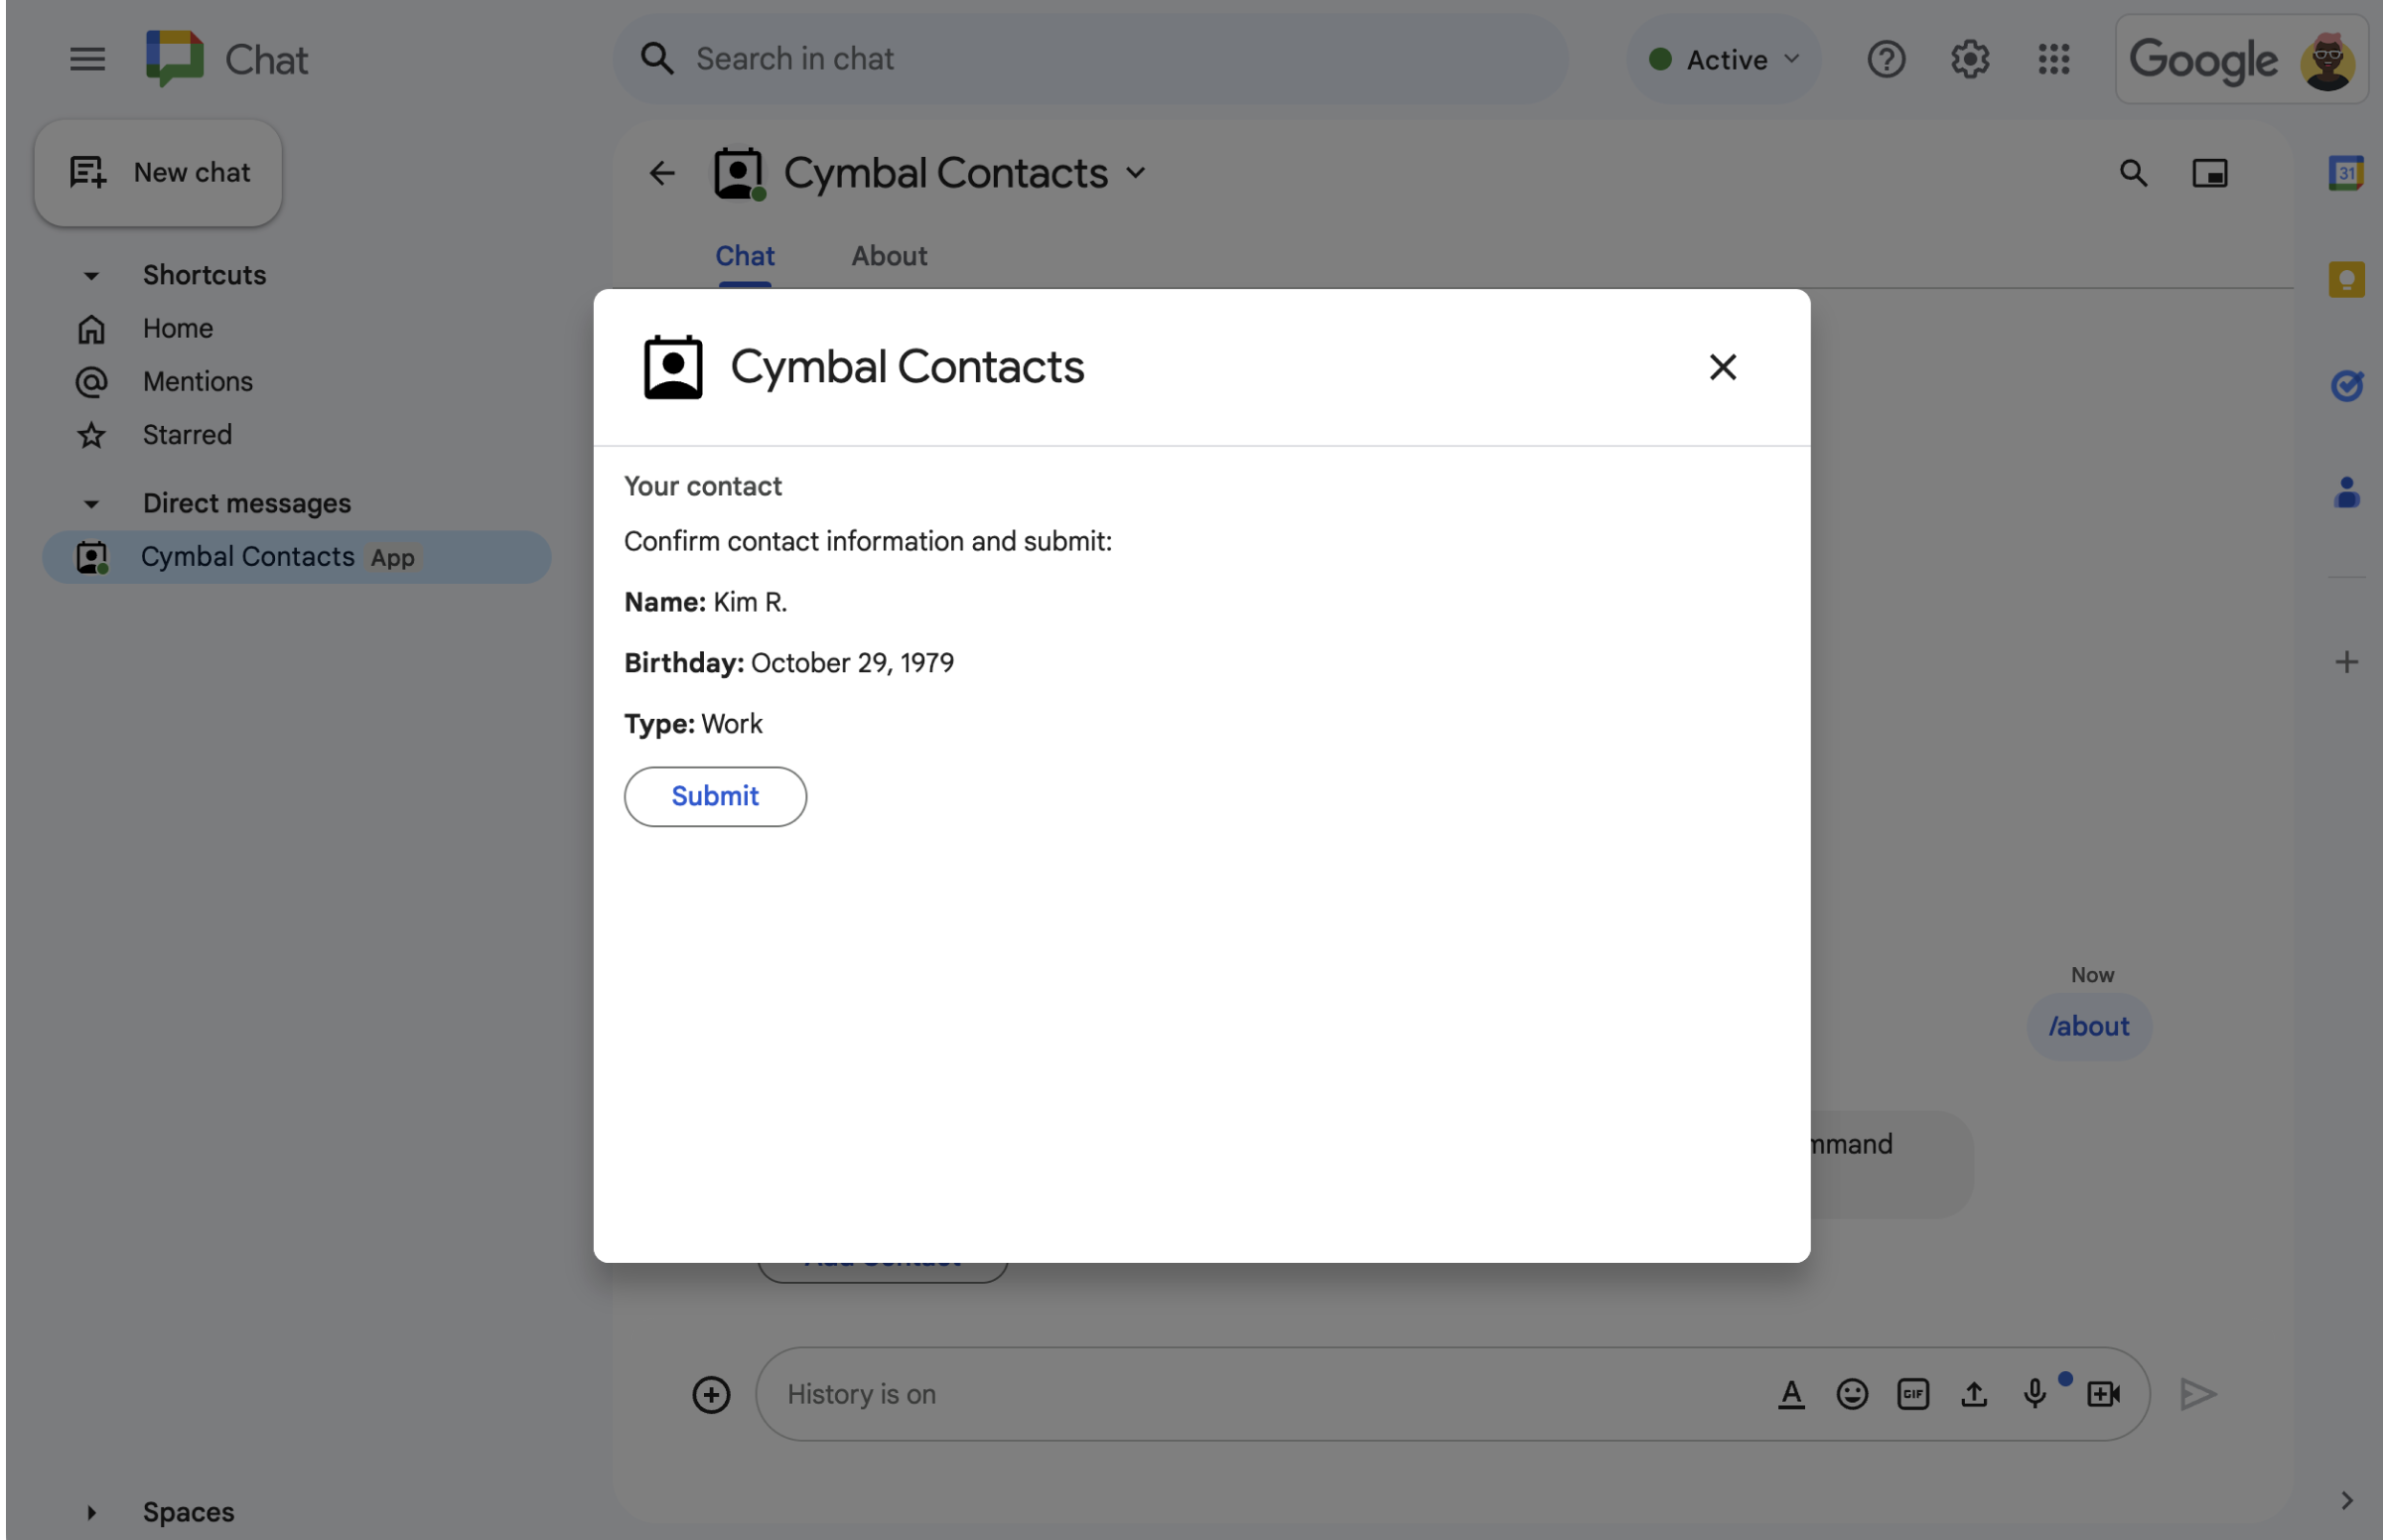
الشكل 3. يعرض تطبيق Chat مربّع حوار تأكيد ليتمكّن المستخدمون من مراجعة المعلومات وتأكيدها قبل إرسالها. -
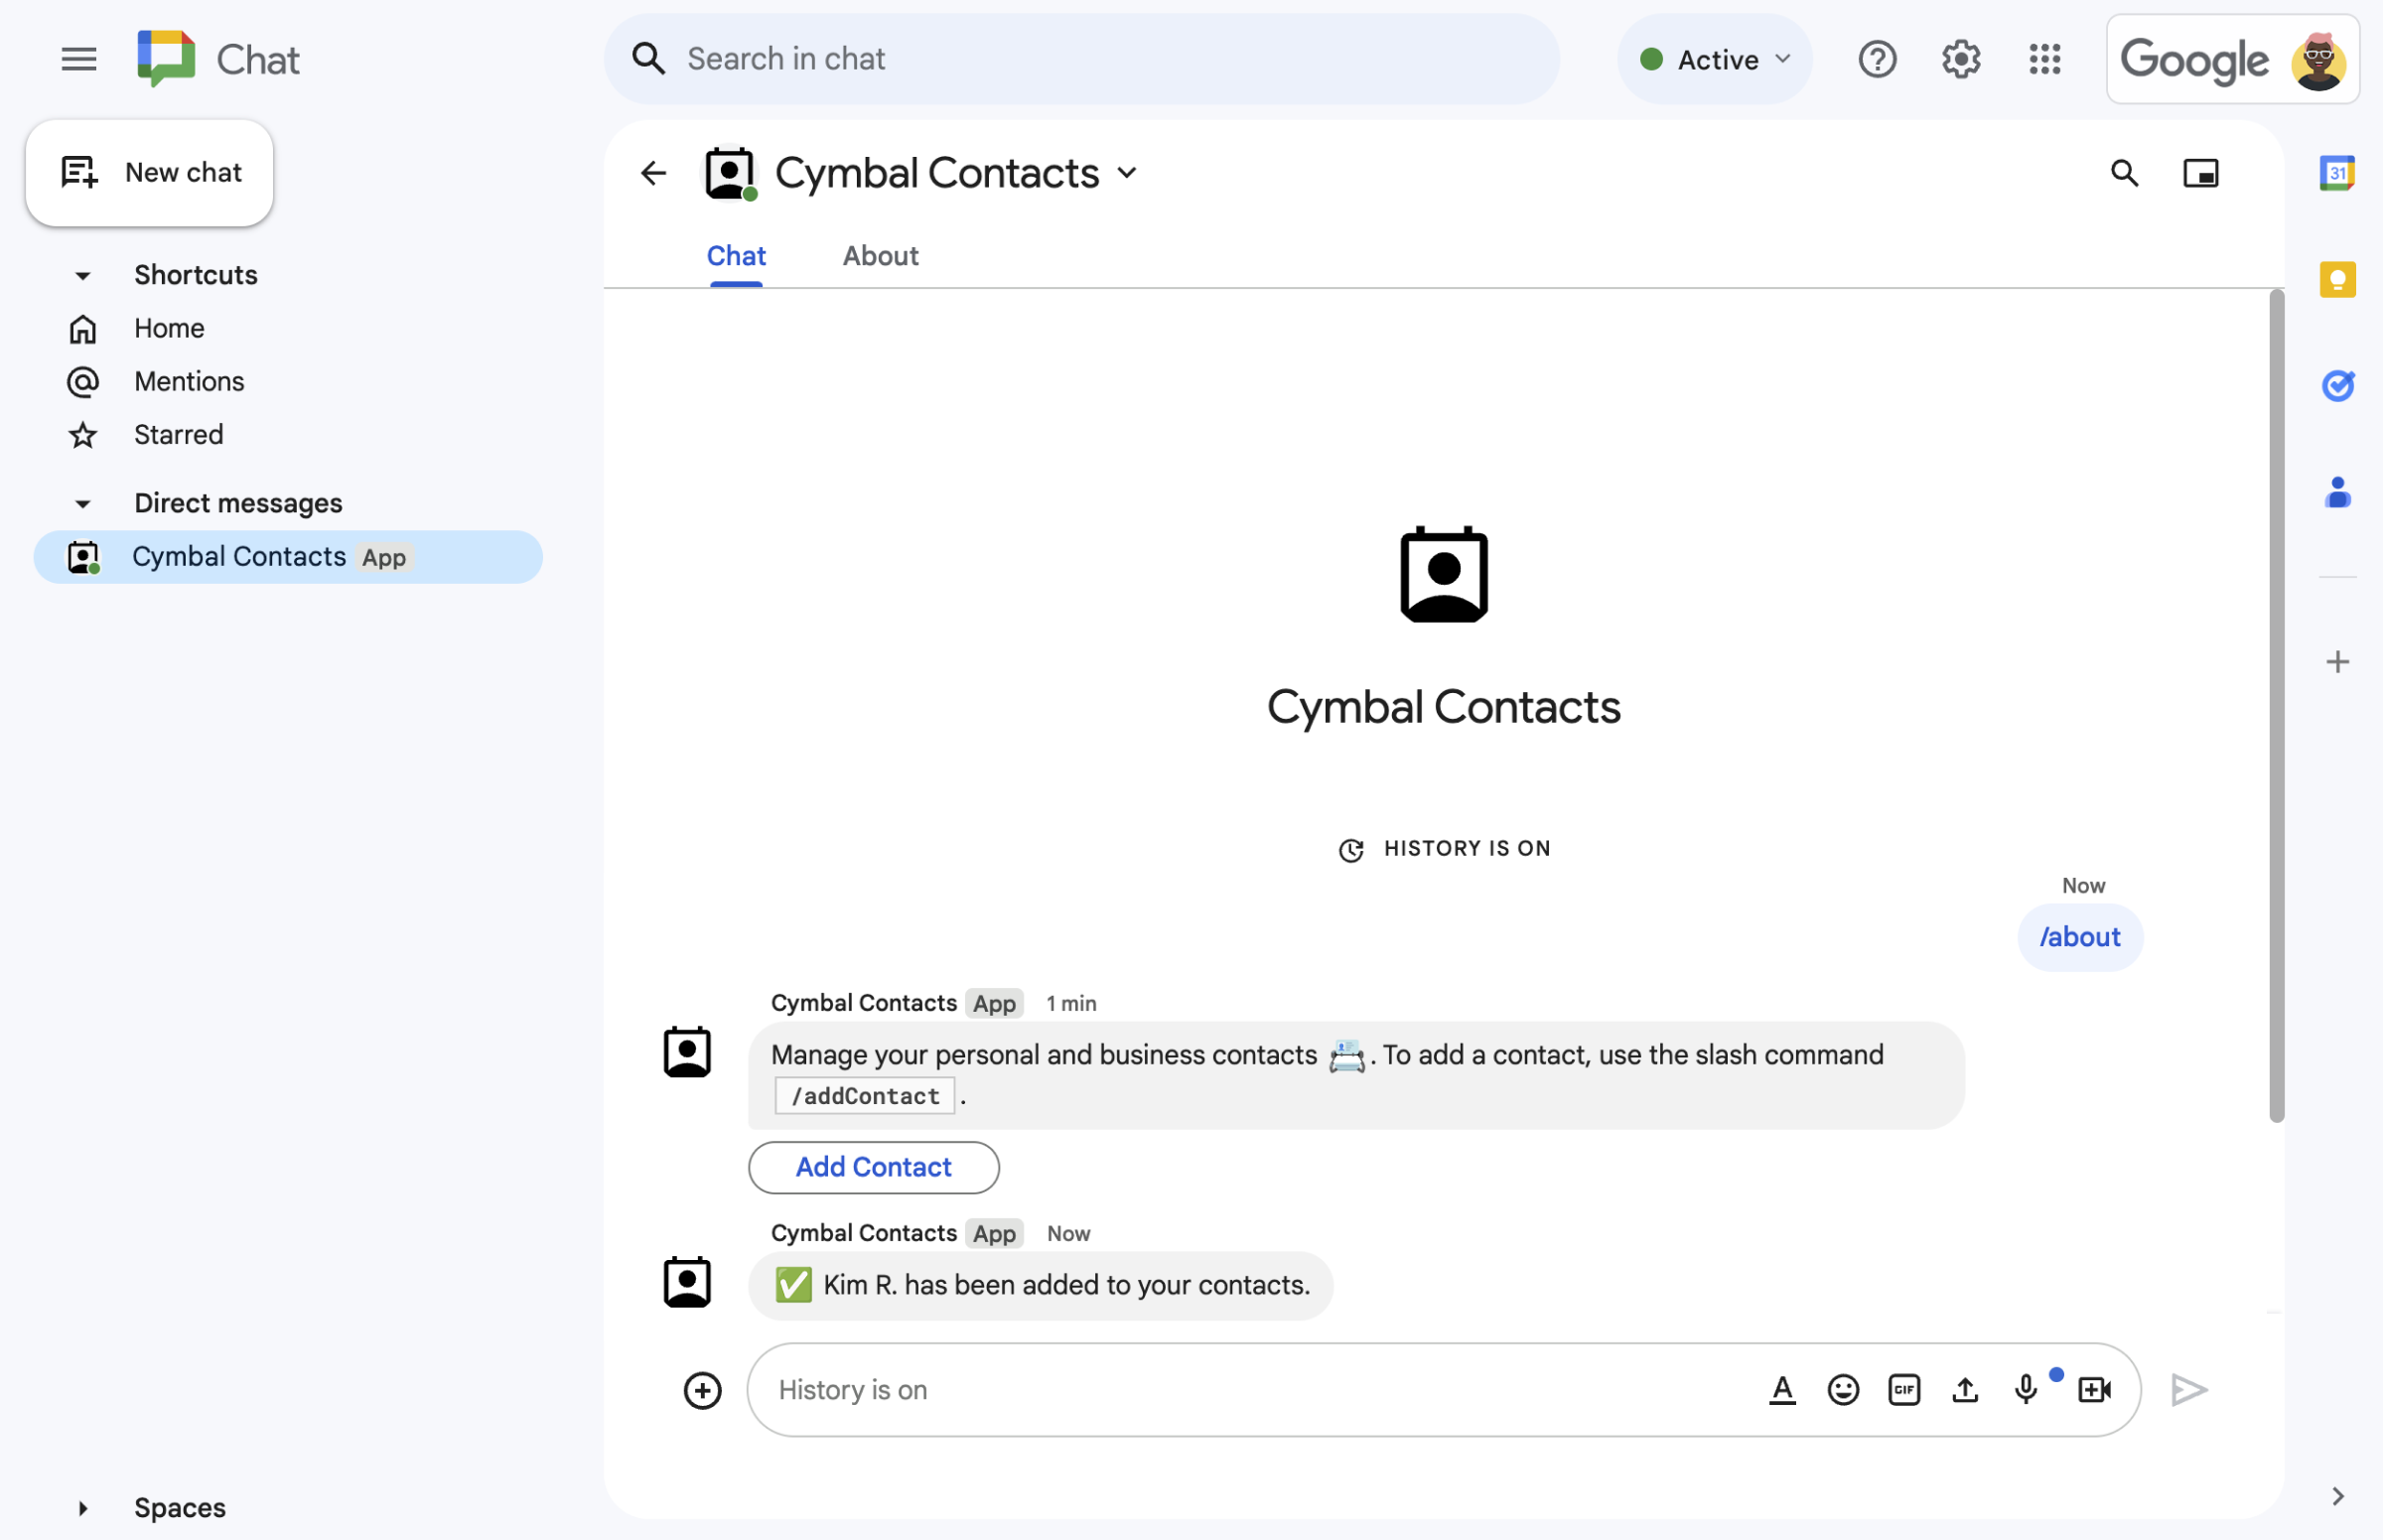
الشكل 4. بعد أن يرسل المستخدم النموذج، يرسل تطبيق Chat رسالة نصية خاصة لتأكيد عملية الإرسال. -
الشكل 5. يطلب تطبيق Chat أيضًا من المستخدمين إضافة جهة اتصال من بطاقة في رسالة.
المتطلبات الأساسية
- حساب Google Workspace Business أو Enterprise مع إمكانية الوصول إلى Google Chat
- أنشئ مشروعًا على Google Cloud.
الأهداف
- تصميم وإنشاء واجهات المستخدم
كعناصر
cardوعرض واجهات المستخدم في الرسائل ومربّعات الحوار - تلقّي المعلومات التي يرسلها المستخدمون ومعالجتها باستخدام عناصر واجهة مستخدم لإدخال النماذج
- الرد على الأوامر برسائل تتضمّن نصوصًا وبطاقات وأدوات ملحقة
الهندسة المعمارية
تم إنشاء تطبيق Chat باستخدام برمجة تطبيقات Google ويستخدم أحداث التفاعل لمعالجة طلبات مستخدمي Chat والردّ عليها.
يوضّح ما يلي كيف يمكن للمستخدم التفاعل عادةً مع تطبيق Chat:
يفتح مستخدم رسالة مباشرة باستخدام تطبيق Chat، أو يضيف تطبيق Chat إلى مساحة حالية.
يطلب تطبيق Chat من المستخدم إضافة جهة اتصال من خلال إنشاء نموذج جهة اتصال وعرضه ككائن
card. لعرض نموذج التواصل، يستجيب تطبيق Chat للمستخدمين بالطرق التالية:- يستجيب لعمليات الإشارة إلى الحساب والرسائل المباشرة من خلال رسالة بطاقة تحتوي على نموذج جهة الاتصال.
- يستجيب للأمر الذي يبدأ بشرطة مائلة
/addContactمن خلال فتح مربّع حوار يتضمّن نموذج تواصل. - يستجيب لأمر يبدأ بشرطة مائلة
/aboutبرسالة نصيّة تتضمّن زر إضافة جهة اتصال يمكن للمستخدمين النقر عليه لفتح مربّع حوار يتضمّن نموذج تواصل.
عندما يظهر نموذج التواصل، يُدخل المستخدم معلومات الاتصال في الحقول وعناصر واجهة المستخدم التالية:
- الاسم الأول واسم العائلة: أداة
textInputتقبل السلاسل. - تاريخ الميلاد: هو
dateTimePickerتطبيق مصغّر يقبل التواريخ فقط. - نوع جهة الاتصال: عنصر واجهة مستخدم
selectionInputيتضمّن أزرار اختيار تتيح للمستخدمين اختيار قيمة سلسلة واحدة وإرسالها (إماPersonalأوWork). - زر المراجعة والإرسال: هو
buttonListمصفوفة تتضمّن أداةbuttonينقر عليها المستخدم لإرسال القيم التي أدخلها.
- الاسم الأول واسم العائلة: أداة
يتعامل تطبيق Google Chat مع حدث تفاعل
CARD_CLICKEDلمعالجة القيم التي يدخلها المستخدم، ويعرض القيم في بطاقة تأكيد.يراجع المستخدم بطاقة التأكيد وينقر على الزر إرسال لإكمال معلومات الاتصال.
يرسل تطبيق Google Chat رسالة نصية خاصة تؤكّد عملية الإرسال.
إعداد البيئة
يوضّح هذا القسم كيفية إعداد مشروع على Google Cloud لتطبيق Chat.
افتح مشروعك على السحابة الإلكترونية في Google API Console
افتح مشروع على السحابة الإلكترونية الذي تريد استخدامه لهذا النموذج إذا لم يكن مفتوحًا من قبل:
- في Google API Console، انتقِل إلى صفحة اختيار مشروع.
- اختَر مشروع Google Cloud الذي تريد استخدامه. أو انقر على إنشاء مشروع واتّبِع التعليمات الظاهرة على الشاشة. في حال إنشاء مشروع على Google Cloud، قد تحتاج إلى تفعيل الفوترة للمشروع.
إعداد المصادقة والتفويض
تتطلّب تطبيقات Google Chat منك إعداد شاشة طلب الموافقة المتعلّقة ببروتوكول OAuth ليتمكّن المستخدمون من منح الإذن لتطبيقك في تطبيقات Google Workspace، بما في ذلك Google Chat.
في هذا البرنامج التعليمي، ستنشئ تطبيق Chat مخصّصًا للاختبار والاستخدام الداخلي فقط، لذا لا بأس من استخدام معلومات العنصر النائب لشاشة طلب الموافقة. قبل نشر تطبيق Chat، استبدِل أي معلومات نائبة بمعلومات حقيقية.
في Google API Console، انتقِل إلى "القائمة" > منصة Google Auth > العلامة التجارية.
إذا سبق لك إعداد منصة Google Auth، يمكنك ضبط إعدادات شاشة طلب الموافقة المتعلّقة ببروتوكول OAuth التالية في العلامة التجارية والجمهور والوصول إلى البيانات. إذا ظهرت لك الرسالة لم يتم إعداد منصة Google Auth بعد، انقر على البدء:
- ضمن معلومات التطبيق، في اسم التطبيق، اكتب
Contact Manager. - في حقل البريد الإلكتروني لدعم المستخدمين، اختَر عنوان بريدك الإلكتروني أو مجموعة Google مناسبة.
- انقر على التالي.
- ضمن الجمهور، اختَر داخلي. إذا لم تتمكّن من اختيار داخلي، اختَر خارجي.
- انقر على التالي.
- ضمن معلومات الاتصال، أدخِل عنوان بريد إلكتروني يمكنك تلقّي إشعارات فيه بشأن أي تغييرات تطرأ على مشروعك.
- انقر على التالي.
- ضمن إنهاء، راجِع سياسة بيانات المستخدمين في خدمات Google API، ثم ضَع علامة في المربّع أوافق على "سياسة بيانات المستخدمين في خدمات Google API" إذا كنت موافقًا.
- انقر على متابعة.
- انقر على إنشاء.
- إذا اخترت خارجي لنوع المستخدم، أضِف مستخدمين اختباريين:
- انقر على الجمهور.
- ضمن المستخدمون التجريبيون، انقر على إضافة مستخدمين.
- أدخِل عنوان بريدك الإلكتروني وأي مستخدمين اختباريين آخرين معتمَدين، ثم انقر على حفظ.
- ضمن معلومات التطبيق، في اسم التطبيق، اكتب
إنشاء تطبيق Chat ونشره
في القسم التالي، عليك نسخ مشروع كامل من مشاريع "برمجة التطبيقات" وتعديله، وهو يحتوي على جميع رموز التطبيق المطلوبة لتطبيق Chat، لذا لن تحتاج إلى نسخ كل ملف ولصقه.
يمكنك اختياريًا الاطّلاع على المشروع بأكمله على GitHub.
في ما يلي نظرة عامة على كل ملف:
main.gsيتعامل مع جميع منطق التطبيق، بما في ذلك أحداث التفاعل المتعلقة بموعد إرسال المستخدمين رسائل إلى تطبيق Chat أو النقر على أزرار من رسالة تطبيق Chat أو فتح مربعات الحوار وإغلاقها.
عرض رمز
main.gscontactForm.gsيحتوي على التطبيقات المصغّرة التي تتلقّى بيانات النموذج من المستخدمين. يتم عرض عناصر واجهة المستخدم الخاصة بإدخال النماذج هذه في بطاقات تظهر في الرسائل ومربّعات الحوار.
عرض رمز
contactForm.gsappsscript.jsonبيان "برمجة تطبيقات Google" الذي يحدّد مشروع "برمجة تطبيقات Google" ويضبطه لتطبيق Chat
عرض رمز
appsscript.json
إنشاء مشروع "برمجة تطبيقات Google"
لإنشاء مشروع في "برمجة تطبيقات Google"، اتّبِع الخطوات التالية:
- انقر على الزر التالي لفتح مشروع إدارة جهات الاتصال في Google Chat على برمجة تطبيقات.
فتح المشروع - انقر على نظرة عامة.
- في صفحة النظرة العامة، انقر على
 إنشاء نسخة.
 أدخِل اسمًا لنسخة مشروع "برمجة التطبيقات Google":
انقر على نسخة من "إدارة جهات الاتصال في Google Chat".
في عنوان المشروع، اكتب
Contact Manager - Google Chat appانقر على إعادة تسمية.
في المستقبل، إذا أردت استخدام Google APIs معيّنة أو نشر تطبيقك، عليك ربط مشروعك على السحابة الإلكترونية بمشروعك على "برمجة تطبيقات Google". ليس عليك اتّخاذ هذا الإجراء في هذا الدليل. لمزيد من المعلومات، راجِع دليل مشاريع Google Cloud.
إنشاء عملية نشر في "برمجة تطبيقات Google"
بعد الانتهاء من إعداد الرمز البرمجي وحفظه، يمكنك الآن نشر مشروع برمجة تطبيقات. يمكنك استخدام معرّف النشر عند إعداد تطبيق Chat في Google Cloud.
في برمجة تطبيقات، افتح مشروع تطبيق Chat.
انقر على نشر > عملية نشر جديدة.
إذا لم يتم اختيار إضافة من قبل، انقر على أنواع النشر
 بجانب اختيار النوع، ثم اختَر إضافة.
في الوصف، أدخِل وصفًا لهذا الإصدار، مثل
Test of Contact Manager.انقر على نشر. تسجّل "برمجة التطبيقات" عملية النشر الناجحة وتوفّر رقم تعريف لعملية النشر.
انقر على نسخ لنسخ رقم تعريف عملية النشر، ثم انقر على تم.
ضبط تطبيق Chat في "وحدة تحكّم Google API"
يوضّح هذا القسم كيفية ضبط إعدادات Google Chat API في "وحدة تحكّم Google API" باستخدام معلومات عن تطبيق Chat، بما في ذلك معرّف عملية النشر التي أنشأتها للتو من مشروع برمجة تطبيقات.
في Google API Console، انقر على القائمة > واجهات برمجة التطبيقات والخدمات > واجهات برمجة التطبيقات والخدمات المفعَّلة > Google Chat API > الإعدادات.
ألغِ تحديد إنشاء تطبيق Chat هذا كإضافة على Google Workspace. سيظهر مربّع حوار يطلب منك التأكيد. في مربّع الحوار، انقر على إيقاف.
في حقل اسم التطبيق، اكتب
Contact Manager.في عنوان URL للأفاتار، اكتب
https://developers.google.com/chat/images/contact-icon.png.في حقل الوصف، اكتب
Manage your personal and business contacts.انقر على مفتاح التبديل تفعيل الميزات التفاعلية لتفعيله.
ضمن الوظائف، اختَر الانضمام إلى المساحات والمحادثات الجماعية.
ضمن إعدادات الاتصال، اختَر برمجة تطبيقات.
في معرّف النشر، الصِق معرّف نشر "برمجة تطبيقات Google" الذي نسخته في القسم السابق عند إنشاء عملية نشر "برمجة تطبيقات Google".
ضمن الأوامر، اضبط الأوامر التي تبدأ بشرطة مائلة
/aboutو/addContact:- انقر على إضافة أمر يبدأ بشرطة مائلة لإعداد الأمر الأول.
- في حقل الاسم، اكتب
About. - في معرّف الأمر، اكتب
1. - في حقل الوصف، اكتب
Learn how to use this Chat app to manage your contacts. - ضمن نوع الأمر، اختَر
Slash command. - في اسم الأمر الذي يبدأ بشرطة مائلة، اكتب
/about. - اختَر يفتح مربّع حوار.
- انقر على تم.
- انقر على إضافة أمر يبدأ بشرطة مائلة لإعداد أمر آخر يبدأ بشرطة مائلة.
- في حقل الاسم، اكتب
Add a contact. - في معرّف الأمر، اكتب
2. - في حقل الوصف، اكتب
Submit information about a contact. - ضمن نوع الأمر، اختَر
Slash command. - في اسم الأمر الذي يبدأ بشرطة مائلة، اكتب
/addContact. - اختَر يفتح مربّع حوار.
- انقر على تم.
ضمن حق الدخول، ضَع علامة في مربّع الاختيار إتاحة تطبيق Chat هذا لمستخدمين ومجموعات محدّدين في YOUR DOMAIN وأدخِل عنوان بريدك الإلكتروني.
ضمن السجلات، اختَر تسجيل الأخطاء في خدمة تسجيل البيانات.
انقر على حفظ. ستظهر رسالة "تم حفظ الإعدادات".
تطبيق Chat جاهز للتثبيت والاختبار في Chat.
اختبار تطبيق Chat
لاختبار تطبيق Chat، افتح مساحة رسالة مباشرة باستخدام تطبيق Chat وأرسِل رسالة:
افتح Google Chat باستخدام حساب Google Workspace الذي قدّمته عند إضافة نفسك كمختبِر موثوق به.
- انقر على محادثة جديدة.
- في حقل إضافة مستخدم واحد أو أكثر، اكتب اسم تطبيق Chat.
اختَر تطبيق Chat من النتائج. سيتم فتح رسالة مباشرة.
في الرسالة المباشرة الجديدة مع تطبيق Chat، اكتب
/addContactواضغط على Enter.في مربّع الحوار الذي يفتح، أدخِل معلومات الاتصال:
- في حقل النص الاسم الأول واسم العائلة، أدخِل اسمًا.
- في أداة اختيار التاريخ تاريخ الميلاد، اختَر تاريخًا.
- ضمن نوع جهة الاتصال، انقر على زر الاختيار العمل أو شخصي.
انقر على المراجعة والإرسال.
في مربّع حوار التأكيد، راجِع المعلومات التي أرسلتها وانقر على إرسال. سيردّ تطبيق Chat برسالة نصية تقول
✅ CONTACT NAME has been added to your contacts..يمكنك اختياريًا اختبار نموذج الاتصال وإرساله بالطرق التالية:
- استخدِم الأمر
/aboutالذي يبدأ بشرطة مائلة. يرد تطبيق المحادثة برسالة نصية وزر في أداة ملحقة مكتوب عليهAdd a contact. يمكنك النقر على الزرّ لفتح مربّع حوار يتضمّن نموذج جهة الاتصال. - أرسِل رسالة مباشرة إلى تطبيق Chat بدون استخدام أمر يبدأ بشرطة مائلة، مثل
Hello. سيردّ تطبيق Chat بنص وبطاقة تحتوي على نموذج الاتصال.
- استخدِم الأمر
تَنظيم
لتجنُّب تحمّل رسوم في حسابك على Google Cloud مقابل الموارد المستخدَمة في هذا البرنامج التعليمي، ننصحك بحذف مشروع على السحابة الإلكترونية.
- في Google API Console، انتقِل إلى صفحة إدارة الموارد. انقر على القائمة > إدارة الهوية وإمكانية الوصول والمشرف > إدارة الموارد.
- في قائمة المشاريع، اختَر المشروع الذي تريد حذفه، ثم انقر على حذف .
- في مربّع الحوار، اكتب رقم تعريف المشروع، ثم انقر على إيقاف لحذف المشروع.
مواضيع ذات صلة
- الردّ على الأوامر
- جمع معلومات من مستخدمي Google Chat ومعالجتها
- فتح مربّعات حوار تفاعلية
- استكشاف نماذج أخرى من تطبيقات Google Chat