Restez organisé à l'aide des collections
Enregistrez et classez les contenus selon vos préférences.
Pour effectuer des mises à jour en temps réel, vous devez envoyer des requêtes à l'API Maps Booking. L'API Maps Booking nécessite que vous authentifiiez vos requêtes via OAuth 2.0 à l'aide d'un compte de service GCP ayant accès à l'API et auquel les QPS nécessaires ont été alloués. Ce guide vous explique comment:
Configurer votre projet Google Cloud
Créer un compte de service
Activer l'API Maps Booking dans votre projet GCP
Déboguer les problèmes courants
Pour savoir comment envoyer des requêtes à l'API, consultez la section Mises à jour de l'API en temps réel du guide de bout en bout sur les annonces Local Services.
Configurer votre projet Google Cloud avec le Centre d'actions
À cette fin, vous pouvez créer un projet ou utiliser un projet existant.
Veuillez noter le numéro du projet cloud, car vous en aurez besoin lors des étapes suivantes. Vous trouverez également le numéro de votre projet cloud sur la page d'accueil de Google Cloud Platform. Le numéro de projet Cloud est toujours numérique.
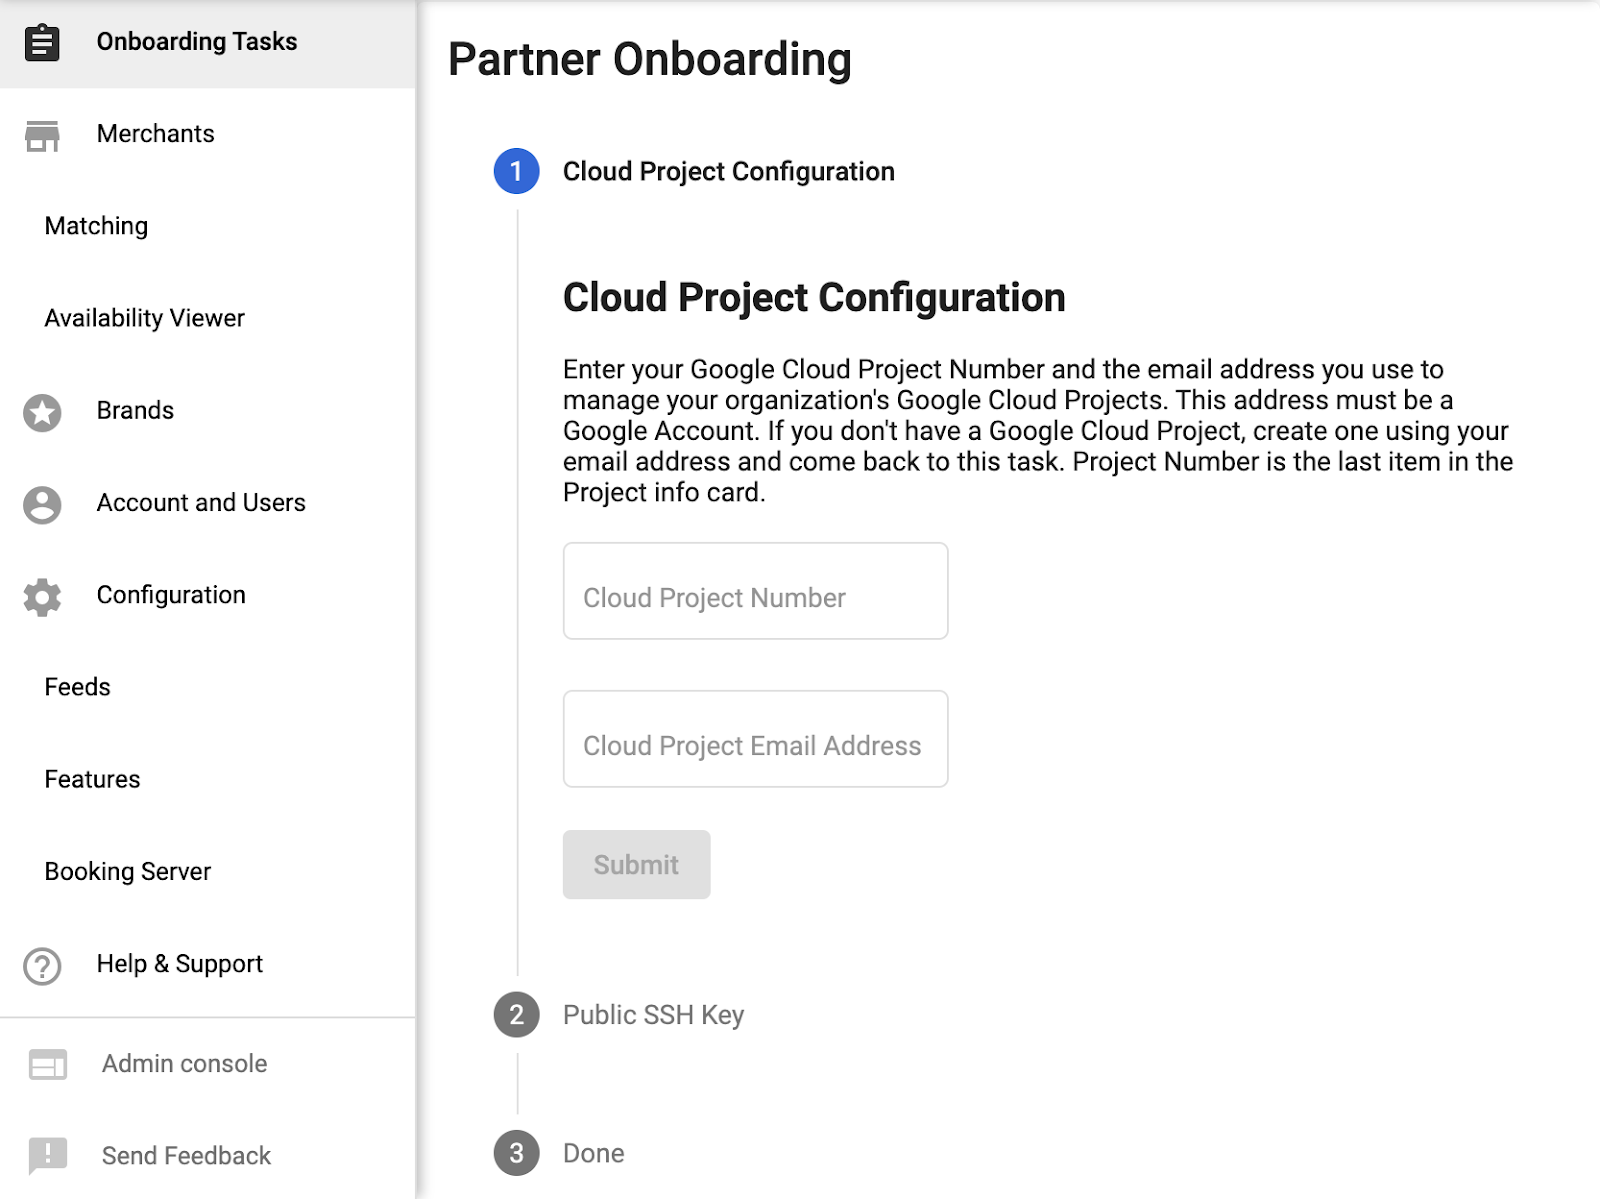
Suivez la première étape de la page "Tâches d'intégration" du Partner Portal en indiquant le numéro et l'adresse e-mail du projet cloud (l'adresse e-mail utilisée pour administrer le projet cloud).
Créer un compte de service et des identifiants OAuth
Attribuez au nouveau compte de service le rôle le plus adapté aux besoins de votre application.
Le choix du rôle pour le compte de service n'a aucune incidence sur les appels pouvant être effectués auprès de l'API Google Maps Booking. En effet, l'allocation d'un quota suffisant pour les utiliser est déterminée par l'association de votre numéro de projet dans la configuration du Centre d'actions.
Si vous ne savez pas quel rôle choisir, sélectionnez simplement Projet > Lecteur.
Après avoir cliqué sur "Continuer" à l'étape 6, vous aurez la possibilité de créer des clés JSON.
Enregistrez les identifiants JSON. Veillez à les stocker dans un endroit sûr, car vous ne pourrez pas les récupérer ultérieurement.
Connectez-vous à nouveau au Partner Portal et effectuez les tâches restantes sur la page Tâches d'intégration du Partner Portal.
Plusieurs raisons peuvent expliquer les problèmes d'autorisation lors de l'envoi de requêtes de mise à jour en temps réel. Pour obtenir des conseils généraux sur l'envoi de requêtes de mises à jour en temps réel, consultez la section Mises à jour de l'API en temps réel du guide de bout en bout sur les annonces Local Services. Vous trouverez également des exemples de clients dans plusieurs langues dans la section Exemples de code.
Si vous rencontrez des erreurs 403, vérifiez que vous respectez toutes les conditions suivantes:
Si des erreurs persistent après avoir suivi ces étapes, contactez votre contact Actions Center en lui fournissant les informations suivantes:
Numéro et ID de projet Cloud avec une capture d'écran
ID du compte de service
Adresse e-mail utilisée pour créer le compte de service
Détails du point de terminaison auquel des requêtes ont été envoyées
Heure des tentatives de requête
Requête complète et messages d'erreur reçus lors de l'envoi de requêtes.
Sauf indication contraire, le contenu de cette page est régi par une licence Creative Commons Attribution 4.0, et les échantillons de code sont régis par une licence Apache 2.0. Pour en savoir plus, consultez les Règles du site Google Developers. Java est une marque déposée d'Oracle et/ou de ses sociétés affiliées.
Dernière mise à jour le 2025/07/26 (UTC).
[null,null,["Dernière mise à jour le 2025/07/26 (UTC)."],[[["\u003cp\u003eReal-time updates require using the Maps Booking API with OAuth 2.0 authentication via a GCP service account.\u003c/p\u003e\n"],["\u003cp\u003eYou need to set up a Google Cloud project, create a service account, and enable the Maps Booking API.\u003c/p\u003e\n"],["\u003cp\u003eCommon errors can arise from incorrect endpoint usage, authorization issues, or scope mismatches, requiring careful setup.\u003c/p\u003e\n"],["\u003cp\u003eDetailed troubleshooting information, including project details, service account, and request specifics, is crucial for resolving issues with Actions Center support.\u003c/p\u003e\n"]]],["To enable real-time updates via the Maps Booking API, authenticate requests using OAuth 2.0 with a GCP service account. This involves setting up a Google Cloud project, creating a service account with appropriate roles, and enabling the Maps Booking API. Use the project number in the Partner Portal. Save the JSON credentials securely. If encountering 403 errors, verify the use of a Google Client Library, OAuth credentials, correct scope (`https://www.googleapis.com/auth/mapsbooking`), and the proper API endpoint.\n"],null,["# Authenticate with Maps Booking API\n\nIn order to make\n[real-time updates](/actions-center/verticals/local-services/e2e/integration-steps/real-time-api-updates), you need to make requests to the\n[Maps Booking API](/maps-booking/reference/maps-booking-api/rest). The Maps Booking API requires that you\nauthenticate your requests via OAuth 2.0 using a GCP service account which\nhas access to the API, and has been allocated the necessary QPS. This guide will walk you through the steps to:\n\n1. Set up your Google Cloud project\n2. Create a service account\n3. Enable the Maps Booking API in your GCP project\n4. Debug common issues\n\nFor information on how to make requests to the API, see our\n[real-time API updates](/actions-center/verticals/local-services/e2e/integration-steps/real-time-api-updates) section of the Local Services Ads End-to-End guide.\n\nSetting up your Google Cloud project with the Actions Center\n------------------------------------------------------------\n\n| **Note:** If you have already set up your Partner Portal account, you must use the Google Cloud project that was entered as part of the setup. If you no longer have access to that Google Cloud Platform project, or need help identifying it, reach out to your Actions Center contact.\n\n1. Log in to your [Google Cloud Platform account](https://cloud.google.com/).\n2. You can [create a new project](https://support.google.com/googleapi/answer/6251787) or use an existing project for this purpose.\n - Please note down the cloud project number as you will require it in the next steps. Your cloud project number can also be found on Google Cloud Platform Home Page. The cloud project number is always numeric only.\n3. Log in to the [Partner Portal](https://partnerdash.google.com/apps/reservewithgoogle/onboarding).\n4. Complete step 1 on the Onboarding Tasks page of the Partner Portal by submitting the cloud project number and the cloud project email address (the email addressed used to administer the cloud project).\n\nCreating a Service Account and OAuth credentials\n------------------------------------------------\n\n| **Note:** These steps must be performed by the account with the developer email that was entered in the onboarding tasks steps.\n\n1. Log back into your [Google Cloud Platform account](https://cloud.google.com/).\n2. Navigate to [IAM \\& admin \\\u003e Service accounts](https://console.cloud.google.com/iam-admin/serviceaccounts).\n3. Search for your existing or newly created cloud project id.\n4. [Create](https://console.cloud.google.com/iam-admin/serviceaccounts/create) a service account.\n5. Fill out the service account details.\n6. Assign the new service account the role that is most suitable for your application needs. The choice of role for the service account will not have any effect on what calls can be made to the Google Maps Booking API, as the allocation of sufficient quota to use them is determined instead by the association of your project number in the Actions Center configuration. If you are unsure what role to pick, just pick Project \\\u003e Viewer.\n7. After clicking \"continue\" in step (6), you will be given an option to create JSON keys.\n8. Save the json credentials. Make sure to store these in a safe place, as you will not be able to retrieve them at a later time.\n9. Log back into Partner Portal and complete remaining tasks on the [Onboarding Tasks](https://partnerdash.google.com/apps/reservewithgoogle/onboarding) page of the Partner Portal.\n\nEnable the MapsBooking API\n--------------------------\n\n1. Log in to your [Google Cloud Platform account](https://cloud.google.com/).\n2. Navigate to [API \\& Services \\\u003e Dashboard](https://console.cloud.google.com/apis/dashboard).\n3. Click on [Enable APIs and Services](https://console.cloud.google.com/apis/library) and search for `Google Maps Booking API`.\n4. Enable the following APIs:\n - Google Maps Booking API\n - Google Maps Booking API (Dev)\n\n| **Note:** If you have already completed the onboarding steps and would like to update your existing cloud project to a new one, please reach out to your Actions Center contact.\n\nCommon Errors\n-------------\n\nThere are a variety of reasons that you may experience authorization issues\nwhen making Real-Time Update requests. If you need general guidance on how to\nmake Real-Time Updates requests, see our\n[real-time API updates](/actions-center/verticals/local-services/e2e/integration-steps/real-time-api-updates) section of the Local Services Ads End-to-End guide. You can also find\nsample clients in multiple languages in the\n[Code Samples](/actions-center/verticals/local-services/e2e/reference/real-time-updates-rest/code-samples/code-sample)\nsection.\n\nIf you are encountering 403 errors, check that you are following all of the\nfollowing requirements:\n\n1. Use a [Google Client Library](/api-client-library).\n2. Create [OAuth Credentials using Service Account Auth](/identity/protocols/OAuth2ServiceAccount#authorizingrequests).\n3. Authorize against the **appropriate scope**.\n4. Make calls to the **appropriate endpoint** (listed below).\n\nEnsure you are **making calls to the correct endpoint:**\n\n1. Sandbox: `https://partnerdev-mapsbooking.googleapis.com/v1alpha/...`\n2. Production: `https://mapsbooking.googleapis.com/v1alpha/...`\n\nEnsure you are **authorizing your OAuth credentials requests properly:**\n\n1. You are authorizing against the scope \"https://www.googleapis.com/auth/mapsbooking\".\n2. You are using the service account key created in [Creating a Service Account and OAuth credentials](#creating-a-service-account-and-OAuth-credentials).\n\n### Still seeing errors?\n\nIf you are still seeing errors after following these steps,\nreach out to your Actions Center contact with the following information:\n\n- Cloud project number and project id with a screenshot\n- Service account id\n- Email used to create the service account\n- End-point details attempted to make requests to\n- Time of request attempts\n- Full request and error messages received when making requests."]]