日付と時刻の形式を設定する
このページでは、Google Issue Tracker で日付と時刻の形式を設定する方法について説明します。
日付と時刻の形式を設定するには:
ウェブブラウザで 公開バグトラッカーを開く。
問題トラッカーの右上にある歯車アイコンをクリックします。
[設定] を選択します。
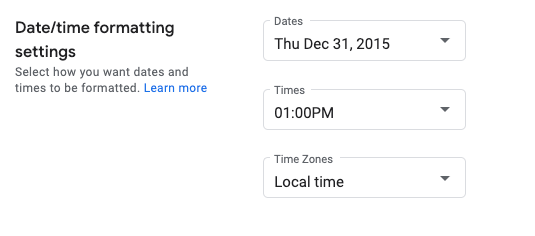
設定オーバーレイの [日時形式の設定] セクションで、プルダウンを使用して設定を選択します。
[日付] プルダウンを使用して、日付の表示方法を設定します。
[時刻] プルダウンを使用して、時刻の表示方法を設定します。
[タイムゾーン] プルダウンを使用して、使用するタイムゾーンを設定します。
次のステップ
All rights reserved. Java は Oracle および関連会社の登録商標です。
最終更新日 2025-02-21 UTC。
[null,null,["最終更新日 2025-02-21 UTC。"],[[["This page provides instructions on customizing date and time formats within Google Issue Tracker."],["Users can adjust date, time, and time zone displays according to their preferences through the Issue Tracker settings."],["Accessing these settings involves navigating to the gear icon, selecting \"Settings,\" and modifying the options within the \"Date/time formatting settings\" section."]]],[]]