В этом руководстве показано, как добавить карту Google в приложение для Android. Карта включает в себя маркер, также называемый булавкой, для обозначения определённого местоположения.
Следуйте инструкциям по созданию приложения для Android с использованием Maps SDK для Android. Рекомендуемая среда разработки — Android Studio .
Получить код
Клонируйте или загрузите репозиторий примеров Google Maps Android API v2 с GitHub.
Просмотреть версию упражнения на Java:
// Copyright 2020 Google LLC // // Licensed under the Apache License, Version 2.0 (the "License"); // you may not use this file except in compliance with the License. // You may obtain a copy of the License at // // http://www.apache.org/licenses/LICENSE-2.0 // // Unless required by applicable law or agreed to in writing, software // distributed under the License is distributed on an "AS IS" BASIS, // WITHOUT WARRANTIES OR CONDITIONS OF ANY KIND, either express or implied. // See the License for the specific language governing permissions and // limitations under the License. package com.example.mapwithmarker; import android.os.Bundle; import androidx.appcompat.app.AppCompatActivity; import com.google.android.gms.maps.CameraUpdateFactory; import com.google.android.gms.maps.GoogleMap; import com.google.android.gms.maps.OnMapReadyCallback; import com.google.android.gms.maps.SupportMapFragment; import com.google.android.gms.maps.model.LatLng; import com.google.android.gms.maps.model.MarkerOptions; /** * An activity that displays a Google map with a marker (pin) to indicate a particular location. */ public class MapsMarkerActivity extends AppCompatActivity implements OnMapReadyCallback { @Override protected void onCreate(Bundle savedInstanceState) { super.onCreate(savedInstanceState); // Retrieve the content view that renders the map. setContentView(R.layout.activity_maps); // Get the SupportMapFragment and request notification when the map is ready to be used. SupportMapFragment mapFragment = (SupportMapFragment) getSupportFragmentManager() .findFragmentById(R.id.map); mapFragment.getMapAsync(this); } /** * Manipulates the map when it's available. * The API invokes this callback when the map is ready to be used. * This is where we can add markers or lines, add listeners or move the camera. In this case, * we just add a marker near Sydney, Australia. * If Google Play services is not installed on the device, the user receives a prompt to install * Play services inside the SupportMapFragment. The API invokes this method after the user has * installed Google Play services and returned to the app. */ @Override public void onMapReady(GoogleMap googleMap) { // Add a marker in Sydney, Australia, // and move the map's camera to the same location. LatLng sydney = new LatLng(-33.852, 151.211); googleMap.addMarker(new MarkerOptions() .position(sydney) .title("Marker in Sydney")); googleMap.moveCamera(CameraUpdateFactory.newLatLng(sydney)); } }
Посмотрите версию упражнения на Kotlin:
// Copyright 2020 Google LLC // // Licensed under the Apache License, Version 2.0 (the "License"); // you may not use this file except in compliance with the License. // You may obtain a copy of the License at // // http://www.apache.org/licenses/LICENSE-2.0 // // Unless required by applicable law or agreed to in writing, software // distributed under the License is distributed on an "AS IS" BASIS, // WITHOUT WARRANTIES OR CONDITIONS OF ANY KIND, either express or implied. // See the License for the specific language governing permissions and // limitations under the License. package com.example.mapwithmarker import android.os.Bundle import android.widget.Toast import androidx.appcompat.app.AppCompatActivity import com.google.android.gms.maps.CameraUpdateFactory import com.google.android.gms.maps.GoogleMap import com.google.android.gms.maps.OnMapReadyCallback import com.google.android.gms.maps.SupportMapFragment import com.google.android.gms.maps.model.LatLng import com.google.android.gms.maps.model.MarkerOptions /** * An activity that displays a Google map with a marker (pin) to indicate a particular location. */ class MapsMarkerActivity : AppCompatActivity(), OnMapReadyCallback { override fun onCreate(savedInstanceState: Bundle?) { super.onCreate(savedInstanceState) // Retrieve the content view that renders the map. setContentView(R.layout.activity_maps) // Get the SupportMapFragment and request notification when the map is ready to be used. val mapFragment = supportFragmentManager.findFragmentById(R.id.map) as? SupportMapFragment mapFragment?.getMapAsync(this) } override fun onMapReady(googleMap: GoogleMap) { val sydney = LatLng(-33.852, 151.211) googleMap.addMarker( MarkerOptions() .position(sydney) .title("Marker in Sydney") ) googleMap.moveCamera(CameraUpdateFactory.newLatLng(sydney)) } }
Настройте свой проект развития
Выполните следующие шаги для создания учебного проекта в Android Studio.
- Загрузите и установите Android Studio.
- Добавьте пакет сервисов Google Play в Android Studio.
- Клонируйте или загрузите репозиторий примеров Google Maps Android API v2, если вы этого не сделали, когда начали читать это руководство.
Импортируйте учебный проект:
- В Android Studio выберите Файл > Новый > Импорт проекта .
- Перейдите в папку, в которую вы сохранили репозиторий образцов Google Maps Android API v2 после его загрузки.
- Проект MapWithMarker можно найти по этому адресу:
PATH-TO-SAVED-REPO /android-samples/tutorials/java/MapWithMarker(Java) или
PATH-TO-SAVED-REPO /android-samples/tutorials/kotlin/MapWithMarker(Kotlin) - Выберите каталог проекта, затем нажмите «Открыть» . Android Studio выполнит сборку вашего проекта с помощью инструмента сборки Gradle.
Включите необходимые API и получите ключ API
Для выполнения этого руководства вам понадобится проект Google Cloud с необходимыми API и ключ API, авторизованный для использования Maps SDK для Android. Подробнее см.:
Добавьте ключ API в свое приложение
- Откройте файл
local.propertiesвашего проекта. Добавьте следующую строку, а затем замените
YOUR_API_KEYзначением вашего ключа API:MAPS_API_KEY=YOUR_API_KEYПри сборке приложения плагин Secrets Gradle для Android скопирует ключ API и сделает его доступным в качестве переменной сборки в манифесте Android, как описано ниже .
Создайте и запустите свое приложение
Чтобы собрать и запустить приложение:
Подключите устройство Android к компьютеру. Следуйте инструкциям , чтобы включить режим разработчика на устройстве Android и настроить систему для обнаружения устройства.
Кроме того, вы можете использовать Android Virtual Device Manager (AVD) для настройки виртуального устройства. При выборе эмулятора убедитесь, что выбранный вами образ включает API Google. Подробнее см. в статье «Настройка проекта Android Studio» .
В Android Studio выберите пункт меню «Выполнить» (или значок кнопки воспроизведения). Выберите устройство в появившемся окне.
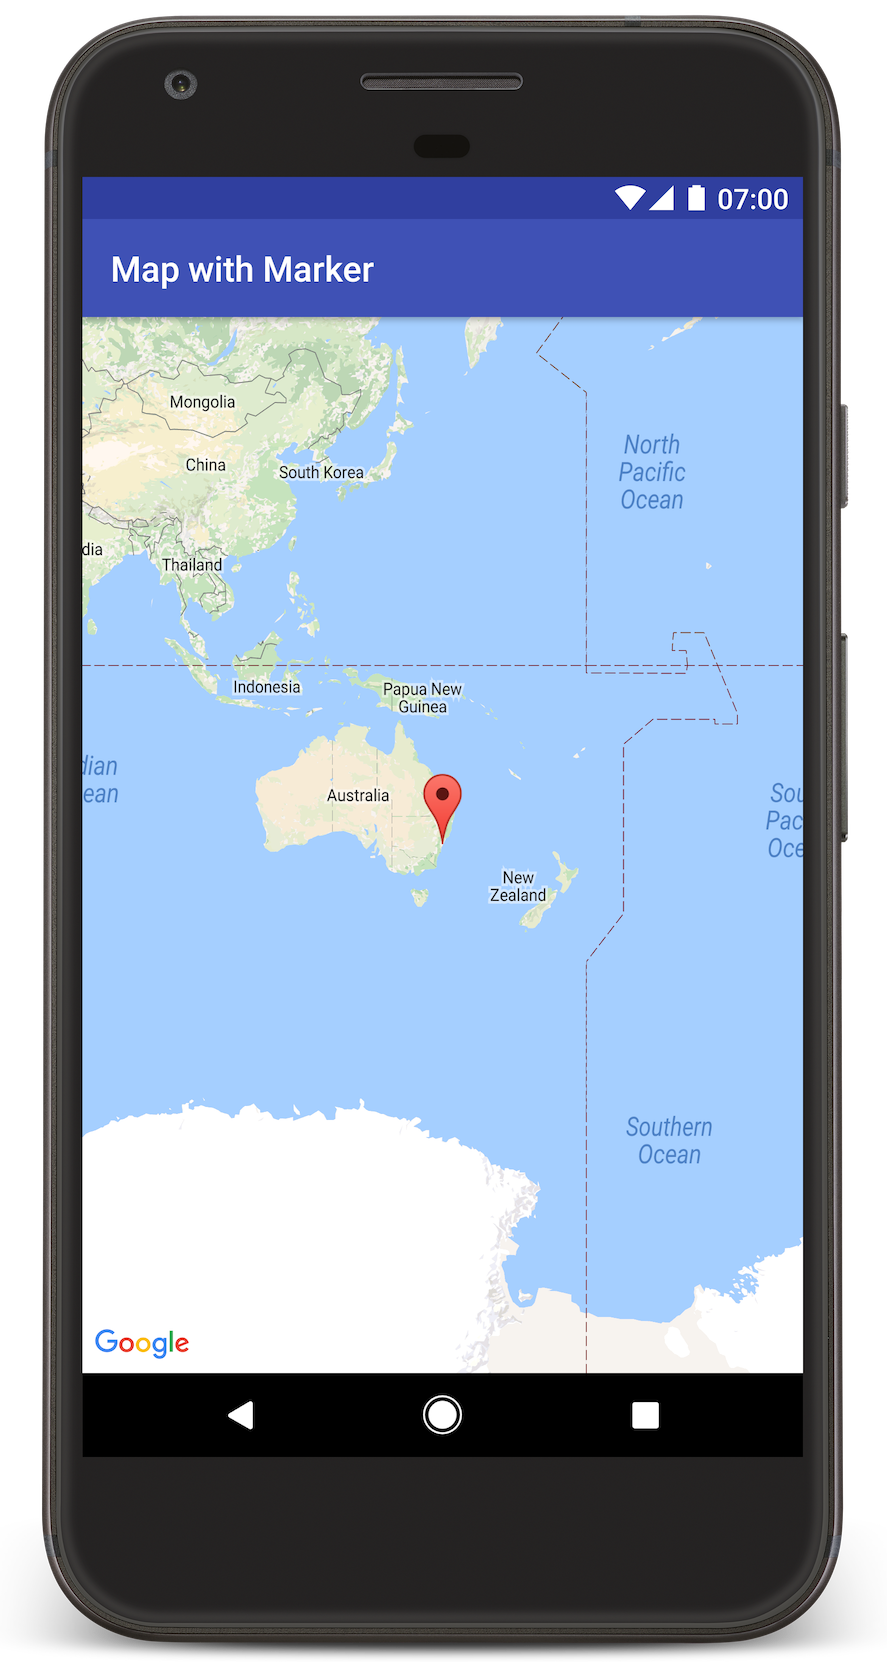
Android Studio вызывает Gradle для сборки приложения, а затем запускает его на устройстве или эмуляторе. Вы увидите карту с маркером, указывающим на Сидней на восточном побережье Австралии, как на изображении на этой странице.
Поиск неисправностей:
- Если карта не отображается, убедитесь, что вы получили ключ API и добавили его в приложение, как описано выше . Проверьте журнал в Android Monitor в Android Studio на наличие сообщений об ошибках, связанных с ключом API.
- Используйте инструменты отладки Android Studio для просмотра журналов и отладки приложения.
Понять код
В этой части руководства объясняются наиболее важные части приложения MapWithMarker , чтобы помочь вам понять, как создать аналогичное приложение.
Проверьте манифест Android
Обратите внимание на следующие элементы в файле AndroidManifest.xml вашего приложения:
Добавьте элемент
meta-dataдля встраивания версии сервисов Google Play, с помощью которой было скомпилировано приложение.<meta-data android:name="com.google.android.gms.version" android:value="@integer/google_play_services_version" />Добавьте элемент
meta-dataуказывающий ваш ключ API. В примере, прилагаемом к этому руководству, значение ключа API сопоставляется с переменной сборки, соответствующей имени ключа, определенного вами ранее,MAPS_API_KEY. При сборке приложения плагин Secrets Gradle для Android сделает ключи из файлаlocal.propertiesдоступными в качестве переменных сборки манифеста.<meta-data android:name="com.google.android.geo.API_KEY" android:value="${MAPS_API_KEY}" />В файле
build.gradleследующая строка передает ваш ключ API в ваш манифест Android.id 'com.google.android.libraries.mapsplatform.secrets-gradle-plugin'
Ниже приведен пример полного манифеста:
<?xml version="1.0" encoding="utf-8"?>
<!--
 Copyright 2020 Google LLC

 Licensed under the Apache License, Version 2.0 (the "License");
 you may not use this file except in compliance with the License.
 You may obtain a copy of the License at

      http://www.apache.org/licenses/LICENSE-2.0

 Unless required by applicable law or agreed to in writing, software
 distributed under the License is distributed on an "AS IS" BASIS,
 WITHOUT WARRANTIES OR CONDITIONS OF ANY KIND, either express or implied.
 See the License for the specific language governing permissions and
 limitations under the License.
-->

<manifest xmlns:android="http://schemas.android.com/apk/res/android">

    <application
        android:allowBackup="true"
        android:icon="@mipmap/ic_launcher"
        android:label="@string/app_name"
        android:supportsRtl="true"
        android:theme="@style/AppTheme">

        <meta-data
            android:name="com.google.android.gms.version"
            android:value="@integer/google_play_services_version" />

        <!--
             The API key for Google Maps-based APIs.
        -->
        <meta-data
            android:name="com.google.android.geo.API_KEY"
            android:value="${MAPS_API_KEY}" />

        <activity
            android:name=".MapsMarkerActivity"
            android:label="@string/title_activity_maps"
            android:exported="true">
            <intent-filter>
                <action android:name="android.intent.action.MAIN" />

                <category android:name="android.intent.category.LAUNCHER" />
            </intent-filter>
        </activity>
    </application>

</manifest>
Добавить карту
Отобразите карту, используя Maps SDK для Android.
Добавьте элемент
<fragment>в файл макета вашей активности,activity_maps.xml. Этот элемент определяетSupportMapFragment, который будет служить контейнером для карты и предоставлять доступ к объектуGoogleMap. В этом руководстве используется версия фрагмента карты из библиотеки поддержки Android для обеспечения обратной совместимости с более ранними версиями фреймворка Android.<!-- Copyright 2020 Google LLC Licensed under the Apache License, Version 2.0 (the "License"); you may not use this file except in compliance with the License. You may obtain a copy of the License at http://www.apache.org/licenses/LICENSE-2.0 Unless required by applicable law or agreed to in writing, software distributed under the License is distributed on an "AS IS" BASIS, WITHOUT WARRANTIES OR CONDITIONS OF ANY KIND, either express or implied. See the License for the specific language governing permissions and limitations under the License. --> <fragment xmlns:android="http://schemas.android.com/apk/res/android" xmlns:tools="http://schemas.android.com/tools" android:id="@+id/map" android:name="com.google.android.gms.maps.SupportMapFragment" android:layout_width="match_parent" android:layout_height="match_parent" tools:context="com.example.mapwithmarker.MapsMarkerActivity" />
В методе
onCreate()вашей активности укажите файл макета в качестве представления содержимого. Получите дескриптор фрагмента карты, вызвавFragmentManager.findFragmentById(). Затем используйтеgetMapAsync()для регистрации обратного вызова карты:Ява
@Override protected void onCreate(Bundle savedInstanceState) { super.onCreate(savedInstanceState); // Retrieve the content view that renders the map. setContentView(R.layout.activity_maps); // Get the SupportMapFragment and request notification when the map is ready to be used. SupportMapFragment mapFragment = (SupportMapFragment) getSupportFragmentManager() .findFragmentById(R.id.map); mapFragment.getMapAsync(this); }
Котлин
override fun onCreate(savedInstanceState: Bundle?) { super.onCreate(savedInstanceState) // Retrieve the content view that renders the map. setContentView(R.layout.activity_maps) // Get the SupportMapFragment and request notification when the map is ready to be used. val mapFragment = supportFragmentManager.findFragmentById(R.id.map) as? SupportMapFragment mapFragment?.getMapAsync(this) }
Реализуйте интерфейс
OnMapReadyCallbackи переопределите методonMapReady(), чтобы настроить карту, когда доступен объектGoogleMap:Ява
public class MapsMarkerActivity extends AppCompatActivity implements OnMapReadyCallback { // ... @Override public void onMapReady(GoogleMap googleMap) { LatLng sydney = new LatLng(-33.852, 151.211); googleMap.addMarker(new MarkerOptions() .position(sydney) .title("Marker in Sydney")); } }
Котлин
class MapsMarkerActivity : AppCompatActivity(), OnMapReadyCallback { // ... override fun onMapReady(googleMap: GoogleMap) { val sydney = LatLng(-33.852, 151.211) googleMap.addMarker( MarkerOptions() .position(sydney) .title("Marker in Sydney") ) } }
По умолчанию Maps SDK для Android отображает содержимое информационного окна при касании маркера пользователем. Если вас устраивает поведение по умолчанию, добавлять прослушиватель щелчков для маркера не нужно.
Следующие шаги
Узнайте больше об объекте карты и о том, что можно делать с маркерами .