packagecom.example.navsdkcustomization;importandroid.content.pm.PackageManager;importandroid.graphics.Bitmap;importandroid.graphics.BitmapFactory;importandroid.os.Bundle;importandroid.util.Log;importandroid.widget.Toast;importandroidx.annotation.NonNull;importandroidx.appcompat.app.AppCompatActivity;importandroidx.core.app.ActivityCompat;importandroidx.core.content.ContextCompat;importcom.google.android.gms.maps.GoogleMap;importcom.google.android.gms.maps.GoogleMap.CameraPerspective;importcom.google.android.gms.maps.OnMapReadyCallback;importcom.google.android.gms.maps.model.BitmapDescriptorFactory;importcom.google.android.gms.maps.model.LatLng;importcom.google.android.gms.maps.model.Marker;importcom.google.android.gms.maps.model.MarkerOptions;importcom.google.android.libraries.navigation.ListenableResultFuture;importcom.google.android.libraries.navigation.NavigationApi;importcom.google.android.libraries.navigation.Navigator;importcom.google.android.libraries.navigation.SimulationOptions;importcom.google.android.libraries.navigation.StylingOptions;importcom.google.android.libraries.navigation.SupportNavigationFragment;importcom.google.android.libraries.navigation.Waypoint;/**AnactivitythatdisplaysamapandacustomizednavigationUI.*/publicclassNavigationActivityCustomizationextendsAppCompatActivity{privatestaticfinalStringTAG=NavigationActivityCustomization.class.getSimpleName();privateNavigatormNavigator;privateSupportNavigationFragmentmNavFragment;privateGoogleMapmMap;//DefinetheSydneyOperaHousebyspecifyingitsplaceID.privatestaticfinalStringSYDNEY_OPERA_HOUSE="ChIJ3S-JXmauEmsRUcIaWtf4MzE";//Setfieldsforrequestinglocationpermission.privatestaticfinalintPERMISSIONS_REQUEST_ACCESS_FINE_LOCATION=1;privatebooleanmLocationPermissionGranted;@OverrideprotectedvoidonCreate(BundlesavedInstanceState){super.onCreate(savedInstanceState);setContentView(R.layout.activity_main);//InitializetheNavigationSDK.initializeNavigationSdk();}/***StartstheNavigationSDKandsetsthecameratofollowthedevice's location. Calls the*navigateToPlace()methodwhenthenavigatorisready.*/privatevoidinitializeNavigationSdk(){/**Requestlocationpermission,sothatwecangetthelocationofthe*device.Theresultofthepermissionrequestishandledbyacallback,*onRequestPermissionsResult.*/if(ContextCompat.checkSelfPermission(this.getApplicationContext(),android.Manifest.permission.ACCESS_FINE_LOCATION)==PackageManager.PERMISSION_GRANTED){mLocationPermissionGranted=true;}else{ActivityCompat.requestPermissions(this,newString[]{android.Manifest.permission.ACCESS_FINE_LOCATION},PERMISSIONS_REQUEST_ACCESS_FINE_LOCATION);}if(!mLocationPermissionGranted){displayMessage("Error loading Navigation SDK: "+"The user has not granted location permission.");return;}//Getanavigator.NavigationApi.getNavigator(this,newNavigationApi.NavigatorListener(){/**SetsupthenavigationUIwhenthenavigatorisreadyforuse.*/@OverridepublicvoidonNavigatorReady(Navigatornavigator){displayMessage("Navigator ready.");mNavigator=navigator;mNavFragment=(SupportNavigationFragment)getSupportFragmentManager().findFragmentById(R.id.navigation_fragment);//Getthemap.mNavFragment.getMapAsync(newOnMapReadyCallback(){@OverridepublicvoidonMapReady(GoogleMapmap){mMap=map;//Navigatetoaplace,specifiedbyPlaceID.navigateToPlace(SYDNEY_OPERA_HOUSE);}});}/***HandleserrorsfromtheNavigationSDK.**@paramerrorCodeTheerrorcodereturnedbythenavigator.*/@OverridepublicvoidonError(@NavigationApi.ErrorCodeinterrorCode){switch(errorCode){caseNavigationApi.ErrorCode.NOT_AUTHORIZED:displayMessage("Error loading Navigation SDK: Your API key is "+"invalid or not authorized to use the Navigation SDK.");break;caseNavigationApi.ErrorCode.TERMS_NOT_ACCEPTED:displayMessage("Error loading Navigation SDK: User did not accept "+"the Navigation Terms of Use.");break;caseNavigationApi.ErrorCode.NETWORK_ERROR:displayMessage("Error loading Navigation SDK: Network error.");break;caseNavigationApi.ErrorCode.LOCATION_PERMISSION_MISSING:displayMessage("Error loading Navigation SDK: Location permission "+"is missing.");break;default:displayMessage("Error loading Navigation SDK: "+errorCode);}}});}/**CustomizesthenavigationUIandthemap.*/privatevoidcustomizeNavigationUI(){//Setcustomcolorsforthenavigator.mNavFragment.setStylingOptions(newStylingOptions().primaryDayModeThemeColor(0xff1A237E).secondaryDayModeThemeColor(0xff3F51B5).primaryNightModeThemeColor(0xff212121).secondaryNightModeThemeColor(0xff424242).headerLargeManeuverIconColor(0xffffff00).headerSmallManeuverIconColor(0xffffa500).headerNextStepTypefacePath("/system/fonts/NotoSerif-BoldItalic.ttf").headerNextStepTextColor(0xff00ff00).headerNextStepTextSize(20f).headerDistanceTypefacePath("/system/fonts/NotoSerif-Italic.ttf").headerDistanceValueTextColor(0xff00ff00).headerDistanceUnitsTextColor(0xff0000ff).headerDistanceValueTextSize(20f).headerDistanceUnitsTextSize(18f).headerInstructionsTypefacePath("/system/fonts/NotoSerif-BoldItalic.ttf").headerInstructionsTextColor(0xffffff00).headerInstructionsFirstRowTextSize(24f).headerInstructionsSecondRowTextSize(20f).headerGuidanceRecommendedLaneColor(0xffffa500));mMap.setTrafficEnabled(false);//Placeamarkeratthefinaldestination.if(mNavigator.getCurrentRouteSegment()!=null){LatLngdestinationLatLng=mNavigator.getCurrentRouteSegment().getDestinationLatLng();BitmapdestinationMarkerIcon=BitmapFactory.decodeResource(getResources(),R.drawable.ic_person_pin_48dp);mMap.addMarker(newMarkerOptions().position(destinationLatLng).icon(BitmapDescriptorFactory.fromBitmap(destinationMarkerIcon)).title("Destination marker"));//Listenforataponthemarker.mMap.setOnMarkerClickListener(newGoogleMap.OnMarkerClickListener(){@OverridepublicbooleanonMarkerClick(Markermarker){displayMessage("Marker tapped: "+marker.getTitle()+", at location "+marker.getPosition().latitude+", "+marker.getPosition().longitude);//Theeventhasbeenhandled.returntrue;}});}//Setthecameratofollowthedevicelocationwith'TILTED'drivingview.mMap.followMyLocation(CameraPerspective.TILTED);}/***Requestsdirectionsfromtheuser's current location to a specific place (provided by the*GooglePlacesAPI).*/privatevoidnavigateToPlace(StringplaceId){Waypointdestination;try{destination=Waypoint.builder().setPlaceIdString(placeId).build();}catch(Waypoint.UnsupportedPlaceIdExceptione){displayMessage("Error starting navigation: Place ID is not supported.");return;}//Createafuturetoawaittheresultoftheasynchronousnavigatortask.ListenableResultFuture<Navigator.RouteStatus> pendingRoute=mNavigator.setDestination(destination);//DefinetheactiontoperformwhentheSDKhasdeterminedtheroute.pendingRoute.setOnResultListener(newListenableResultFuture.OnResultListener<Navigator.RouteStatus>(){@OverridepublicvoidonResult(Navigator.RouteStatuscode){switch(code){caseOK://HidethetoolbartomaximizethenavigationUI.if(getActionBar()!=null){getActionBar().hide();}//CustomizethenavigationUI.customizeNavigationUI();//Enablevoiceaudioguidance(throughthedevicespeaker).mNavigator.setAudioGuidance(Navigator.AudioGuidance.VOICE_ALERTS_AND_GUIDANCE);//Simulatevehicleprogressalongtheroutefordemo/debugbuilds.if(BuildConfig.DEBUG){mNavigator.getSimulator().simulateLocationsAlongExistingRoute(newSimulationOptions().speedMultiplier(5));}//Startturn-by-turnguidancealongthecurrentroute.mNavigator.startGuidance();break;//Handleerrorconditionsreturnedbythenavigator.caseNO_ROUTE_FOUND:displayMessage("Error starting navigation: No route found.");break;caseNETWORK_ERROR:displayMessage("Error starting navigation: Network error.");break;caseROUTE_CANCELED:displayMessage("Error starting navigation: Route canceled.");break;default:displayMessage("Error starting navigation: "+String.valueOf(code));}}});}/**Handlestheresultoftherequestforlocationpermissions.*/@OverridepublicvoidonRequestPermissionsResult(intrequestCode,@NonNullString[]permissions,@NonNullint[]grantResults){mLocationPermissionGranted=false;switch(requestCode){casePERMISSIONS_REQUEST_ACCESS_FINE_LOCATION:{//Ifrequestiscanceled,theresultarraysareempty.if(grantResults.length > 0 && grantResults[0]==PackageManager.PERMISSION_GRANTED){mLocationPermissionGranted=true;}}}}/***Showsamessageonscreenandinthelog.Usedwhensomethinggoeswrong.**@paramerrorMessageThemessagetodisplay.*/privatevoiddisplayMessage(StringerrorMessage){Toast.makeText(this,errorMessage,Toast.LENGTH_LONG).show();Log.d(TAG,errorMessage);}}
privateSupportNavigationFragmentmNavFragment;mNavFragment=(SupportNavigationFragment)getFragmentManager().findFragmentById(R.id.navigation_fragment);// Set the styling options on the fragment.mNavFragment.setStylingOptions(newStylingOptions().primaryDayModeThemeColor(0xff1A237E).secondaryDayModeThemeColor(0xff3F51B5).primaryNightModeThemeColor(0xff212121).secondaryNightModeThemeColor(0xff424242).headerLargeManeuverIconColor(0xffffff00).headerSmallManeuverIconColor(0xffffa500).headerNextStepTypefacePath("/system/fonts/NotoSerif-BoldItalic.ttf").headerNextStepTextColor(0xff00ff00).headerNextStepTextSize(20f).headerDistanceTypefacePath("/system/fonts/NotoSerif-Italic.ttf").headerDistanceValueTextColor(0xff00ff00).headerDistanceUnitsTextColor(0xff0000ff).headerDistanceValueTextSize(20f).headerDistanceUnitsTextSize(18f).headerInstructionsTypefacePath("/system/fonts/NotoSerif-BoldItalic.ttf").headerInstructionsTextColor(0xffffff00).headerInstructionsFirstRowTextSize(24f).headerInstructionsSecondRowTextSize(20f).headerGuidanceRecommendedLaneColor(0xffffa500));
privateGoogleMapmMap;// Get the map, and when the async call returns, setTrafficEnabled// (callback will be on the UI thread)mMap=mNavFragment.getMapAsync(navMap->navMap.setTrafficEnabled(false));
// Force night mode on.mNavFragment.setForceNightMode(FORCE_NIGHT);
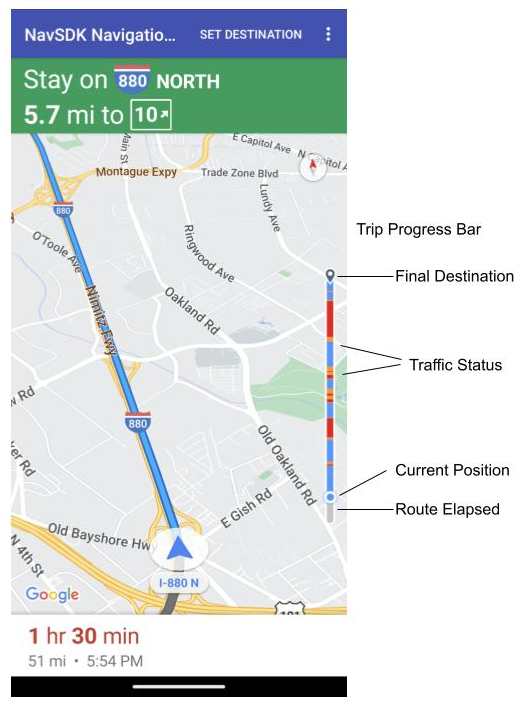
显示路线列表
首先,创建视图并将其添加到层次结构中。
voidsetupDirectionsListView(){// Create the view.DirectionsListViewdirectionsListView=newDirectionsListView(getApplicationContext());// Add the view to your view hierarchy.ViewGroupgroup=findViewById(R.id.directions_view);group.addView(directionsListView);// Add a button to your layout to close the directions list view.ImageButtonbutton=findViewById(R.id.close_directions_button);// this button is part of the container we hide in the next line.button.setOnClickListener(v->findViewById(R.id.directions_view_container).setVisibility(View.GONE));}