
Bạn có thể sử dụng SDK người tiêu dùng để tạo và chạy một ứng dụng cơ bản dành cho người tiêu dùng, tích hợp với các dịch vụ phụ trợ Giải pháp gọi xe và giao hàng theo yêu cầu. Bạn có thể tạo ứng dụng Tiến trình đặt hàng và chuyến đi có thể hiển thị một chuyến đi đang diễn ra, phản hồi thông tin cập nhật về chuyến đi và xử lý các lỗi về chuyến đi.
Vì SDK người tiêu dùng có cấu trúc mô-đun, nên bạn có thể dùng các phần của API mà bạn muốn dùng cho ứng dụng cụ thể của mình và tích hợp những phần đó với API của riêng bạn, các dịch vụ phụ trợ do Fleet Engine cung cấp và các API bổ sung của Nền tảng Google Maps.
Yêu cầu tối thiểu về hệ thống
Cấu hình dự án
Trình quản lý gói Swift
Bạn có thể cài đặt SDK người tiêu dùng thông qua Trình quản lý gói Swift. Để thêm SDK, hãy đảm bảo bạn đã xoá mọi phần phụ thuộc hiện có của SDK người tiêu dùng.
Để thêm SDK vào dự án mới hoặc dự án hiện có, hãy làm theo các bước sau:
-
Mở Xcode
projecthoặcworkspace, sau đó chuyển đến File > Add Package Dependencies (Tệp > Thêm phần phụ thuộc gói). - Nhập https://github.com/googlemaps/ios-consumer-sdk làm URL, nhấn Enter để lấy gói và nhấp vào "Add Package" (Thêm gói).
-
Để cài đặt một
versioncụ thể, hãy đặt trường Quy tắc phần phụ thuộc thành một trong các lựa chọn dựa trên phiên bản. Đối với các dự án mới, bạn nên chỉ định phiên bản mới nhất và sử dụng tuỳ chọn "Phiên bản chính xác". Sau khi hoàn tất, hãy nhấp vào "Add Package" (Thêm gói). -
Trong cửa sổ Choose Package Products (Chọn sản phẩm gói), hãy xác minh rằng
GoogleRidesharingConsumersẽ được thêm vào mục tiêumainđược chỉ định. Sau khi hoàn tất, hãy nhấp vào "Add Package" (Thêm gói). -
Để xác minh chế độ cài đặt của bạn, hãy chuyển đến ngăn
Generalcủa mục tiêu. Trong Khung, Thư viện và Nội dung được nhúng, bạn sẽ thấy các gói đã cài đặt. Bạn cũng có thể xem phần "Package Dependencies" (Phần phụ thuộc của gói) trong "Project Navigator" (Trình điều hướng dự án) để xác minh gói và phiên bản của gói.
Để cập nhật package cho một dự án hiện có, hãy làm theo các bước sau:
Nếu đang nâng cấp từ phiên bản cũ hơn 9.0.0, bạn phải xoá các phần phụ thuộc sau:
GoogleMapsBase,GoogleMapsCorevàGoogleMapsM4Bsau khi nâng cấp. Đừng xoá phần phụ thuộc củaGoogleMaps. Để biết thêm thông tin, hãy xem Ghi chú phát hành phiên bản 9.0.0.Trong phần cài đặt cấu hình dự án Xcode, hãy tìm Khung, Thư viện và Nội dung được nhúng. Sử dụng dấu trừ(-) để loại bỏ khung sau:
GoogleMapsBase(Chỉ dành cho bản nâng cấp từ các phiên bản cũ hơn 9.0.0)GoogleMapsCore(Chỉ dành cho bản nâng cấp từ các phiên bản cũ hơn 9.0.0)GoogleMapsM4B(Chỉ dành cho bản nâng cấp từ các phiên bản cũ hơn 9.0.0)
- Trên Xcode, hãy chuyển đến "File > Packages > Update To New Package Versions" (Tệp > Gói > Cập nhật lên phiên bản gói mới nhất).
- Để xác minh việc cài đặt của bạn, hãy chuyển đến phần Package Dependencies (Phần phụ thuộc gói) trong Project Navigator (Trình điều hướng dự án) để xác minh gói và phiên bản của gói.
Để xoá các phần phụ thuộc hiện có của SDK người tiêu dùng mà bạn đã thêm bằng CocoaPods, hãy làm theo các bước sau:
- Đóng không gian làm việc Xcode của bạn. Mở cửa sổ dòng lệnh rồi thực thi lệnh sau:
sudo gem install cocoapods-deintegrate cocoapods-clean
pod deintegrate
pod cache clean --all
-
Xoá
Podfile,Podfile.resolvedvà Xcodeworkspacenếu bạn không sử dụng chúng cho bất cứ mục đích nào khác ngoài CocoaPods.
Để xoá SDK người tiêu dùng hiện có được cài đặt theo cách thủ công, hãy làm theo các bước sau:
Trong phần cài đặt cấu hình dự án Xcode, hãy tìm Khung, Thư viện và Nội dung được nhúng. Sử dụng dấu trừ
(-)để xoá khung sau:GoogleRidesharingConsumer.xcframework
Từ thư mục cấp cao nhất của dự án Xcode, hãy xoá gói
GoogleRidesharingConsumer.
CocoaPods
Để định cấu hình SDK người tiêu dùng bằng CocoaPods, bạn cần có các mục sau:
Công cụ CocoaPods: Để cài đặt công cụ này, hãy mở Cửa sổ dòng lệnh và chạy lệnh sau.
sudo gem install cocoapods
Hãy tham khảo Hướng dẫn bắt đầu sử dụng CocoaPods để biết thêm thông tin chi tiết.
Tạo một Podfile cho SDK người tiêu dùng và sử dụng tệp này để cài đặt API và các phần phụ thuộc của API đó. Trước tiên, hãy tạo một tệp có tên Podfile trong thư mục dự án. Tệp này xác định các phần phụ thuộc của dự án. Sau đó, hãy chỉnh sửa Podfile và thêm các phần phụ thuộc. Dưới đây là một ví dụ có các phần phụ thuộc:
  source "https://github.com/CocoaPods/Specs.git"

  target 'YOUR_APPLICATION_TARGET_NAME_HERE' do
    pod 'GoogleRidesharingConsumer'
  end
Lưu Podfile. Mở cửa sổ dòng lệnh rồi chuyển đến thư mục chứa Podfile:
cd <path-to-project>Chạy lệnh cài đặt nhóm. Thao tác này sẽ cài đặt các API được chỉ định trong Podfile, cùng với mọi phần phụ thuộc có thể có.
pod installĐóng Xcode rồi mở (nhấp đúp) tệp .xcworkspace của dự án để chạy Xcode. Để mở dự án vào lúc khác, hãy sử dụng tệp .xcworkspace.
Cài đặt theo cách thủ công
XCFramework là một gói nhị phân mà bạn dùng để cài đặt SDK người dùng. Bạn có thể sử dụng gói này trên nhiều nền tảng, bao gồm cả các máy sử dụng chipset M1. Hướng dẫn này cho bạn biết cách thêm XCFramework chứa SDK tiêu dùng theo cách thủ công vào dự án và định cấu hình chế độ cài đặt bản dựng trong Xcode.
Tải tệp nhị phân và tài nguyên SDK xuống:
Giải nén các tệp nén để truy cập vào XCFramework và tài nguyên.
Khởi động Xcode rồi mở một dự án hiện có hoặc tạo dự án mới. Nếu bạn mới sử dụng iOS, hãy tạo một dự án mới và chọn mẫu Ứng dụng iOS.
Tạo một nhóm Khung trong nhóm dự án của bạn nếu chưa có nhóm nào.
Để cài đặt SDK người tiêu dùng, hãy kéo tệp
GoogleRidesharingConsumer.xcframeworkvào dự án của bạn trong phần Frameworks, Libraries and Embedded Content (Khung, Thư viện và Nội dung được nhúng). Khi được nhắc, hãy chọn Sao chép các mục nếu cần.Kéo
GoogleRidesharingConsumer.bundleđã tải xuống vào thư mục cấp cao nhất của dự án Xcode của bạn. Khi được nhắc, hãy chọnCopy items if needed.Chọn dự án của bạn trên Project Navigator và chọn mục tiêu của ứng dụng.
Mở thẻ Xây dựng giai đoạn và trong Liên kết nhị phân với thư viện, thêm các khung và thư viện sau nếu chưa có:
Accelerate.frameworkCoreData.frameworkCoreGraphics.frameworkCoreImage.frameworkCoreLocation.frameworkCoreTelephony.frameworkCoreText.frameworkGLKit.frameworkImageIO.frameworklibc++.tbdlibz.tbdMetal.frameworkOpenGLES.frameworkQuartzCore.frameworkSystemConfiguration.frameworkUIKit.framework
Chọn dự án của bạn chứ không phải mục tiêu cụ thể, rồi mở thẻ Build Settings (Cài đặt bản dựng). Trong mục Cờ trình liên kết khác, hãy thêm
-ObjCcho cả gỡ lỗi và phát hành. Nếu các chế độ cài đặt này không xuất hiện, hãy thay đổi bộ lọc trong thanh Cài đặt bản dựng từ Basic (Cơ bản) thành All (Tất cả).
Thêm tệp kê khai quyền riêng tư của Apple
Apple yêu cầu thông tin chi tiết về quyền riêng tư của ứng dụng đối với các ứng dụng trên App Store. Hãy truy cập trang Thông tin chi tiết về quyền riêng tư trong App Store của Apple để biết thông tin cập nhật và biết thêm thông tin.
- Tải gói Tệp kê khai về quyền riêng tư xuống cho SDK người tiêu dùng dành cho iOS: GoogleRidesharingConsumerPrivacy.
- Hãy giải nén tệp này để truy cập vào
GoogleRidesharingConsumerPrivacy.bundle. - Thêm
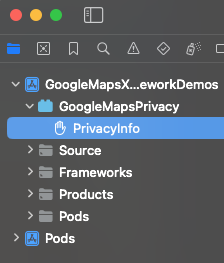
GoogleRidesharingConsumerPrivacy.bundlevào trình điều hướng của Dự án Xcode bằng cách sử dụng một trong các phương pháp sau. Hãy nhớ chọn hộp "Thêm vào mục tiêu" cho mục tiêu của ứng dụng. Sau khi thêm, tệp PrivacyInfo sẽ xuất hiện trong trình điều hướng của dự án và bạn có thể kiểm tra các giá trị. - Xác minh rằng tệp kê khai về quyền riêng tư đã được thêm vào bằng cách tạo một bản lưu trữ cho ứng dụng của bạn rồi tạo báo cáo về quyền riêng tư từ kho lưu trữ đó.
Tích hợp ứng dụng
Cung cấp mã thông báo xác thực
Khi ứng dụng cho người tiêu dùng yêu cầu thông tin cập nhật về chuyến đi từ Fleet Engine, thì các yêu cầu đó phải bao gồm mã truy cập hợp lệ. Để cho phép và xác thực các yêu cầu này, SDK tiêu dùng sẽ gọi đối tượng của bạn theo giao thức GMTCAuthorization. Đối tượng chịu trách nhiệm cung cấp mã truy cập cần thiết.
Là nhà phát triển ứng dụng, bạn sẽ chọn cách tạo mã thông báo. Quá trình triển khai của bạn phải mang lại khả năng thực hiện những việc sau:
- Tìm nạp mã truy cập (có thể ở định dạng JSON) từ một máy chủ HTTPS.
- Phân tích cú pháp và lưu mã thông báo vào bộ nhớ đệm.
- Làm mới mã thông báo khi mã này hết hạn.
Để biết thông tin chi tiết về các mã thông báo mà máy chủ Fleet Engine dự kiến, hãy xem phần Tạo mã thông báo web JSON (JWT) để uỷ quyền.
Mã nhà cung cấp giống với mã dự án trên Google Cloud. Để biết thêm thông tin, hãy xem bài viết Bắt đầu sử dụng Fleet Engine.
Ví dụ sau đây triển khai một trình cung cấp mã truy cập:
Swift
/*

    *   SampleAccessTokenProvider.swift
 */
import GoogleRidesharingConsumer

private let providerURL = "INSERT_YOUR_TOKEN_PROVIDER_URL"

class SampleAccessTokenProvider: NSObject, GMTCAuthorization {
  private struct AuthToken {
    // The cached trip token.
    let token: String
    // Keep track of when the token expires for caching.
    let expiration: TimeInterval
    // Keep track of the trip ID the cached token is for.
    let tripID: String
  }

  enum AccessTokenError: Error {
    case missingAuthorizationContext
    case missingData
  }

  private var authToken: AuthToken?

  func fetchToken(
    with authorizationContext: GMTCAuthorizationContext?,
    completion: @escaping GMTCAuthTokenFetchCompletionHandler
  ) {
    // Get the trip ID from the authorizationContext. This is set by the Consumer SDK.
    guard let authorizationContext = authorizationContext else {
      completion(nil, AccessTokenError.missingAuthorizationContext)
      return
    }
    let tripID = authorizationContext.tripID

    // If appropriate, use the cached token.
    if let authToken = authToken,
      authToken.expiration > Date.now.timeIntervalSince1970 && authToken.tripID == tripID
    {
      completion(authToken.token, nil)
      return
    }

    // Otherwise, try to fetch a new token from your server.
    let request = URLRequest(url: URL(string: providerURL))
    let task = URLSession.shared.dataTask(with: request) { [weak self] data, _, error in
      guard let strongSelf = self else { return }
      guard error == nil else {
        completion(nil, error)
        return
      }

      // Replace the following key values with the appropriate keys based on your
      // server's expected response.
      let tripTokenKey = "TRIP_TOKEN_KEY"
      let tokenExpirationKey = "TOKEN_EXPIRATION"
      guard let data = data,
        let fetchData = try? JSONSerialization.jsonObject(with: data) as? [String: Any],
        let token = fetchData[tripTokenKey] as? String,
        let expiration = fetchData[tokenExpirationKey] as? Double
      else {
        completion(nil, AccessTokenError.missingData)
        return
      }

      strongSelf.authToken = AuthToken(token: token, expiration: expiration, tripID: tripID)
      completion(token, nil)
    }
    task.resume()
  }
}
Objective-C
/*

    *   SampleAccessTokenProvider.h
 */
#import <Foundation/Foundation.h>
#import <GoogleRidesharingConsumer/GoogleRidesharingConsumer.h>

NS_ASSUME_NONNULL_BEGIN

@interface SampleAccessTokenProvider : NSObject <GMTCAuthorization>

@end

NS_ASSUME_NONNULL_END

/*

    *   SampleAccessTokenProvider.m
 */
#import "SampleAccessTokenProvider.h"
#import "GoogleRidesharingConsumer/GoogleRidesharingConsumer.h"

static NSString *const PROVIDER_URL = @"INSERT_YOUR_TOKEN_PROVIDER_URL";

// SampleAccessTokenProvider.m
@implementation SampleAccessTokenProvider {
  // The cached token with claims to the current trip.
  NSString *_cachedTripToken;
  // Keep track of the Trip ID the cached token is for.
  NSString *_lastKnownTripID;
  // Keep track of when tokens expire for caching.
  NSTimeInterval _tokenExpiration;
}

-   (void)fetchTokenWithContext:(nullable GMTCAuthorizationContext *)authorizationContext
                   completion:(nonnull GMTCAuthTokenFetchCompletionHandler)completion {
  // Get the trip ID from the authorizationContext. This is set by the Consumer SDK.
  NSString *tripID = authorizationContext.tripID;

  // Clear cached trip token if trip ID has changed.
  if (![_lastKnownTripID isEqual:tripID]) {
    _tokenExpiration = 0.0;
    _cachedTripToken = nil;
  }
  _lastKnownTripID = tripID;

  // Clear cached tripToken if it has expired.
  if ([[NSDate date] timeIntervalSince1970] > _tokenExpiration) {
    _cachedTripToken = nil;
  }

  // If appropriate, use the cached token.
  if (_cachedTripToken) {
    completion(_cachedTripToken, nil);
    return;
  }
  // Otherwise, try to fetch a new token from your server.
  NSURL *requestURL = [NSURL URLWithString:PROVIDER_URL];
  NSMutableURLRequest *request =
      [[NSMutableURLRequest alloc] initWithURL:requestURL];
  request.HTTPMethod = @"GET";

  // Replace the following key values with the appropriate keys based on your
  // server's expected response.
  NSString *tripTokenKey = @"TRIP_TOKEN_KEY";
  NSString *tokenExpirationKey = @"TOKEN_EXPIRATION";

  __weak typeof(self) weakSelf = self;
  void (^handler)(NSData *_Nullable data, NSURLResponse *_Nullable response,
                  NSError *_Nullable error) =
      ^(NSData *_Nullable data, NSURLResponse *_Nullable response, NSError *_Nullable error) {
        typeof(self) strongSelf = weakSelf;
        if (error) {
          completion(nil, error);
          return;
        }

        NSError *JSONError;
        NSMutableDictionary *JSONResponse =
            [NSJSONSerialization JSONObjectWithData:data options:kNilOptions error:&JSONError];

        if (JSONError) {
          completion(nil, JSONError);
          return;
        } else {
          // Sample code only. No validation logic.
          id expirationData = JSONResponse[tokenExpirationKey];
          if ([expirationData isKindOfClass:[NSNumber class]]) {
            NSTimeInterval expirationTime = ((NSNumber *)expirationData).doubleValue;
            strongSelf->_tokenExpiration = [[NSDate date] timeIntervalSince1970] + expirationTime;
          }
          strongSelf->_cachedTripToken = JSONResponse[tripTokenKey];
          completion(JSONResponse[tripTokenKey], nil);
        }
      };
  NSURLSessionConfiguration *config = [NSURLSessionConfiguration defaultSessionConfiguration];
  NSURLSession *mainQueueURLSession =
      [NSURLSession sessionWithConfiguration:config delegate:nil
                               delegateQueue:[NSOperationQueue mainQueue]];
  NSURLSessionDataTask *task = [mainQueueURLSession dataTaskWithRequest:request completionHandler:handler];
  [task resume];
}

@end
Khởi chạy ứng dụng
Swift
/*

    *   AppDelegate.swift
 */
import GoogleRidesharingConsumer
import GoogleMaps

@UIApplicationMain
class AppDelegate: UIResponder, UIApplicationDelegate {

  func application(_ application: UIApplication,
      didFinishLaunchingWithOptions launchOptions: [UIApplication.LaunchOptionsKey: Any]?) -> Bool {
    // Register your API key for GMSServices.
    GMSServices.provideAPIKey(yourMapsAPIKey)

    // Set the instance of the SampleAccessTokenProvider.
    GMTCServices.setAccessTokenProvider(SampleAccessTokenProvider(), providerID: yourProviderID)

    // Other initialization code ...
    return true
  }
}
Objective-C
/*

    *   AppDelegate.m
 */
#import <GoogleMaps/GoogleMaps.h>
#import <GoogleRidesharingConsumer/GoogleRidesharingConsumer.h>

@implementation AppDelegate

-   (BOOL)application:(UIApplication *)application
    didFinishLaunchingWithOptions:(NSDictionary *)launchOptions {
  //Register your API key for GMSServices.
  [GMSServices provideAPIKey:yourMapsAPIKey];

  //Set the instance of the AccessTokenFactory.
  [GMTCServices setAccessTokenProvider:[[SampleAccessTokenProvider alloc] init]
                            providerID:yourProviderID];

  // Other initialization code ...
  return YES;
}

@end
Tích hợp chế độ xem bản đồ
Khởi chạy chế độ xem bản đồ
Ví dụ sau đây trình bày cách khởi tạo GMTCMapView.
Swift
/*

    *   MapViewController.swift
 */
class ViewController: UIViewController, GMTCMapViewDelegate {
  private var rideSharingMap: GMTCMapView?

  override func viewDidLoad() {
    super.viewDidLoad()

    self.rideSharingMap = GMTCMapView(frame: UIScreen.main.bounds)
    self.rideSharingMap.delegate = self
    self.rideSharingMap?.settings.myLocationButton = true
    self.view.addSubview(self.rideSharingMap!)
    ...
  }
Objective-C
/*

    *   MapViewController.h
 */
@interface MapViewController : UIViewController<GMTCMapViewDelegate>
...
@end

/*

    *   MapViewController.m
 */
@implementation MapViewController

-   (void)viewDidLoad {
  [super viewDidLoad];
  ...
  self.mapView = [[GMTCMapView alloc] initWithFrame:CGRectZero];
  self.mapView.settings.myLocationButton = YES;
  self.mapView.delegate = self;
  ...
}

...

@end
Xử lý sự kiện xem bản đồ
Ví dụ sau cho biết cách triển khai uỷ quyền để xử lý các sự kiện trạng thái khách hàng.
Swift
func mapViewDidInitialize(_ mapview: GMTCMapView) {
  // Handle the update to the state of the map view to browsing.
}

func mapView(_ mapView: GMSMapView, didTapConsumerMarker mapMarker: GMSMarker, markerType: GMTCMapViewMarkerType) -> Bool {
  // Handle the mapView marker was tapped.
}
Objective-C
/*

    *   MapViewController.m
 */
#pragma mark - GMTCMapViewDelegate implementation

// Handle state update of map view.

-   (void)mapViewDidInitializeCustomerState:(GMTCMapView *)mapview {
  // Handle the update to the state of the map view to browsing.
}

-   (void)mapView:(GMSMapView *)mapView
    didTapConsumerMarker:(nonnull GMSMarker *)mapMarker
              markerType:(GMTCMapViewMarkerType)markerType {
  // Handle the mapView marker was tapped.
}
Chia sẻ hành trình
Bắt đầu chuyến đi mới khi chế độ xem đã tải
Ví dụ sau đây cho thấy cách bắt đầu chia sẻ hành trình ngay sau khi chế độ xem tải. Bạn có thể thu thập tất cả hoạt động đầu vào của người dùng (chẳng hạn như vị trí trả xe và đến lấy hàng) từ một ViewController, sau đó tạo một ViewController mới để bắt đầu trực tiếp chia sẻ hành trình.
Swift
/*

    *   MapViewController.swift
 */
override func viewDidLoad() {
  super.viewDidLoad()
  ...
  self.mapView = GMTCMapView(frame: UIScreen.main.bounds)
  self.mapView.delegate = self
  self.view.addSubview(self.mapView)
}

func mapViewDidInitializeCustomerState(_: GMTCMapView) {
  self.mapView.pickupLocation = self.selectedPickupLocation
  self.mapView.dropoffLocation = self.selectedDropoffLocation

  self.startConsumerMatchWithLocations(
    pickupLocation: self.mapView.pickupLocation!,
    dropoffLocation: self.mapView.dropoffLocation!
  ) { [weak self] (tripName, error) in
    guard let strongSelf = self else { return }
    if error != nil {
      // print error message.
      return
    }
    let tripService = GMTCServices.shared().tripService
    // Create a tripModel instance for listening the update of the trip
    // specified by this trip name.
    let tripModel = tripService.tripModel(forTripName: tripName)
    // Create a journeySharingSession instance based on the tripModel
    let journeySharingSession = GMTCJourneySharingSession(tripModel: tripModel)
    // Add the journeySharingSession instance on the mapView for UI updating.
    strongSelf.mapView.show(journeySharingSession)
    // Register for the trip update events.
    tripModel.register(strongSelf)

    strongSelf.currentTripModel = tripModel
    strongSelf.currentJourneySharingSession = journeySharingSession
    strongSelf.hideLoadingView()
  }

  self.showLoadingView()
}
Objective-C
/*

    *   MapViewController.m
 */
-   (void)viewDidLoad {
  [super viewDidLoad];
  ...
  self.mapView = [[GMTCMapView alloc] initWithFrame:CGRectZero];
  self.mapView.delegate = self;
  [self.view addSubview:self.mapView];
}

// Handle the callback when the GMTCMapView did initialized.

-   (void)mapViewDidInitializeCustomerState:(GMTCMapView *)mapview {
  self.mapView.pickupLocation = self.selectedPickupLocation;
  self.mapView.dropoffLocation = self.selectedDropoffLocation;

  __weak __typeof(self) weakSelf = self;
  [self startTripBookingWithPickupLocation:self.selectedPickupLocation
                           dropoffLocation:self.selectedDropoffLocation
                                completion:^(NSString *tripName, NSError *error) {
                                  __typeof(self) strongSelf = weakSelf;
                                  GMTCTripService *tripService = [GMTCServices sharedServices].tripService;
                                  // Create a tripModel instance for listening to updates to the trip specified by this trip name.
                                  GMTCTripModel *tripModel = [tripService tripModelForTripName:tripName];
                                  // Create a journeySharingSession instance based on the tripModel.
                                  GMTCJourneySharingSession *journeySharingSession =
                                    [[GMTCJourneySharingSession alloc] initWithTripModel:tripModel];
                                  // Add the journeySharingSession instance on the mapView for updating the UI.
                                  [strongSelf.mapView showMapViewSession:journeySharingSession];
                                  // Register for trip update events.
                                  [tripModel registerSubscriber:self];

                                  strongSelf.currentTripModel = tripModel;
                                  strongSelf.currentJourneySharingSession = journeySharingSession;
                                  [strongSelf hideLoadingView];
                                }];
    [self showLoadingView];
}
Huỷ chuyến đi đang hoạt động
Ví dụ sau đây trình bày cách đặt lại chuyến đi hiện đang hoạt động.
Swift
/*

    *   MapViewController.swift
 */
func cancelCurrentActiveTrip() {
  // Stop the tripModel
  self.currentTripModel.unregisterSubscriber(self)

  // Remove the journey sharing session from the mapView's UI stack.
  self.mapView.hide(journeySharingSession)
}
Objective-C
/*

    *   MapViewController.m
 */
-   (void)cancelCurrentActiveTrip {
  // Stop the tripModel
  [self.currentTripModel unregisterSubscriber:self];

  // Remove the journey sharing session from the mapView's UI stack.
  [self.mapView hideMapViewSession:journeySharingSession];
}
Nghe thông tin cập nhật về chuyến đi
Ví dụ sau đây cho thấy cách đăng ký lệnh gọi lại tripModel.
Swift
/*

    *   MapViewController.swift
 */
override func viewDidLoad() {
  super.viewDidLoad()
  // Register for trip update events.
  self.currentTripModel.register(self)
}
Objective-C
/*

    *   MapViewController.m
 */
-   (void)viewDidLoad {
  [super viewDidLoad];
  // Register for trip update events.
  [self.currentTripModel registerSubscriber:self];
  ...
}
Ví dụ sau đây cho thấy cách huỷ đăng ký lệnh gọi lại tripModel.
Swift
/*

    *   MapViewController.swift
 */
deinit {
  self.currentTripModel.unregisterSubscriber(self)
}
Objective-C
/*

    *   MapViewController.m
 */
-   (void)dealloc {
  [self.currentTripModel unregisterSubscriber:self];
  ...
}
Ví dụ sau đây cho biết cách triển khai giao thức GMTCTripModelSubscriber để xử lý lệnh gọi lại khi trạng thái chuyến đi được cập nhật.
Swift
/*

    *   MapViewController.swift
 */
func tripModel(_: GMTCTripModel, didUpdate trip: GMTSTrip?, updatedPropertyFields: GMTSTripPropertyFields) {
  // Update the UI with the new `trip` data.
  self.updateUI(with: trip)
}

func tripModel(_: GMTCTripModel, didUpdate tripStatus: GMTSTripStatus) {
  // Handle trip status did change.
}

func tripModel(_: GMTCTripModel, didUpdateActiveRouteRemainingDistance activeRouteRemainingDistance: Int32) {
  // Handle remaining distance of active route did update.
}

func tripModel(_: GMTCTripModel, didUpdateActiveRoute activeRoute: [GMTSLatLng]?) {
  // Handle trip active route did update.
}

func tripModel(_: GMTCTripModel, didUpdate vehicleLocation: GMTSVehicleLocation?) {
  // Handle vehicle location did update.
}

func tripModel(_: GMTCTripModel, didUpdatePickupLocation pickupLocation: GMTSTerminalLocation?) {
  // Handle pickup location did update.
}

func tripModel(_: GMTCTripModel, didUpdateDropoffLocation dropoffLocation: GMTSTerminalLocation?) {
  // Handle drop off location did update.
}

func tripModel(_: GMTCTripModel, didUpdatePickupETA pickupETA: TimeInterval) {
  // Handle the pickup ETA did update.
}

func tripModel(_: GMTCTripModel, didUpdateDropoffETA dropoffETA: TimeInterval) {
  // Handle the drop off ETA did update.
}

func tripModel(_: GMTCTripModel, didUpdateRemaining remainingWaypoints: [GMTSTripWaypoint]?) {
  // Handle updates to the pickup, dropoff or intermediate destinations of the trip.
}

func tripModel(_: GMTCTripModel, didFailUpdateTripWithError error: Error?) {
  // Handle the error.
}

func tripModel(_: GMTCTripModel, didUpdateIntermediateDestinations intermediateDestinations: [GMTSTerminalLocation]?) {
  // Handle the intermediate destinations being updated.
}

func tripModel(_: GMTCTripModel, didUpdateActiveRouteTraffic activeRouteTraffic: GMTSTrafficData?) {
  // Handle trip active route traffic being updated.
}
Objective-C
/*

    *   MapViewController.m
 */
#pragma mark - GMTCTripModelSubscriber implementation

-   (void)tripModel:(GMTCTripModel *)tripModel
            didUpdateTrip:(nullable GMTSTrip *)trip
    updatedPropertyFields:(enum GMTSTripPropertyFields)updatedPropertyFields {
  // Update the UI with the new `trip` data.
  [self updateUIWithTrip:trip];
  ...
}

-   (void)tripModel:(GMTCTripModel *)tripModel didUpdateTripStatus:(enum GMTSTripStatus)tripStatus {
  // Handle trip status did change.
}

-   (void)tripModel:(GMTCTripModel *)tripModel
    didUpdateActiveRouteRemainingDistance:(int32_t)activeRouteRemainingDistance {
   // Handle remaining distance of active route did update.
}

-   (void)tripModel:(GMTCTripModel *)tripModel
    didUpdateActiveRoute:(nullable NSArray<GMTSLatLng *> *)activeRoute {
  // Handle trip active route did update.
}

-   (void)tripModel:(GMTCTripModel *)tripModel
    didUpdateVehicleLocation:(nullable GMTSVehicleLocation *)vehicleLocation {
  // Handle vehicle location did update.
}

-   (void)tripModel:(GMTCTripModel *)tripModel
    didUpdatePickupLocation:(nullable GMTSTerminalLocation *)pickupLocation {
  // Handle pickup location did update.
}

-   (void)tripModel:(GMTCTripModel *)tripModel
    didUpdateDropoffLocation:(nullable GMTSTerminalLocation *)dropoffLocation {
  // Handle drop off location did update.
}

-   (void)tripModel:(GMTCTripModel *)tripModel didUpdatePickupETA:(NSTimeInterval)pickupETA {
  // Handle the pickup ETA did update.
}

-   (void)tripModel:(GMTCTripModel *)tripModel
    didUpdateRemainingWaypoints:(nullable NSArray<GMTSTripWaypoint *> *)remainingWaypoints {
  // Handle updates to the pickup, dropoff or intermediate destinations of the trip.
}

-   (void)tripModel:(GMTCTripModel *)tripModel didUpdateDropoffETA:(NSTimeInterval)dropoffETA {
  // Handle the drop off ETA did update.
}

-   (void)tripModel:(GMTCTripModel *)tripModel didFailUpdateTripWithError:(nullable NSError *)error {
  // Handle the error.
}

-   (void)tripModel:(GMTCTripModel *)tripModel
    didUpdateIntermediateDestinations:
        (nullable NSArray<GMTSTerminalLocation *> *)intermediateDestinations {
  // Handle the intermediate destinations being updated.
}

-   (void)tripModel:(GMTCTripModel *)tripModel
    didUpdateActiveRouteTraffic:(nullable GMTSTrafficData *)activeRouteTraffic {
  // Handle trip active route traffic being updated.
}
Xử lý lỗi
Nếu đã đăng ký TripModel và xảy ra lỗi, thì bạn có thể nhận lệnh gọi lại của TripModel bằng cách triển khai phương thức uỷ quyền tripModel(_:didFailUpdateTripWithError:). Fleet Engine đã tạo thông báo lỗi theo tiêu chuẩn Lỗi của Google Cloud. Để biết định nghĩa chi tiết về thông báo lỗi và tất cả mã lỗi, hãy tham khảo tài liệu về Lỗi trên Google Cloud.
Cụ thể, để theo dõi chuyến đi, tính năng này yêu cầu cung cấp một mã thông báo xác thực hợp lệ. 401 UNAUTHENTICATED sẽ được tạo ra nếu không có thông tin xác thực hợp lệ, chẳng hạn như mã thông báo đã hết hạn.403 PERMISSION_DENIED sẽ được tạo ra nếu phương thức gọi không có quyền gọi một API cụ thể (ví dụ: người dùng có vai trò người tiêu dùng cố gắng gọi updateTrip) hoặc yêu cầu không có car_id/trip_id hợp lệ trong mã thông báo JWT.
Để biết thêm thông tin, hãy xem bài viết Xử lý lỗi SDK của người tiêu dùng.
Tuỳ chỉnh giao diện người dùng
Tải và đặt các tuỳ chọn giao diện người dùng hình nhiều đường tuỳ chỉnh
Ví dụ sau đây cho thấy cách thiết lập các tuỳ chọn tuỳ chỉnh cho giao diện người dùng đối với hình nhiều đường.
Swift
/** MapViewController.swift */

func updatePolylineUIOptions() {
  // The polyline type that you would like to set custom UI options for.
  let customizablePolylineType = GMTCPolylineType.activeRoute

  let polylineStyleOptions = GMTCMutablePolylineStyleOptions()
  polylineStyleOptions.strokeWidth = 8.0
  polylineStyleOptions.strokeColor = .blue
  polylineStyleOptions.isVisible = true
  polylineStyleOptions.zIndex = 1000
  polylineStyleOptions.isGeodesic = true
  let coordinator = self.mapView.consumerMapStyleCoordinator
  coordinator.setPolylineStyleOptions(polylineStyleOptions, polylineType:customizablePolylineType)
}
Objective-C
/** MapViewController.m */

-   (void)updatePolylineUIOptions {
  // The polyline type that you would like to set custom UI options for.
  GMTCPolylineType customizablePolylineType = GMTCPolylineTypeActiveRoute;

  GMTCMutablePolylineStyleOptions *polylineStyleOptions =
      [[GMTCMutablePolylineStyleOptions alloc] init];
  polylineStyleOptions.strokeWidth = 8.0;
  polylineStyleOptions.strokeColor = [UIColor blueColor];
  polylineStyleOptions.isVisible = YES;
  polylineStyleOptions.zIndex = 1000;
  polylineStyleOptions.isGeodesic = YES;
  [[_mapView consumerMapStyleCoordinator] setPolylineStyleOptions:polylineStyleOptions
                                                polylineType:customizablePolylineType];
}
Tải và đặt các tuỳ chọn giao diện người dùng cho điểm đánh dấu tuỳ chỉnh
Ví dụ sau đây cho thấy cách thiết lập tuỳ chọn giao diện người dùng tuỳ chỉnh cho điểm đánh dấu.
Swift
/** MapViewController.swift */

func updateMarkerUIOptions() {
  let customizableMarkerType = GMTCCustomizableMarkerType.tripVehicle
  let markerStyleOptions = GMTCMutableMarkerStyleOptions()
  markerStyleOptions.groundAnchor = groundAnchor
  markerStyleOptions.isVisible = true
  markerStyleOptions.icon = icon
  markerStyleOptions.zIndex = 100
  markerStyleOptions.isFlat = false
  let coordinator = self.mapView.consumerMapStyleCoordinator
  coordinator.setMarkerStyleOptions(markerStyleOptions, markerType: customizableMarkerType)
}
Objective-C
/** MapViewController.m */

-   (void)updateMarkerUIOptions {
  // The marker type that you would like to set custom UI options for.
  GMTCCustomizableMarkerType customizableMarkerType = GMTCCustomizableMarkerTypeTripVehicle;

  GMTCMutableMarkerStyleOptions *markerStyleOptions =
      [[GMTCMutableMarkerStyleOptions alloc] init];
  markerStyleOptions.groundAnchor = groundAnchor;
  markerStyleOptions.isVisible = YES;
  markerStyleOptions.icon = icon;
  markerStyleOptions.zIndex = 100;
  markerStyleOptions.isFlat = NO;

  [[_mapView consumerMapStyleCoordinator] setMarkerStyleOptions:markerStyleOptions markerType:customizableMarkerType];
}
Điều chỉnh mức thu phóng của máy ảnh
Nút Vị trí của tôi trong SDK Maps dành cho iOS đặt máy ảnh vào vị trí thiết bị.
Nếu có một phiên Chia sẻ hành trình đang hoạt động, bạn có thể căn giữa máy ảnh để tập trung vào hành trình của mình thay vì chỉ tập trung vào vị trí của thiết bị.
SDK người tiêu dùng cung cấp tính năng máy ảnh tự động được bật theo mặc định. Máy ảnh sẽ thu phóng để tập trung vào tuyến đường chia sẻ hành trình và điểm tham chiếu tiếp theo.
Nếu cần kiểm soát hành vi của máy ảnh nhiều hơn, bạn có thể tắt hoặc bật tính năng máy ảnh tự động bằng cách sử dụng thuộc tính isAllowCameraAutoUpdate.
Để biết thêm các cách tuỳ chỉnh máy ảnh, hãy xem phần Maps SDK dành cho iOS Di chuyển máy ảnh.