
Google Business Profile Account & Linking
Introduction and Business Impact
If a merchant is integrating through the LFP program, they need to have a GBP. Learn more about creating one.
To run Local Inventory Ads, our system requires store information from Google Business Profile. The business profile can be linked to the merchant account and store information can then be pulled into the Merchant Center.
Utilizing the Google Business Profile API, Google Business Location & Business can be created as part of your onboarding process using existing information that is collected by the sub-account.
A merchant sub account (or the Local Feeds Partnership provider upon getting access) can use the Google Business profile UI to create the Location Group and its business at Google Locations.
If a Google Business Profile already exists for the merchant, you can link it
using Content APIs' liasettings.requestgmbaccess. Accounts can be looked
up through the following API: AccountManagement.accounts.list.
Finally, after the account has been created and linked to the merchant account, you need to login to the Merchant Center account and specify business profiles, which are GBP Business Location's. To activate through the API, you can use accounts.update with AccountGoogleMyBusinessLink filled. GBP Locations and Merchant Center Business Profiles enables the Merchant Center to know which store information it should import.
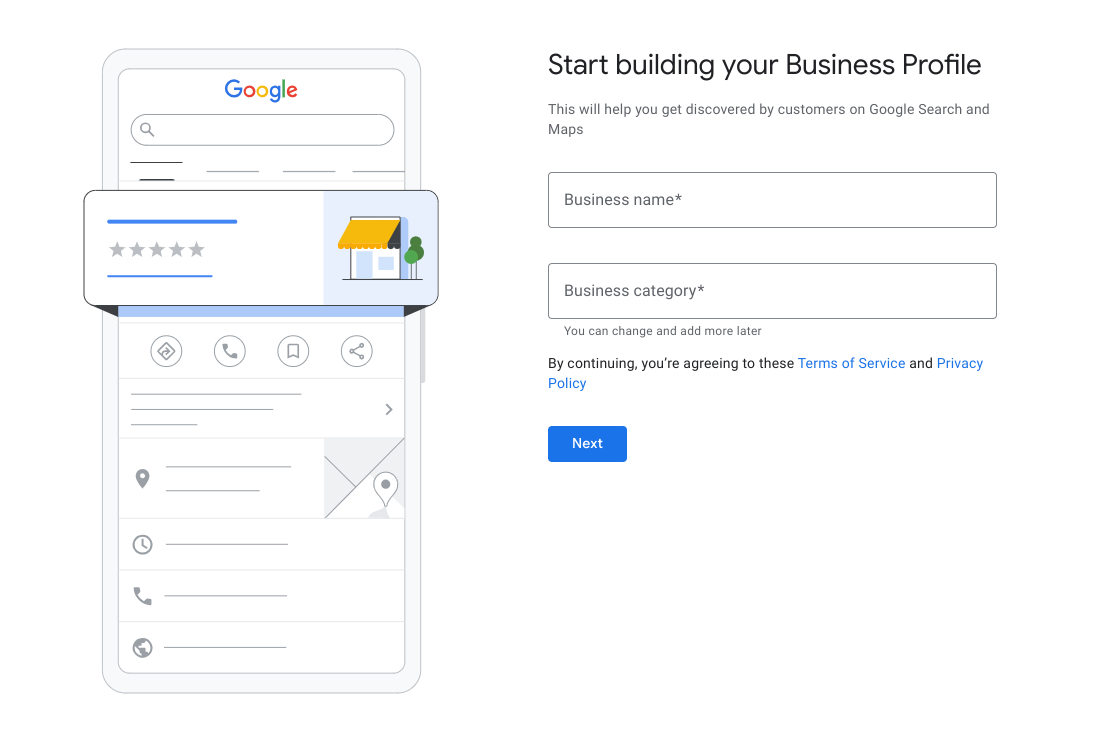
Create a Google Business Profile
Log into Google Business, if there are no businesses associated with this account, the only available option is the "Add Business" drop down. Select, "Add Business", to begin adding a merchant's business.
You can start managing the business my clicking on "manage now" on the main Business Profile Page.

The following screen assists you with creating a new profile for your business. Enter the Business Name and the Business Category. The Business Category comes from Google's extensive list of merchant categories, select one that is best suited for your merchant's business. Select, "Next" when finished.
The following screen is important for your local inventory ads. It asks you to add a location customers can visit. This is required for business verification. Select "Yes", and Select, "Next".
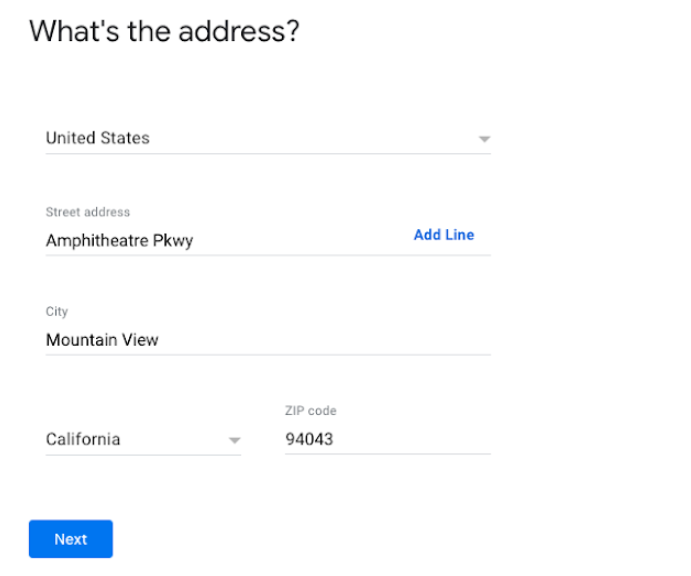
The next screen requires you to enter an address for a merchant's business location. If you have multiple locations, you are able to enter each location separately after you've created a merchant's business. This is also the address that shows up in the Google Search Card.
Companies that are identified around a merchant's business may appear as possible matches. If there are no matches, then select "None of these".
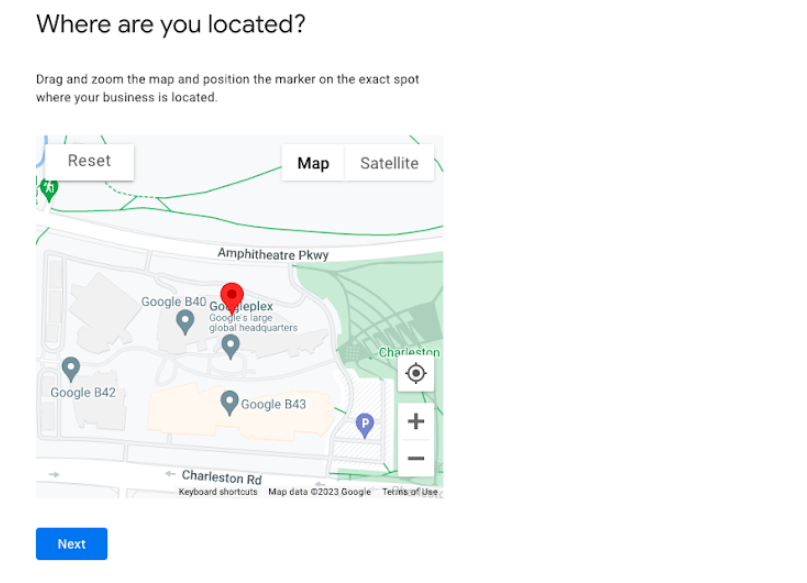
If your address is too broad, Google Business Profile may ask you to select your location on the map. When you've selected your location, Select "Next".
The next screen asks if you provide deliveries or home office visits. This can be populated later and is out of the scope for this document. For now, Select "No", then, Select "Next".
The next screen asks for adding business contact information. This is different from the verification phone number, which is collected in Step 10. For now, you can Select "Skip".
Select Yes or No, if you want updates and recommendations for the business that is registering with Google. Then, Select "Next".
If you want, enter a phone number, and select "Next". Otherwise, you can choose to Verify Later. It is important that if you select "Verify Later", this may cause issues with your local feed setup. The created business profile needs to be verified in order to be usable by the LFP integration.
In the following screen, you are asked to "Add business hours", similar to previous steps, this is out of scope, and it can be performed later. Select "Skip".
For "Add Messaging", similar to previous steps, this is out of scope, and it can be performed later. Select "Skip".
You may enter a business description, but it is out-of-scope for the Local Feed Provider & Local Inventory Ads Setup. It can be populated later. Select "Skip".
You may add photos of a merchant's business, but it is out-of-scope for the Local Feed Provider & Local Inventory Ads Setup. It can be populated later. Select "Skip".
If you have yet to claim your $500 free advertising credit, you can choose to do that here. Otherwise, Select "Skip".
For Exploring and Selecting Domains, it is out-of-scope for the Local Feed Provider & Local Inventory Ads Setup. Select "Skip".
The final screen lets you know that edits to a merchant's business profile is visible when you're verified. Select "Continue".
Go back to Google Locations. If a message appears about managing your business, Select "Stay here".
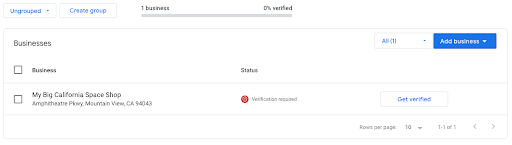
Your newly created business is going to appear on the screen. Follow these steps when convenient to fully verify a merchant's business. If you want to create a group for this or future locations, you can Select "Create Group". Otherwise, your Google Business Profile has been successfully created.
How to link a Google Business Profile to a Merchant Center Account
In order to have Local Offers displayed, the Google Business Profile needs to be linked to the Merchant Center Account.
With the rollout of the new version of Merchant Center, new merchants are usually required to enter their Business Profile when creating a Merchant Center account. In this case, the linking is usually already established.
However, for any other use case, you can link the Google Business Profile to the Target Merchant Center account directly either in Merchant Center or through the API.
UX Guidance Merchant Center UI
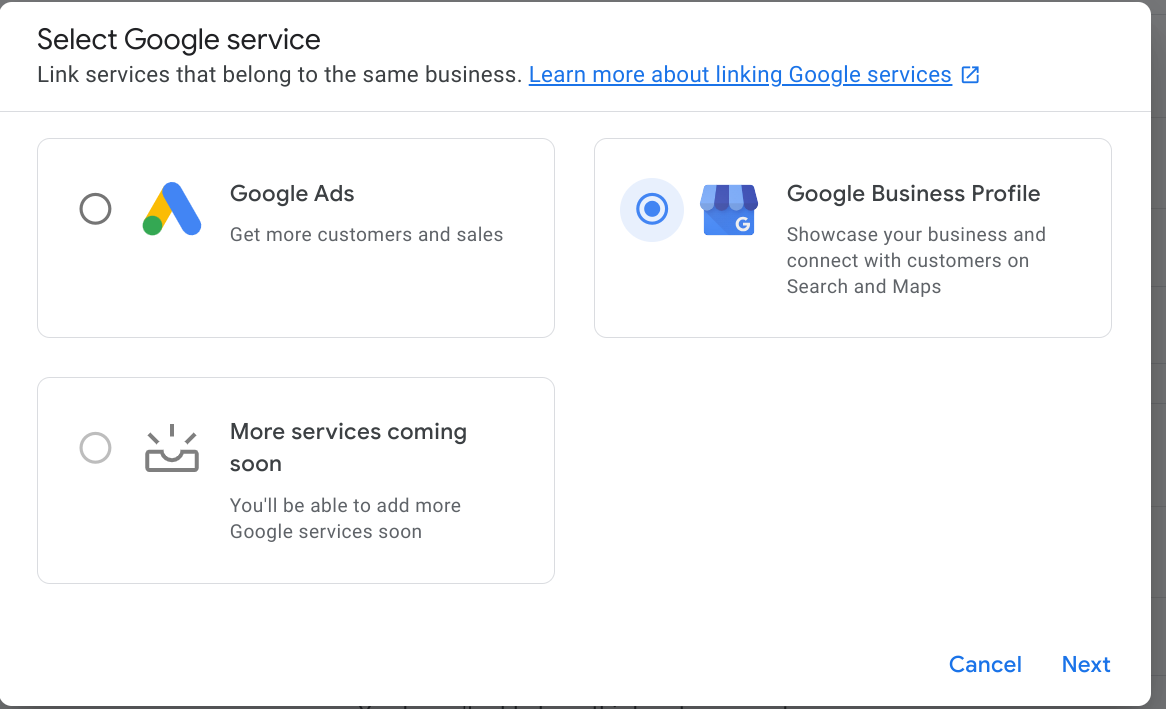
Log into the retailers Merchant Center account and select:
- Settings wheel from the top right
- Apps and services
- Select "Google Business Profile" from the list of services
- Enter the email address linked to the Business Profile
- If the email address entered is not matching any of the super admins on the Merchant Center accounts, a request will be sent to the Business Profile email address to validate the link.

Tech Guidance (linking GBP/MC using the API)
Depending on the ability to have ownership over the Merchant's GBPs, the list of calls differ:
- Partner has ownership over merchants' GBPs
- You can link an existing Google Business Profile using the API method liasettings.requestgmbaccess
- Then call accounts.update
- Partner doesn't have ownership over Merchant GBPs:
- You can link an existing Google Business Profile using the API method liasettings.requestgmbaccess
- This will trigger a request to the Google Business Profile Admin which will need to approve the request.
- Call accounts.update
Accounts can be looked up through the following API:
AccountManagement.accounts.list
Generally, after the account has been created and linked to the merchant account, you need to login to the Merchant Center account and specify business profiles, which are GBP Business Locations. To activate through the API, you can use accounts.update with AccountGoogleMyBusinessLink filled.
GBP Locations and Merchant Center Business Profiles enable the Merchant Center to know which store information it should import.
A detailed description can be also seen in the "Link your Business Profile" API guide.