
この例では、Maps SDK for Android の SupportMapFragment を使用して地図を作成します。
詳しくは、こちらのドキュメントをご覧ください。
始める
サンプルコードを試す前に、開発環境を構成する必要があります。 詳しくは、Maps SDK for Android のコードサンプルをご覧ください。
コードを表示する
Kotlin
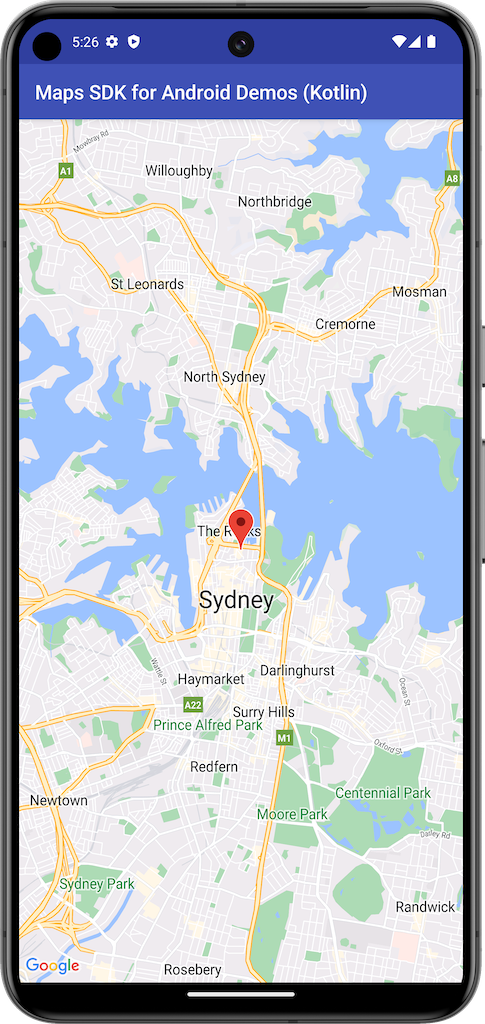
class BasicMapDemoActivity : AppCompatActivity(), OnMapReadyCallback { val SYDNEY = LatLng(-33.862, 151.21) val ZOOM_LEVEL = 13f override fun onCreate(savedInstanceState: Bundle?) { super.onCreate(savedInstanceState) setContentView(R.layout.activity_basic_map_demo) val mapFragment : SupportMapFragment? = supportFragmentManager.findFragmentById(R.id.map) as? SupportMapFragment mapFragment?.getMapAsync(this) } /** * This is where we can add markers or lines, add listeners or move the camera. In this case, * we just move the camera to Sydney and add a marker in Sydney. */ override fun onMapReady(googleMap: GoogleMap) { with(googleMap) { moveCamera(CameraUpdateFactory.newLatLngZoom(SYDNEY, ZOOM_LEVEL)) addMarker(MarkerOptions().position(SYDNEY)) } } }
Java
public class BasicMapDemoActivity extends SamplesBaseActivity implements OnMapReadyCallback { @Override protected void onCreate(Bundle savedInstanceState) { super.onCreate(savedInstanceState); setContentView(R.layout.basic_demo); SupportMapFragment mapFragment = (SupportMapFragment) getSupportFragmentManager().findFragmentById(R.id.map); mapFragment.getMapAsync(this); applyInsets(findViewById(R.id.map_container)); } /** * This is where we can add markers or lines, add listeners or move the camera. In this case, * we * just add a marker near Africa. */ @Override public void onMapReady(GoogleMap map) { map.addMarker(new MarkerOptions().position(new LatLng(0, 0)).title("Marker")); } }
サンプルのクローンを作成して実行する
このサンプルをローカルで実行するには、Git が必要です。次のコマンドで、サンプルアプリ リポジトリのクローンを作成します。
git clone git@github.com:googlemaps-samples/android-samples.git
サンプル プロジェクトを Android Studio にインポートします。
- Android Studio で、[File] > [New] > [Import Project] を選択します。
リポジトリの保存先に移動し、Kotlin または Java のプロジェクト ディレクトリを選択します。
- Kotlin:
PATH-REPO/android-samples/ApiDemos/kotlin - Java:
PATH-REPO/android-samples/ApiDemos/java
- Kotlin:
- [Open] を選択します。Android Studio が Gradle ビルドツールを使用してプロジェクトをビルドします。
- プロジェクトの
local.propertiesファイルと同じディレクトリに空のsecrets.propertiesファイルを作成します。詳しくは、API キーをプロジェクトに追加するをご覧ください。 次の文字列を
secrets.propertiesに追加し、YOUR_API_KEY を実際の API キーの値に置き換えます。MAPS_API_KEY=YOUR_API_KEY- アプリを実行します。