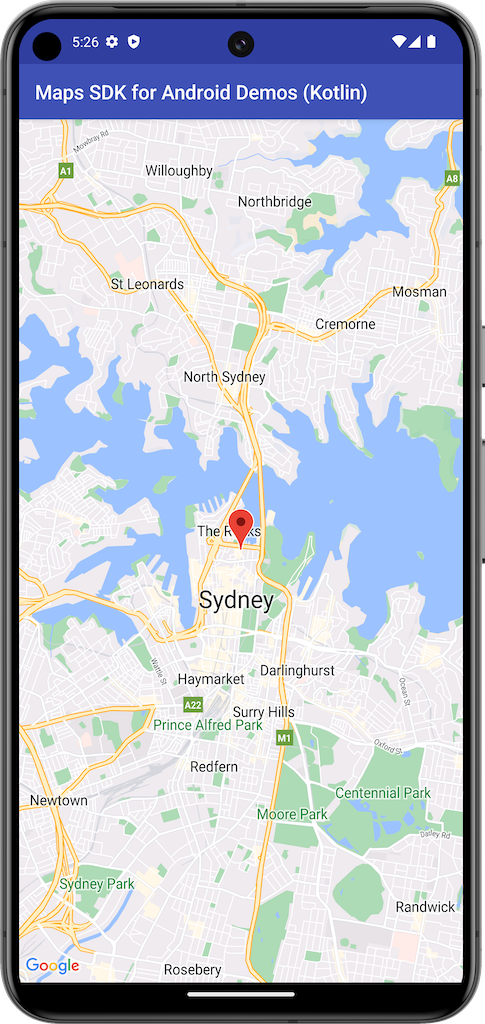
แสดงแผนที่พื้นฐาน
จัดทุกอย่างให้เป็นระเบียบอยู่เสมอด้วยคอลเล็กชัน
บันทึกและจัดหมวดหมู่เนื้อหาตามค่ากำหนดของคุณ

ตัวอย่างนี้จะสร้างแผนที่โดยใช้ SupportMapFragment
จาก Maps SDK สําหรับ Android
ดูข้อมูลเพิ่มเติมได้ที่เอกสารประกอบ
เริ่มต้นใช้งาน
คุณต้องกําหนดค่าสภาพแวดล้อมการพัฒนาก่อนจึงจะลองใช้โค้ดตัวอย่างได้
ดูข้อมูลเพิ่มเติมได้ที่ตัวอย่างโค้ด Maps SDK สำหรับ Android
ดูโค้ด
Kotlin
class BasicMapDemoActivity : SamplesBaseActivity(), OnMapReadyCallback {
val SYDNEY = LatLng(-33.862, 151.21)
val ZOOM_LEVEL = 13f
override fun onCreate(savedInstanceState: Bundle?) {
super.onCreate(savedInstanceState)
setContentView(com.example.common_ui.R.layout.basic_demo)
val mapFragment : SupportMapFragment? =
supportFragmentManager.findFragmentById(com.example.common_ui.R.id.map) as? SupportMapFragment
mapFragment?.getMapAsync(this)
}
/**
* This is where we can add markers or lines, add listeners or move the camera. In this case,
* we just move the camera to Sydney and add a marker in Sydney.
*/
override fun onMapReady(googleMap: GoogleMap) {
with(googleMap) {
moveCamera(CameraUpdateFactory.newLatLngZoom(SYDNEY, ZOOM_LEVEL))
addMarker(MarkerOptions().position(SYDNEY))
}
}
}
Java
public class BasicMapDemoActivity extends SamplesBaseActivity implements OnMapReadyCallback {
@Override
protected void onCreate(Bundle savedInstanceState) {
super.onCreate(savedInstanceState);
setContentView(com.example.common_ui.R.layout.basic_demo);
SupportMapFragment mapFragment =
(SupportMapFragment) getSupportFragmentManager().findFragmentById(com.example.common_ui.R.id.map);
mapFragment.getMapAsync(this);
applyInsets(findViewById(com.example.common_ui.R.id.map_container));
}
/**
* This is where we can add markers or lines, add listeners or move the camera. In this case,
* we
* just add a marker near Africa.
*/
@Override
public void onMapReady(GoogleMap map) {
map.addMarker(new MarkerOptions().position(new LatLng(0, 0)).title("Marker"));
}
}
โคลนและเรียกใช้ตัวอย่าง
คุณต้องใช้ Git เพื่อเรียกใช้ตัวอย่างนี้ในเครื่อง คำสั่งต่อไปนี้จะโคลนที่เก็บแอปพลิเคชันตัวอย่าง
git clone git@github.com:googlemaps-samples/android-samples.git
นําเข้าโปรเจ็กต์ตัวอย่างไปยัง Android Studio โดยทำดังนี้
- ใน Android Studio ให้เลือกไฟล์ > ใหม่ > นำเข้าโปรเจ็กต์
ไปที่ตำแหน่งที่คุณบันทึกที่เก็บไว้ แล้วเลือกไดเรกทอรีโปรเจ็กต์สำหรับ Kotlin หรือ Java
- Kotlin:
PATH-REPO/android-samples/ApiDemos/kotlin
- Java:
PATH-REPO/android-samples/ApiDemos/java
- เลือกเปิด Android Studio จะสร้างโปรเจ็กต์โดยใช้เครื่องมือบิลด์ Gradle
- สร้างไฟล์
secrets.properties
ว่างในไดเรกทอรีเดียวกับไฟล์ local.properties
ของโปรเจ็กต์ ดูข้อมูลเพิ่มเติมเกี่ยวกับไฟล์นี้ได้ที่หัวข้อเพิ่มคีย์ API ลงในโปรเจ็กต์
- รับคีย์ API จากโปรเจ็กต์ที่เปิดใช้ Maps SDK สำหรับ Android
เพิ่มสตริงต่อไปนี้ลงใน secrets.properties
โดยแทนที่ YOUR_API_KEY ด้วยค่าของคีย์ API
MAPS_API_KEY=YOUR_API_KEY
- เรียกใช้แอป
เนื้อหาของหน้าเว็บนี้ได้รับอนุญาตภายใต้ใบอนุญาตที่ต้องระบุที่มาของครีเอทีฟคอมมอนส์ 4.0 และตัวอย่างโค้ดได้รับอนุญาตภายใต้ใบอนุญาต Apache 2.0 เว้นแต่จะระบุไว้เป็นอย่างอื่น โปรดดูรายละเอียดที่นโยบายเว็บไซต์ Google Developers Java เป็นเครื่องหมายการค้าจดทะเบียนของ Oracle และ/หรือบริษัทในเครือ
อัปเดตล่าสุด 2025-08-31 UTC
[null,null,["อัปเดตล่าสุด 2025-08-31 UTC"],[[["\u003cp\u003eThis guide demonstrates how to create a basic map in your Android application using the Maps SDK for Android and a \u003ccode\u003eSupportMapFragment\u003c/code\u003e.\u003c/p\u003e\n"],["\u003cp\u003eCode samples are provided in both Kotlin and Java, showing how to display a map with a marker.\u003c/p\u003e\n"],["\u003cp\u003eBefore running the sample code, you need to configure your development environment, including cloning the sample repository and importing the project into Android Studio.\u003c/p\u003e\n"],["\u003cp\u003eYou will also need to obtain an API key and add it to your project's configuration files to enable map functionality.\u003c/p\u003e\n"]]],[],null,["This example creates a map using a `SupportMapFragment` from the\nMaps SDK for Android.\n\nFor more information, see the [documentation.](/maps/documentation/android-sdk/map)\n\nGet started\n\nBefore you can try the sample code, you must configure your development environment.\nFor more information, see [Maps SDK for Android code samples](/maps/documentation/android-sdk/examples).\n\nView the code\n\n\nKotlin \n\n```kotlin\nclass BasicMapDemoActivity : SamplesBaseActivity(), OnMapReadyCallback {\n\n val SYDNEY = LatLng(-33.862, 151.21)\n val ZOOM_LEVEL = 13f\n\n override fun onCreate(savedInstanceState: Bundle?) {\n super.onCreate(savedInstanceState)\n setContentView(com.example.common_ui.R.layout.basic_demo)\n val mapFragment : SupportMapFragment? =\n supportFragmentManager.findFragmentById(com.example.common_ui.R.id.map) as? SupportMapFragment\n mapFragment?.getMapAsync(this)\n }\n\n /**\n * This is where we can add markers or lines, add listeners or move the camera. In this case,\n * we just move the camera to Sydney and add a marker in Sydney.\n */\n override fun onMapReady(googleMap: GoogleMap) {\n with(googleMap) {\n moveCamera(CameraUpdateFactory.newLatLngZoom(SYDNEY, ZOOM_LEVEL))\n addMarker(MarkerOptions().position(SYDNEY))\n }\n }\n}https://github.com/googlemaps-samples/android-samples/blob/73ac16ffca01a2ca6fedd1988c713138ec000082/ApiDemos/project/kotlin-app/src/main/java/com/example/kotlindemos/BasicMapDemoActivity.kt#L32-L55\n\n \n```\n\nJava \n\n```java\npublic class BasicMapDemoActivity extends SamplesBaseActivity implements OnMapReadyCallback {\n\n @Override\n protected void onCreate(Bundle savedInstanceState) {\n super.onCreate(savedInstanceState);\n setContentView(com.example.common_ui.R.layout.basic_demo);\n\n SupportMapFragment mapFragment =\n (SupportMapFragment) getSupportFragmentManager().findFragmentById(com.example.common_ui.R.id.map);\n mapFragment.getMapAsync(this);\n applyInsets(findViewById(com.example.common_ui.R.id.map_container));\n }\n\n /**\n * This is where we can add markers or lines, add listeners or move the camera. In this case,\n * we\n * just add a marker near Africa.\n */\n @Override\n public void onMapReady(GoogleMap map) {\n map.addMarker(new MarkerOptions().position(new LatLng(0, 0)).title(\"Marker\"));\n }\n}https://github.com/googlemaps-samples/android-samples/blob/73ac16ffca01a2ca6fedd1988c713138ec000082/ApiDemos/project/java-app/src/main/java/com/example/mapdemo/BasicMapDemoActivity.java#L31-L53\n\n \n```\n\n\u003cbr /\u003e\n\nClone and run the samples\n\nGit is required to run this sample locally. The following command clones the sample\napplication repository. \n\n```\ngit clone git@github.com:googlemaps-samples/android-samples.git\n```\n\nImport the sample project into Android Studio:\n\n1. In Android Studio, select **File \\\u003e New \\\u003e Import Project**.\n2. Go to the location where you saved the repository and select the project directory for\n Kotlin or Java:\n\n - **Kotlin** : \u003cvar translate=\"no\"\u003ePATH-REPO\u003c/var\u003e`/android-samples/ApiDemos/kotlin`\n - **Java** : \u003cvar translate=\"no\"\u003ePATH-REPO\u003c/var\u003e`/android-samples/ApiDemos/java`\n3. Select **Open**. Android Studio builds your project, using the Gradle build tool.\n4. Create a blank `secrets.properties` file in the same directory as your project's `local.properties` file. For more information about this file, see [Add your API key to the project](/maps/documentation/android-sdk/config#step_3_add_your_api_key_to_the_project).\n5. [Get an API key](/maps/documentation/android-sdk/get-api-key) from your project with the [Maps SDK for Android enabled](/maps/documentation/android-sdk/cloud-setup#enabling-apis).\n6. Add the following string to `secrets.properties`, replacing **YOUR_API_KEY** with the value of\n your API key:\n\n ```scdoc\n MAPS_API_KEY=YOUR_API_KEY\n ```\n7. Run the app."]]