
Cette page explique comment ajouter une carte 3D de base à une application Android à l'aide du SDK Maps 3D pour Android. Les instructions de cette page supposent que vous avez déjà effectué les étapes de la page de configuration et que vous disposez des éléments suivants :
- Un projet Google Cloud avec le SDK Maps 3D pour Android activé
- Une clé API configurée pour être utilisée avec le SDK Maps 3D pour Android
- Un projet Android Studio configuré pour être utilisé avec le SDK Maps 3D pour Android
Pour en savoir plus sur ces prérequis, consultez la section Configuration.
Partie 1 : Mettre à jour le fichier de mise en page (activity_main.xml) pour ajouter le composant Map3DView
Le composant Map3DView est la vue qui affiche la carte 3D dans l'application. Les étapes suivantes ajoutent le composant et configurent l'état initial de la carte, y compris la position de la caméra et les attributs associés :
Ouvrez le fichier de mise en page de votre activité principale, qui se trouve généralement à l'adresse
app/src/main/res/layout/activity_main.xml.Dans l'élément racine
ConstraintLayout(ou votre élément de mise en page racine), ajoutez l'espace de noms XMLmap3d:xmlns:map3d="http://schemas.android.com/apk/res-auto"Supprimez l'élément par défaut
<TextView>qui affiche "Hello World!".Ajoutez le composant
Map3DViewà votre mise en page. Vous pouvez personnaliser la position de la caméra et d'autres attributs :<?xml version="1.0" encoding="utf-8"?> <androidx.constraintlayout.widget.ConstraintLayout xmlns:android="http://schemas.android.com/apk/res/android" xmlns:app="http://schemas.android.com/apk/res-auto" xmlns:map3d="http://schemas.android.com/apk/res-auto" xmlns:tools="http://schemas.android.com/tools" android:id="@+id/main" android:layout_width="match_parent" android:layout_height="match_parent" tools:context=".MainActivity"> <com.google.android.gms.maps3d.Map3DView android:id="@+id/map3dView" android:layout_width="match_parent" android:layout_height="match_parent" map3d:mode="hybrid" map3d:centerLat="38.544012" map3d:centerLng="-107.670428" map3d:centerAlt="2427.6" map3d:heading="310" map3d:tilt="63" map3d:range="8266" map3d:roll="0" map3d:minAltitude="0" map3d:maxAltitude="1000000" map3d:minHeading="0" map3d:maxHeading="360" map3d:minTilt="0" map3d:maxTilt="90" app:layout_constraintBottom_toBottomOf="parent" app:layout_constraintEnd_toEndOf="parent" app:layout_constraintStart_toStartOf="parent" app:layout_constraintTop_toTopOf="parent" /> </androidx.constraintlayout.widget.ConstraintLayout>
Partie 2 : Mettre à jour MainActivity.kt
Les étapes suivantes initialisent le composant Map3DView ajouté au fichier activity_main.xml dans la partie 1 et gèrent les événements de cycle de vie des composants.
Notez que le SDK Maps 3D pour Android n'accepte qu'une seule instance Map3DView
active à la fois. L'affichage simultané de plusieurs instances Map3DView (par exemple, dans la même mise en page ou dans différentes activités ou fragments visibles) n'est pas pris en charge et peut entraîner des problèmes de rendu, tels que des écrans noirs dans les vues secondaires.
De plus, tous les Map3DView partageront et refléteront le même état de carte (par exemple, la position de la caméra, les repères ajoutés, les polygones, etc.), qui persistera même si un Map3DView est détruit (à l'aide de onDestroy) et qu'un autre est créé, sauf s'il est effacé manuellement. Par exemple, si vous ajoutez des repères à Map3DView1, puis que vous le détruisez et créez Map3DView2, ces mêmes repères seront toujours présents sur Map3DView2.
Responsabilités du développeur :
- Une vue à la fois : assurez-vous qu'un seul
Map3DViewse trouve dans une partie active de votre hiérarchie de vues à tout moment. - Nettoyage manuel : lorsque vous passez d'un
Map3DView(par exemple,Map3DView1) à un autre (par exemple,Map3DView2), vous devez appeleronDestroy()sur l'ancienne instance (Map3DView1). Étant donné que l'état de la carte sous-jacente est partagé, pour vous assurer queMap3DView2démarre avec un état nouveau ou spécifique, vous devez effacer manuellement tout état défini parMap3DView1. Cela inclut la suppression des repères, des superpositions, etc., et la réinitialisation de la position de la caméra à l'aide de l'objetGoogleMap3Dobtenu dans leOnMap3DViewReadyCallback.
Ouvrez votre fichier
MainActivity.kt, qui se trouve généralement à l'adresseapp/src/main/java/com/example/yourpackagename/MainActivity.kt.Ajoutez les importations nécessaires pour le SDK Maps 3D pour Android :
import com.google.android.gms.maps3d.GoogleMap3D
import com.google.android.gms.maps3d.Map3DView
import com.google.android.gms.maps3d.OnMap3DViewReadyCallback
Modifiez la classe
MainActivitypour implémenterOnMap3DViewReadyCallback:class MainActivity : AppCompatActivity(), OnMap3DViewReadyCallback {Déclarez des variables pour
Map3DViewetGoogleMap3D:private lateinit var map3DView: Map3DView private var googleMap3D: GoogleMap3D? = nullDans la méthode
onCreate, aprèssetContentView(...)et le blocViewCompat.setOnApplyWindowInsetsListener, initialisez lemap3DView, appelez sa méthode de cycle de vieonCreateet demandez la carte de manière asynchrone :override fun onCreate(savedInstanceState: Bundle?) { super.onCreate(savedInstanceState) enableEdgeToEdge() setContentView(R.layout.activity_main) ViewCompat.setOnApplyWindowInsetsListener(findViewById(R.id.main)) { v, insets -> val systemBars = insets.getInsets(WindowInsetsCompat.Type.systemBars()) v.setPadding(systemBars.left, systemBars.top, systemBars.right, systemBars.bottom) insets } map3DView = findViewById(R.id.map3dView) map3DView.onCreate(savedInstanceState) map3DView.getMap3DViewAsync(this) }Remplacez la méthode
onMap3DViewReady. Ce rappel est déclenché dès que la carte est prête à être utilisée :override fun onMap3DViewReady(googleMap3D: GoogleMap3D) { // Interact with the googleMap3D object here this.googleMap3D = googleMap3D // You can now make calls to the googleMap3D object, e.g., // googleMap3D.cameraController.flyTo(camera { ... }) }Transférez les événements de cycle de vie de votre activité vers le
Map3DViewen ajoutant les remplacements suivants auMainActivity:override fun onStart() { super.onStart() map3DView.onStart() } override fun onResume() { super.onResume() map3DView.onResume() } override fun onPause() { map3DView.onPause() super.onPause() } override fun onStop() { map3DView.onStop() super.onStop() } override fun onDestroy() { map3DView.onDestroy() super.onDestroy() } override fun onSaveInstanceState(outState: Bundle) { super.onSaveInstanceState(outState) map3DView.onSaveInstanceState(outState) } override fun onLowMemory() { super.onLowMemory() map3DView.onLowMemory() }
Partie 3 : Synchroniser Gradle et exécuter
Maintenant que vous avez mis à jour la mise en page et l'activité de votre application, vous pouvez la compiler et l'exécuter pour afficher la vue de carte 3D.
Pour synchroniser votre projet avec Gradle, sélectionnez File > Sync Project with Gradle Files (Fichier > Synchroniser le projet avec les fichiers Gradle).
Pour compiler et exécuter votre application sur un émulateur ou un appareil physique, sélectionnez Run > Run (Exécuter > Exécuter).
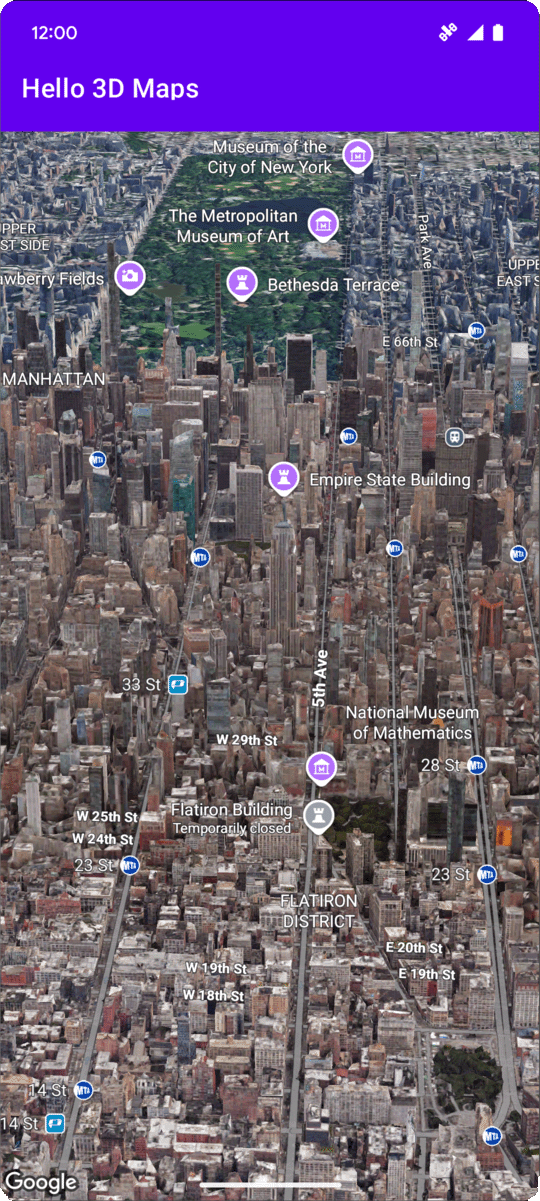
Si tout est correctement configuré, une carte 3D s'affiche dans votre application, centrée près des coordonnées spécifiées dans votre activity_main.xml.
Étapes suivantes
Maintenant que vous avez ajouté une carte 3D de base à votre application, vous pouvez explorer des fonctionnalités plus avancées du SDK Maps 3D pour Android, telles que les animations de chemin de caméra, les repères 3D, ou les polygones.
Écouter les événements de clic sur la carte
Pour écouter les événements de clic sur la carte, utilisez GoogleMap3D.setMap3DClickListener. Cet écouteur est déclenché lorsqu'un utilisateur clique sur la carte et fournit l'emplacement et l'ID de lieu du point cliqué.
L'exemple suivant montre comment définir un écouteur de clic sur la carte :
googleMap3D.setMap3DClickListener { location, placeId ->
    lifecycleScope.launch(Dispatchers.Main) {
        if (placeId != null) {
            Toast.makeText(this@MainActivity, "Clicked on place with ID: $placeId", Toast.LENGTH_SHORT).show()
        } else {
            Toast.makeText(this@MainActivity, "Clicked on location: $location", Toast.LENGTH_SHORT).show()
        }
    }
}
Notez que le gestionnaire de clics ne s'exécute pas sur le thread principal (ou d'UI). Si vous souhaitez apporter des modifications à l'UI (par exemple, afficher un message Toast), vous devez passer au thread principal. Pour Kotlin, vous pouvez le faire à l'aide de lifecycleScope.launch(Dispatchers.Main).