
בדף הזה מוסבר איך להוסיף מפה תלת-ממדית בסיסית לאפליקציית Android באמצעות Maps 3D SDK ל-Android. ההוראות בדף הזה מניחות שכבר השלמתם את השלבים בדף הגדרה ושיש לכם את הפרטים הבאים:
- פרויקט ב-Google Cloud עם Maps 3D SDK ל-Android מופעל
- מפתח API שהוגדר לשימוש עם Maps 3D SDK ל-Android
- פרויקט Android Studio שהוגדר לשימוש עם Maps 3D SDK ל-Android
מידע נוסף על הדרישות המוקדמות האלה זמין במאמר בנושא הגדרה.
חלק 1: עדכון קובץ הפריסה (activity_main.xml) כדי להוסיף את הרכיב Map3DView
רכיב Map3DView הוא התצוגה שבה המפה בתלת-ממד מוצגת באפליקציה.
בשלבים הבאים מוסיפים את הרכיב ומגדירים את המצב הראשוני של המפה, כולל מיקום המצלמה ומאפיינים קשורים:
פותחים את קובץ הפריסה של הפעילות הראשית, שבדרך כלל נמצא בנתיב
app/src/main/res/layout/activity_main.xml.ב-root
ConstraintLayout(או ברכיב פריסת ה-root), מוסיפים את מרחב השמות של ה-XML:map3dxmlns:map3d="http://schemas.android.com/apk/res-auto"מוחקים את ברירת המחדל
<TextView>שמוצג בה הטקסט Hello World!.מוסיפים את הרכיב
Map3DViewלפריסה. אפשר להתאים אישית את מיקום המצלמה ומאפיינים אחרים:<?xml version="1.0" encoding="utf-8"?> <androidx.constraintlayout.widget.ConstraintLayout xmlns:android="http://schemas.android.com/apk/res/android" xmlns:app="http://schemas.android.com/apk/res-auto" xmlns:map3d="http://schemas.android.com/apk/res-auto" xmlns:tools="http://schemas.android.com/tools" android:id="@+id/main" android:layout_width="match_parent" android:layout_height="match_parent" tools:context=".MainActivity"> <com.google.android.gms.maps3d.Map3DView android:id="@+id/map3dView" android:layout_width="match_parent" android:layout_height="match_parent" map3d:mode="hybrid" map3d:centerLat="38.544012" map3d:centerLng="-107.670428" map3d:centerAlt="2427.6" map3d:heading="310" map3d:tilt="63" map3d:range="8266" map3d:roll="0" map3d:minAltitude="0" map3d:maxAltitude="1000000" map3d:minHeading="0" map3d:maxHeading="360" map3d:minTilt="0" map3d:maxTilt="90" app:layout_constraintBottom_toBottomOf="parent" app:layout_constraintEnd_toEndOf="parent" app:layout_constraintStart_toStartOf="parent" app:layout_constraintTop_toTopOf="parent" /> </androidx.constraintlayout.widget.ConstraintLayout>
חלק 2: עדכון הקובץ MainActivity.kt
בשלבים הבאים מאתחלים את רכיב Map3DView שנוסף לקובץ activity_main.xml בחלק 1 ומנהלים את אירועי מחזור החיים של הרכיב.
חשוב לזכור ש-Maps 3D SDK ל-Android תומך רק במופע פעיל אחד בכל פעם.Map3DView הצגה של כמה מופעים של Map3DView בו-זמנית (למשל, באותו פריסת מסך או בפעילויות או בקטעים שונים שגלויים) לא נתמכת, ויכולה לגרום לבעיות בעיבוד, כמו מסכים שחורים בתצוגות משניות.
בנוסף, כל הרכיבים Map3DView ישתפו את מצב המפה וישקפו אותו (למשל: מיקום המצלמה, סמנים שנוספו, מצולעים וכו'), והמצב יישמר גם אם רכיב Map3DView אחד נמחק (באמצעות onDestroy) ונוצר רכיב אחר, אלא אם המצב נוקה באופן ידני. לדוגמה, אם מוסיפים סמנים ל-Map3DView1, ואז משמידים אותו ויוצרים את Map3DView2, אותם סמנים עדיין יהיו ב-Map3DView2.
תחומי האחריות של המפתח:
- תצוגה אחת בכל פעם: מוודאים שרק רכיב
Map3DViewאחד נמצא בחלק פעיל בהיררכיית התצוגה בכל רגע נתון. - ניקוי ידני: כשעוברים מ-
Map3DView(למשל,Map3DView1) למפה אחרת (למשל,Map3DView2), צריך להפעיל אתonDestroy()במופע הישן (Map3DView1). מכיוון שמצב המפה הבסיסי משותף, כדי לוודא ש-Map3DView2מתחילה במצב חדש או ספציפי, אתם אחראים לנקות באופן ידני את כל המצב שהוגדר על ידיMap3DView1. זה כולל הסרה של סמנים, שכבות-על וכו', ואיפוס של מיקום המצלמה באמצעות האובייקטGoogleMap3Dשהתקבל ב-OnMap3DViewReadyCallback.
פותחים את הקובץ
MainActivity.kt, שבדרך כלל נמצא במיקוםapp/src/main/java/com/example/yourpackagename/MainActivity.kt.מוסיפים את ההצהרות הנדרשות ל-Maps 3D SDK ל-Android:
import com.google.android.gms.maps3d.GoogleMap3D
import com.google.android.gms.maps3d.Map3DView
import com.google.android.gms.maps3d.OnMap3DViewReadyCallback
משנים את המחלקה
MainActivityכדי להטמיע אתOnMap3DViewReadyCallback:class MainActivity : AppCompatActivity(), OnMap3DViewReadyCallback {הצהרה על משתנים עבור
Map3DViewו-GoogleMap3D:private lateinit var map3DView: Map3DView private var googleMap3D: GoogleMap3D? = nullבשיטה
onCreate, אחריsetContentView(...)והבלוקViewCompat.setOnApplyWindowInsetsListener, מאתחלים אתmap3DView, קוראים לשיטת מחזור החייםonCreateומבקשים את המפה באופן אסינכרוני:override fun onCreate(savedInstanceState: Bundle?) { super.onCreate(savedInstanceState) enableEdgeToEdge() setContentView(R.layout.activity_main) ViewCompat.setOnApplyWindowInsetsListener(findViewById(R.id.main)) { v, insets -> val systemBars = insets.getInsets(WindowInsetsCompat.Type.systemBars()) v.setPadding(systemBars.left, systemBars.top, systemBars.right, systemBars.bottom) insets } map3DView = findViewById(R.id.map3dView) map3DView.onCreate(savedInstanceState) map3DView.getMap3DViewAsync(this) }מבטלים את השיטה
onMap3DViewReady. הקריאה החוזרת הזו מופעלת כשהמפה מוכנה לשימוש:override fun onMap3DViewReady(googleMap3D: GoogleMap3D) { // Interact with the googleMap3D object here this.googleMap3D = googleMap3D // You can now make calls to the googleMap3D object, e.g., // googleMap3D.cameraController.flyTo(camera { ... }) }כדי להעביר אירועים של מחזור חיים מהפעילות אל
Map3DView, מוסיפים את ההחלפות הבאות אלMainActivity:override fun onStart() { super.onStart() map3DView.onStart() } override fun onResume() { super.onResume() map3DView.onResume() } override fun onPause() { map3DView.onPause() super.onPause() } override fun onStop() { map3DView.onStop() super.onStop() } override fun onDestroy() { map3DView.onDestroy() super.onDestroy() } override fun onSaveInstanceState(outState: Bundle) { super.onSaveInstanceState(outState) map3DView.onSaveInstanceState(outState) } override fun onLowMemory() { super.onLowMemory() map3DView.onLowMemory() }
חלק 3: סנכרון Gradle והרצה
אחרי שמעדכנים את הפריסה והפעילות של האפליקציה, אפשר ליצור ולהפעיל את האפליקציה כדי לראות את תצוגת המפה התלת-ממדית.
כדי לסנכרן את הפרויקט עם Gradle, בוחרים באפשרות File > Sync Project with Gradle Files (קובץ > סנכרון הפרויקט עם קובצי Gradle).
כדי לבנות ולהריץ את האפליקציה באמולטור או במכשיר פיזי, בוחרים באפשרות Run > Run (הפעלה > הפעלה).
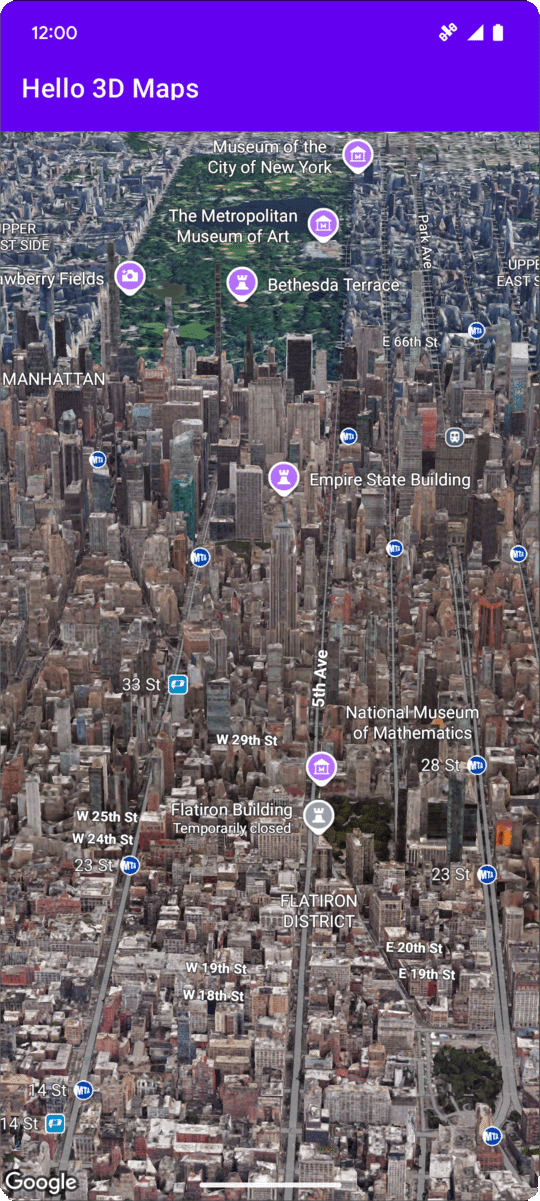
אם הכל מוגדר בצורה נכונה, אמורה להופיע מפה תלת-ממדית באפליקציה, במרכז הקואורדינטות שצוינו ב-activity_main.xml.
השלבים הבאים
אחרי שמוסיפים לאפליקציה מפה תלת-ממדית בסיסית, אפשר להשתמש בתכונות מתקדמות יותר של Maps 3D SDK ל-Android, כמו אנימציות של נתיבי מצלמה, סמנים תלת-ממדיים או מצולעים.
המתנה לאירועים מסוג קליק במפה
כדי להאזין לאירועי לחיצה במפה, משתמשים ב-GoogleMap3D.setMap3DClickListener. המאזין הזה מופעל כשמשתמש לוחץ על המפה, ומספק את המיקום ואת מזהה המקום של הנקודה שנלחצה.
בדוגמה הבאה אפשר לראות איך מגדירים מאזין לקליקים במפה:
googleMap3D.setMap3DClickListener { location, placeId ->
    lifecycleScope.launch(Dispatchers.Main) {
        if (placeId != null) {
            Toast.makeText(this@MainActivity, "Clicked on place with ID: $placeId", Toast.LENGTH_SHORT).show()
        } else {
            Toast.makeText(this@MainActivity, "Clicked on location: $location", Toast.LENGTH_SHORT).show()
        }
    }
}
חשוב לדעת: click handler לא פועל ב-thread הראשי (או ב-thread של ממשק המשתמש). אם רוצים לבצע שינויים בממשק המשתמש (למשל להציג הודעת Toast), צריך לעבור ל-Main thread. ב-Kotlin, אפשר לעשות את זה באמצעות lifecycleScope.launch(Dispatchers.Main).