Mit Sammlungen den Überblick behalten
Sie können Inhalte basierend auf Ihren Einstellungen speichern und kategorisieren.
Schritt 6: Google Ads-Kampagne
Einführung und Auswirkungen auf das Geschäft
Wenn Sie Anzeigen für lokales Inventar verwenden möchten, müssen Sie Ihr Google Ads-Konto verknüpfen. Wählen Sie im
Im Menü „Informationen zum Unternehmen“ und „Konten“ in Anzeigen für lokales Inventar
Ihr Konto verknüpfen. Sie können Ihr Konto abrufen oder ein neues Konto erstellen, indem Sie
Google Ads: Sie wird rechts oben auf dem Bildschirm neben
in Ihrem Kontoprofil. Kopieren Sie diese Nummer und fügen Sie sie in das Feld
Konto-Dialogfeld und wählen Sie Verknüpfungsanfrage senden aus.
Für API-Anfragen müssen Sie den folgenden Bereich hinzufügen:
https://www.googleapis.com/auth/adwords
Google Ads-Konto im Merchant Center verknüpfen
Sie können ein Google Ads-Konto über das Merchant Center verknüpfen oder erstellen.
Weitere Informationen finden Sie in der Merchant Center-Hilfe.
Google Ads-Konto verknüpfen
Melden Sie sich in Google Ads mit dem Konto an, das Ihre Google Ads-Kampagnen enthält.
Kampagnen:
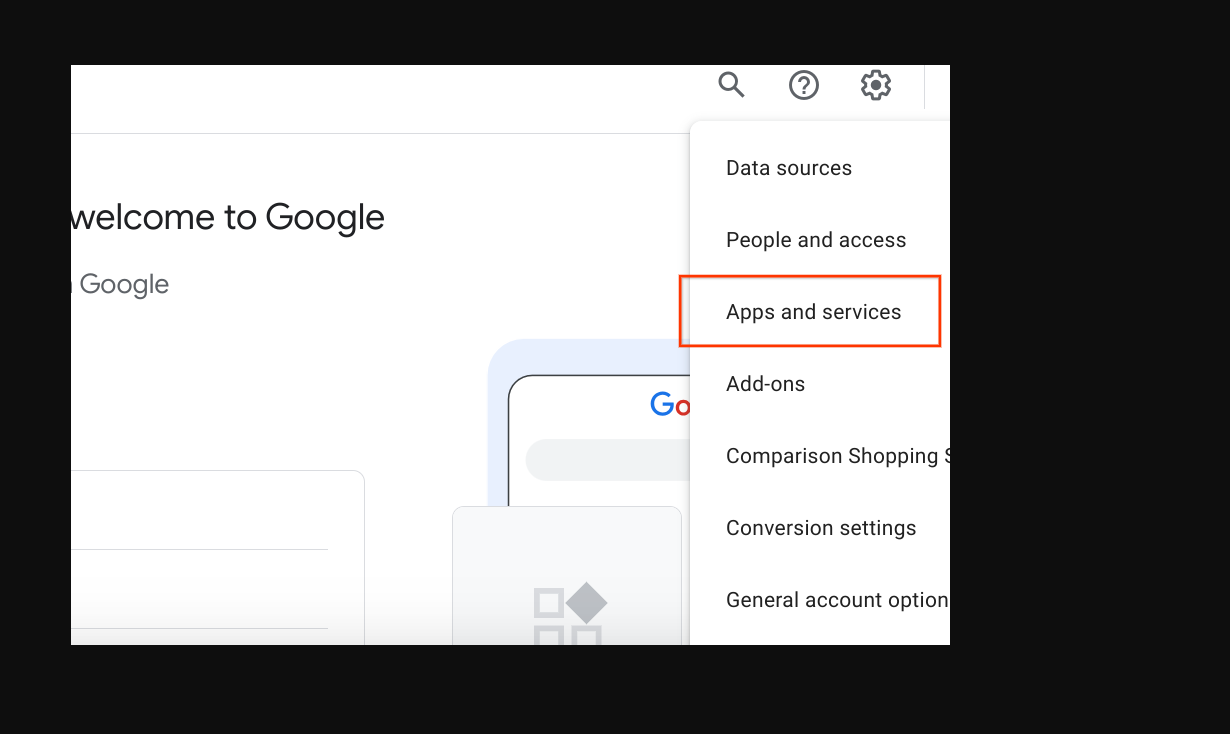
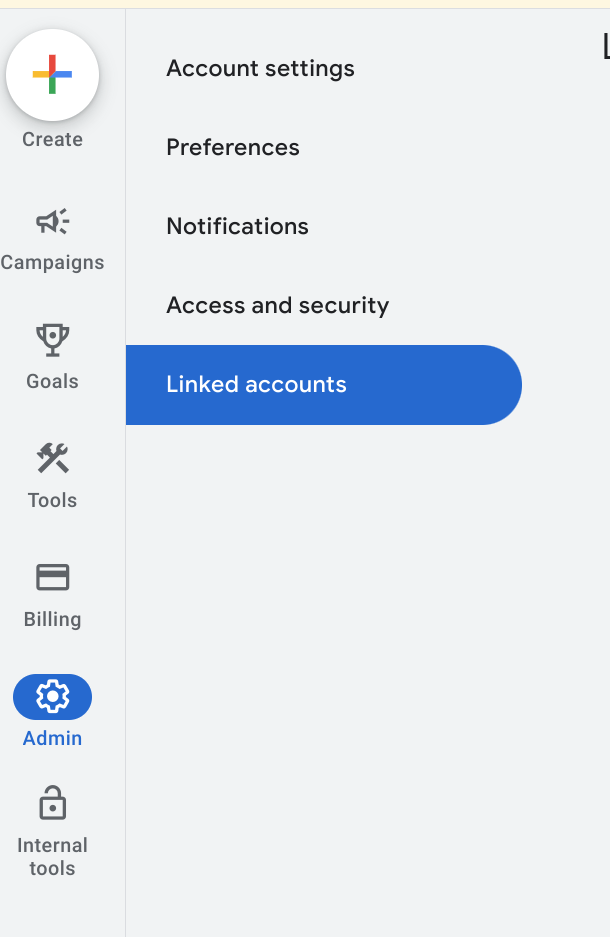
Klicken Sie auf den Tab „Verwaltung“. und wählen Sie dann Verknüpfte Konten aus.
Es wird eine Liste mit Anwendungen angezeigt, die Sie verlinken können. Wenn Sie das
Kontoidentität beim Aktivieren von Anzeigen für lokales Inventar, Google Merchant Center
sollten ganz oben stehen, mit „Verwalten und Verknüpfen. Das Google Merchant Center befindet sich
allgemeine Liste mit „Details“ haben Sie vielleicht
das falsche Konto verknüpft
sich im falschen Google Ads-Konto angemeldet oder das Konto unter
alle. Im Abschnitt Anzeigen für lokales Inventar aktivieren finden Sie weitere Informationen.
führen Sie diesen Schritt aus. Wählen Sie Verwalten und Link“.
Verknüpft
Verknüpfung aufgehoben
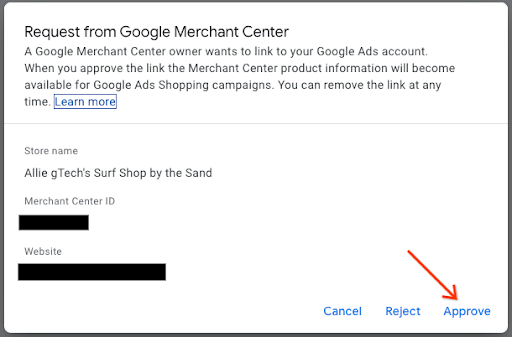
Wählen Sie im Fenster „Verknüpfungsanfragen“ die Option Anfrage ansehen aus.
Es wird ein Dialogfenster mit Informationen zum Konto angezeigt,
um den Link anzufordern. Wählen Sie Genehmigen aus.
Nach der Verknüpfung wird in der neuen Ansicht das Konto angezeigt, das mit dem folgenden Status verknüpft ist:
Verknüpft:
Google Ads-Datenansicht
Merchant Center-Ansicht
Kampagne mit Shopping-Anzeigen erstellen und lokal erhältliche Produkte aktivieren
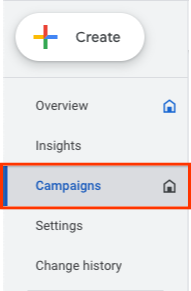
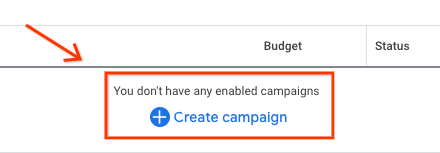
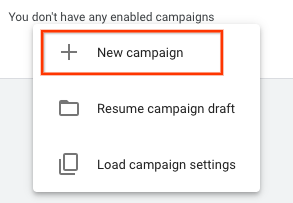
Klicken Sie links auf dem Bildschirm auf Kampagnen und dann im
Wählen Sie im Fenster „Kampagnen“ die Option Erstellen aus. Wenn ein Fenster angezeigt wird, wählen Sie
+ Neue Kampagne.
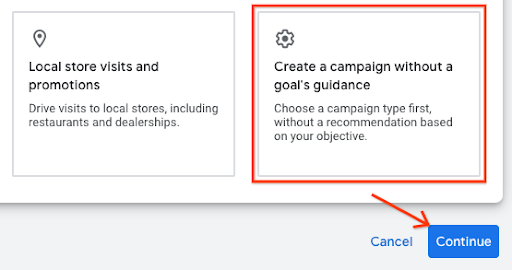
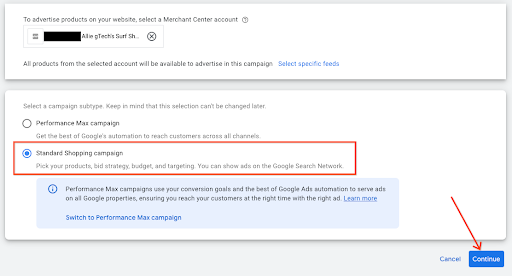
Wenn der Bildschirm zur Kampagnenauswahl erscheint, wählen Sie
Kampagne ohne Zielvorhaben erstellen Wählen Sie dann Weiter aus.
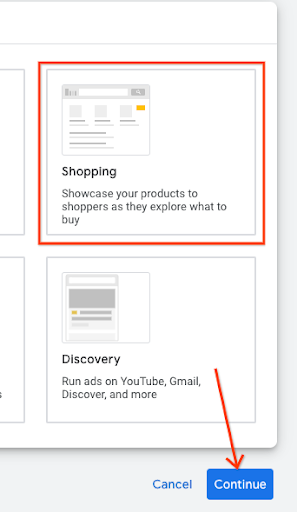
Wähle aus den nächsten Optionen die Option Shopping aus. Kachel,
und wählen Sie Weiter aus.
Direkt darunter werden mehrere neue Optionen angezeigt. Zuerst muss Ihr Händler
Konto ist das Konto, das im Textfeld aufgeführt ist. Wählen Sie dann
Standard-Shopping-Kampagne als mit der Performance Max-Kampagne.
wählen Sie Weiter aus.
Das nächste Menü erscheint unter „Allgemeine Einstellungen“. Geben Sie einen Kampagnennamen,
Klicken Sie dann unter „Lokale Produkte“ auf den Chevron, um das Menü zu maximieren. Setzen Sie ein Häkchen in das Kästchen.
Aktivieren Sie Anzeigen für Produkte, die in Geschäften vor Ort verkauft werden.
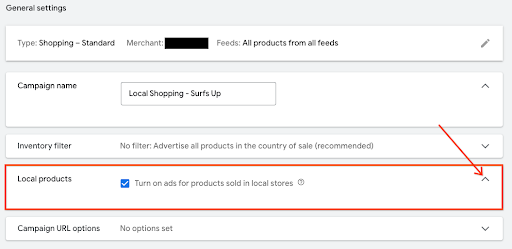
Wählen Sie unten Kampagne erstellen aus. Nach dem Speichern
Die neu erstellte Kampagne wird auf dem Kampagnenbildschirm angezeigt.
UX-Anleitung
Sie können die Kampagne früher verknüpfen, indem Sie sie als Teil des Händlers verknüpfen.
Datensammlung.
Technische Hilfe
Wenn Sie die API in Google Ads verwenden möchten, muss sichergestellt sein, dass Sie
folgenden Bereich:
https://www.googleapis.com/auth/adwords.
Für die Kontoverknüpfung benötigen Sie die folgende Anfrage:
CustomerClientLinkService. Dies nimmt den
MutateCustomerClientLinkRequest, die eine customer_id akzeptiert.
Sie können eine neue Kampagne programmatisch erstellen, indem Sie
CampaignService
[null,null,["Zuletzt aktualisiert: 2025-07-25 (UTC)."],[[["\u003cp\u003eTo run local inventory ads, link your Google Ads account to your Merchant Center account, ensuring the correct account is selected for a seamless connection.\u003c/p\u003e\n"],["\u003cp\u003eCreate a Standard Shopping campaign in Google Ads and enable local products to display ads for items sold in your physical stores.\u003c/p\u003e\n"],["\u003cp\u003eFor API access, include the \u003ccode\u003ehttps://www.googleapis.com/auth/adwords\u003c/code\u003e scope to manage your Google Ads campaigns programmatically.\u003c/p\u003e\n"],["\u003cp\u003eMerchants can link an advertising account managed by a third party if they don't directly handle their own Google Ads campaigns.\u003c/p\u003e\n"]]],["To utilize local inventory ads, link your Google Ads account in Merchant Center by finding your account number on Google Ads and sending a link request. In Google Ads, navigate to \"Linked Accounts\" under the \"Admin\" settings and \"Approve\" the Merchant Center link request. To create a Shopping Ads campaign, select \"Campaigns\" then \"+New Campaign,\" choose \"Shopping,\" and \"Standard Shopping Campaign\". Finally, enable \"Turn on ads for products sold in local stores\" and create your campaign. For API access, add the `https://www.googleapis.com/auth/adwords` scope.\n"],null,["Step 6: Google Ads Campaign\n---------------------------\n\n### Introduction and Business Impact\n\n*** ** * ** ***\n\nFor local inventory ads, you need to link your Google Ads Account. From the\nBusiness Information and Accounts menu for Local Inventory Ads, there's a URL to\nlink your account. You can retrieve your account or create one by going to\n[Google Ads](https://ads.google.com). It's listed in the top-right corner of the screen next to\nyour account profile. Copy and paste this number in the Link a Google Ads\nAccount modal, then select, \"**Send Link Request**\".\n\nFor API requests, you need to add the following scope: \n\n https://www.googleapis.com/auth/adwords\n\n### Link the Ads Account in Merchant Center\n\nYou can link or create a Google Ads account through Merchant Center.\nMore details are available in the [Merchant Center Help guide](https://support.google.com/google-ads/answer/12499498).\n\n#### Link your Google Ads Account\n\n1. Login to [Google Ads](https://ads.google.com) with the account that contains your Google Ads\n Campaigns.\n\n2. Click the \"Admin\" settings wheel, then select \"**Linked Accounts**\".\n\n3. A list of applications appears that you can link to. If you linked the\n account identity while enabling Local Inventory Ads, Google Merchant Center\n should be at the top, with Manage \\& Link. Google Merchant Center is in the\n general list, with \"Details\" you may have either linked the wrong account,\n logged into the incorrect Google Ads account, or have not linked the account at\n all. Visit the [*Enabling Free Local Inventory Ads Listing*](https://developers.google.com/merchant/storebuilder/local/sections/4_0_enabling_and_configure_lia_pos#enabling_free_local_product_listings) section to\n complete this step. Select \"**Manage \\& Link**\".\n\n *Linked*\n\n *Unlinked*\n\n4. In the Link Requests window, select \"**View Request**\"\n\n5. A modal appears providing you information about the account that is\n requesting the link. Select \"**Approve**\"\n\n6. When linked, the new view shows the account that is linked with the status of\n \"**Linked**\".\n\n *Google Ads View*\n\n *Merchant Center View*\n\n#### Create Shopping Ads Campaign and Enable Local Products\n\n1. Login to [Google Ads](https://ads.google.com)\n\n2. Along the left hand side of the screen, select \"**Campaigns** \", then in the\n Campaigns windows, select \"**Create** .\" If a window appears, select\n \"+ **New Campaign**.\"\n\n3. When the campaign selection screen appears, select\n \"**Create a campaign without a goal's guidance** .\" Then, select \"**Continue**\".\n\n4. On the next set of options, select the \"**Shopping** \" tile,\n then select \"**Continue**.\"\n\n5. Just below, several new options appears. First, make sure your merchant\n account is the one that is listed in the text field. Then, select\n \"**Standard Shopping Campaign** \" instead of the Performance Max Campaign,\n select \"**Continue**.\"\n\n6. The next menu appears under General Settings. Provide a Campaign name,\n then under local products, click the chevron to expand the menu. Check the box,\n \"**Turn on ads for products sold in local stores**.\"\n\n7. Go to the bottom, and select \"**Create Campaign**.\" When saved,\n the newly created campaign appears on the campaign screen.\n\n### UX Guidance\n\n*** ** * ** ***\n\nYou can help link the campaign earlier by linking it as part of the merchant\ncollection process.\n\n### Tech Guidance\n\n*** ** * ** ***\n\n- For Google Ads, if you want to use the API, ensure that you've added the following scope:\n\n https://www.googleapis.com/auth/adwords.\n\n- For account linking, you consume the following request:\n CustomerClientLinkService. This takes the\n [MutateCustomerClientLinkRequest](https://developers.google.com/google-ads/api/reference/rpc/v13/MutateCustomerClientLinkRequest), which accepts a *customer_id*.\n\n- You can create a new campaign programmatically by consuming\n the [CampaignService](https://developers.google.com/google-ads/api/reference/rpc/v13/CampaignService).\n\n- For more information about how to use the Google Ads API, visit the following\n [Client Libraries and Example](https://developers.google.com/google-ads/api/docs/client-libs) page.\n\n| **Tip:** The merchant doesn't need to use their own Ads account. If the merchant's ad business is managed by a different account other than their own, they can use the same link method to link their account."]]