
โปรเจ็กต์ Google Apps Script ที่เชื่อมโยงกับ Google เอกสาร, Google ชีต หรือ Google ฟอร์มจะแสดง องค์ประกอบของอินเทอร์เฟซผู้ใช้ได้ เช่น การแจ้งเตือนที่สร้างไว้ล่วงหน้า พรอมต์ ข้อความป๊อปอัป กล่องโต้ตอบ และ แถบด้านข้าง โดยปกติแล้ว องค์ประกอบเหล่านี้จะมีเนื้อหาบริการ HTML ที่กำหนดเอง และมักจะเปิดจากรายการเมนู ในฟอร์ม องค์ประกอบของอินเทอร์เฟซผู้ใช้ จะแสดงต่อผู้แก้ไขที่เปิดฟอร์มเพื่อแก้ไขเท่านั้น ไม่แสดงต่อผู้ตอบ
กล่องโต้ตอบการแจ้งเตือน
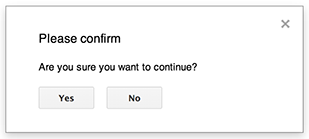
การแจ้งเตือนคือกล่องโต้ตอบที่สร้างไว้ล่วงหน้าซึ่งจะเปิดขึ้นภายในโปรแกรมแก้ไขเอกสาร
ชีต สไลด์ หรือฟอร์ม โดยจะแสดงข้อความและปุ่มตกลง ส่วนชื่อและปุ่มทางเลือกนั้น
ไม่บังคับ ซึ่งคล้ายกับการเรียกใช้
window.alert
ใน JavaScript ฝั่งไคลเอ็นต์ภายในเว็บเบราว์เซอร์
การแจ้งเตือนจะระงับสคริปต์ฝั่งเซิร์ฟเวอร์ขณะที่กล่องโต้ตอบเปิดอยู่ สคริปต์ จะทำงานต่อหลังจากที่ผู้ใช้ปิดกล่องโต้ตอบ แต่การเชื่อมต่อ JDBC จะไม่คงอยู่เมื่อมีการระงับ
ดังที่แสดงในตัวอย่างต่อไปนี้ เอกสาร ฟอร์ม
สไลด์ และชีตทั้งหมดใช้วิธีการ
Ui.alert ซึ่งมีให้ใช้งาน
ใน 3 รูปแบบ หากต้องการลบล้างปุ่มตกลงเริ่มต้น ให้ส่งค่าจาก
Ui.ButtonSet enum เป็นอาร์กิวเมนต์ buttons
หากต้องการประเมินว่าผู้ใช้คลิกปุ่มใด ให้เปรียบเทียบค่าที่ส่งคืน
สำหรับ alert กับการแจงนับ Ui.Button
function onOpen() {
  SpreadsheetApp.getUi() // Or DocumentApp or SlidesApp or FormApp.
    .createMenu("Custom Menu")
    .addItem("Show alert", "showAlert")
    .addToUi();
}

function showAlert() {
  const ui = SpreadsheetApp.getUi(); // Same variations.

  const result = ui.alert(
    "Please confirm",
    "Are you sure you want to continue?",
    ui.ButtonSet.YES_NO,
  );

  // Process the user's response.
  if (result === ui.Button.YES) {
    // User clicked "Yes".
    ui.alert("Confirmation received.");
  } else {
    // User clicked "No" or X in the title bar.
    ui.alert("Permission denied.");
  }
}
กล่องโต้ตอบข้อความแจ้ง
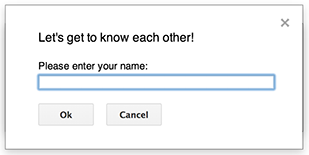
พรอมต์คือกล่องโต้ตอบที่สร้างไว้ล่วงหน้าซึ่งจะเปิดขึ้นภายในโปรแกรมแก้ไขเอกสาร
ชีต สไลด์ หรือฟอร์ม โดยจะ
แสดงข้อความ ช่องป้อนข้อความ และปุ่มตกลง ส่วนชื่อและ
ปุ่มสำรองเป็นตัวเลือก ซึ่งคล้ายกับการเรียกใช้
window.prompt
ใน JavaScript ฝั่งไคลเอ็นต์ภายในเว็บเบราว์เซอร์
พรอมต์จะระงับสคริปต์ฝั่งเซิร์ฟเวอร์ขณะที่กล่องโต้ตอบเปิดอยู่ สคริปต์ จะทำงานต่อหลังจากที่ผู้ใช้ปิดกล่องโต้ตอบ แต่การเชื่อมต่อ JDBC จะไม่คงอยู่เมื่อมีการระงับ
ดังที่แสดงในตัวอย่างต่อไปนี้ เอกสาร ฟอร์ม
สไลด์ และชีตทั้งหมดใช้วิธีการ
Ui.prompt ซึ่งมีให้ใช้งานใน 3 รูปแบบ
หากต้องการลบล้างปุ่มตกลงเริ่มต้น ให้ส่งค่า
จาก Enum Ui.ButtonSet เป็นอาร์กิวเมนต์
buttons หากต้องการประเมินการตอบกลับของผู้ใช้ ให้บันทึกค่าที่ส่งคืน
สำหรับ prompt จากนั้นเรียกใช้
PromptResponse.getResponseText
เพื่อดึงข้อมูลที่ผู้ใช้ป้อน และเปรียบเทียบค่าที่ส่งคืนสำหรับ
PromptResponse.getSelectedButton
กับ Enum Ui.Button
function onOpen() {
  SpreadsheetApp.getUi() // Or DocumentApp or SlidesApp or FormApp.
    .createMenu("Custom Menu")
    .addItem("Show prompt", "showPrompt")
    .addToUi();
}

function showPrompt() {
  const ui = SpreadsheetApp.getUi(); // Same variations.

  const result = ui.prompt(
    "Let's get to know each other!",
    "Please enter your name:",
    ui.ButtonSet.OK_CANCEL,
  );

  // Process the user's response.
  const button = result.getSelectedButton();
  const text = result.getResponseText();
  if (button === ui.Button.OK) {
    // User clicked "OK".
    ui.alert("Your name is " + text + ".");
  } else if (button === ui.Button.CANCEL) {
    // User clicked "Cancel".
    ui.alert("I didn't get your name.");
  } else if (button === ui.Button.CLOSE) {
    // User clicked X in the title bar.
    ui.alert("You closed the dialog.");
  }
}
ข้อความแจ้งของสเปรดชีต
"ข้อความโทสต์" คือหน้าต่างกล่องโต้ตอบขนาดเล็กที่มุมขวาล่างของโปรแกรมแก้ไขชีต ซึ่งจะแสดงข้อความแต่ไม่ระงับสคริปต์ ซึ่งเป็นวิธีที่ดีในการแสดงข้อความสถานะหรือการอัปเดตที่ไม่ต้องมีการโต้ตอบจากผู้ใช้
ดังที่แสดงในตัวอย่างต่อไปนี้ ชีตจะใช้วิธีการ
Spreadsheet.toast
ข้อความแจ้งจะใช้ได้ในชีตเท่านั้น
function showToast() {
  SpreadsheetApp.getActiveSpreadsheet().toast("Task completed successfully.");
}
กล่องโต้ตอบที่กำหนดเอง
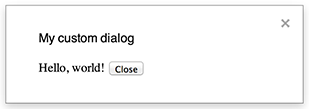
กล่องโต้ตอบที่กำหนดเองสามารถแสดงอินเทอร์เฟซผู้ใช้ HTML Service ภายในเครื่องมือแก้ไขเอกสาร, ชีต, สไลด์ หรือฟอร์ม
กล่องโต้ตอบที่กำหนดเองไม่ระงับสคริปต์ฝั่งเซิร์ฟเวอร์ขณะที่กล่องโต้ตอบเปิดอยู่
เนื่องจากฟังก์ชันฝั่งเซิร์ฟเวอร์ที่เปิดกล่องโต้ตอบ จึงทำงานแบบไม่พร้อมกัน หากต้องการส่งข้อมูลจากกล่องโต้ตอบที่กำหนดเองกลับไปยังเซิร์ฟเวอร์
ให้ใช้ API google.script ในโค้ดฝั่งไคลเอ็นต์
กล่องโต้ตอบจะปิดตัวเองได้โดยการเรียกใช้
google.script.host.close
ในฝั่งไคลเอ็นต์ของอินเทอร์เฟซบริการ HTML อินเทอร์เฟซอื่นๆ จะปิดกล่องโต้ตอบไม่ได้ มีเพียงผู้ใช้หรือตัวกล่องโต้ตอบเองเท่านั้นที่ปิดได้
ดังที่แสดงในตัวอย่างต่อไปนี้ เอกสาร ฟอร์ม
สไลด์ และชีตทั้งหมดใช้วิธีการ
Ui.showModalDialog
เพื่อเปิดกล่องโต้ตอบ
Code.gs
function onOpen() {
  SpreadsheetApp.getUi() // Or DocumentApp or SlidesApp or FormApp.
      .createMenu('Custom Menu')
      .addItem('Show dialog', 'showDialog')
      .addToUi();
}

function showDialog() {
  const html = HtmlService.createHtmlOutputFromFile('Page')
      .setWidth(400)
      .setHeight(300);
  SpreadsheetApp.getUi() // Or DocumentApp or SlidesApp or FormApp.
      .showModalDialog(html, 'My custom dialog');
}
Page.html
Hello, world! <input type="button" value="Close" onclick="google.script.host.close()" />
แถบด้านข้างที่กำหนดเอง

แถบด้านข้างสามารถแสดงอินเทอร์เฟซผู้ใช้ของบริการ HTML ภายในโปรแกรมแก้ไขเอกสาร, ฟอร์ม, สไลด์ และชีต
แถบด้านข้างไม่ระงับสคริปต์ฝั่งเซิร์ฟเวอร์ขณะที่กล่องโต้ตอบเปิดอยู่ คอมโพเนนต์ฝั่งไคลเอ็นต์สามารถเรียกใช้สคริปต์ฝั่งเซิร์ฟเวอร์แบบไม่พร้อมกัน โดยใช้ API google.script สำหรับ อินเทอร์เฟซบริการ HTML
แถบด้านข้างสามารถปิดตัวเองได้โดยการเรียกใช้
google.script.host.close
ในฝั่งไคลเอ็นต์ของอินเทอร์เฟซบริการ HTML แถบด้านข้างจะปิดโดยอินเทอร์เฟซอื่นไม่ได้ แต่ปิดได้โดยผู้ใช้หรือตัวแถบเองเท่านั้น
ดังที่แสดงในตัวอย่างต่อไปนี้ เอกสาร ฟอร์ม
สไลด์ และชีตทั้งหมดใช้วิธี
Ui.showSidebar เพื่อเปิด
แถบด้านข้าง
Code.gs
function onOpen() {
  SpreadsheetApp.getUi() // Or DocumentApp or SlidesApp or FormApp.
      .createMenu('Custom Menu')
      .addItem('Show sidebar', 'showSidebar')
      .addToUi();
}

function showSidebar() {
  const html = HtmlService.createHtmlOutputFromFile('Page')
      .setTitle('My custom sidebar');
  SpreadsheetApp.getUi() // Or DocumentApp or SlidesApp or FormApp.
      .showSidebar(html);
}
Page.html
Hello, world! <input type="button" value="Close" onclick="google.script.host.close()" />
กล่องโต้ตอบการเปิดไฟล์
Google Picker เป็น JavaScript API ที่ช่วยให้ผู้ใช้เลือกหรือ อัปโหลดไฟล์ใน Google ไดรฟ์ได้ ใช้ไลบรารี Google Picker ในบริการ HTML เพื่อสร้างกล่องโต้ตอบที่กำหนดเองซึ่งช่วยให้ผู้ใช้เลือกไฟล์ที่มีอยู่หรืออัปโหลดไฟล์ใหม่ จากนั้นส่งการเลือกกลับไปยังสคริปต์ของคุณ
ข้อกำหนด
การใช้ Google Picker กับ Google Apps Script มีข้อกำหนดหลายประการดังนี้
ตั้งค่าสภาพแวดล้อม สำหรับ Google Picker
โปรเจ็กต์สคริปต์ต้องใช้โปรเจ็กต์ Google Cloud มาตรฐาน
ส่งหมายเลขโปรเจ็กต์ที่อยู่ในระบบคลาวด์เดียวกันไปยัง
PickerBuilder.setAppIdหากใช้ขอบเขตdrive.fileไฟล์ Manifest ของโปรเจ็กต์ Apps Script ต้องระบุขอบเขต การให้สิทธิ์ที่ Google Picker API ต้องการเพื่อให้
ScriptApp.getOAuthTokenแสดงโทเค็นที่ถูกต้องสำหรับPickerBuilder.setOauthtokenจำกัดคีย์ API ที่ตั้งค่าไว้ใน
PickerBuilder.setDeveloperKeyเป็น Apps Script ในส่วนการจำกัดแอปพลิเคชัน ให้ทำตามขั้นตอนต่อไปนี้- เลือกผู้อ้างอิง HTTP (เว็บไซต์)
- ในส่วนการจํากัดเว็บไซต์ ให้คลิกเพิ่มรายการ
- คลิกผู้แนะนำ แล้วป้อน
*.google.com - เพิ่มรายการอื่นและป้อน
*.googleusercontent.comเป็นผู้แนะนำ - คลิกเสร็จสิ้น
ตัวอย่าง
ตัวอย่างต่อไปนี้แสดง Google Picker ใน Apps Script