
מזהה מפה הוא מזהה ייחודי שמייצג את הסגנון של מפות Google והגדרות התצורה שלהן, שמאוחסנים ב-Google Cloud. אתם משתמשים במזהי מפה כדי להפעיל תכונות או לנהל מפות באתרים ובאפליקציות שלכם, או כדי להגדיר את הסגנון שלהן. אפשר ליצור מזהי מפה לכל פלטפורמה שצריך – JavaScript, Android, iOS או מפות סטטיות – בפרויקט שלכם במסוף Google Cloud בדף ניהול מפות.
פרטים נוספים על מזהי מפות ועל תכונות שמשתמשות בהם זמינים במאמר סקירה כללית על מזהי מפות.
ההרשאות הנדרשות
כדי ליצור או לנהל מזהי מפות בפרויקט, אתם צריכים להשתמש בחשבון ראשי עם הרשאות מתאימות ברמת התפקיד, עורך או בעלים, בדף IAM במסוף Cloud עבור הפרויקט. לרשימת כל התפקידים המוגדרים מראש
יצירת מזהי מפות
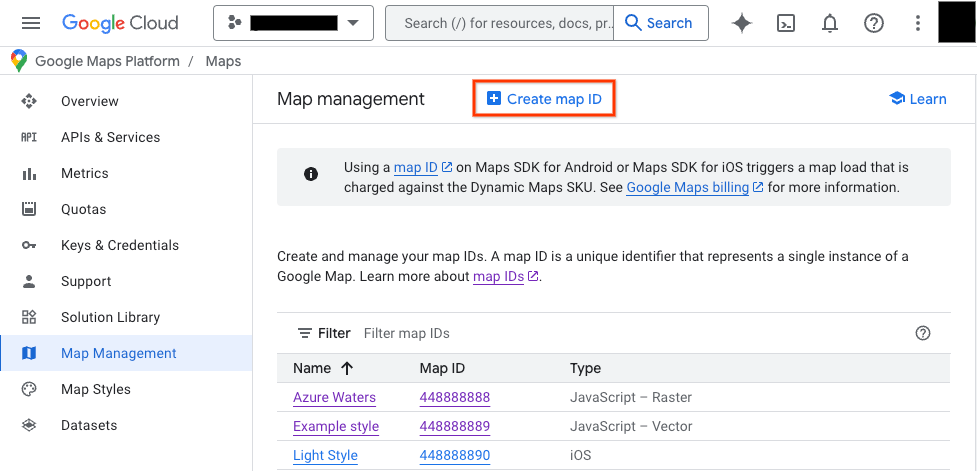
כדי ליצור מזהי מפות ב-Cloud Console:
נכנסים לפרויקט ב-Cloud Console ופותחים אותו עם ההרשאות הנדרשות.
נכנסים לדף ניהול המפות במסוף Cloud.
לוחצים על יצירת מזהה מפה.
בדף Create new map ID (יצירת מזהה מפה חדש), מבצעים את הפעולות הבאות:
- בשדה Name (שם), נותנים שם למזהה המפה.
- אופציונלי: בשדה תיאור, מתארים את השימוש במזהה המפה.
- בקטע Map type (סוג מפה), בוחרים את הפלטפורמה שבה מתכננים להשתמש במזהה המפה. אם בוחרים באפשרות JavaScript, צריך לבחור גם את סוג המפה Raster (ברירת המחדל) או Vector. מידע נוסף על מפות וקטוריות זמין במאמר בנושא מפות וקטוריות.
- לוחצים על שמירה כדי להציג את מזהה המפה החדש.
שיוך מזהה מפה לסגנון מפה
אם אתם משתמשים בעיצוב מפות מבוסס-ענן, אתם משייכים סגנון מפה למזהה המפה. פרטים נוספים זמינים במאמר בנושא שיוך סגנון למזהה מפה.
הוספת מזהה המפה לאפליקציה
Android
מוסיפים את מזהה המפה באמצעות רכיב <fragment> בקובץ הפריסה של הפעילות, באמצעות המחלקה MapView או באופן פרוגרמטי באמצעות המחלקה GoogleMapOptions.
לדוגמה, נניח שיצרתם מזהה מפה שמאוחסן כערך מחרוזת בשם map_id ב-res/values/strings.xml:
<?xml version="1.0" encoding="utf-8"?>
<resources>
<string name="map_id">MAP_ID</string>
</resources>
במפות שנוספו באמצעות רכיב <fragment> בקובץ הפריסה של הפעילות, צריך לציין את מזהה המפה במאפיין map:mapId של כל קטע מפה שצריך להחיל עליו את הסגנון המותאם אישית:
<fragment xmlns:map="http://schemas.android.com/apk/res-auto"
    map:name="com.google.android.gms.maps.SupportMapFragment"
    …
    map:mapId="@string/map_id" />
אפשר גם להשתמש במאפיין map:mapId של המחלקה MapView כדי לציין מזהה של מפה:
<com.google.android.gms.maps.MapView
    xmlns:map="http://schemas.android.com/apk/res-auto"
    ....
    map:mapId="@string/map_id" />
כדי לציין מזהה מפה באופן פרוגרמטי, מעבירים אותו למופע MapFragment באמצעות המחלקה GoogleMapOptions:
Java
 MapFragment mapFragment = MapFragment.newInstance(
     new GoogleMapOptions()
         .mapId(getResources().getString(R.string.map_id)));
Kotlin
 val mapFragment = MapFragment.newInstance(
     GoogleMapOptions()
         .mapId(resources.getString(R.string.map_id))
 )
ב-Android Studio, מפתחים ומריצים את האפליקציה כרגיל. סגנונות מותאמים אישית שהוגדרו בשלב הראשון יחולו על כל המפות עם מזהה המפה שצוין.
iOS
כדי ליצור מופע של מפה באמצעות מזהה מפה, מבצעים את הפעולות הבאות:
- יוצרים
GMSMapIDעם מחרוזת מזהה המפה מ-מסוף Cloud. - יוצרים
GMSMapViewומציינים את מזהה המפה שיצרתם.
Swift
let camera = GMSCameraPosition(latitude: 47.0169, longitude: -122.336471, zoom: 12)
let mapID = GMSMapID(identifier: "MAP_ID")
let mapView = GMSMapView(frame: .zero, mapID: mapID, camera: camera)
self.view = mapView
Objective-C
GMSCameraPosition *camera = [GMSCameraPosition cameraWithLatitude:47.0169
                                                        longitude:-122.336471
                                                             zoom:12];
GMSMapID *mapID = [GMSMapID mapIDWithIdentifier:@"MAP_ID"];
GMSMapView *mapView = [GMSMapView mapWithFrame:CGRectZero mapID:mapID camera:camera];
self.view = mapView;
אם אתם משתמשים במזהה מפה משלכם, אתם יכולים להגדיר אותו במסוף Cloud כך שיכלול סגנון חדש בכל שלב, והסגנון הזה יופיע בתצוגת המפה שלכם ושל המשתמשים באופן אוטומטי תוך שש שעות בערך.
אם רוצים לראות את השינויים באופן מיידי, אפשר לסגור את האפליקציה ולהפעיל אותה מחדש. כדי לעשות זאת, יוצאים מהאפליקציה, מבצעים סגירה מאולצת של האפליקציה מרשימת האפליקציות שהיו בשימוש לאחרונה, ואז פותחים אותה מחדש. המפה המעודכנת תופיע.
JavaScript
כדי ליצור מפה עם מזהה מפה בקוד האפליקציה:
אם כבר התאמתם אישית את המפה באמצעות קוד JSON מוטמע, צריך להסיר את המאפיין
stylesמהאובייקטMapOptions. אחרת, אפשר לדלג על השלב הזה.מוסיפים מזהה מפה למפה באמצעות המאפיין
mapId. לדוגמה:
map = new google.maps.Map(document.getElementById('map'), {
center: {lat: -34.397, lng: 150.644},
zoom: 8,
mapId: 'MAP_ID'
});
Maps Static
כדי להוסיף מזהה מפה למפה חדשה או קיימת שמשתמשת באחד מממשקי ה-API של שירות האינטרנט שלנו, צריך לצרף את פרמטר כתובת ה-URL map_id ולהגדיר אותו למזהה המפה. בדוגמה הזו מוצג איך להוסיף מזהה למפה באמצעות Maps Static API.
<img src="https://maps.googleapis.com/maps/api/staticmap?center=Brooklyn+Bridge,New+York,NY&zoom=13&size=600x300&maptype=roadmap&markers=color:blue%7Clabel:S%7C40.702147,-74.015794&markers=color:green%7Clabel:G%7C40.711614,-74.012318&markers=color:red%7Clabel:C%7C40.718217,-73.998284&key=YOUR_API_KEY&map_id=MAP_ID&signature=YOUR_SIGNATURE" />