
توضّح هذه الصفحة مثالاً على كيفية إضافة خريطة ثلاثية الأبعاد أساسية إلى تطبيق Android باستخدام حزمة تطوير البرامج بالاستناد إلى بيانات "خرائط Google" الثلاثية الأبعاد لأجهزة Android. تفترض التعليمات الواردة في هذه الصفحة أنّك أكملت الخطوات الواردة في صفحة الإعداد وأنّ لديك ما يلي:
- مشروع على Google Cloud تم تفعيل حزمة تطوير البرامج بالاستناد إلى بيانات "خرائط Google" الثلاثية الأبعاد لأجهزة Android فيه
- مفتاح واجهة برمجة تطبيقات تم إعداده لاستخدامه مع حزمة تطوير البرامج بالاستناد إلى بيانات "خرائط Google" الثلاثية الأبعاد لأجهزة Android
- مشروع في "استوديو Android" تم إعداده لاستخدامه مع حزمة تطوير البرامج بالاستناد إلى بيانات "خرائط Google" الثلاثية الأبعاد لأجهزة Android
لمزيد من المعلومات حول هذه المتطلبات الأساسية، يُرجى الاطّلاع على مقالة الإعداد.
الجزء 1: تعديل ملف التصميم (activity_main.xml) لإضافة المكوّن Map3DView
المكوِّن Map3DView هو طريقة العرض التي تعرض الخريطة الثلاثية الأبعاد داخل التطبيق.
تضيف الخطوات التالية المكوِّن وتضبط الحالة الأولية للخريطة،
بما في ذلك موضع الكاميرا والسمات ذات الصلة:
افتح ملف تنسيق النشاط الرئيسي، والذي يكون عادةً في
app/src/main/res/layout/activity_main.xml.في الجذر
ConstraintLayout(أو عنصر تصميم الجذر)، أضِف مساحة اسمmap3dXML:xmlns:map3d="http://schemas.android.com/apk/res-auto"احذف ملف
<TextView>التلقائي الذي يعرض "Hello World!".أضِف مكوّن
Map3DViewإلى التنسيق. يمكنك تخصيص موضع الكاميرا وسمات أخرى:<?xml version="1.0" encoding="utf-8"?> <androidx.constraintlayout.widget.ConstraintLayout xmlns:android="http://schemas.android.com/apk/res/android" xmlns:app="http://schemas.android.com/apk/res-auto" xmlns:map3d="http://schemas.android.com/apk/res-auto" xmlns:tools="http://schemas.android.com/tools" android:id="@+id/main" android:layout_width="match_parent" android:layout_height="match_parent" tools:context=".MainActivity"> <com.google.android.gms.maps3d.Map3DView android:id="@+id/map3dView" android:layout_width="match_parent" android:layout_height="match_parent" map3d:mode="hybrid" map3d:centerLat="38.544012" map3d:centerLng="-107.670428" map3d:centerAlt="2427.6" map3d:heading="310" map3d:tilt="63" map3d:range="8266" map3d:roll="0" map3d:minAltitude="0" map3d:maxAltitude="1000000" map3d:minHeading="0" map3d:maxHeading="360" map3d:minTilt="0" map3d:maxTilt="90" app:layout_constraintBottom_toBottomOf="parent" app:layout_constraintEnd_toEndOf="parent" app:layout_constraintStart_toStartOf="parent" app:layout_constraintTop_toTopOf="parent" /> </androidx.constraintlayout.widget.ConstraintLayout>
الجزء 2: تعديل ملف MainActivity.kt
توضّح الخطوات التالية كيفية تهيئة مكوّن Map3DView الذي تمت إضافته إلى الملف activity_main.xml في الجزء 1 وإدارة أحداث دورة حياة المكوّن.
يُرجى العِلم أنّ حزمة تطوير البرامج بالاستناد إلى بيانات "خرائط Google" الثلاثية الأبعاد لأجهزة Android لا تتيح سوى مثيل نشط واحد Map3DView
في كل مرة. لا يمكن عرض مثيلات متعددة من Map3DView في الوقت نفسه (مثلًا، في التصميم نفسه أو في أنشطة أو أجزاء مختلفة مرئية)، وقد يؤدي ذلك إلى مشاكل في العرض، مثل ظهور شاشات سوداء في طرق العرض الثانوية.
بالإضافة إلى ذلك، ستتشارك جميع عناصر Map3DView حالة الخريطة نفسها وتعكسها
(مثل موضع الكاميرا، والعلامات المضافة، والمضلّعات، وما إلى ذلك)، وستبقى هذه الحالة محفوظة حتى إذا تم إتلاف أحد عناصر Map3DView (باستخدام onDestroy) وإنشاء عنصر آخر، ما لم يتم محوها يدويًا. على سبيل المثال، إذا أضفت علامات إلى Map3DView1، ثم محوتها وأنشأت Map3DView2، ستظل العلامات نفسها متوفّرة في Map3DView2.
مسؤوليات المطوِّر:
- عرض واحد في كل مرة: تأكَّد من أنّ
Map3DViewواحدًا فقط يظهر في جزء نشط من هيكلية طرق العرض في أي لحظة. - التنظيف اليدوي: عند التبديل من
Map3DView(مثلMap3DView1) إلى آخر (مثلMap3DView2)، عليك استدعاءonDestroy()على المثيل القديم (Map3DView1). وبما أنّ حالة الخريطة الأساسية مشترَكة، لضمان بدءMap3DView2بحالة جديدة أو محددة، عليك إزالة أي حالة تم ضبطها بواسطةMap3DView1يدويًا. ويشمل ذلك إزالة العلامات والتراكبات وما إلى ذلك، وإعادة ضبط موضع الكاميرا باستخدام العنصرGoogleMap3Dالذي تم الحصول عليه فيOnMap3DViewReadyCallback.
افتح ملف
MainActivity.ktالذي يكون عادةً فيapp/src/main/java/com/example/yourpackagename/MainActivity.kt.أضِف عمليات الاستيراد اللازمة لحزمة تطوير البرامج بالاستناد إلى بيانات "خرائط Google" الثلاثية الأبعاد لأجهزة Android:
import com.google.android.gms.maps3d.GoogleMap3D
import com.google.android.gms.maps3d.Map3DView
import com.google.android.gms.maps3d.OnMap3DViewReadyCallback
عدِّل الفئة
MainActivityلتنفيذOnMap3DViewReadyCallback:class MainActivity : AppCompatActivity(), OnMap3DViewReadyCallback {عرِّف المتغيّرات الخاصة بـ
Map3DViewوGoogleMap3D:private lateinit var map3DView: Map3DView private var googleMap3D: GoogleMap3D? = nullفي طريقة
onCreate، بعدsetContentView(...)وكتلةViewCompat.setOnApplyWindowInsetsListener، عليك إعدادmap3DViewواستدعاء طريقة مراحل النشاطonCreateوطلب الخريطة بشكل غير متزامن:override fun onCreate(savedInstanceState: Bundle?) { super.onCreate(savedInstanceState) enableEdgeToEdge() setContentView(R.layout.activity_main) ViewCompat.setOnApplyWindowInsetsListener(findViewById(R.id.main)) { v, insets -> val systemBars = insets.getInsets(WindowInsetsCompat.Type.systemBars()) v.setPadding(systemBars.left, systemBars.top, systemBars.right, systemBars.bottom) insets } map3DView = findViewById(R.id.map3dView) map3DView.onCreate(savedInstanceState) map3DView.getMap3DViewAsync(this) }تجاوز طريقة
onMap3DViewReadyيتم تشغيل دالة ردّ الاتصال هذه عندما تصبح الخريطة جاهزة للاستخدام:override fun onMap3DViewReady(googleMap3D: GoogleMap3D) { // Interact with the googleMap3D object here this.googleMap3D = googleMap3D // You can now make calls to the googleMap3D object, e.g., // googleMap3D.cameraController.flyTo(camera { ... }) }أرسِل أحداث مراحل النشاط من نشاطك إلى
Map3DViewعن طريق إضافة عمليات الإلغاء التالية إلىMainActivity:override fun onStart() { super.onStart() map3DView.onStart() } override fun onResume() { super.onResume() map3DView.onResume() } override fun onPause() { map3DView.onPause() super.onPause() } override fun onStop() { map3DView.onStop() super.onStop() } override fun onDestroy() { map3DView.onDestroy() super.onDestroy() } override fun onSaveInstanceState(outState: Bundle) { super.onSaveInstanceState(outState) map3DView.onSaveInstanceState(outState) } override fun onLowMemory() { super.onLowMemory() map3DView.onLowMemory() }
الجزء 3: مزامنة Gradle وتشغيل التطبيق
بعد تعديل تصميم تطبيقك ونشاطه، يمكنك إنشاء التطبيق وتشغيله للاطّلاع على عرض الخريطة الثلاثية الأبعاد.
لمزامنة مشروعك مع Gradle، اختَر ملف > مزامنة المشروع مع ملفات Gradle.
لإنشاء تطبيقك وتشغيله على محاكي أو جهاز فعلي، انقر على تشغيل > تشغيل.
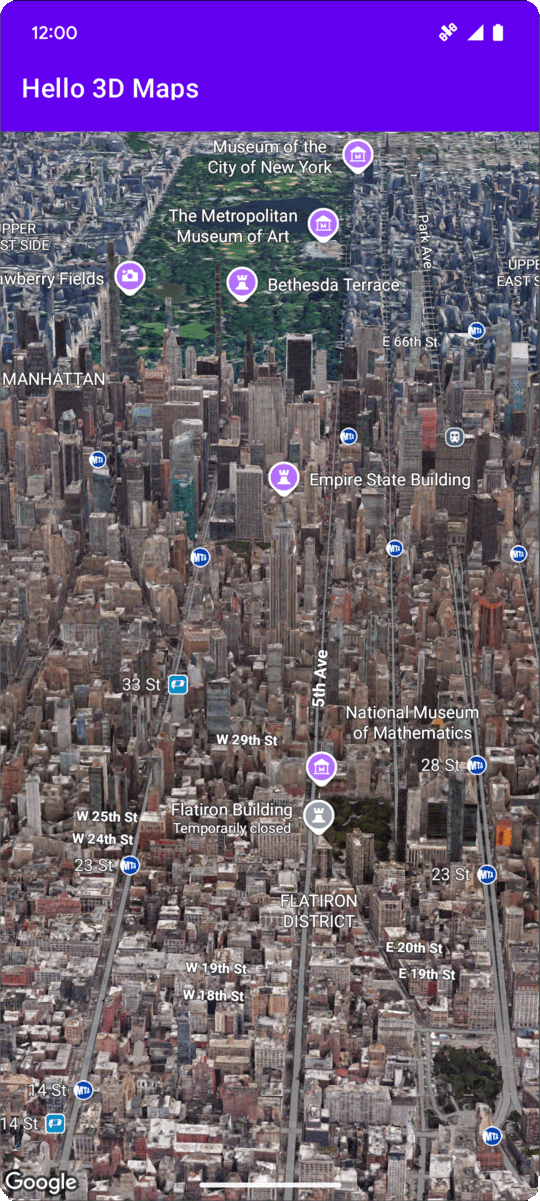
في حال ضبط جميع الإعدادات بشكلٍ سليم، من المفترض أن تظهر خريطة ثلاثية الأبعاد في تطبيقك، مع توسيطها بالقرب من الإحداثيات المحدّدة في activity_main.xml.
الخطوات التالية
بعد إضافة خريطة ثلاثية الأبعاد أساسية إلى تطبيقك، يمكنك استكشاف المزيد من الميزات المتقدّمة في "حزمة تطوير البرامج بالاستناد إلى بيانات خرائط Google الثلاثية الأبعاد" لنظام التشغيل Android، مثل الرسوم المتحركة لمسار الكاميرا أو العلامات الثلاثية الأبعاد أو المضلّعات.
رصد أحداث النقر على الخريطة
للاستماع إلى أحداث النقر على الخريطة، استخدِم
GoogleMap3D.setMap3DClickListener. يتم تشغيل أداة معالجة الأحداث هذه عندما ينقر أحد المستخدمين على الخريطة، وتوفّر الموقع الجغرافي ورقم تعريف المكان للنقطة التي تم النقر عليها.
يوضّح المثال التالي كيفية ضبط أداة معالجة نقرات الخريطة:
googleMap3D.setMap3DClickListener { location, placeId ->
    lifecycleScope.launch(Dispatchers.Main) {
        if (placeId != null) {
            Toast.makeText(this@MainActivity, "Clicked on place with ID: $placeId", Toast.LENGTH_SHORT).show()
        } else {
            Toast.makeText(this@MainActivity, "Clicked on location: $location", Toast.LENGTH_SHORT).show()
        }
    }
}
يُرجى العِلم أنّ معالج النقرات لا يتم تنفيذه في سلسلة التعليمات الرئيسية (أو واجهة المستخدم). إذا كنت تريد إجراء تغييرات على واجهة المستخدم (مثل عرض رسالة Toast)، عليك التبديل إلى سلسلة التعليمات البرمجية الرئيسية. بالنسبة إلى Kotlin، يمكنك إجراء ذلك باستخدام
lifecycleScope.launch(Dispatchers.Main).