

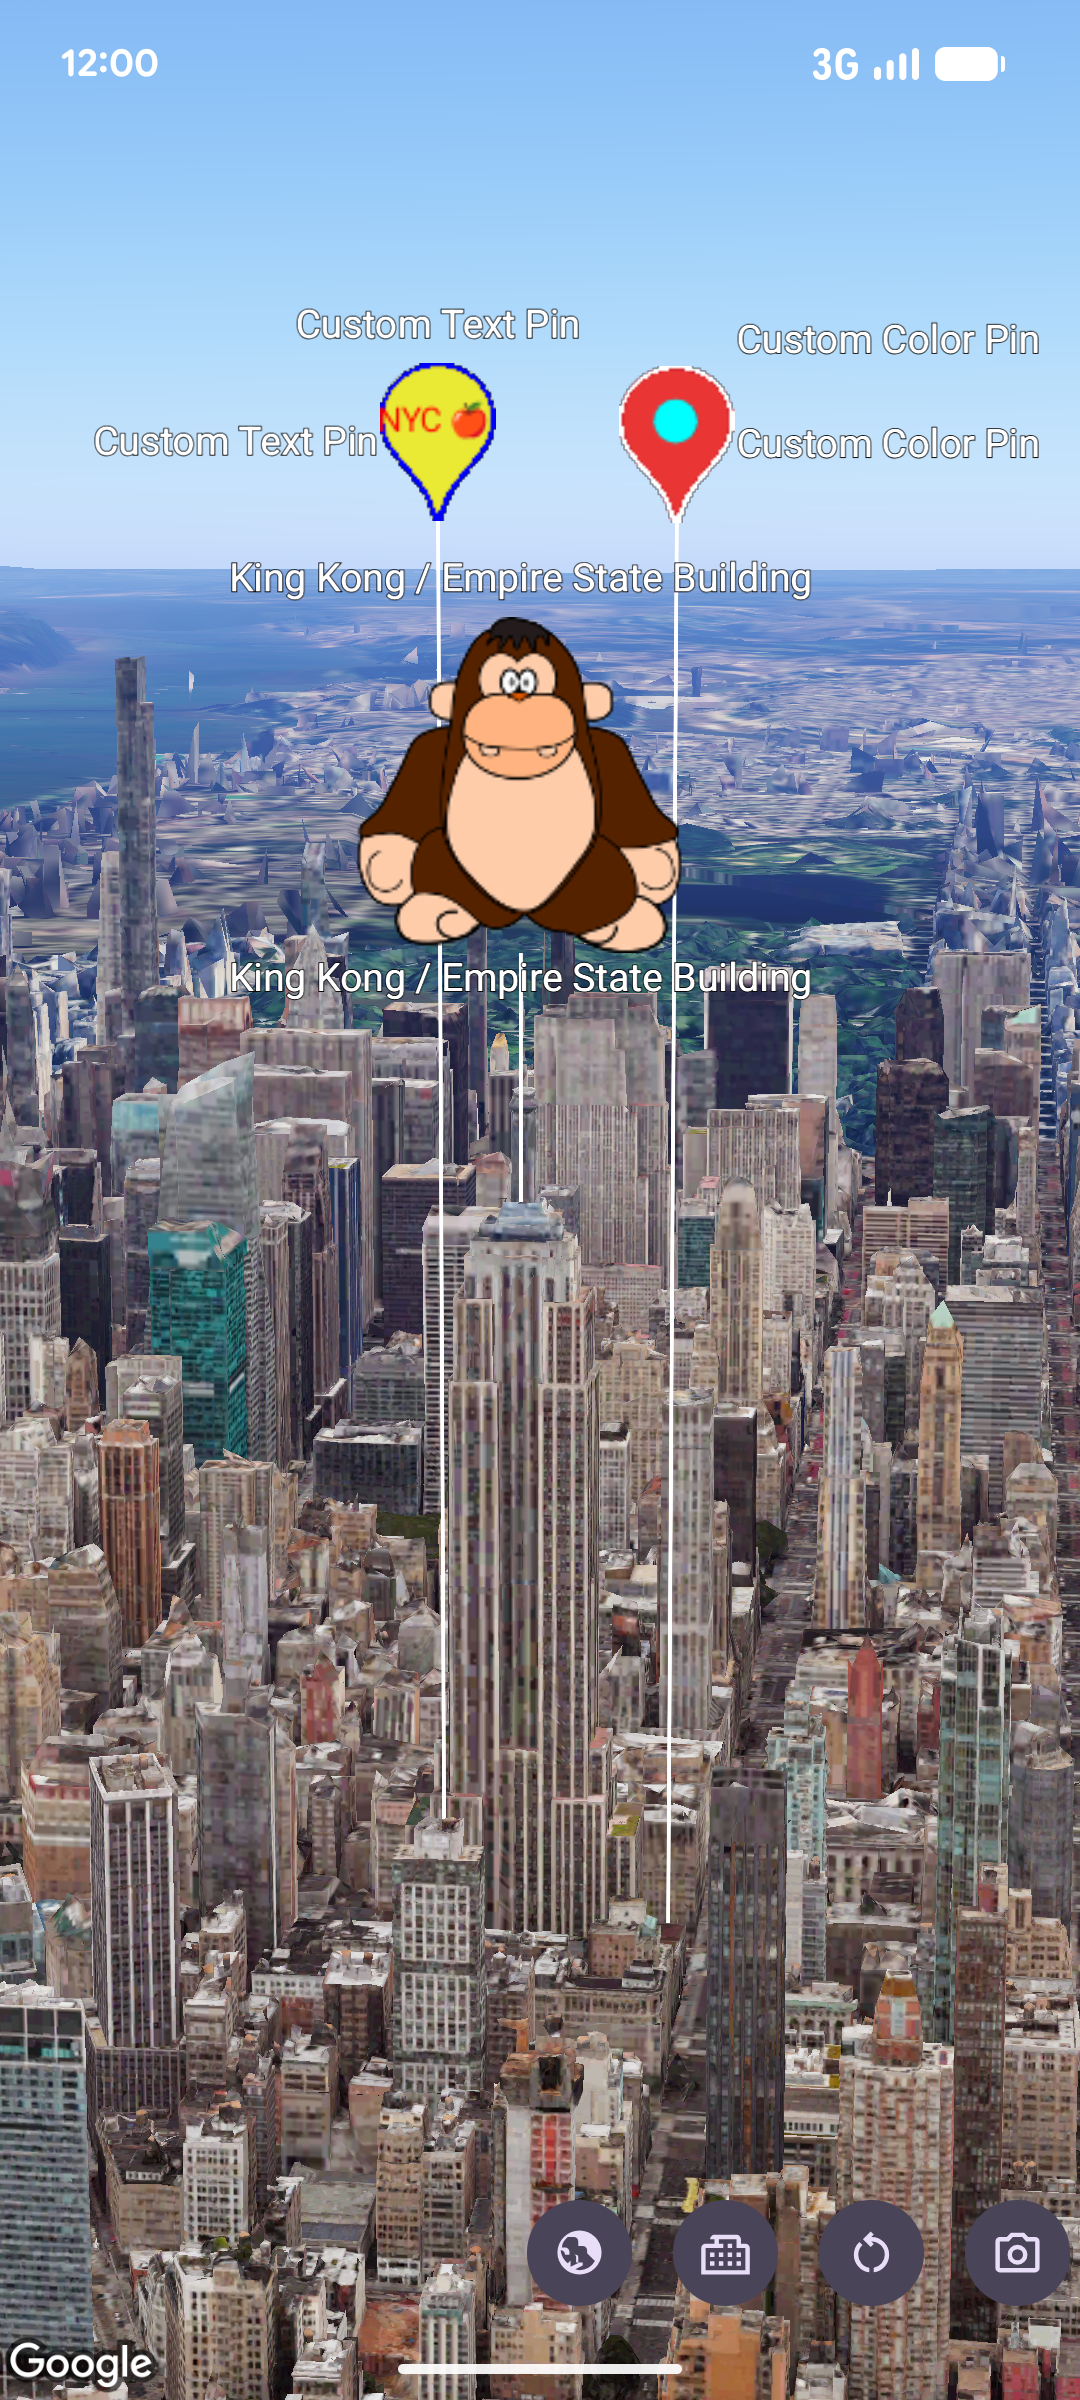
คุณสามารถใช้
MarkerView
เพื่อแสดงผลลำดับชั้น View ของ Android ที่กำหนดเองเป็นเครื่องหมายบนแผนที่ 3 มิติได้ เครื่องหมายมุมมองที่กำหนดเองช่วยให้คุณแสดงเลย์เอาต์ของ UI ที่สมบูรณ์ วิดเจ็ตแบบอินเทอร์แอกทีฟ และภาพเคลื่อนไหวของมุมมองที่ยึดกับพิกัดทางภูมิศาสตร์ได้
เพิ่มเครื่องหมายมุมมองที่กำหนดเอง
หากต้องการเพิ่มเครื่องหมายมุมมองที่กำหนดเองลงในแผนที่ ให้สร้างอินสแตนซ์ MarkerViewOptions กำหนดค่าตำแหน่งด้วย setPosition โดยใช้ออบเจ็กต์ LatLngAltitude และระบุ View ของ Android ที่กำหนดเองโดยใช้ setContent
จากนั้นส่งตัวเลือกไปยัง addMarkerView ในอินสแตนซ์ GoogleMap3D
หากคุณไม่ได้ระบุมุมมองให้กับ setContent SDK จะสร้างและแสดงผล PinView เริ่มต้น
// Add imports
import android.widget.TextView
import com.google.android.gms.maps3d.model.MarkerViewOptions
import com.google.android.gms.maps3d.model.latLngAltitude

// Create a custom Android View
val badgeView = TextView(context).apply {
    text = "Empire State Building"
    contentDescription = "Marker for Empire State Building"
    setPadding(24, 12, 24, 12)
}

// Configure MarkerViewOptions and add the marker view to the map
val options = MarkerViewOptions().apply {
    position = latLngAltitude {
        latitude = 40.7484
        longitude = -73.9857
        altitude = 100.0
    }
    content = badgeView
}

val markerView = googleMap3D.addMarkerView(options)
ปรับแต่ง PinView เริ่มต้น
แทนที่จะสร้าง View ของ Android ที่กำหนดเองทั้งหมด คุณสามารถแสดงผลหมุดที่กำหนดเองได้โดยสร้าง PinView ที่มี PinConfiguration ที่กำหนดเอง (หรืออัปเดตอินสแตนซ์ที่มีอยู่ด้วย setPinConfiguration) แล้วส่งไปยัง setContent
// Add imports
import android.graphics.Color
import com.google.android.gms.maps3d.model.MarkerViewOptions
import com.google.android.gms.maps3d.model.PinView
import com.google.android.gms.maps3d.model.latLngAltitude
import com.google.android.gms.maps3d.model.pinConfiguration

// Create a customized PinView
val customPinView = PinView(context, pinConfiguration {
    backgroundColor = Color.BLUE
    borderColor = Color.WHITE
})

// Configure MarkerViewOptions and add the marker view to the map
val options = MarkerViewOptions().apply {
    position = latLngAltitude {
        latitude = 40.7484
        longitude = -73.9857
        altitude = 100.0
    }
    content = customPinView
}

val markerView = googleMap3D.addMarkerView(options)
จัดการการโต้ตอบและภาพเคลื่อนไหว
เนื่องจาก MarkerView รวม View ของ Android ไว้ คุณจึงแนบฟังก์ชันรอคลิกมาตรฐานและดูภาพเคลื่อนไหวได้โดยตรงในมุมมองที่ getContent แสดงผล
นอกจากนี้
MarkerView
ยังใช้
Anchorable
ซึ่งช่วยให้คุณยึด
Popover
ไว้กับมุมมองเครื่องหมายโดยใช้
addPopover ได้
markerView?.content?.setOnClickListener { view ->
    // Animate the view when clicked
    view.animate().rotationBy(90f).setDuration(300).start()
}
กำหนดค่าระดับความสูงและการดำเนินการสำหรับการซ้อนทับ
คุณสามารถปรับแต่งตำแหน่งของ MarkerView ในแนวตั้งและวิธีที่โต้ตอบกับป้ายกำกับหรือเครื่องหมายบนแผนที่ที่ทับซ้อนกันได้ ดังนี้
- โหมดระดับความสูง: เรียกใช้
setAltitudeModeในMarkerViewOptionsด้วยค่าคงที่AltitudeModeโดยค่าเริ่มต้นMarkerViewOptionsจะใช้AltitudeMode.CLAMP_TO_GROUND - การดำเนินการสำหรับการซ้อนทับ: เรียกใช้
setCollisionBehaviorด้วยค่าคงที่CollisionBehavior(ค่าเริ่มต้นคือCollisionBehavior.REQUIRED) และใช้setCollisionPriorityเพื่อระบุลำดับความสำคัญในการแสดงผลเมื่อเครื่องหมายซ้อนทับกัน
การช่วยเหลือพิเศษและการนำออก
คุณมีหน้าที่รับผิดชอบในการกำหนดค่าพร็อพเพอร์ตี้การช่วยเหลือพิเศษ เช่น contentDescription ใน Android View ที่กำหนดเองซึ่งจัดหาให้แก่ setContent
หากต้องการนำ
MarkerView
ออกจากแผนที่ ให้เรียกใช้
remove:
markerView?.remove()