
Prerequisites and Essential Information Before Starting
Before starting, it's important to first ensure you are set up with all of the necessary prerequisites and essential information.
Merchant Center
Create a Google Account: Before you begin, you need a Google account to sign up for Merchant Center. If you don't have a Google account, go to accounts.google.com and click "Create account".
Merchant Center Account Creation: After creating your Google Account, access Merchant Center and sign in with your Google account to create a merchant center sub account. We recommend creating 2 sub accounts: one for testing and the other for converting into an official MCA account for your integration.
Convert a Merchant Center account to an MCA (Multi-Client Account): A Multi-Client Account (MCA) is required to manage your merchants accounts and connect to existing Merchant Center accounts through account linking. To read more about how to convert your MC to an MCA, read the step by step instructions. We recommend adding individuals who work on the integration as
adminandreporting manageraccess users to your MCA and initial test accounts. This provides them access to use the Content APIs and access the Merchant Center to develop the integration. Learn more at how to add individuals directly in Merchant Center.Merchant Center Next: In 2023, Google introduced Merchant Center Next, a simplified platform for businesses to manage how their products show up on Google. Merchant Center Next (MC Next) is easier, allowing you to control how your products appear across Google, and gives you valuable insights about your business, products, and market. MC Next has already started rolling out for new users with plans to complete the global rollout in 2024. Merchants can expect be notified directly on Merchant Center when the new experience is ready for them. When on Merchant Center Next, everything will keep working without any further actions on your side.
Merchant Center Next Benefits
Manage products more easily: Automatically connect your product data from your website and control how your products appear across Google. If you have a physical store, display your in-store products on Google Search and Maps by adding them to your physical locations in Merchant Center.
Fix issues quickly with guidance: Prioritize which products to fix based on how many potential clicks a product can get on Google. View your most impactful issues at a glance and a list of all products that need your attention.
Understand your overall performance: Get valuable insights about your business, products, market, and more with holistic performance reports. Find answers to your performance questions, whether you need a quick overview or a more in-depth analysis.
Account linking
To enable and access, see Account Linking. We recommend you contact your Google POC.
OAuth and Google Cloud Platform (GCP) Project Creation
A Google Cloud Platform project is required for Storebuilders to set up OAuth 2.0. GCP leverages OAuth 2.0 for API authentication and authorization. To create a GCP project, you need to have a Google Cloud Platform account.
Once you have an account, you can create a project in the Google Cloud Platform Console and follow the steps below to complete the process.
Create a New Google Cloud Project
Login to the Google Cloud Developer Console with an administrative account to create or add-to an existing cloud project. If you have an existing project you'd prefer to use, then simply select the project from the drop down in the top-left hand corner. Otherwise, select the drop down in the top-left hand corner to reveal the modal. Then select, "New Project".
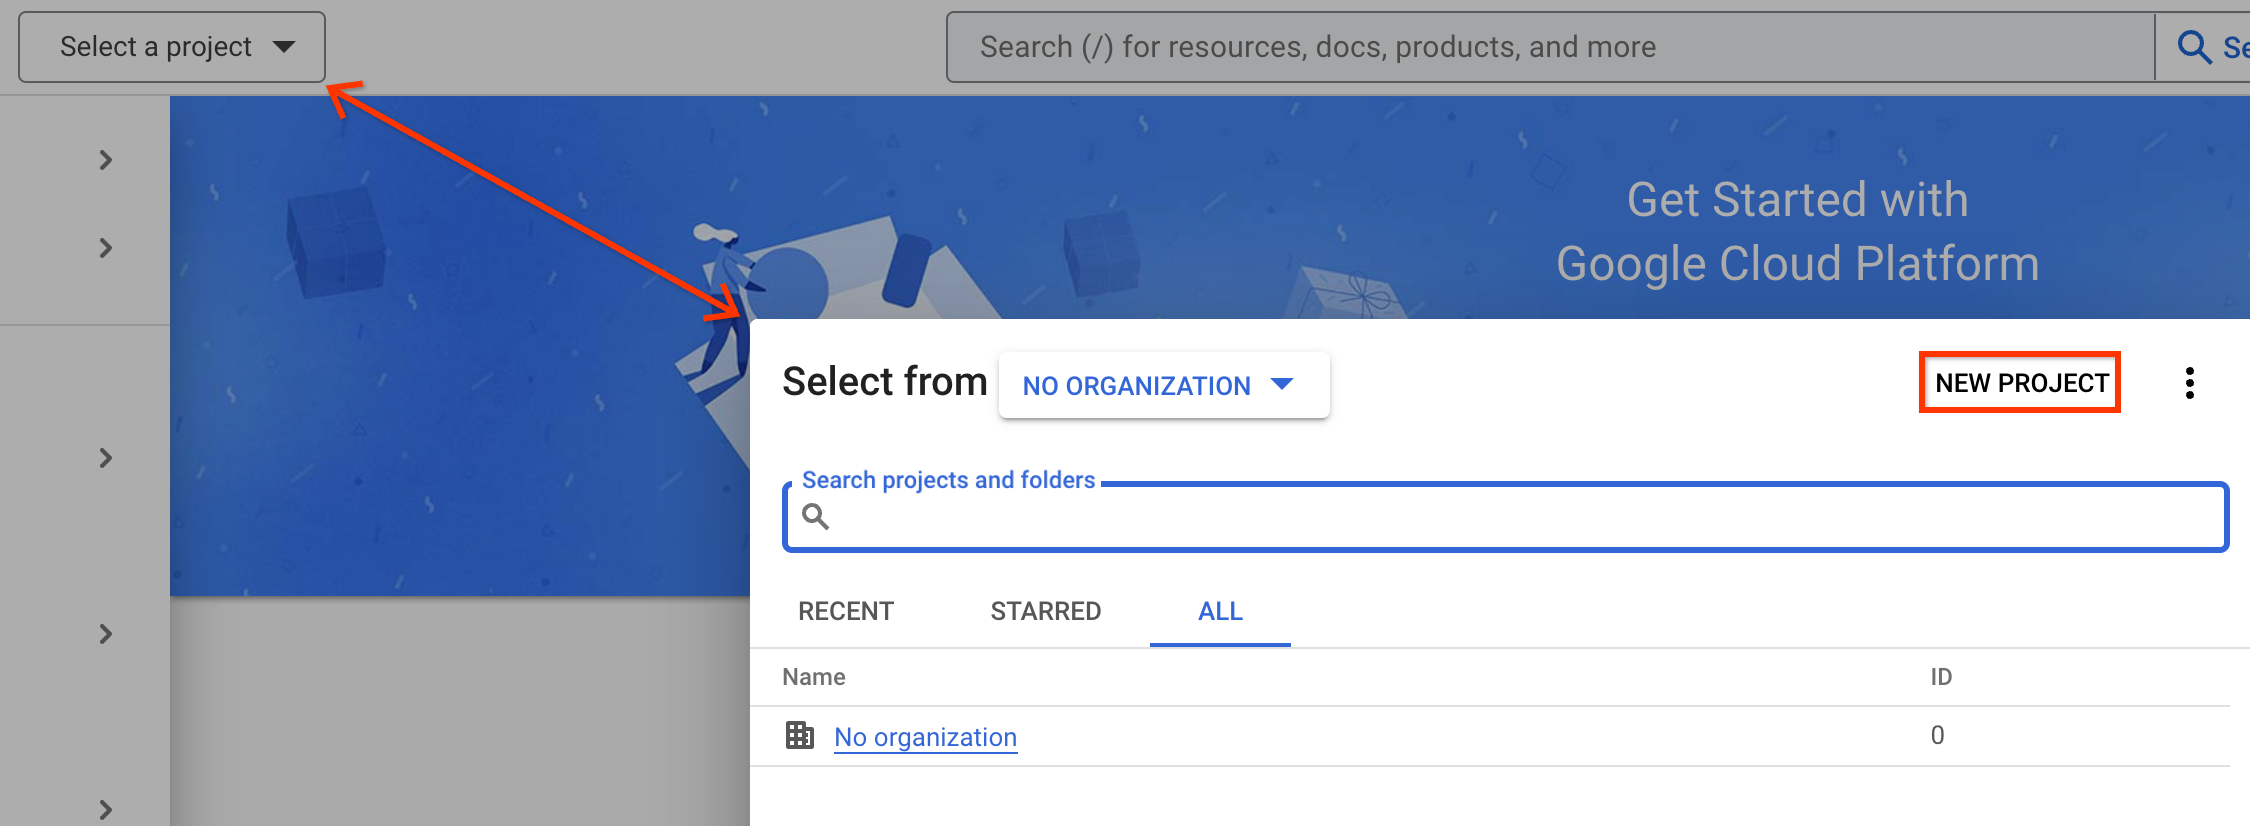
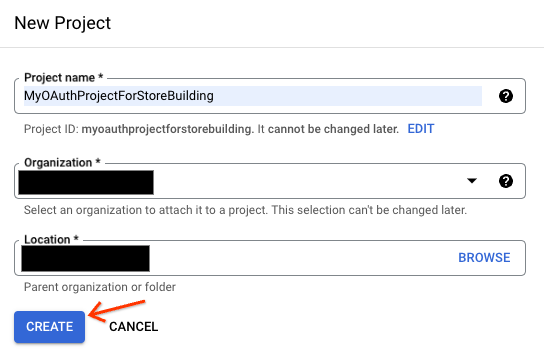
In the New Project configuration, provide a name for your project. If you are part of an existing organization, select that organization. Then, select a Location of where your project is stored. Finally, select "Create".
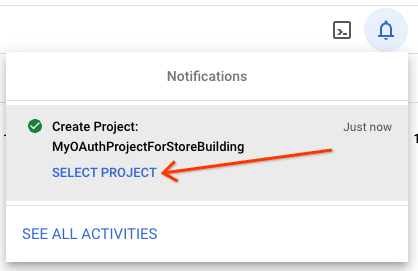
Your Project takes a minute to create and the notifications menu announces when your project has been created. Select the notifications' "bell icon" in the top-right hand corner of the screen to reveal that your project has been created. You can select your new project from there.
Next, in your new project, you configure the Content API for Google Shopping.
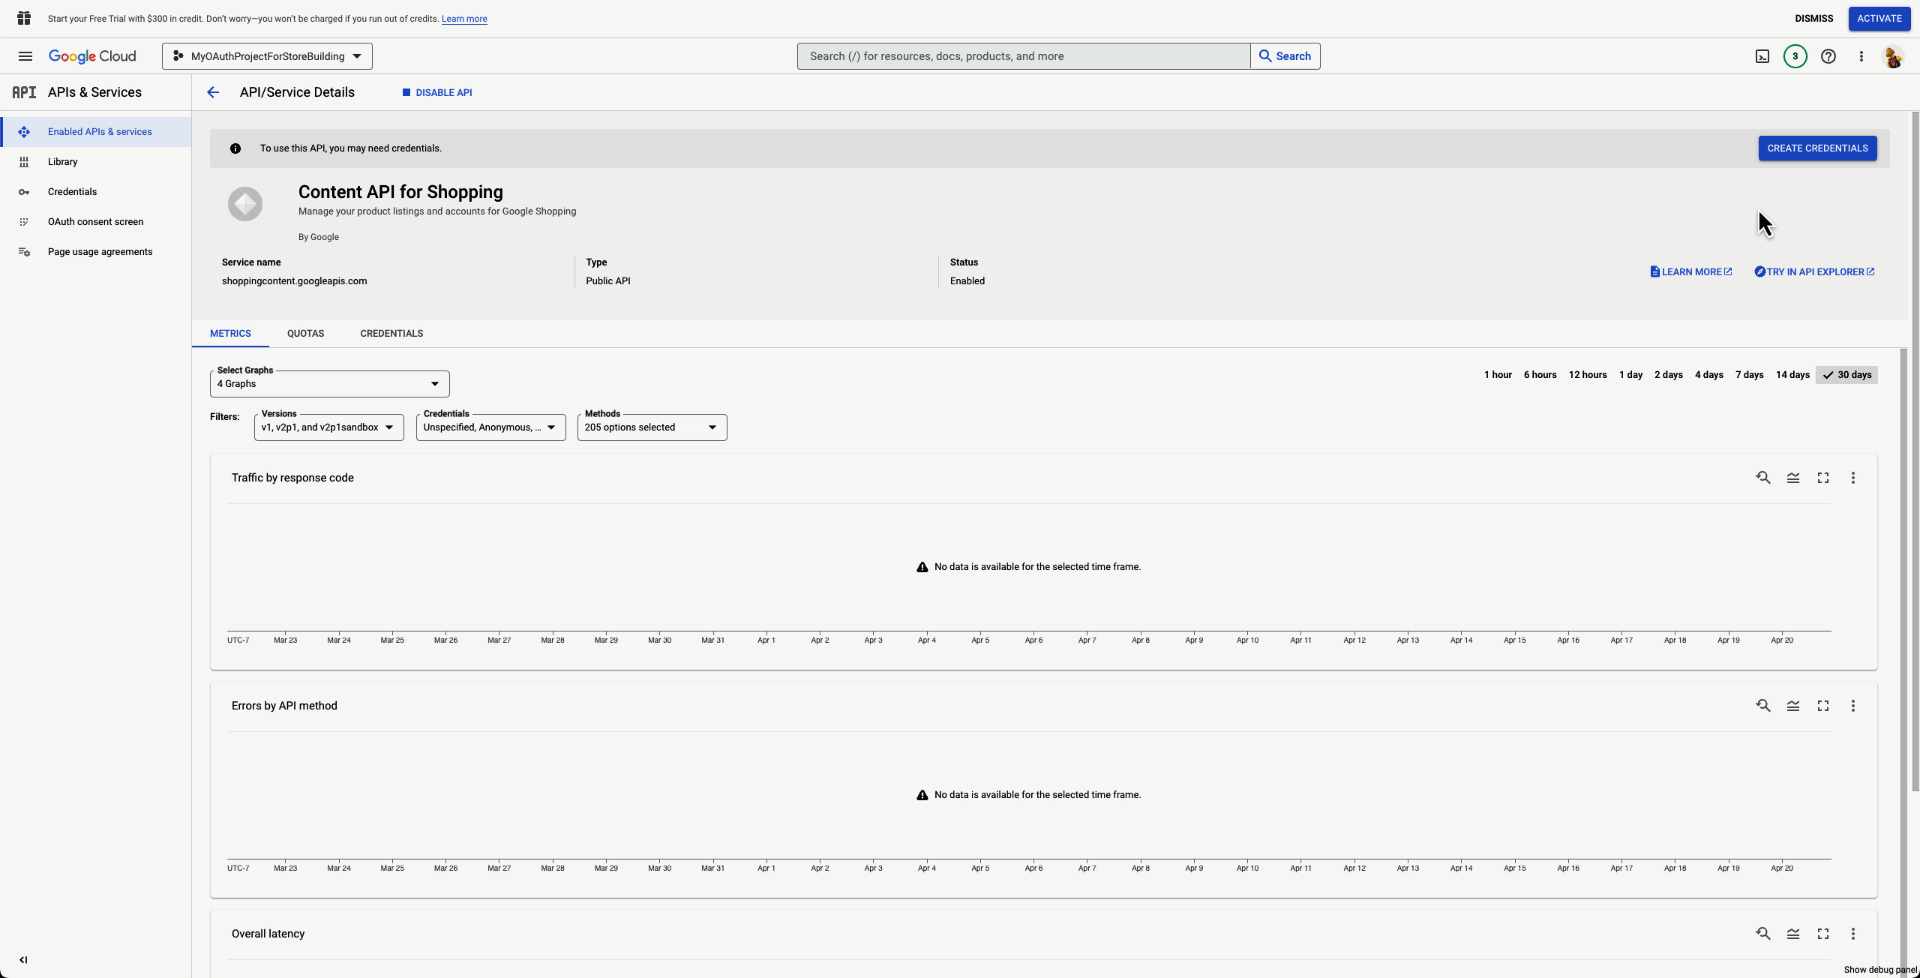
Enable Content API for Shopping
Before configuring OAuth, you need to enable the Content API for Shopping. This lets you transition to creating OAuth credentials for your application.
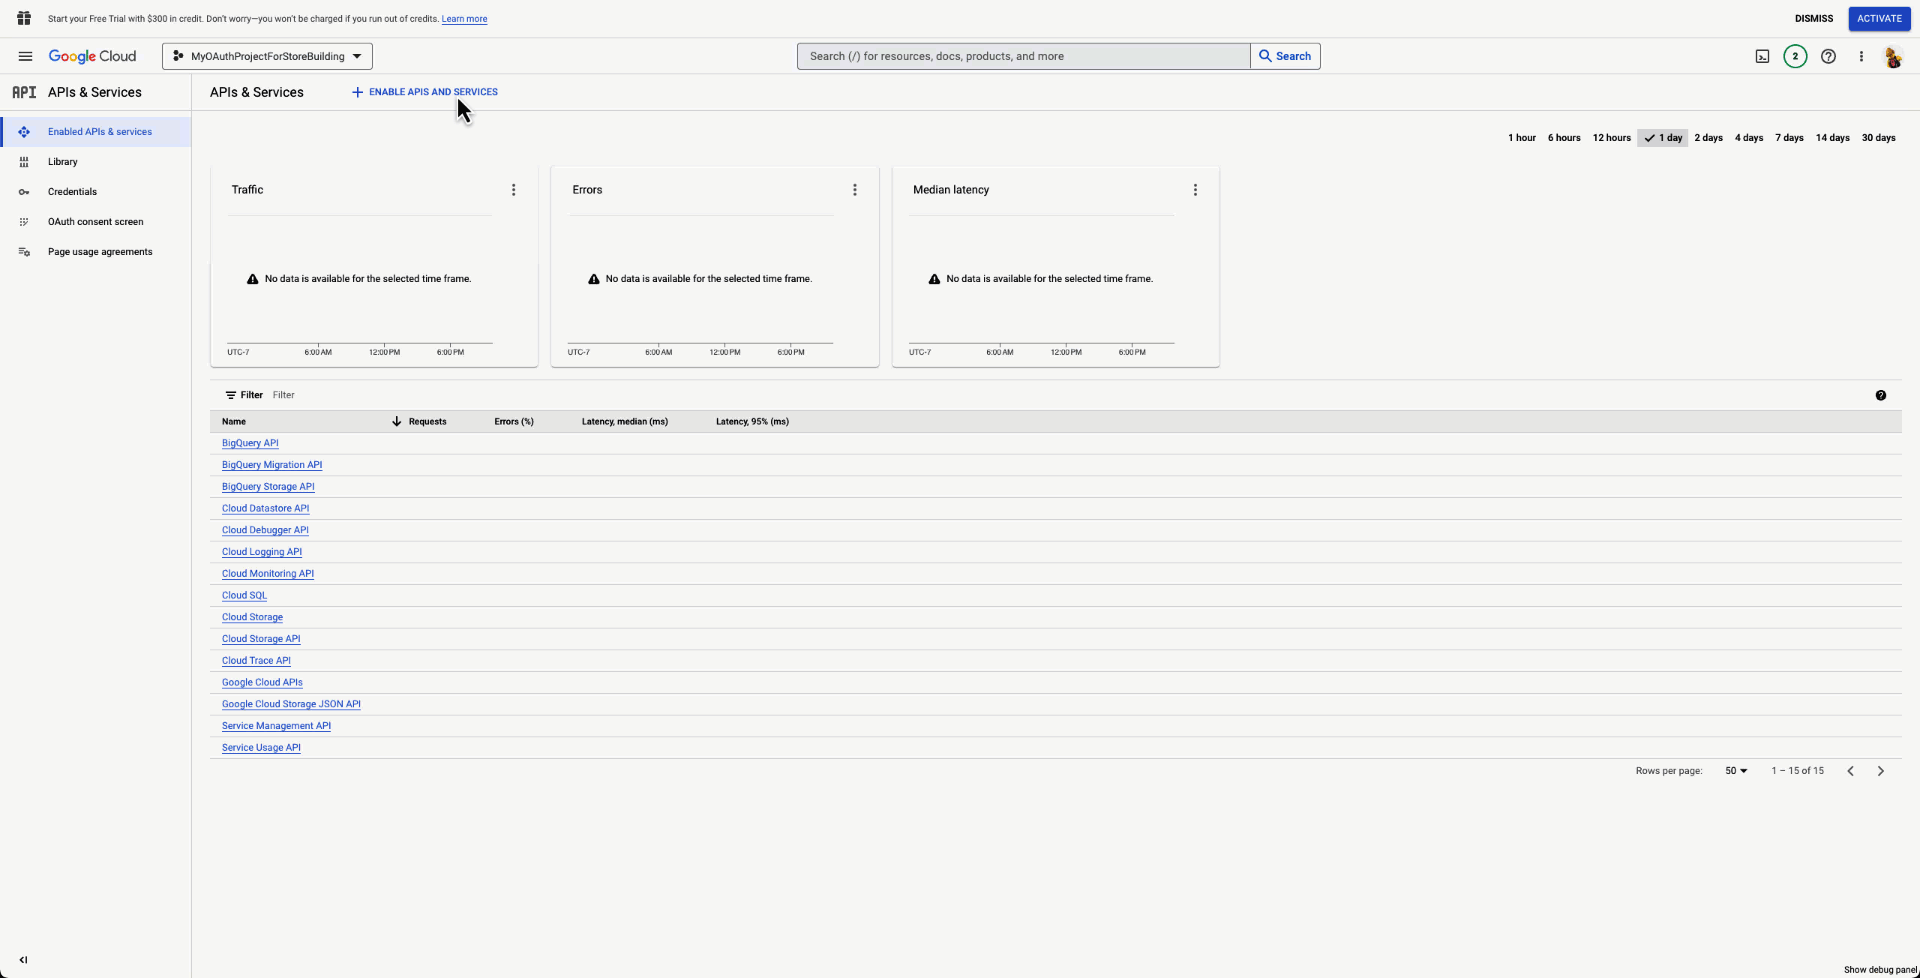
Select your Project from the drop-down in the top-left hand corner. Then, in the left-hand navigation menu, select Enable API + Services. Just underneath the Project drop-down at the top, select the button that says, "+ ENABLE APIS AND SERVCES".
In the search field, type "Content API", and the autocomplete should read "content api for shopping". Select "content api for shopping".
Next, Select the API to access the API Menu. A blue button is present that says, "Enable". Select "Enable" to turn on the API.
Configure OAuth Credentials in Google Cloud Project
Once the Content API for shopping is enabled, you can now create credentials for development.
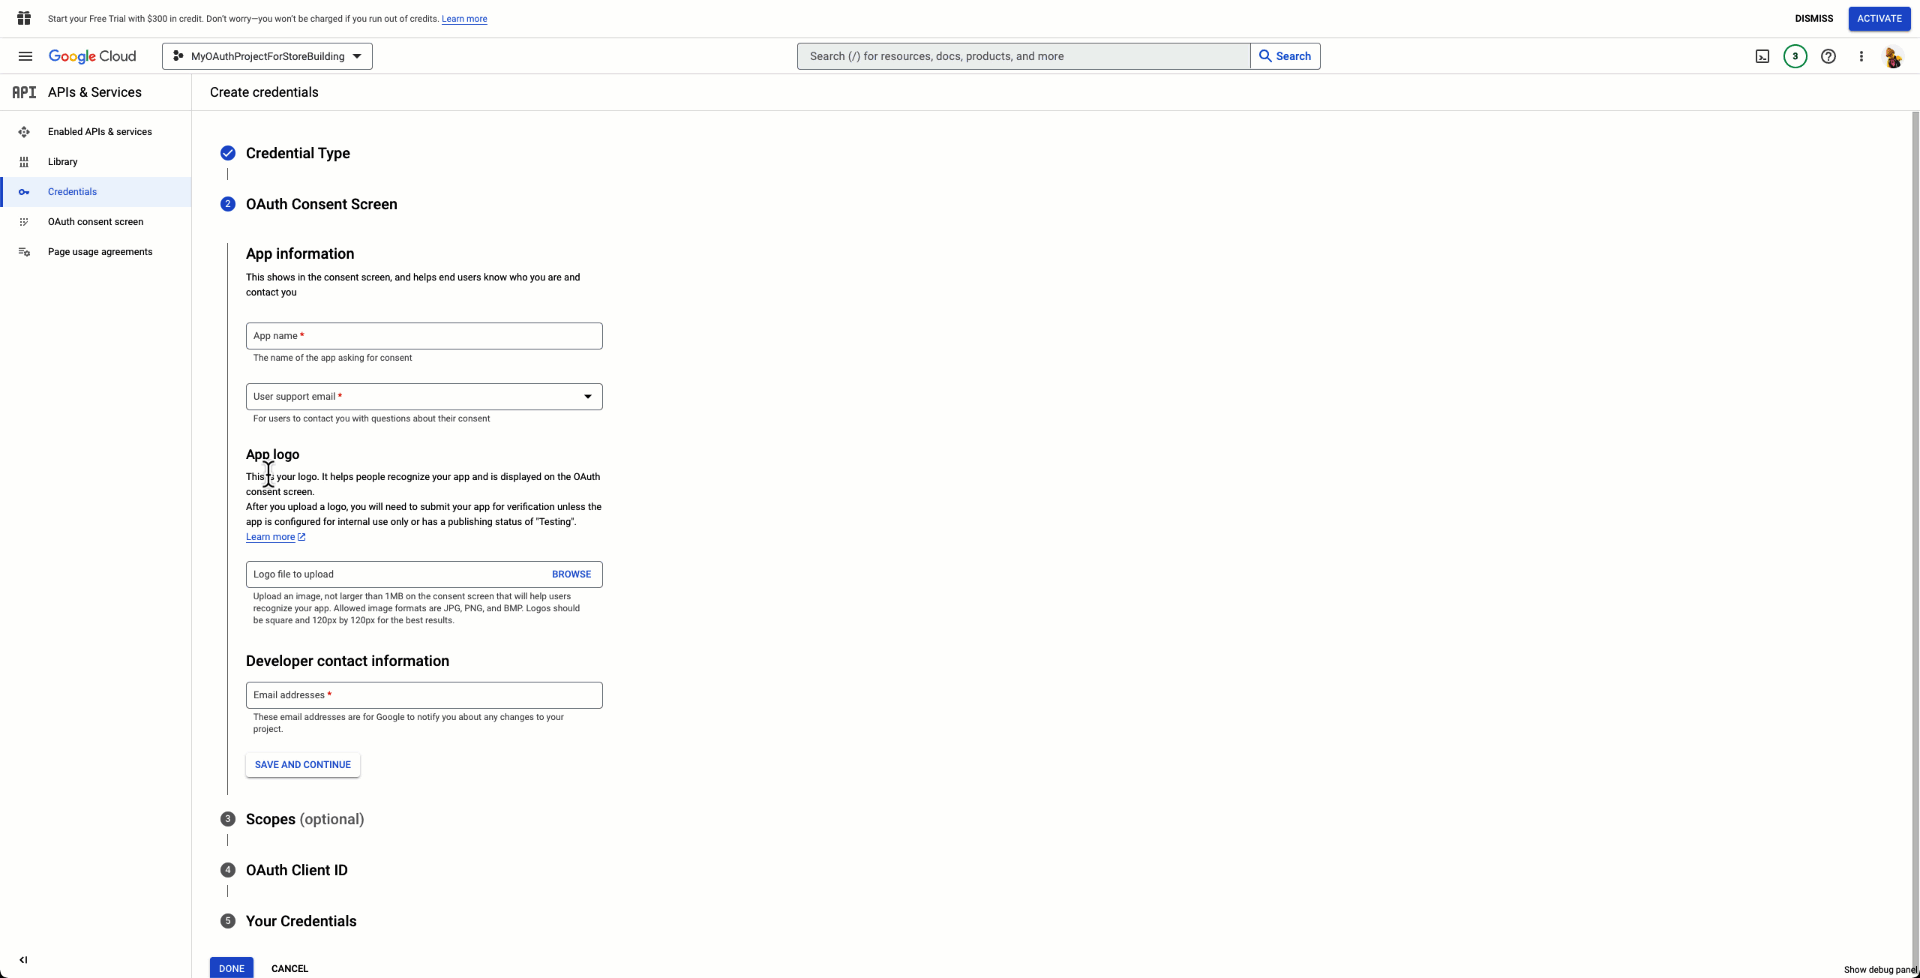
When the Content API Dashboard is loaded, select the blue button in the top-right handcorner called "Create Credentials" to begin the Credential Creation Wizard for OAuth. In the first section, select "User Data" radio button, then select next.
The next section identifes your application to users. Here you define the application's name. You also provide a user support email, application logo, and developer contact email address. When finished, select "Save and Continue".
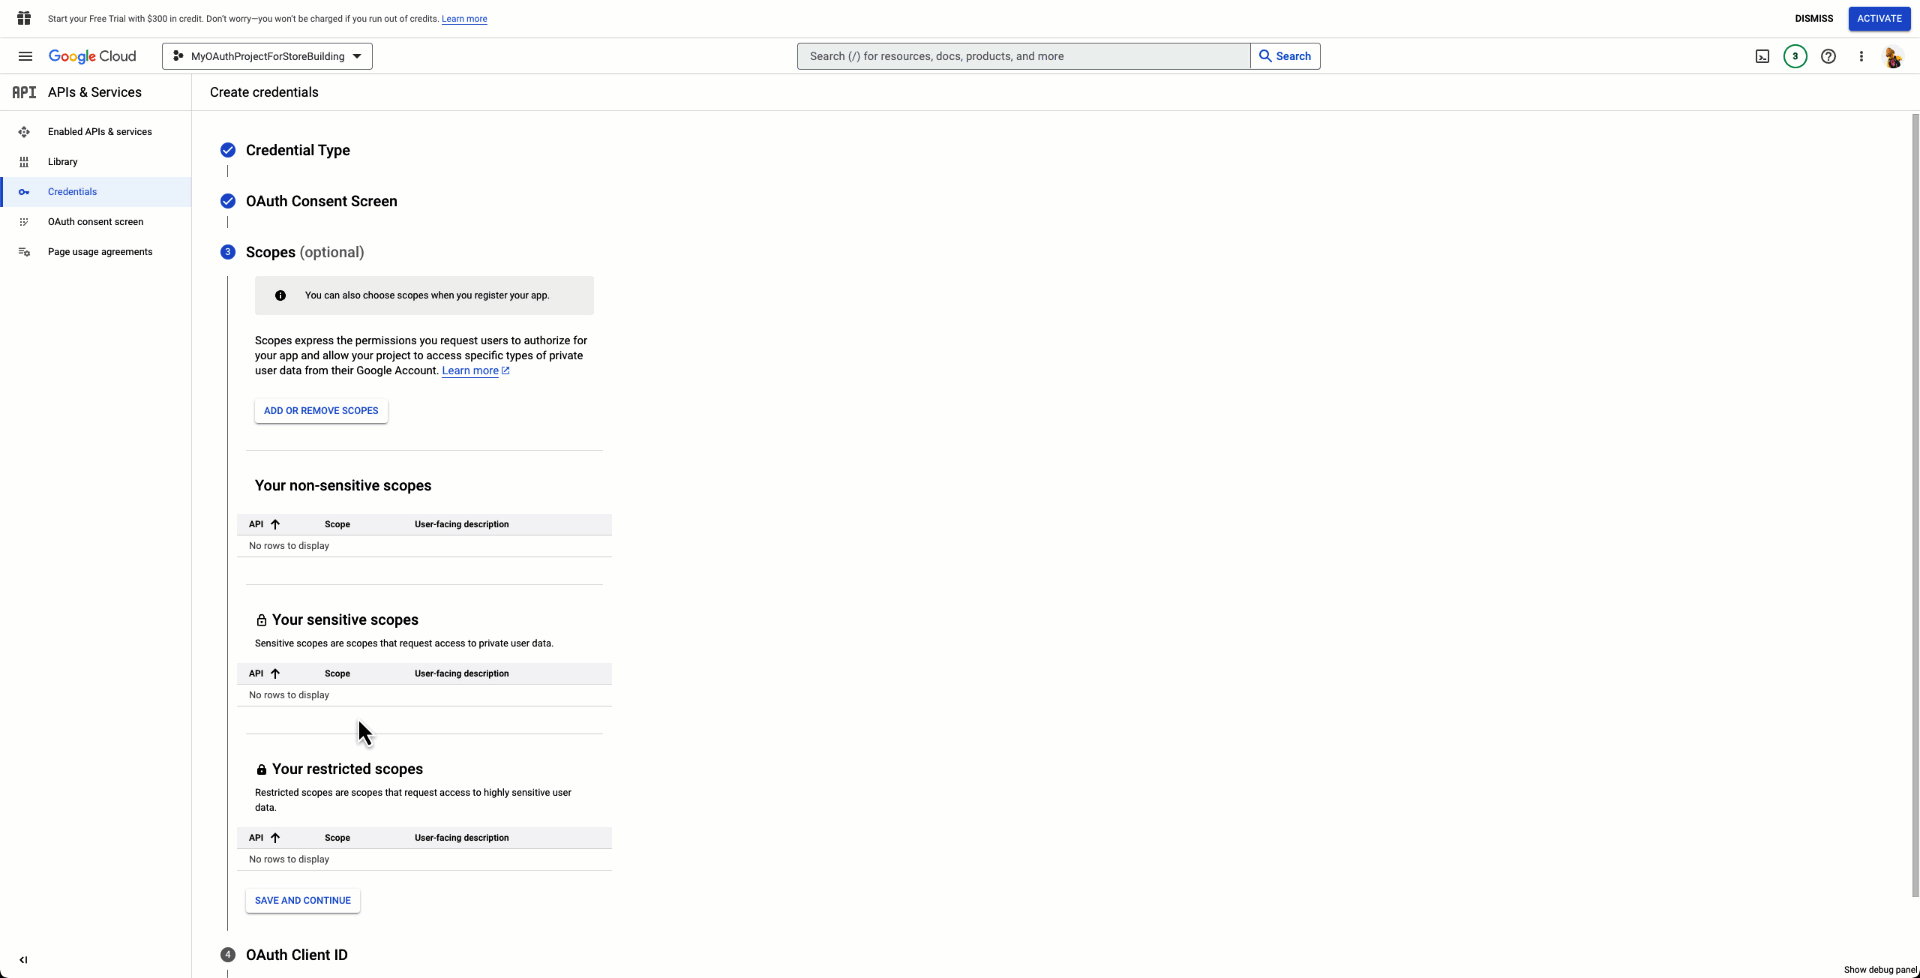
This section requires you to select scopes. This provides users more control of how your application utilizes their credentials for interacting with Content API. Select "Add or Remove Scopes", and a pop-in menu appears on the right-side of the screen. In the "filter", begin typing "Content API", and select Content API for Shopping. Two options appear, and you need to check both of them. Select "Save and Continue".
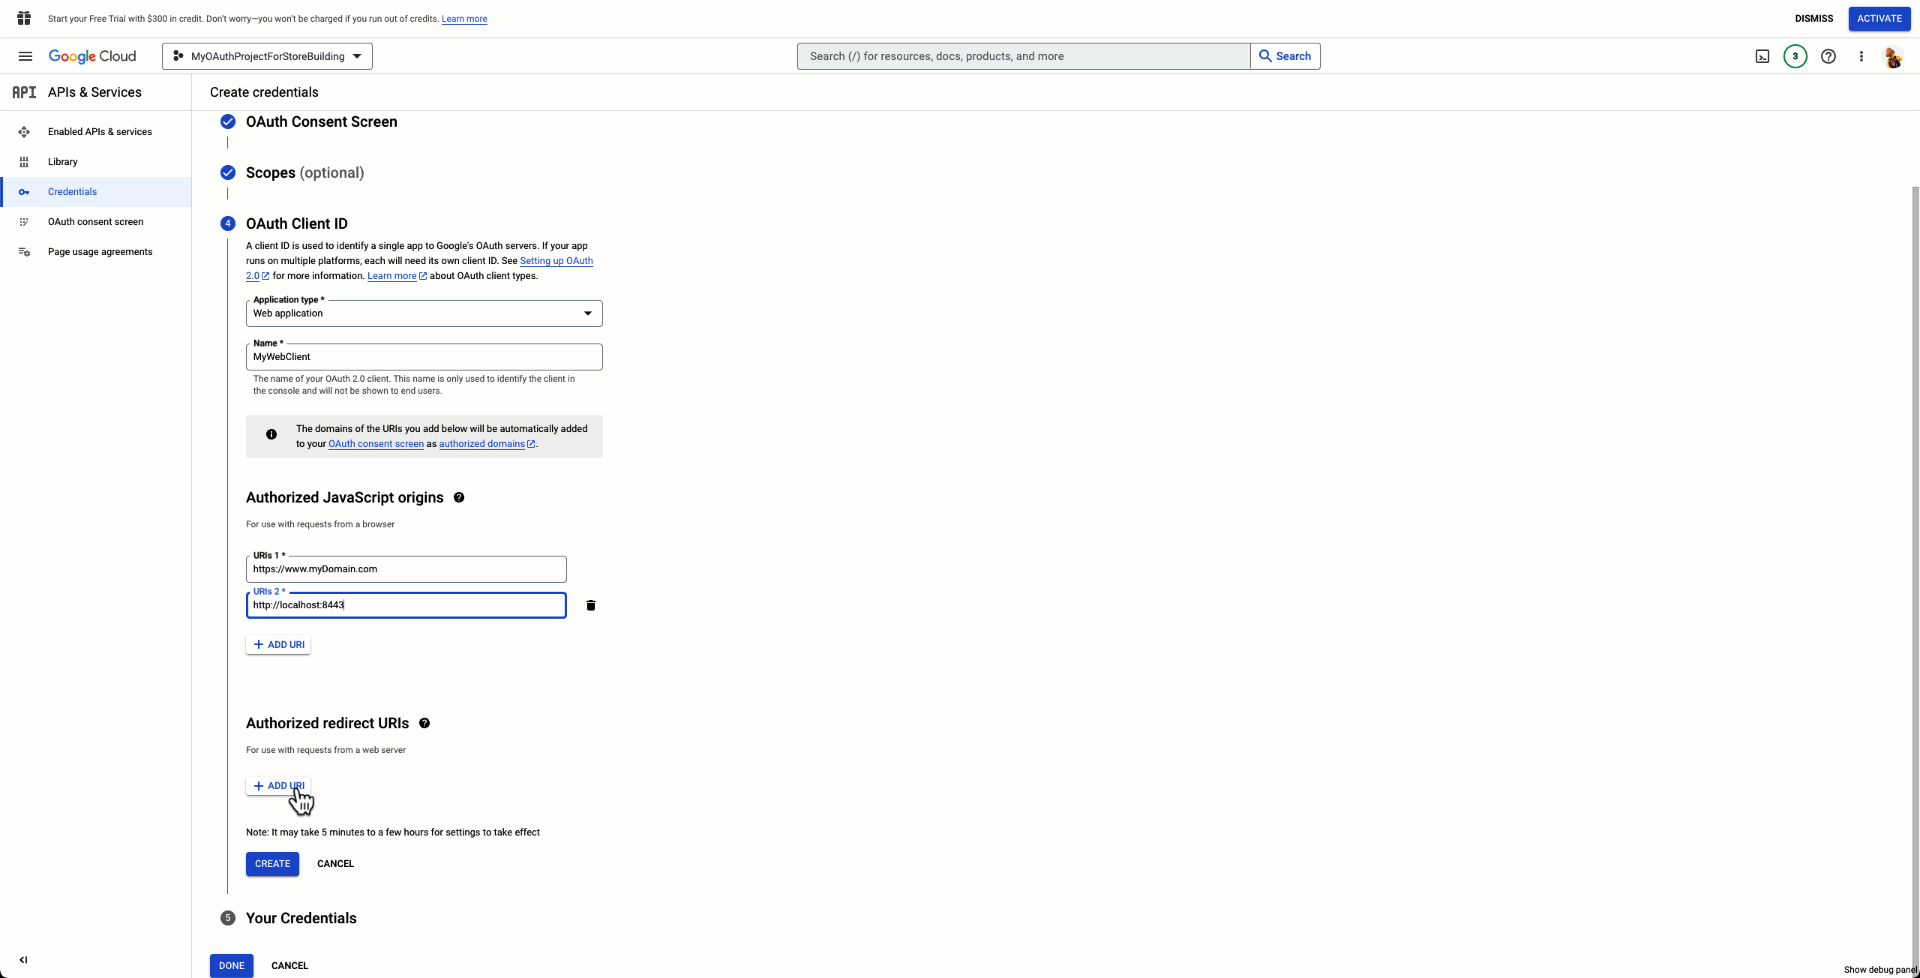
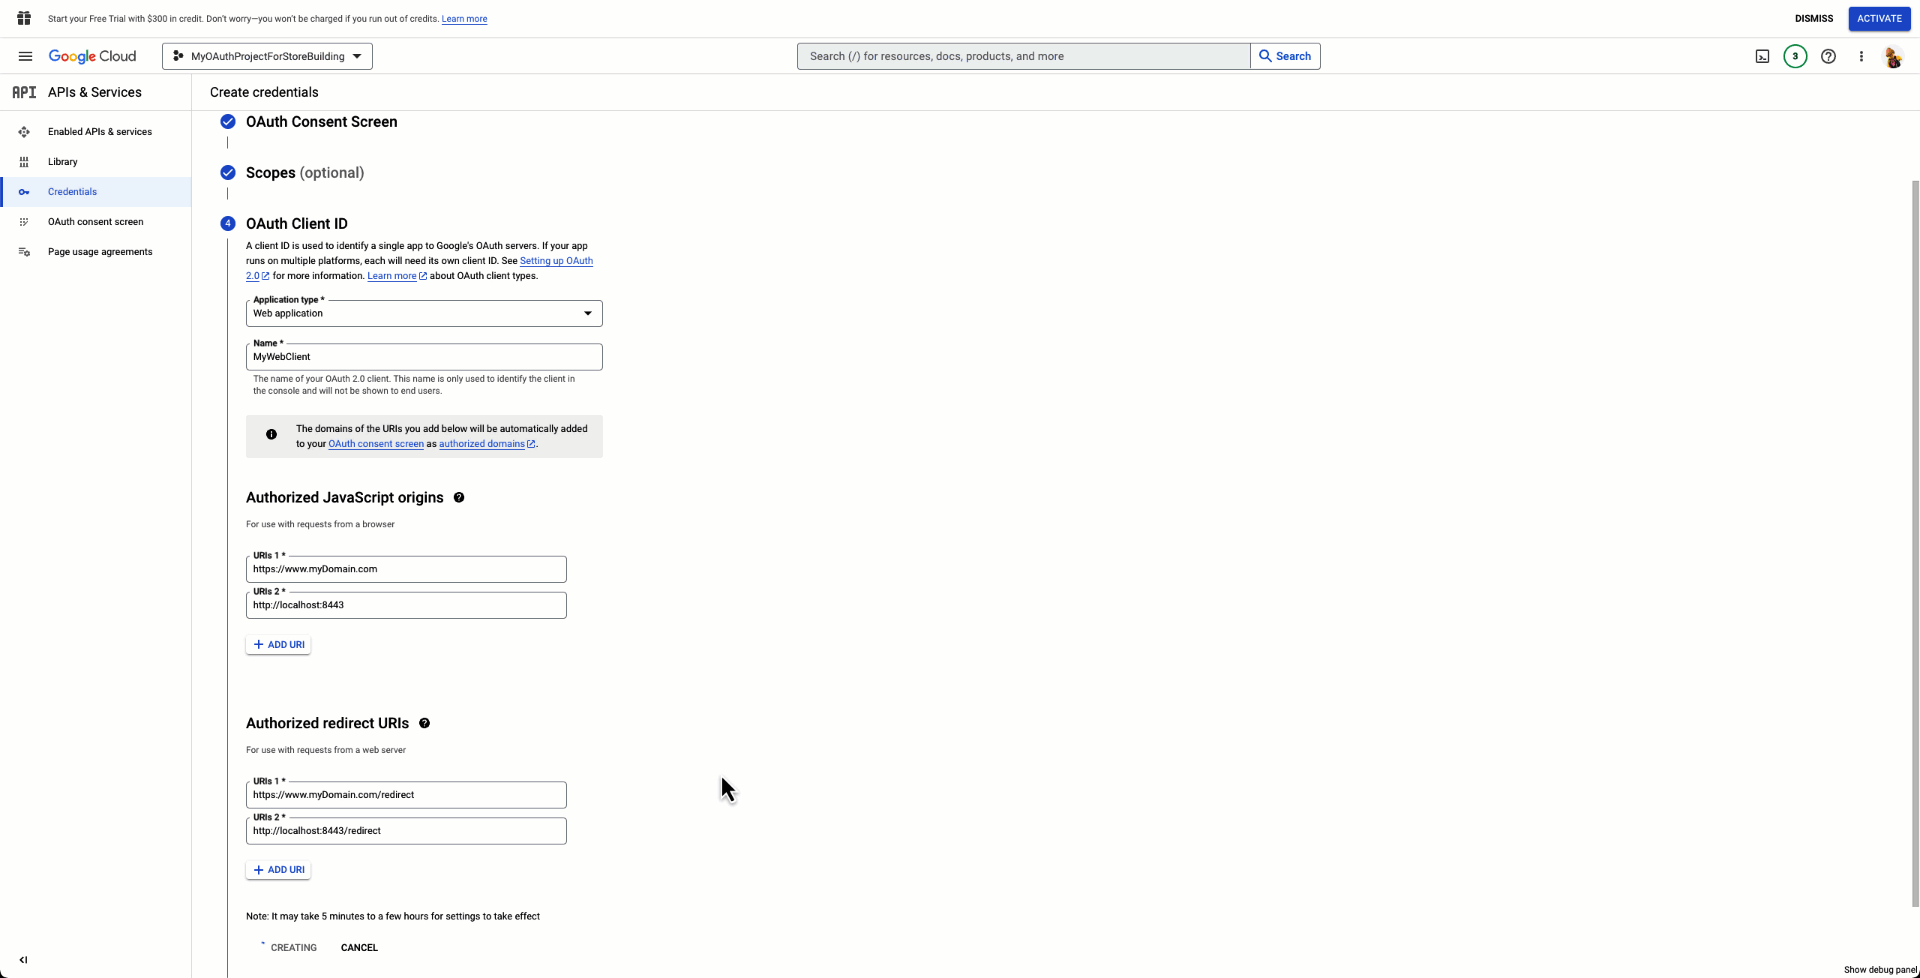
You can add more scopes to your application in the future as you need them.For OAuth Client ID, you first select the application type, "Web Application". Then, give your Web Application a name. Next, add a few "Authorized Javascript Origins". The authorized javascript origins tell your OAuth Client hosted endpoint can call your OAuth Application. You can add more than one. If you are still in development, you can add
http://localhostas an option, for example.
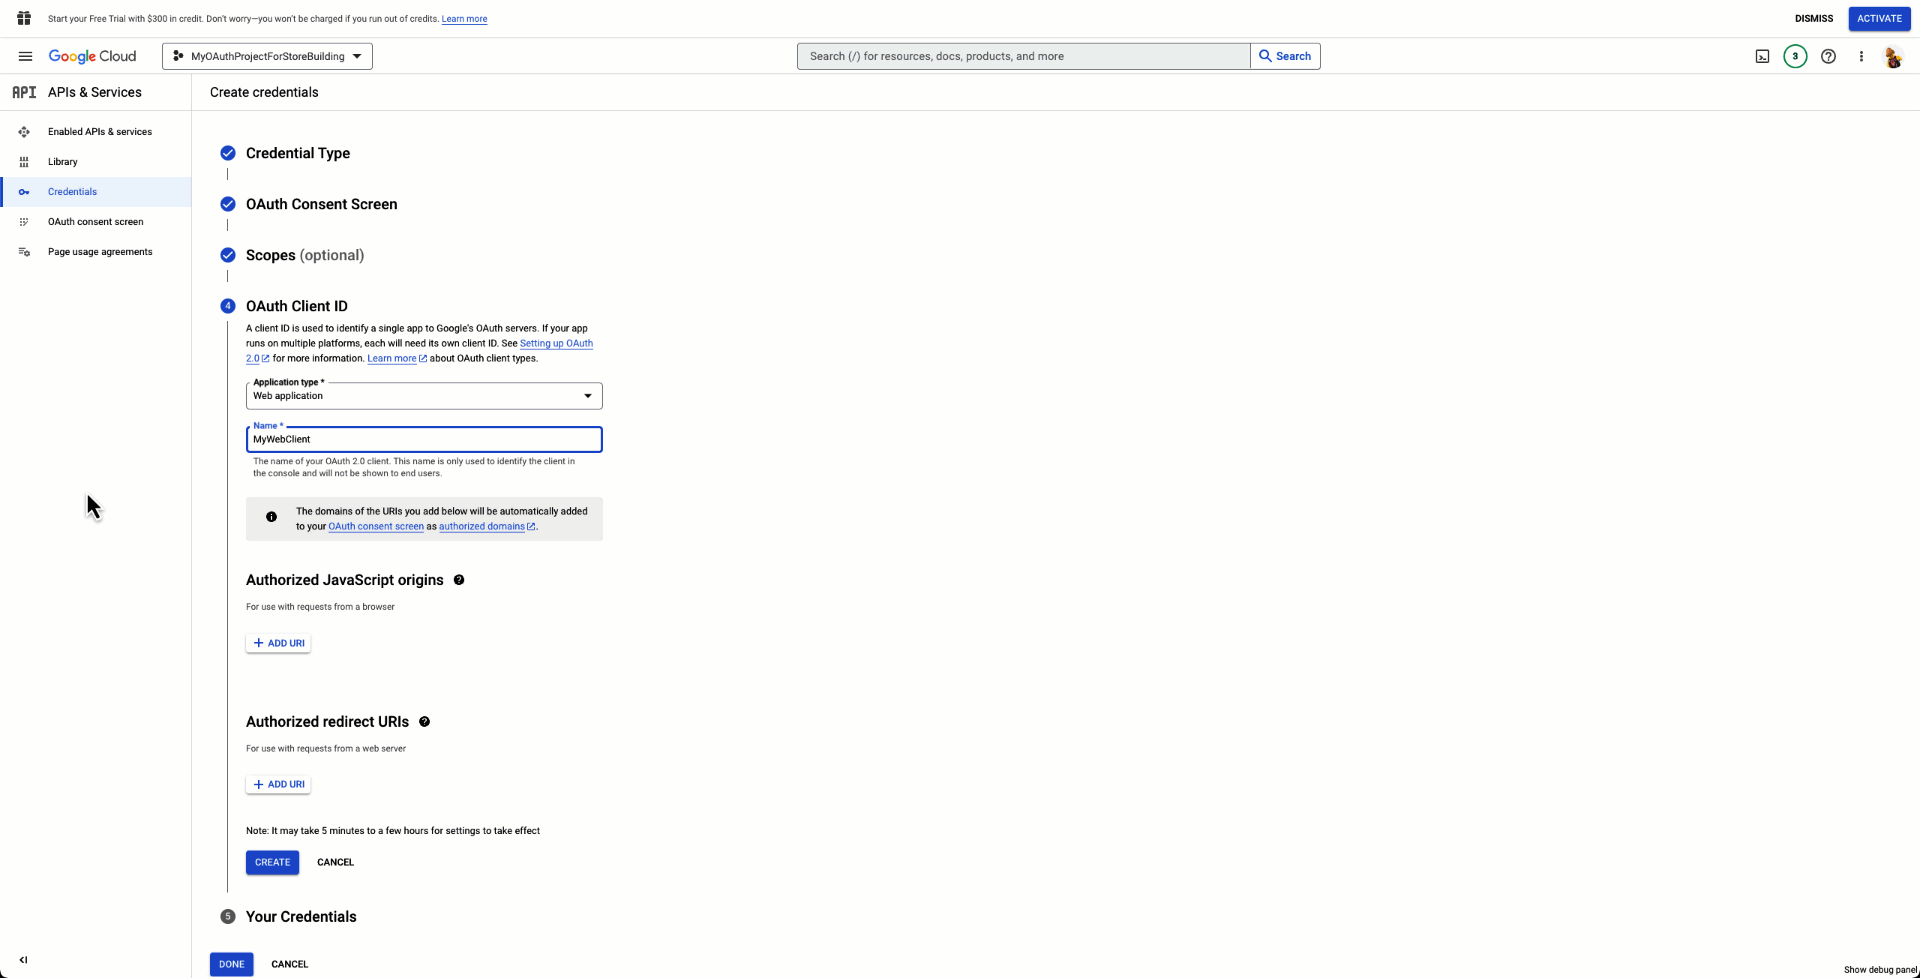
Similarly, you want to add an Authorized redirect URL. The authorized redirect url tells the OAuth application where to send the user after the application is finished loading. So, for example, if you're in development, you can redirect to an endpoint such ashttp://localhost/authenticated. If you have a public domain already, you can add that as well; however, for a public domain, you should be utilizing the HTTPS protocol. Finally, select "Create".
Your credentials are created. You can download your Client ID profile and utilize these credentials from within your application and use them with code examples.
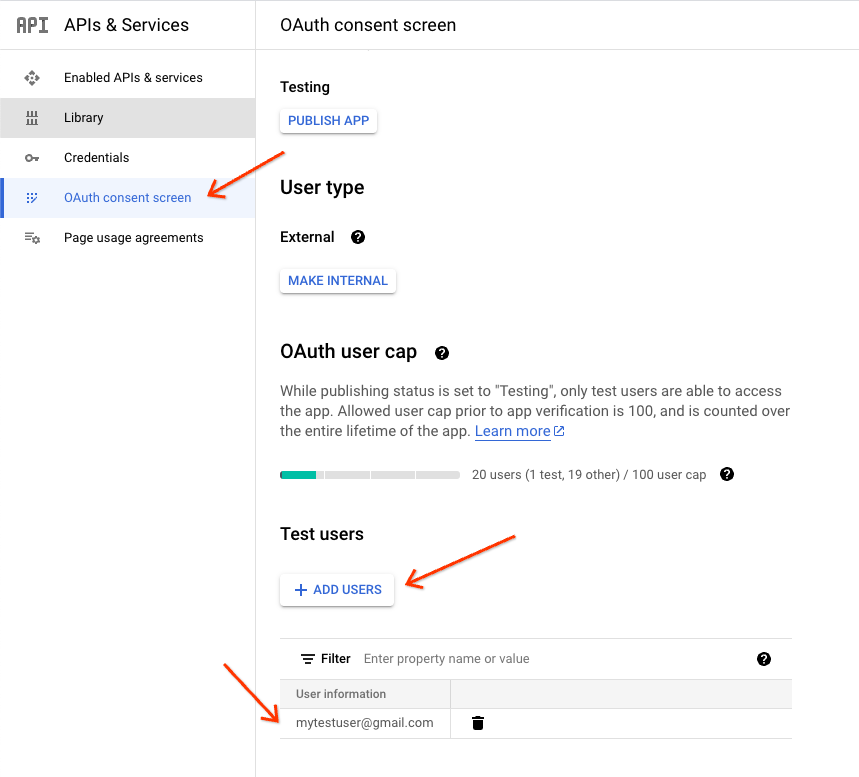
Add Test Users
If your application has not been published yet, you need to add Test Users to test your integration. If you don't add test users, you are not able to utilize your OAuth client.
Go to API & Services within your Cloud Developer Dashboard.
Click "OAuth consent screen".
Under Test users select, "+Add Users".
Enter the email address of the test user and select, "Save".
Your test user is added, and you can add up to 100 users without application verification.
Paid Ads
Keep in mind, if you decide to integrate with the consolidated billing system, you need to get approval. Learn more about this in the Direct Billing Option section of this Guide.
Ongoing Management
Initial sub-account, initial quota offer and ongoing quota increase process
For Merchant Center sub-accounts created under your MCA, these merchants are subject to your MCA's quota. These are quotas such as sub accounts, offers, and feeds. For more information about quota type and amounts, see the Quota Management section of the guide and how to request an increase or contact your Google POC.
We recommend increasing the quota once you a few test accounts. This prevents any issues when you pilot or go live. As your integration develops with adding more merchants and offers, you need to be aware of this quota to increase accordingly.
Content API quotas
The Content API has limits and quotas with particular features. Review Published Limits to understand this in more detail and how to apply for increase.
Schema.org (recommended but not required)
Schema.org shows you how to implement structured data markup for your product data. This allows Google to extract relevant information from product landing pages, such as accurate price & availability information:
Before getting started, review About structured data markup for Merchant Center and verify your merchants' sites meet the requirements.
For general guidelines for structured data beyond your Merchant Center product data, visit schema.org's Getting started guide. We also recommend using Search Console to troubleshoot structured data related issues, and to measure your site's search traffic and performance.
Additional guidance can be found in the Search Product structured data article, specifically the sections on Merchant Listings.
Contact Channels
Refer to the options below if you have any questions:
Content API for Shopping Support: You can contact the Content API for Shopping Support Team for technical support.
Google Merchant Support: This support channel is mainly for merchants who need support with Merchant Center and Paid Ads.
Google Point of Contact (POC): If you have a dedicated Google POC to support your integration, we recommend reaching out to them directly for any questions.