LE Audio Validator App User Manual

This page is specific to the LE Audio version of the Validator App. See the Audio switch Validator App page for help on the Audio switch version of the Validator App.

Setup

To enable testing in the Validator app:

  • Ensure the device has GmsCore version 23.37.xx or later.
  • Ensure your testing emails are part of the Fast Pair Partner Testing Group.
    • It may take 6-24 hours for newly registered emails and phones to synchronize permissions.
    • Logging in and out of the associated Google Account may also trigger an immediate sync.

The GMS version can be found in the App Info page for Google Play services.

Required Devices

Testing requires at least two (2) phones:

  • One running Android 15 (U) with LE Audio support (e.g. a Pixel 7)
  • One running Android 6-13 (M-T) which does not support LE Audio.
    • Data-only devices need to use only one of these phones.

Connecting to the LE Audio Profile on Android 15 (V)

LE Audio is not natively enabled on Android 15 (V). To enable it:

  • Navigate to the 'Developer Options' page on the phone.
    • To enable Developer Options:
    • Navigate to Settings > System > About Phone > Build number.
    • Tap "Build number" 7 times.
  • Turn off "Disable Bluetooth LE audio".
  • Turn on "Bypass Bluetooth LE Audio Allowlist".
  • Reboot the phone.

This shows the LEA switches under the Developer Options page.

Enabling the BLE Tests for Data-Only Devices

The Validator App will display the data-only test menu if the device's Model ID has 'Data-Only Connection' selected in the Device Console (note: not all device types have this option). The test menu for this mode is as shown:

The App automatically updates the test list for a data-only device once the switch is enabled.

Enabling the BLE Specification and BT Classic Tests for Devices Without LE Audio Support

Testers will need to flip the 'Enable LE spect test' switch to see BLE tests. The tester will need to confirm that the device under test does not support LE Audio in order to see the BT Classic tests, as shown:

The test list is only updated after the tester confirms that the device does not support LE Audio.

Enabling the BLE Specification and LE Audio Tests on a Pixel Phone Running Android 14 (U) or Later

Testers will need to flip the 'Enable LE spect test' switch to see BLE tests. Then, testers must acknowledge the remaining prompts to see the test screen. The App will automatically populate the available tests for this configuration, including LE Audio tests, like shown:

The App can populate the correct test list because Pixel phones are a known configuration.

Enabling the BLE Specification and LE Audio Tests on a Pixel Phone Running Android 13 (T) or Earlier

Testers will need to flip the 'Enable LE spect test' switch to see BLE tests. Then, testers must acknowledge the remaining prompts to see the test screen. The App will automatically populate the available tests for this configuration, including BT classic tests, like shown:

The App can populate the correct test list because Pixel phones are a known configuration.

Enabling the BLE Specification and LE Audio Tests on a non-Pixel Phone with LE Audio Support

Testers will need to flip the 'Enable LE spect test' switch to see BLE tests. Testers must tell the Validator App whether or not the test Phone and device (seeker) supports connections with LE Audio. The App can't know this information for non-Pixel phones, as feature support is controlled by the OEM. Selecting LE Audio support in the pop-up will enable the LE Audio tests, like shown:

The LE Audio tests are shown if the user confirms that the non-Pixel Phone supports LE Audio.

Enabling the BLE Specification and LE Audio Tests on a non-Pixel Phone With A2DP and HFP Support

Testers will need to flip the 'Enable LE spect test' switch to see BLE tests. Testers must tell the Validator App whether or not the test Phone and device (seeker) supports connections with LE Audio. The App can't know this information for non-Pixel phones, as feature support is controlled by the OEM. Selecting A2DP + HFP support in the pop-up will enable BT Classic tests, like shown:

BT Classic tests are shown if the user selects A2DP + HFP support for the non-Pixel Phone.

Mandatory Tests

See the Mandatory Tests Section for which tests are required for a given Fast Pair version and device type. Note that the table has separate tabs for Data-only Devices, Phones running Android 13 or Earlier, and Phones running Android 14 or later.

Common Audio Service UUID Verification

This test verifies that the LE connectable advertisement includes the CAS UUID, as required by the Bluetooth Adapter Profile (BAP 1.0.1) and Common Audio Profile requirements.

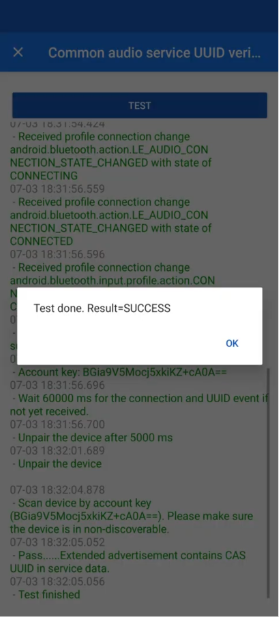
A successful test will look like this:

A successful test displays Passing results in the log.

This test verifies that the Provider uses the correct address type (Fast Pair service data (0xFE2C)) when advertising during initial pairing (Identity address) and subsequent pairing (RPA) attempts.

  • Devices that support CTKD from Classic to LE should advertise RPA during initial pairing.
  • All other devices support CTKD from LE to Classic should advertise their identity address during initial pairing.
  • All devices, regardless of CTKD support, should advertise their RPA during subsequent pairing.

A successful test will look like this:

A successful test displays Passing results in the log.

Test Changes in BLE Specification Mode

Some tests will change once the "Enable LE spec tests" switch is activated. For example, the "Battery Level Update" tests will change to "Battery Level Update with LE audio connection" and "Battery Level Update with classic profile connection". The modified tests will only appear on their respective Android versions.

Any test that changes like this must be tested on 2 phones to ensure proper functionality, one phone without LE Audio and another with LE Audio. For Pixel phones, this means testing on a phone with Android 14 (U) or later and a phone with Android 13 (T) or earlier. For non-Pixel phones, this means testing on a phone with LE Audio implemented and one with only A2D + HFP.

An example of the change:

The test changes to LE Audio on Android 14 or later, while it uses BLE CLassic on Android 13 or earlier.

How to Upload Results to the Device Console

How to Submit Your Results

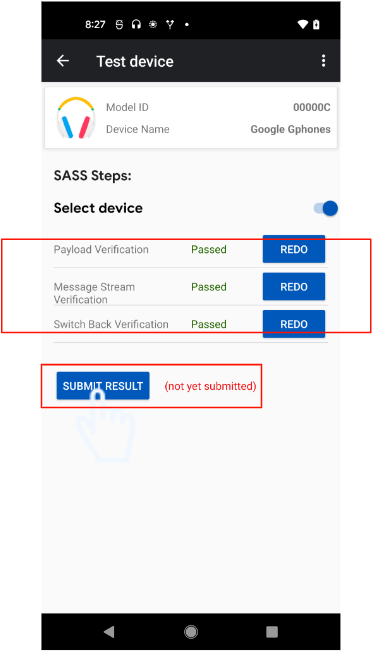
The "SUBMIT RESULT' button will present a summary of the test results but does not actually submit the results to Google.

The submittal process begins by pressing the 'SUBMIT RESULT' button.

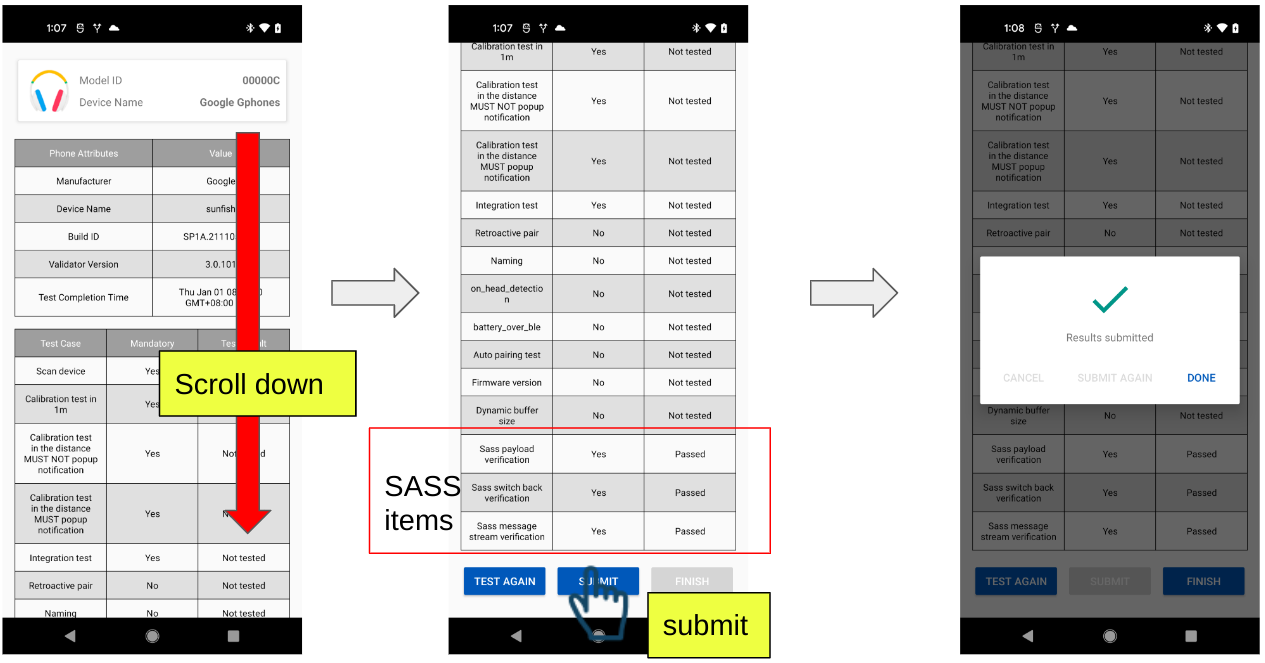
After reviewing all results, press the 'SUBMIT' button at the bottom of the results page to submit results to Google.

Results are submitted after scrolling to the bottom of the results page and pressing

Viewing Uploaded Results in the Device Console

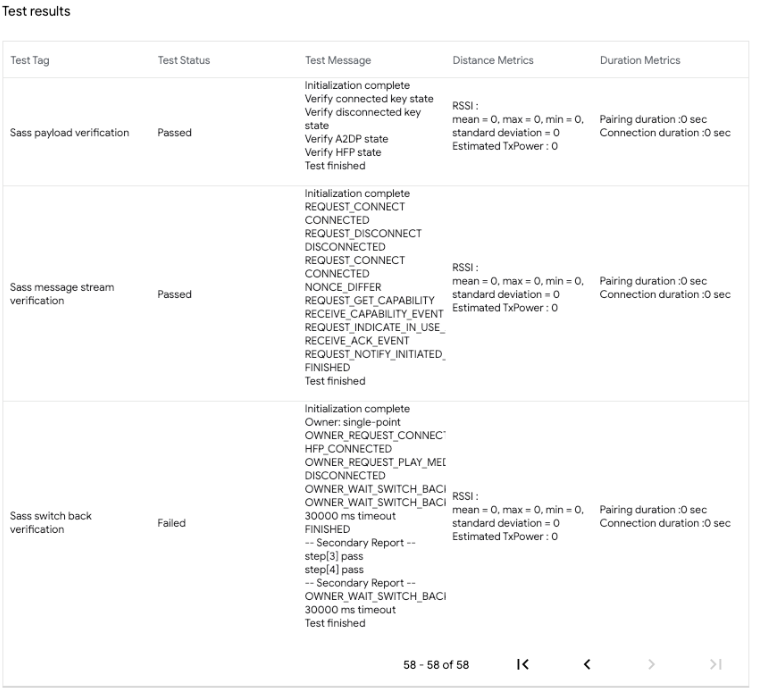
Submitted test results can be found on the Nearby Console. (Distance Metrics & Duration Metrics will be removed for Audio switch test cases). For example:

Tests results are displayed in a table in the Nearby Console.

Troubleshooting

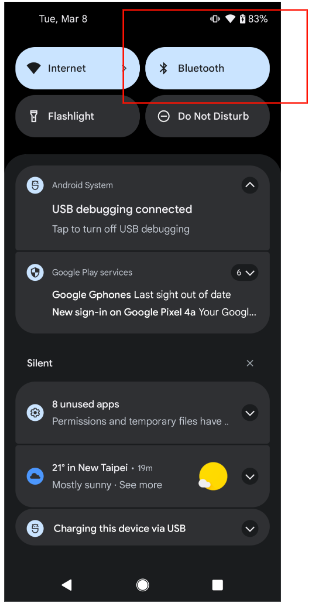
Try toggling Bluetooth off and on if all your tests failed.

Bluetooth can be enabled and disabled from the button on the pull-down menu.

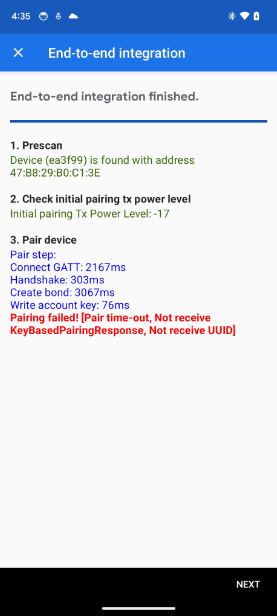
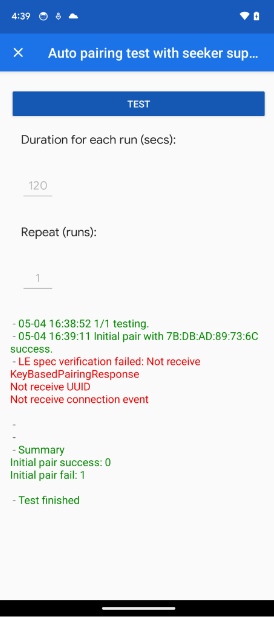
Not Receive KeyBasedPairingResponse

If pairing succeeds but the error message still appears like shown, then this is likely caused by an old GMS core version. Verify that the phone has been configured as described in the setup section.

The following screenshots show how this error can manifest in different tests.

The app shows a KeyBasedPairingResponse error in the E2E Integration test. The app shows a KeyBasedPairingResponse error in the Auto Pairing and Auto Subsequent Pairing tests.

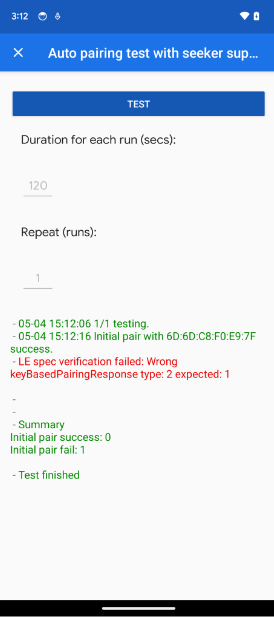
Wrong KeyBasedPairingResponse Type

This can be caused by the Provider sending the wrong message type. A Seeker supporting LE Audio should receive message type 2, with all other cases receiving message type 1.

The following screenshots show how this error can manifest in different tests.

The app shows a KeyBasedPairingResponseType error in the E2E Integration test. The app shows a KeyBasedPairingResponseType error in the Auto Pairing and Auto Subsequent Pairing tests.

KeyBasedPairingExtensionResponse Wrong Address Length

This can be caused by choosing the incorrect type of CSIP support for a LE Audio device. Devices supporting CSIP and LE Audio should receive an address length of 2, with all other cases receiving an address length of 1.

The following screenshots show how this error can manifest in different tests.

The app shows a KeyBasedPairingExtensionResponse address length error in the E2E Integration test. The app shows a KeyBasedPairingExtensionResponse address length error in the Auto Pairing and Auto Subsequent Pairing tests.

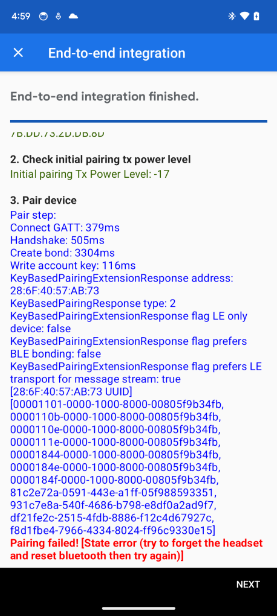
State error

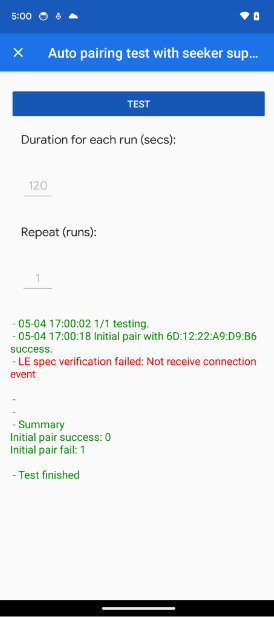
This is usually caused by the provider (device) failing to connect. For CSIP devices, there must be two (2) connection events.

The following screenshots show how this error can manifest in different tests.

The app shows a State error in the E2E Integration test. The app shows a State error in the Auto Pairing and Auto Subsequent Pairing tests.

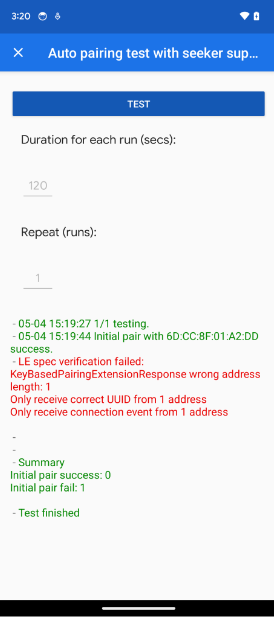
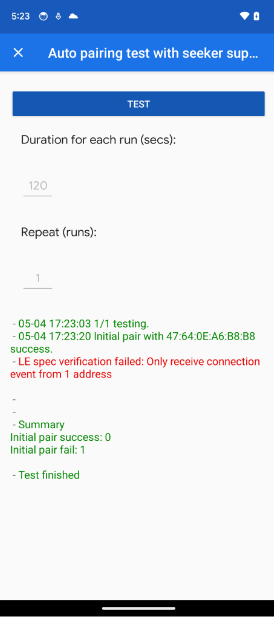
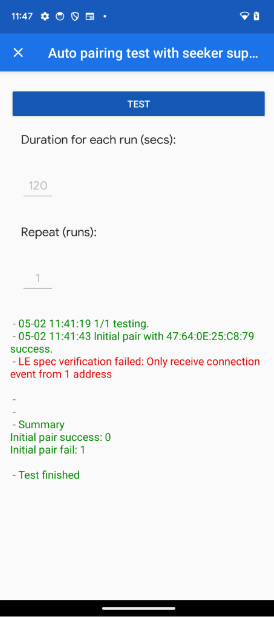
Only Receive Connection Event From 1 Address

This occurs when a Seeker receives only 1 address from a CSIP device. CSIP- capable devices should always provide 2 addresses.

The following screenshots show how this error can manifest in different tests.

The app shows the only receive connection event from 1 address error in the Auto Pairing and Auto Subsequent Pairing tests.

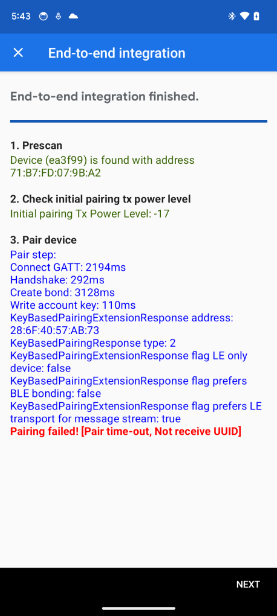
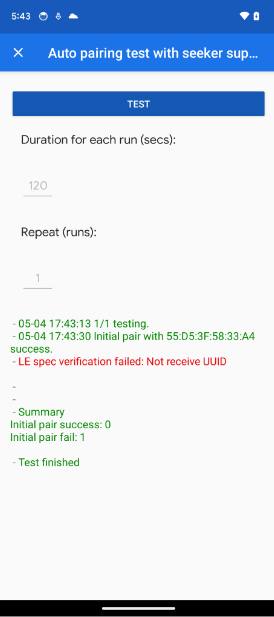
Not receive UUID

The Seeker didn't receive a UUID of any kind.

The following screenshots show how this error can manifest in different tests.

The app shows a UUID error in the E2E Integration test. The app shows a UUID error in the Auto Pairing and Auto Subsequent Pairing tests.

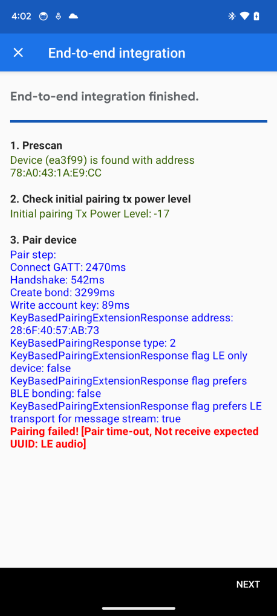
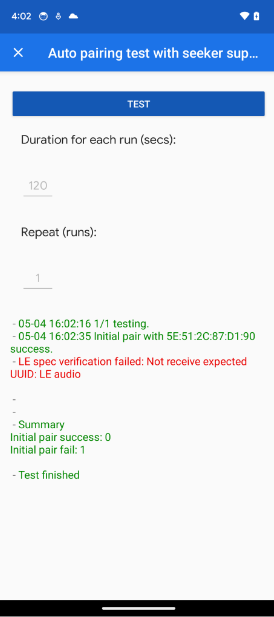
Not Receive Expected UUID

The Seeker expects to receive a specific kind of UUID for different scenarios. The following table defines what the UUID should be in these different cases.

The Provider Supports LE Audio The Provider Doesn't Support LE Audio The Provider is a Data-Only Device
The Seeker Does Not Support BLE 110B or 1108 or 111E 110B or 1108 or 111E N/A
The Seeker Supports BLE 110B or 1108 or 111E 110B or 1108 or 111E 1812
The Seeker Supports BLE and LEA 184E 110B or 1108 or 111E 1812

The following screenshots show how this error can manifest in different tests.

The app shows the unexpected UUID error in the E2E Integration test. The app shows the unexpected UUID error in the Auto Pairing and Auto Subsequent Pairing tests.

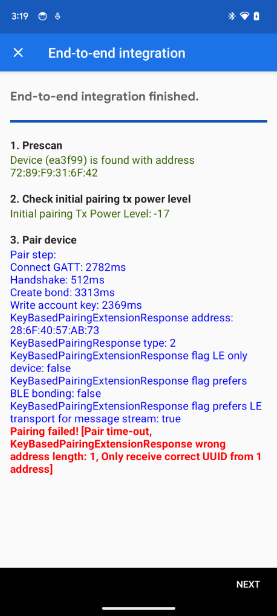
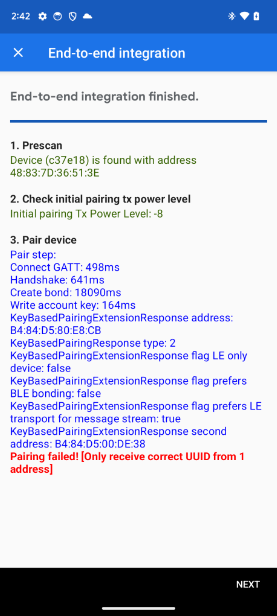
Only Receive Correct UUID From 1 Address

This occurs when a Seeker receives only 1 address from a CSIP device. CSIP-capable devices should always provide 2 addresses.

The following screenshots show how this error can manifest in different tests.

The app shows the only receive 1 UUID error in the E2E Integration test. The app shows the only receive 1 UUID error in the Auto Pairing and Auto Subsequent Pairing tests.