
หากส่วนเสริมของ Google Workspace เชื่อมต่อกับบริการหรือ API ของบุคคลที่สาม ที่ต้องมีการให้สิทธิ์ ส่วนเสริมจะแจ้งให้ ผู้ใช้ลงชื่อเข้าใช้และให้สิทธิ์เข้าถึงได้
หน้านี้อธิบายวิธีตรวจสอบสิทธิ์ผู้ใช้โดยใช้ขั้นตอนการให้สิทธิ์ (เช่น OAuth) ซึ่งรวมถึงขั้นตอนต่อไปนี้
- ตรวจหาเมื่อต้องมีการให้สิทธิ์
- แสดงอินเทอร์เฟซการ์ดที่แจ้งให้ผู้ใช้ลงชื่อเข้าใช้บริการ
- รีเฟรชส่วนเสริมเพื่อให้ผู้ใช้เข้าถึงบริการหรือทรัพยากรที่ได้รับการปกป้องได้
หากส่วนเสริมต้องการเพียงข้อมูลประจำตัวของผู้ใช้ คุณก็สามารถตรวจสอบสิทธิ์ผู้ใช้ได้โดยตรงโดยใช้รหัส Google Workspace หรืออีเมลของผู้ใช้ หากต้องการใช้ อีเมลเพื่อการตรวจสอบสิทธิ์ โปรดดูการตรวจสอบคำขอ JSON หากสร้างส่วนเสริมโดยใช้ Google Apps Script คุณจะทำให้กระบวนการนี้ง่ายขึ้นได้โดยใช้ไลบรารี OAuth2 สำหรับ Google Apps Script (นอกจากนี้ยังมีเวอร์ชัน OAuth1 ด้วย)
ตรวจหาว่าต้องมีการให้สิทธิ์
เมื่อใช้ส่วนเสริม ผู้ใช้อาจไม่ได้รับอนุญาต ให้เข้าถึงทรัพยากรที่ได้รับการปกป้องด้วยเหตุผลหลายประการ เช่น เหตุผลต่อไปนี้
- ยังไม่ได้สร้างโทเค็นเพื่อการเข้าถึงเพื่อเชื่อมต่อกับบริการของบุคคลที่สาม หรือโทเค็นหมดอายุแล้ว
- โทเค็นเพื่อการเข้าถึงไม่ครอบคลุมทรัพยากรที่ขอ
- โทเค็นเพื่อการเข้าถึงไม่ครอบคลุมขอบเขตที่จำเป็นของคำขอ
ส่วนเสริมควรตรวจหาเคสเหล่านี้เพื่อให้ผู้ใช้ลงชื่อเข้าใช้และเข้าถึงบริการของคุณได้
หากคุณกำลังสร้างใน Apps Script ฟังก์ชันไลบรารี OAuth
hasAccess() จะบอกได้ว่าคุณมีสิทธิ์เข้าถึงบริการหรือไม่
หรือเมื่อใช้คำขอ
UrlFetchApp fetch()
คุณสามารถตั้งค่าพารามิเตอร์ muteHttpExceptions เป็น true ได้ ซึ่งจะ
ป้องกันไม่ให้คำขอแสดงข้อยกเว้นเมื่อคำขอล้มเหลว และช่วยให้คุณ
ตรวจสอบรหัสการตอบกลับของคำขอและเนื้อหาในออบเจ็กต์ HttpResponse ที่ส่งคืนได้
แจ้งให้ผู้ใช้ลงชื่อเข้าใช้บริการของคุณ
เมื่อส่วนเสริมตรวจพบว่าต้องมีการให้สิทธิ์ ส่วนเสริมจะต้องแสดงอินเทอร์เฟซการ์ด เพื่อแจ้งให้ผู้ใช้ลงชื่อเข้าใช้บริการ การ์ดลงชื่อเข้าใช้ต้อง เปลี่ยนเส้นทางผู้ใช้ให้ดำเนินการตรวจสอบสิทธิ์และการให้สิทธิ์ของบุคคลที่สาม ในโครงสร้างพื้นฐานของคุณให้เสร็จสมบูรณ์
เมื่อสร้างส่วนเสริมโดยใช้ปลายทาง HTTP เราขอแนะนำให้คุณป้องกันแอปปลายทางด้วยการลงชื่อเข้าใช้ด้วย Google และรับรหัสผู้ใช้โดยใช้โทเค็นข้อมูลประจำตัว ที่ออกให้ระหว่างการลงชื่อเข้าใช้ การอ้างสิทธิ์ย่อย มีรหัสที่ไม่ซ้ำกันของผู้ใช้และสามารถเชื่อมโยงกับรหัสจาก ส่วนเสริมของคุณได้
สร้างและส่งคืนบัตรลงชื่อเข้าใช้
สำหรับการ์ดลงชื่อเข้าใช้ของบริการ คุณสามารถใช้การ์ดการให้สิทธิ์พื้นฐานของ Google หรือปรับแต่งการ์ดเพื่อ แสดงข้อมูลเพิ่มเติม เช่น โลโก้ขององค์กร หากคุณ เผยแพร่ส่วนเสริม ต่อสาธารณะ คุณต้องใช้การ์ดที่กำหนดเอง
บัตรอนุญาตพื้นฐาน
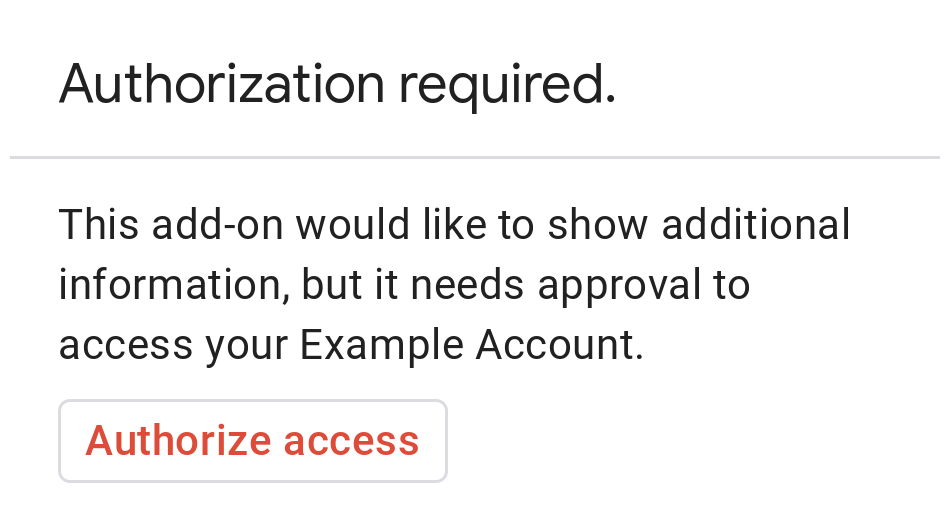
รูปภาพต่อไปนี้แสดงตัวอย่างบัตรการให้สิทธิ์พื้นฐานของ Google


หากต้องการแจ้งให้ผู้ใช้ทราบด้วยบัตรการให้สิทธิ์พื้นฐาน คุณต้องส่งคืนออบเจ็กต์
AuthorizationError โค้ดต่อไปนี้แสดงตัวอย่างออบเจ็กต์
AuthorizationError
Apps Script
CardService.newAuthorizationException()
    .setAuthorizationUrl('AUTHORIZATION_URL')
    .setResourceDisplayName('RESOURCE_DISPLAY_NAME')
    .throwException();
JSON
แสดงผลการตอบกลับ JSON ต่อไปนี้
{
  "basic_authorization_prompt": {
    "authorization_url": "AUTHORIZATION_URL",
    "resource": "RESOURCE_DISPLAY_NAME"
  }
}
แทนที่ค่าต่อไปนี้
AUTHORIZATION_URL: URL ของเว็บแอปที่ จัดการการให้สิทธิ์RESOURCE_DISPLAY_NAME: ชื่อที่แสดงสำหรับ ทรัพยากรหรือบริการที่ได้รับการปกป้อง ชื่อนี้จะแสดงต่อผู้ใช้ใน ข้อความแจ้งการให้สิทธิ์ เช่น หากRESOURCE_DISPLAY_NAMEของคุณคือExample Accountพรอมต์จะระบุว่า "ส่วนเสริมนี้ ต้องการแสดงข้อมูลเพิ่มเติม แต่ต้องได้รับอนุมัติให้เข้าถึง บัญชีตัวอย่างของคุณ"
หลังจากให้สิทธิ์เสร็จสมบูรณ์แล้ว ระบบจะแจ้งให้ผู้ใช้รีเฟรช ส่วนเสริมเพื่อเข้าถึงทรัพยากรที่ได้รับการปกป้อง
ส่งคืนบัตรการให้สิทธิ์ใน Google Chat
หากส่วนเสริมขยาย Google Chat และผู้ใช้
เรียกใช้ภายใน Google Chat ผู้ใช้จะดำเนินการให้สิทธิ์
ให้เสร็จสมบูรณ์ได้โดยไม่ต้องรีเฟรชด้วยตนเอง Google Chat รองรับการลองดำเนินการก่อนหน้าอีกครั้งโดยอัตโนมัติ หากทริกเกอร์เป็นข้อความ เพิ่มลงในพื้นที่ทำงาน หรือคำสั่งแอป สำหรับทริกเกอร์เหล่านี้ ส่วนเสริมจะได้รับ completeRedirectUri ในเพย์โหลดของเหตุการณ์
คุณต้องเข้ารหัส completeRedirectUri ใน URL การกำหนดค่าเพื่อทริกเกอร์
การลองใหม่โดยอัตโนมัติ การเปลี่ยนเส้นทางไปยัง URL นี้จะส่งสัญญาณไปยัง Google Chat ว่าคำขอการกำหนดค่า
ได้รับการดำเนินการแล้ว และอนุญาตให้ Google Chat ลองดำเนินการ
ก่อนหน้าอีกครั้ง
เมื่อเปลี่ยนเส้นทางผู้ใช้ไปยัง configCompleteRedirectUrl
ที่ระบุไว้ในข้อความต้นฉบับได้สำเร็จ Google Chat จะทำตามขั้นตอนต่อไปนี้
- ลบพรอมต์ที่แสดงต่อผู้ใช้ที่เริ่มการสนทนา
- ส่งออบเจ็กต์เหตุการณ์เดิมไปยังส่วนเสริมเดียวกัน เป็นครั้งที่ 2
หากคุณไม่ได้เข้ารหัส completeRedirectUri ใน URL การกำหนดค่า ผู้ใช้จะยังคงทำขั้นตอนการให้สิทธิ์ให้เสร็จสมบูรณ์ได้
อย่างไรก็ตาม Google Chat จะไม่ลองดำเนินการก่อนหน้าอีกครั้ง และผู้ใช้จะต้องเรียกใช้ส่วนเสริมของคุณอีกครั้งด้วยตนเอง
ตัวอย่างโค้ดต่อไปนี้แสดงวิธีที่แอป Chat สามารถ ขอข้อมูลเข้าสู่ระบบ OAuth2 แบบออฟไลน์ จัดเก็บไว้ในฐานข้อมูล และใช้ข้อมูลดังกล่าวเพื่อ ทำการเรียก API ด้วยการตรวจสอบสิทธิ์ผู้ใช้
บัตรการให้สิทธิ์ที่กำหนดเอง
หากต้องการแก้ไขข้อความแจ้งการให้สิทธิ์ คุณสามารถสร้างการ์ดที่กำหนดเองสำหรับประสบการณ์การลงชื่อเข้าใช้ของบริการได้
หากเผยแพร่ส่วนเสริมแบบสาธารณะ คุณต้องใช้การ์ดการให้สิทธิ์ที่กำหนดเองสำหรับแอปพลิเคชันโฮสต์ของ Google Workspace ทั้งหมด ยกเว้น Chat ดูข้อมูลเพิ่มเติมเกี่ยวกับข้อกำหนดในการเผยแพร่สำหรับ Google Workspace Marketplace ได้ที่เกี่ยวกับรีวิวแอป
บัตรที่ส่งคืนต้องมีลักษณะดังนี้
- แจ้งให้ผู้ใช้ทราบอย่างชัดเจนว่าส่วนเสริมกำลังขอสิทธิ์เข้าถึงบริการที่ไม่ใช่ของ Google ในนามของผู้ใช้
- ระบุให้ชัดเจนว่าส่วนเสริมทำอะไรได้บ้างหากได้รับ อนุญาต
- มีปุ่มหรือวิดเจ็ตที่คล้ายกันซึ่งนำผู้ใช้ไปยัง URL การให้สิทธิ์ของบริการ ตรวจสอบว่าผู้ใช้เข้าใจฟังก์ชันของวิดเจ็ตนี้อย่างชัดเจน
- วิดเจ็ตด้านบนต้องใช้การตั้งค่า
OnClose.RELOADในออบเจ็กต์OpenLinkเพื่อให้มั่นใจว่าส่วนเสริมจะโหลดซ้ำหลังจากได้รับ การให้สิทธิ์ - ลิงก์ทั้งหมดที่เปิดจากข้อความแจ้งการให้สิทธิ์ต้องใช้ HTTPS
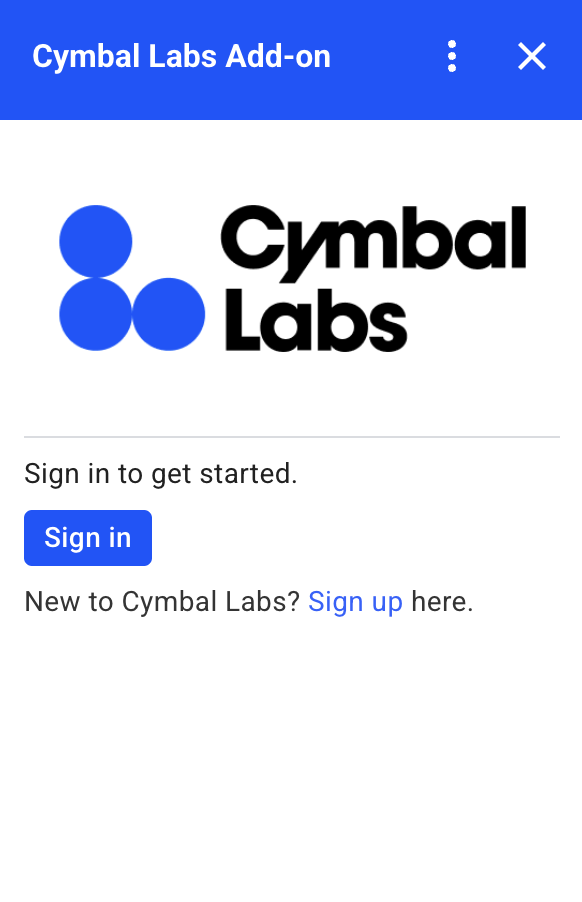
รูปภาพต่อไปนี้แสดงตัวอย่างการ์ดการให้สิทธิ์ที่กำหนดเองสำหรับหน้าแรกของส่วนเสริม การ์ดประกอบด้วยโลโก้ คำอธิบาย และปุ่มลงชื่อเข้าใช้


โค้ดต่อไปนี้แสดงวิธีใช้ตัวอย่างการ์ดที่กำหนดเองนี้
Apps Script
function customAuthorizationCard() {
    let cardSection1Image1 = CardService.newImage()
        .setImageUrl('LOGO_URL')
        .setAltText('LOGO_ALT_TEXT');

    let cardSection1Divider1 = CardService.newDivider();

    let cardSection1TextParagraph1 = CardService.newTextParagraph()
        .setText('DESCRIPTION');

    let cardSection1ButtonList1Button1 = CardService.newTextButton()
        .setText('Sign in')
        .setBackgroundColor('#0055ff')
        .setTextButtonStyle(CardService.TextButtonStyle.FILLED)
        .setAuthorizationAction(CardService.newAuthorizationAction()
            .setAuthorizationUrl('AUTHORIZATION_URL'));

    let cardSection1ButtonList1 = CardService.newButtonSet()
        .addButton(cardSection1ButtonList1Button1);

    let cardSection1TextParagraph2 = CardService.newTextParagraph()
        .setText('TEXT_SIGN_UP');

    let cardSection1 = CardService.newCardSection()
        .addWidget(cardSection1Image1)
        .addWidget(cardSection1Divider1)
        .addWidget(cardSection1TextParagraph1)
        .addWidget(cardSection1ButtonList1)
        .addWidget(cardSection1TextParagraph2);

    let card = CardService.newCardBuilder()
        .addSection(cardSection1)
        .build();
    return [card];
}

function startNonGoogleAuth() {
    CardService.newAuthorizationException()
        .setAuthorizationUrl('AUTHORIZATION_URL')
        .setResourceDisplayName('RESOURCE_DISPLAY_NAME')
        .setCustomUiCallback('customAuthorizationCard')
        .throwException();
  }
JSON
แสดงผลการตอบกลับ JSON ต่อไปนี้
{
  "custom_authorization_prompt": {
    "action": {
      "navigations": [
        {
          "pushCard": {
            "sections": [
              {
                "widgets": [
                  {
                    "image": {
                      "imageUrl": "LOGO_URL",
                      "altText": "LOGO_ALT_TEXT"
                    }
                  },
                  {
                    "divider": {}
                  },
                  {
                    "textParagraph": {
                      "text": "DESCRIPTION"
                    }
                  },
                  {
                    "buttonList": {
                      "buttons": [
                        {
                          "text": "Sign in",
                          "onClick": {
                            "openLink": {
                              "url": "AUTHORIZATION_URL",
                              "onClose": "RELOAD",
                              "openAs": "OVERLAY"
                            }
                          },
                          "color": {
                            "red": 0,
                            "green": 0,
                            "blue": 1,
                            "alpha": 1,
                          }
                        }
                      ]
                    }
                  },
                  {
                    "textParagraph": {
                      "text": "TEXT_SIGN_UP"
                    }
                  }
                ]
              }
            ]
          }
        }
      ]
    }
  }
}
แทนที่ค่าต่อไปนี้
LOGO_URL: URL ของโลโก้หรือรูปภาพ ต้องเป็น URL สาธารณะLOGO_ALT_TEXT: ข้อความแสดงแทนโลโก้หรือรูปภาพ เช่นCymbal Labs LogoDESCRIPTION: คำกระตุ้นให้ผู้ใช้ลงชื่อเข้าใช้ เช่นSign in to get started- วิธีอัปเดตปุ่มลงชื่อเข้าใช้
AUTHORIZATION_URL: URL ของเว็บแอปที่ จัดการการให้สิทธิ์- ไม่บังคับ: หากต้องการเปลี่ยนสีปุ่ม ให้อัปเดตค่าลอยตัว RGBA ของฟิลด์
colorสำหรับ Apps Script ให้อัปเดตเมธอดsetBackgroundColor()โดยใช้ค่าฐานสิบหก
TEXT_SIGN_UP: ข้อความที่แจ้งให้ผู้ใช้สร้างบัญชีหากยังไม่มี เช่นNew to Cymbal Labs? <a href=\"https://www.example.com/signup\">Sign up</a> here
จัดการการเข้าสู่ระบบของบุคคลที่สามในแอป Google Workspace
แอปพลิเคชันทั่วไปอย่างหนึ่งสำหรับส่วนเสริมของ Google Workspace คือการจัดเตรียมอินเทอร์เฟซสำหรับการโต้ตอบกับระบบของบุคคลที่สามจากภายใน แอปพลิเคชันโฮสต์ของ Google Workspace
ระบบของบุคคลที่สามมักกำหนดให้ผู้ใช้ลงชื่อเข้าใช้โดยใช้ รหัสผู้ใช้ รหัสผ่าน หรือข้อมูลเข้าสู่ระบบอื่นๆ เมื่อผู้ใช้ลงชื่อเข้าใช้บริการของบุคคลที่สามขณะที่ใช้โฮสต์ Google Workspace รายการใดรายการหนึ่ง คุณต้องตรวจสอบว่าผู้ใช้ไม่ต้องลงชื่อเข้าใช้อีกครั้งเมื่อเปลี่ยนไปใช้โฮสต์ Google Workspace อื่น
หากสร้างใน Apps Script คุณสามารถป้องกันคำขอเข้าสู่ระบบซ้ำๆ ได้ด้วยพร็อพเพอร์ตี้ผู้ใช้หรือโทเค็นรหัส ซึ่งจะอธิบาย ในส่วนต่อไปนี้
พร็อพเพอร์ตี้ผู้ใช้
คุณสามารถจัดเก็บข้อมูลการลงชื่อเข้าใช้ของผู้ใช้ในพร็อพเพอร์ตี้ผู้ใช้ของ Apps Script ได้ เช่น คุณอาจสร้าง JSON Web Token (JWT) ของคุณเองจากบริการเข้าสู่ระบบของบุคคลที่สามและบันทึกไว้ในพร็อพเพอร์ตี้ผู้ใช้ หรือบันทึกชื่อผู้ใช้และรหัสผ่านสำหรับบริการของบุคคลที่สาม
พร็อพเพอร์ตี้ผู้ใช้มีขอบเขตเพื่อให้ผู้ใช้ดังกล่าวเข้าถึงได้เท่านั้น
ภายในสคริปต์ของส่วนเสริม ผู้ใช้รายอื่นและสคริปต์อื่นๆ จะเข้าถึงพร็อพเพอร์ตี้เหล่านี้ไม่ได้ ดูรายละเอียดเพิ่มเติมได้ที่
PropertiesService
โทเค็นรหัส
คุณสามารถใช้โทเค็นรหัส Google เป็นข้อมูลเข้าสู่ระบบสำหรับบริการของคุณได้ ซึ่งเป็นวิธีหนึ่งในการใช้การลงชื่อเพียงครั้งเดียว ผู้ใช้เข้าสู่ระบบ Google อยู่แล้ว เนื่องจากอยู่ในแอปโฮสต์ของ Google
ตัวอย่างการกำหนดค่า OAuth ที่ไม่ใช่ของ Google
ตัวอย่างโค้ด Apps Script ต่อไปนี้แสดงวิธีกำหนดค่าส่วนเสริมให้ใช้ API ที่ไม่ใช่ของ Google ซึ่งต้องใช้ OAuth ตัวอย่างนี้ใช้ไลบรารี OAuth2 สำหรับ Apps Script เพื่อสร้างบริการสำหรับการเข้าถึง API
Apps Script
/**
* Attempts to access a non-Google API using a constructed service
* object.
*
* If your add-on needs access to non-Google APIs that require OAuth,
* you need to implement this method. You can use the OAuth1 and
* OAuth2 Apps Script libraries to help implement it.
*
* @param {String} url         The URL to access.
* @param {String} method_opt  The HTTP method. Defaults to GET.
* @param {Object} headers_opt The HTTP headers. Defaults to an empty
*                             object. The Authorization field is added
*                             to the headers in this method.
* @return {HttpResponse} the result from the UrlFetchApp.fetch() call.
*/
function accessProtectedResource(url, method_opt, headers_opt) {
  var service = getOAuthService();
  var maybeAuthorized = service.hasAccess();
  if (maybeAuthorized) {
    // A token is present, but it may be expired or invalid. Make a
    // request and check the response code to be sure.

    // Make the UrlFetch request and return the result.
    var accessToken = service.getAccessToken();
    var method = method_opt || 'get';
    var headers = headers_opt || {};
    headers['Authorization'] =
        Utilities.formatString('Bearer %s', accessToken);
    var resp = UrlFetchApp.fetch(url, {
      'headers': headers,
      'method' : method,
      'muteHttpExceptions': true, // Prevents thrown HTTP exceptions.
    });

    var code = resp.getResponseCode();
    if (code >= 200 && code < 300) {
      return resp.getContentText("utf-8"); // Success
    } else if (code == 401 || code == 403) {
      // Not fully authorized for this action.
      maybeAuthorized = false;
    } else {
      // Handle other response codes by logging them and throwing an
      // exception.
      console.error("Backend server error (%s): %s", code.toString(),
                    resp.getContentText("utf-8"));
      throw ("Backend server error: " + code);
    }
  }

  if (!maybeAuthorized) {
    // Invoke the authorization flow using the default authorization
    // prompt card.
    CardService.newAuthorizationException()
        .setAuthorizationUrl(service.getAuthorizationUrl())
        .setResourceDisplayName("Display name to show to the user")
        .throwException();
  }
}

/**
* Create a new OAuth service to facilitate accessing an API.
* This example assumes there is a single service that the add-on needs to
* access. Its name is used when persisting the authorized token, so ensure
* it is unique within the scope of the property store. You must set the
* client secret and client ID, which are obtained when registering your
* add-on with the API.
*
* See the Apps Script OAuth2 Library documentation for more
* information:
*   https://github.com/googlesamples/apps-script-oauth2#1-create-the-oauth2-service
*
*  @return A configured OAuth2 service object.
*/
function getOAuthService() {
  return OAuth2.createService('SERVICE_NAME')
      .setAuthorizationBaseUrl('SERVICE_AUTH_URL')
      .setTokenUrl('SERVICE_AUTH_TOKEN_URL')
      .setClientId('CLIENT_ID')
      .setClientSecret('CLIENT_SECRET')
      .setScope('SERVICE_SCOPE_REQUESTS')
      .setCallbackFunction('authCallback')
      .setCache(CacheService.getUserCache())
      .setPropertyStore(PropertiesService.getUserProperties());
}

/**
* Boilerplate code to determine if a request is authorized and returns
* a corresponding HTML message. When the user completes the OAuth2 flow
* on the service provider's website, this function is invoked from the
* service. In order for authorization to succeed you must make sure that
* the service knows how to call this function by setting the correct
* redirect URL.
*
* The redirect URL to enter is:
* https://script.google.com/macros/d/<Apps Script ID>/usercallback
*
* See the Apps Script OAuth2 Library documentation for more
* information:
*   https://github.com/googlesamples/apps-script-oauth2#1-create-the-oauth2-service
*
*  @param {Object} callbackRequest The request data received from the
*                  callback function. Pass it to the service's
*                  handleCallback() method to complete the
*                  authorization process.
*  @return {HtmlOutput} a success or denied HTML message to display to
*          the user.
*/
function authCallback(callbackRequest) {
  var authorized = getOAuthService().handleCallback(callbackRequest);
  if (authorized) {
    return HtmlService.createHtmlOutput(
      'Success!');
  } else {
    return HtmlService.createHtmlOutput('Denied');
  }
}

/**
* Unauthorizes the non-Google service. This is useful for OAuth
* development/testing.  Run this method (Run > resetOAuth in the script
* editor) to reset OAuth to re-prompt the user for OAuth.
*/
function resetOAuth() {
  getOAuthService().reset();
}
