
Google Workspace アドオンが認証を必要とするサードパーティ サービスまたは API に接続する場合、アドオンはユーザーにログインとアクセス権の承認を求めることができます。
このページでは、認可フロー(OAuth など)を使用してユーザーを認証する方法について説明します。これには次の手順が含まれます。
- 承認が必要なタイミングを検出します。
- ユーザーにサービスへのログインを求めるカード インターフェースを返します。
- ユーザーがサービスまたは保護されたリソースにアクセスできるように、アドオンを更新します。
アドオンでユーザー ID のみが必要な場合は、Google Workspace ID またはメールアドレスを使用してユーザーを直接認証できます。認証にメールアドレスを使用するには、JSON リクエストの検証をご覧ください。Google Apps Script を使用してアドオンをビルドした場合は、OAuth2 for Google Apps Script ライブラリ(OAuth1 バージョンもあります)を使用すると、このプロセスを簡単にできます。
認可が必要であることを検出する
アドオンを使用する際、ユーザーが保護されたリソースにアクセスできない理由はさまざまです。たとえば、次のような理由が考えられます。
- サードパーティ サービスに接続するためのアクセス トークンがまだ生成されていないか、期限切れです。
- アクセス トークンがリクエストされたリソースをカバーしていません。
- アクセス トークンがリクエストに必要なスコープをカバーしていない。
アドオンは、ユーザーがログインしてサービスにアクセスできるように、このようなケースを検出する必要があります。
Apps Script でビルドしている場合、OAuth ライブラリの hasAccess() 関数を使用すると、サービスにアクセスできるかどうかを確認できます。また、UrlFetchApp fetch() リクエストを使用する場合は、muteHttpExceptions パラメータを true に設定できます。これにより、リクエストの失敗時にリクエストが例外をスローすることを防ぎ、返された HttpResponse オブジェクトでリクエスト レスポンス コードとコンテンツを調べることができます。
サービスにログインするようユーザーに求める
アドオンで認証が必要であることが検出された場合、アドオンは カード インターフェースを返して、ユーザーにサービスへのログインを求める必要があります。ログインカードは、ユーザーをリダイレクトして、インフラストラクチャでサードパーティの認証と認可のプロセスを完了する必要があります。
HTTP エンドポイントを使用してアドオンを構築する場合は、Google ログインで宛先アプリを保護し、ログイン時に発行されるID トークンを使用してユーザー ID を取得することをおすすめします。sub クレームにはユーザーの一意の ID が含まれており、アドオンの ID と関連付けることができます。
ログインカードをビルドして返す
サービスのログインカードには、Google の基本認証カードを使用することも、カードをカスタマイズして組織のロゴなどの追加情報を表示することもできます。アドオンを一般公開する場合は、カスタムカードを使用する必要があります。
基本的な承認カード
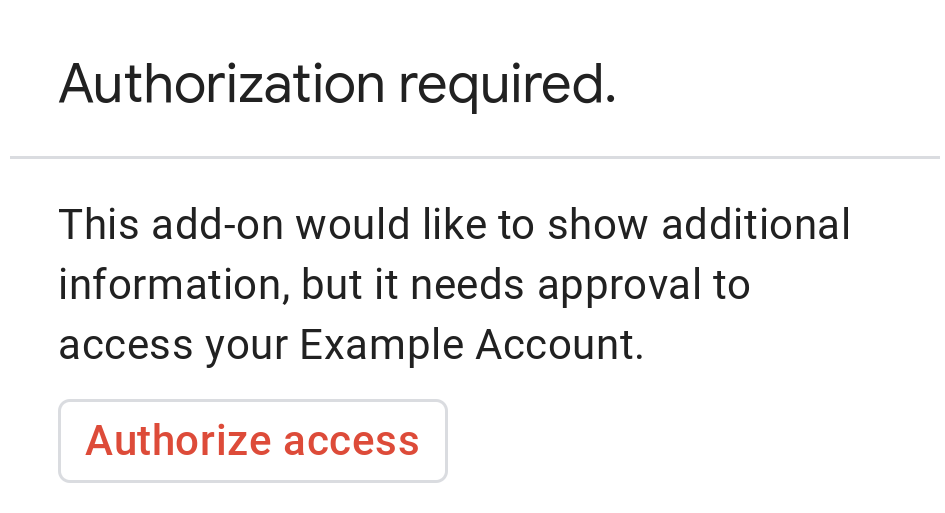
次の図は、Google の基本的な認証カードの例を示しています。
基本認証カードをユーザーに表示するには、オブジェクト AuthorizationError を返す必要があります。次のコードは、AuthorizationError オブジェクトの例を示しています。
Apps Script
CardService.newAuthorizationException()
    .setAuthorizationUrl('AUTHORIZATION_URL')
    .setResourceDisplayName('RESOURCE_DISPLAY_NAME')
    .throwException();
JSON
次の JSON レスポンスを返します。
{
  "basic_authorization_prompt": {
    "authorization_url": "AUTHORIZATION_URL",
    "resource": "RESOURCE_DISPLAY_NAME"
  }
}
次のように置き換えます。
AUTHORIZATION_URL: 認証を処理するウェブアプリの URL。RESOURCE_DISPLAY_NAME: 保護されたリソースまたはサービスの表示名。この名前は、認証プロンプトでユーザーに表示されます。たとえば、RESOURCE_DISPLAY_NAMEがExample Accountの場合、「このアドオンは追加情報を表示するため、Example アカウントへのアクセス許可を必要としています」というメッセージが表示されます。
承認が完了すると、保護されたリソースにアクセスするためにアドオンを更新するよう求めるメッセージが表示されます。
Google Chat で承認カードを返す
アドオンが Google Chat を拡張し、ユーザーが Google Chat 内でアドオンを実行する場合、ユーザーは手動で更新しなくても承認プロセスを完了できます。トリガーが メッセージ、スペースに追加、またはアプリ コマンドの場合、Google Chat は以前の実行の自動再試行をサポートします。これらのトリガーの場合、アドオンはイベント ペイロードで completeRedirectUri を受け取ります。自動再試行をトリガーするには、構成 URL で completeRedirectUri をエンコードする必要があります。この URL にリダイレクトすると、Google Chat に構成リクエストが完了したことが通知され、Google Chat は前の実行を再試行できます。
ユーザーが元のメッセージで指定された configCompleteRedirectUrl に正常にリダイレクトされると、Google Chat は次の手順を実行します。
- 開始ユーザーに表示されたプロンプトを消去します。
- 元のイベント オブジェクトを同じアドオンに 2 回送信します。
構成 URL で completeRedirectUri をエンコードしない場合でも、ユーザーは認証フローを完了できます。ただし、Google Chat は以前の実行を再試行しません。ユーザーはアドオンを手動で再度呼び出す必要があります。
次のコードサンプルは、Chat 用アプリがオフライン OAuth2 認証情報をリクエストし、データベースに保存して、ユーザー認証で API 呼び出しを行う方法を示しています。
カスタム承認カード
承認プロンプトを変更するには、サービスのログイン エクスペリエンス用のカスタムカードを作成します。
アドオンを一般公開する場合は、Chat 以外のすべての Google Workspace ホスト アプリケーションでカスタム認証カードを使用する必要があります。Google Workspace Marketplace の公開要件について詳しくは、アプリ審査についてをご覧ください。
返されるカードは、次のことを行う必要があります。
- アドオンがユーザーに代わって Google 以外のサービスにアクセスする権限を求めていることを、ユーザーに明確に伝えます。
- 承認された場合にアドオンで何ができるかを明確にする。
- ユーザーをサービスの認証 URL に誘導するボタンや同様のウィジェットが含まれている。このウィジェットの機能がユーザーにわかりやすいようにしてください。
- 上記のウィジェットは、
OpenLinkオブジェクトのOnClose.RELOAD設定を使用して、認証の受信後にアドオンが再読み込みされるようにする必要があります。 - 認証プロンプトから開かれるすべてのリンクは HTTPS を使用する必要があります。
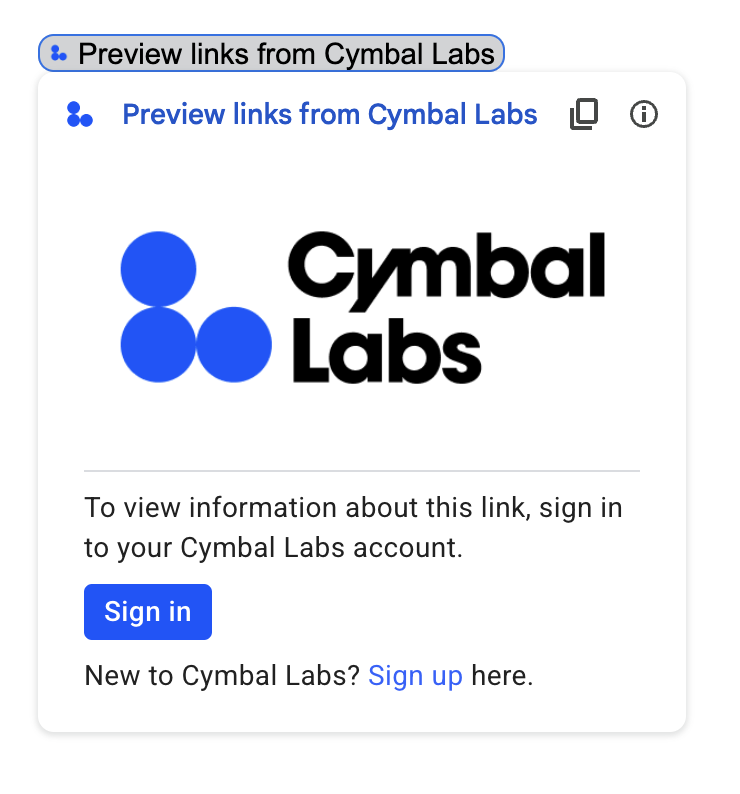
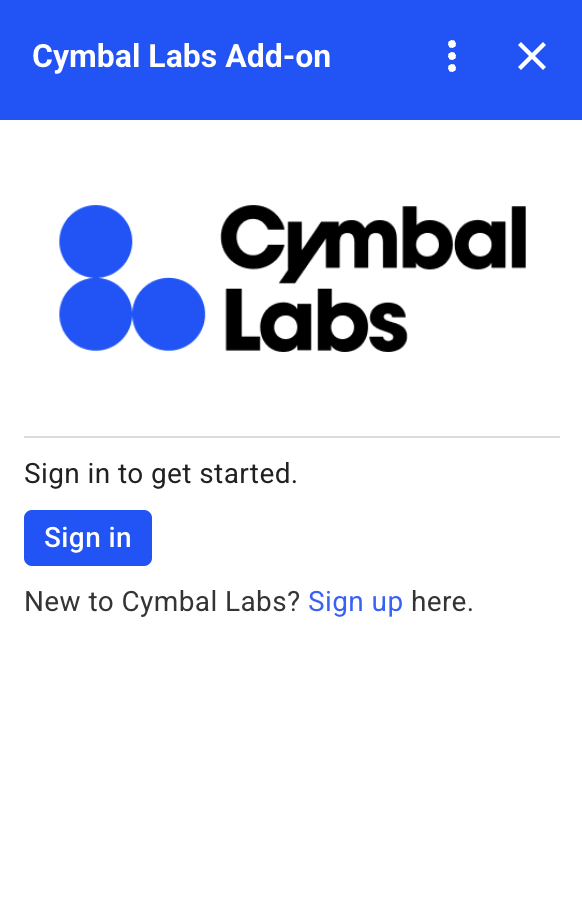
次の画像は、アドオンのホームページのカスタム認証カードの例を示しています。カードには、ロゴ、説明、ログインボタンが含まれています。
次のコードは、このカスタムカードの例の使用方法を示しています。
Apps Script
function customAuthorizationCard() {
    let cardSection1Image1 = CardService.newImage()
        .setImageUrl('LOGO_URL')
        .setAltText('LOGO_ALT_TEXT');

    let cardSection1Divider1 = CardService.newDivider();

    let cardSection1TextParagraph1 = CardService.newTextParagraph()
        .setText('DESCRIPTION');

    let cardSection1ButtonList1Button1 = CardService.newTextButton()
        .setText('Sign in')
        .setBackgroundColor('#0055ff')
        .setTextButtonStyle(CardService.TextButtonStyle.FILLED)
        .setAuthorizationAction(CardService.newAuthorizationAction()
            .setAuthorizationUrl('AUTHORIZATION_URL'));

    let cardSection1ButtonList1 = CardService.newButtonSet()
        .addButton(cardSection1ButtonList1Button1);

    let cardSection1TextParagraph2 = CardService.newTextParagraph()
        .setText('TEXT_SIGN_UP');

    let cardSection1 = CardService.newCardSection()
        .addWidget(cardSection1Image1)
        .addWidget(cardSection1Divider1)
        .addWidget(cardSection1TextParagraph1)
        .addWidget(cardSection1ButtonList1)
        .addWidget(cardSection1TextParagraph2);

    let card = CardService.newCardBuilder()
        .addSection(cardSection1)
        .build();
    return [card];
}

function startNonGoogleAuth() {
    CardService.newAuthorizationException()
        .setAuthorizationUrl('AUTHORIZATION_URL')
        .setResourceDisplayName('RESOURCE_DISPLAY_NAME')
        .setCustomUiCallback('customAuthorizationCard')
        .throwException();
  }
JSON
次の JSON レスポンスを返します。
{
  "custom_authorization_prompt": {
    "action": {
      "navigations": [
        {
          "pushCard": {
            "sections": [
              {
                "widgets": [
                  {
                    "image": {
                      "imageUrl": "LOGO_URL",
                      "altText": "LOGO_ALT_TEXT"
                    }
                  },
                  {
                    "divider": {}
                  },
                  {
                    "textParagraph": {
                      "text": "DESCRIPTION"
                    }
                  },
                  {
                    "buttonList": {
                      "buttons": [
                        {
                          "text": "Sign in",
                          "onClick": {
                            "openLink": {
                              "url": "AUTHORIZATION_URL",
                              "onClose": "RELOAD",
                              "openAs": "OVERLAY"
                            }
                          },
                          "color": {
                            "red": 0,
                            "green": 0,
                            "blue": 1,
                            "alpha": 1,
                          }
                        }
                      ]
                    }
                  },
                  {
                    "textParagraph": {
                      "text": "TEXT_SIGN_UP"
                    }
                  }
                ]
              }
            ]
          }
        }
      ]
    }
  }
}
次のように置き換えます。
LOGO_URL: ロゴまたは画像の URL。公開 URL である必要があります。LOGO_ALT_TEXT: ロゴまたは画像の代替テキスト(Cymbal Labs Logoなど)。DESCRIPTION: ユーザーにログインを促す行動を促すフレーズ(Sign in to get startedなど)。- ログイン ボタンを更新するには:
AUTHORIZATION_URL: 認証を処理するウェブアプリの URL。- 省略可: ボタンの色を変更するには、
colorフィールドの RGBA 浮動小数点値を更新します。Apps Script の場合は、16 進数値を使用してsetBackgroundColor()メソッドを更新します。
TEXT_SIGN_UP: アカウントを持っていないユーザーにアカウントの作成を促すテキスト。例:New to Cymbal Labs? <a href=\"https://www.example.com/signup\">Sign up</a> here
Google Workspace アプリ全体でサードパーティのログインを管理する
Google Workspace アドオンの一般的な用途の 1 つは、Google Workspace のホスト アプリケーション内からサードパーティ システムとやり取りするためのインターフェースを提供することです。
サードパーティ システムでは、ユーザー ID、パスワード、その他の認証情報を使用してログインすることが求められることがよくあります。ユーザーが Google Workspace ホストの 1 つを使用しているときにサードパーティ サービスにログインした場合、別の Google Workspace ホストに切り替えたときに再度ログインする必要がないようにする必要があります。
Apps Script で構築している場合は、ユーザー プロパティまたは ID トークンを使用して、ログイン リクエストの繰り返しを防止できます。詳細については、以降のセクションで説明します。
ユーザー プロパティ
ユーザーのログインデータを Apps Script のユーザー プロパティに保存できます。たとえば、ログイン サービスから独自の JSON ウェブトークン(JWT)を作成してユーザー プロパティに記録したり、サービスのユーザー名とパスワードを記録したりできます。
ユーザー プロパティは、アドオンのスクリプト内でそのユーザーのみがアクセスできるようにスコープ設定されています。他のユーザーや他のスクリプトはこれらのプロパティにアクセスできません。詳しくは、PropertiesService をご覧ください。
ID トークン
Google ID トークンをサービスのログイン認証情報として使用できます。これはシングル サインオンを実現する方法の 1 つです。ユーザーは Google ホストアプリを使用しているため、すでに Google にログインしています。
Google 以外の OAuth 構成の例
次の Apps Script コードサンプルは、OAuth を必要とする Google 以外の API を使用するようにアドオンを構成する方法を示しています。このサンプルでは、OAuth2 for Apps Script ライブラリを使用して、API にアクセスするためのサービスを構築します。
Apps Script
/**
* Attempts to access a non-Google API using a constructed service
* object.
*
* If your add-on needs access to non-Google APIs that require OAuth,
* you need to implement this method. You can use the OAuth1 and
* OAuth2 Apps Script libraries to help implement it.
*
* @param {String} url         The URL to access.
* @param {String} method_opt  The HTTP method. Defaults to GET.
* @param {Object} headers_opt The HTTP headers. Defaults to an empty
*                             object. The Authorization field is added
*                             to the headers in this method.
* @return {HttpResponse} the result from the UrlFetchApp.fetch() call.
*/
function accessProtectedResource(url, method_opt, headers_opt) {
  var service = getOAuthService();
  var maybeAuthorized = service.hasAccess();
  if (maybeAuthorized) {
    // A token is present, but it may be expired or invalid. Make a
    // request and check the response code to be sure.

    // Make the UrlFetch request and return the result.
    var accessToken = service.getAccessToken();
    var method = method_opt || 'get';
    var headers = headers_opt || {};
    headers['Authorization'] =
        Utilities.formatString('Bearer %s', accessToken);
    var resp = UrlFetchApp.fetch(url, {
      'headers': headers,
      'method' : method,
      'muteHttpExceptions': true, // Prevents thrown HTTP exceptions.
    });

    var code = resp.getResponseCode();
    if (code >= 200 && code < 300) {
      return resp.getContentText("utf-8"); // Success
    } else if (code == 401 || code == 403) {
      // Not fully authorized for this action.
      maybeAuthorized = false;
    } else {
      // Handle other response codes by logging them and throwing an
      // exception.
      console.error("Backend server error (%s): %s", code.toString(),
                    resp.getContentText("utf-8"));
      throw ("Backend server error: " + code);
    }
  }

  if (!maybeAuthorized) {
    // Invoke the authorization flow using the default authorization
    // prompt card.
    CardService.newAuthorizationException()
        .setAuthorizationUrl(service.getAuthorizationUrl())
        .setResourceDisplayName("Display name to show to the user")
        .throwException();
  }
}

/**
* Create a new OAuth service to facilitate accessing an API.
* This example assumes there is a single service that the add-on needs to
* access. Its name is used when persisting the authorized token, so ensure
* it is unique within the scope of the property store. You must set the
* client secret and client ID, which are obtained when registering your
* add-on with the API.
*
* See the Apps Script OAuth2 Library documentation for more
* information:
*   https://github.com/googlesamples/apps-script-oauth2#1-create-the-oauth2-service
*
*  @return A configured OAuth2 service object.
*/
function getOAuthService() {
  return OAuth2.createService('SERVICE_NAME')
      .setAuthorizationBaseUrl('SERVICE_AUTH_URL')
      .setTokenUrl('SERVICE_AUTH_TOKEN_URL')
      .setClientId('CLIENT_ID')
      .setClientSecret('CLIENT_SECRET')
      .setScope('SERVICE_SCOPE_REQUESTS')
      .setCallbackFunction('authCallback')
      .setCache(CacheService.getUserCache())
      .setPropertyStore(PropertiesService.getUserProperties());
}

/**
* Boilerplate code to determine if a request is authorized and returns
* a corresponding HTML message. When the user completes the OAuth2 flow
* on the service provider's website, this function is invoked from the
* service. In order for authorization to succeed you must make sure that
* the service knows how to call this function by setting the correct
* redirect URL.
*
* The redirect URL to enter is:
* https://script.google.com/macros/d/<Apps Script ID>/usercallback
*
* See the Apps Script OAuth2 Library documentation for more
* information:
*   https://github.com/googlesamples/apps-script-oauth2#1-create-the-oauth2-service
*
*  @param {Object} callbackRequest The request data received from the
*                  callback function. Pass it to the service's
*                  handleCallback() method to complete the
*                  authorization process.
*  @return {HtmlOutput} a success or denied HTML message to display to
*          the user.
*/
function authCallback(callbackRequest) {
  var authorized = getOAuthService().handleCallback(callbackRequest);
  if (authorized) {
    return HtmlService.createHtmlOutput(
      'Success!');
  } else {
    return HtmlService.createHtmlOutput('Denied');
  }
}

/**
* Unauthorizes the non-Google service. This is useful for OAuth
* development/testing.  Run this method (Run > resetOAuth in the script
* editor) to reset OAuth to re-prompt the user for OAuth.
*/
function resetOAuth() {
  getOAuthService().reset();
}