
如果 Google Workspace 外掛程式連線至需要授權的第三方服務或 API,外掛程式可以提示使用者登入並授權存取。
本頁面說明如何使用授權流程 (例如 OAuth) 驗證使用者,包括下列步驟:
- 偵測何時需要授權。
- 傳回提示使用者登入服務的資訊卡介面。
- 重新整理外掛程式,讓使用者存取服務或受保護的資源。
如果外掛程式只需要使用者身分,您可以直接使用 Google Workspace ID 或電子郵件地址驗證使用者。如要使用電子郵件地址進行驗證,請參閱驗證 JSON 要求。 如果您是使用 Google Apps Script 建構外掛程式,可以利用 OAuth2 for Google Apps Script 程式庫簡化這個程序 (另有 OAuth1 版本)。
偵測是否需要授權
使用外掛程式時,使用者可能因各種原因而無法存取受保護的資源,例如:
- 存取權杖尚未產生或已過期,因此無法連結至第三方服務。
- 存取權杖未涵蓋要求的資源。
- 存取權杖未涵蓋要求所需的範圍。
外掛程式應偵測這些情況,讓使用者登入及存取服務。
如果您使用 Apps Script 建構,OAuth 程式庫 hasAccess() 函式可判斷您是否有權存取服務。或者,使用 UrlFetchApp fetch() 要求時,您可以將 muteHttpExceptions 參數設為 true。這樣一來,要求失敗時就不會擲回例外狀況,您也可以檢查傳回的 HttpResponse 物件中的要求回應代碼和內容。
提示使用者登入服務
當外掛程式偵測到需要授權時,外掛程式必須傳回資訊卡介面,提示使用者登入服務。登入卡片必須將使用者重新導向,在您的基礎架構上完成第三方驗證和授權程序。
使用 HTTP 端點建構外掛程式時,建議您使用 Google 登入保護目的地應用程式,並使用登入期間核發的身分識別權杖取得使用者 ID。子聲明包含使用者的專屬 ID,可與外掛程式中的 ID 建立關聯。
建構並傳回登入卡片
服務的登入資訊卡可以使用 Google 的基本授權資訊卡,也可以自訂資訊卡,顯示其他資訊,例如貴機構的標誌。如要公開發布外掛程式,請務必使用自訂資訊卡。
基本授權卡
下圖顯示 Google 的基本授權卡片範例:
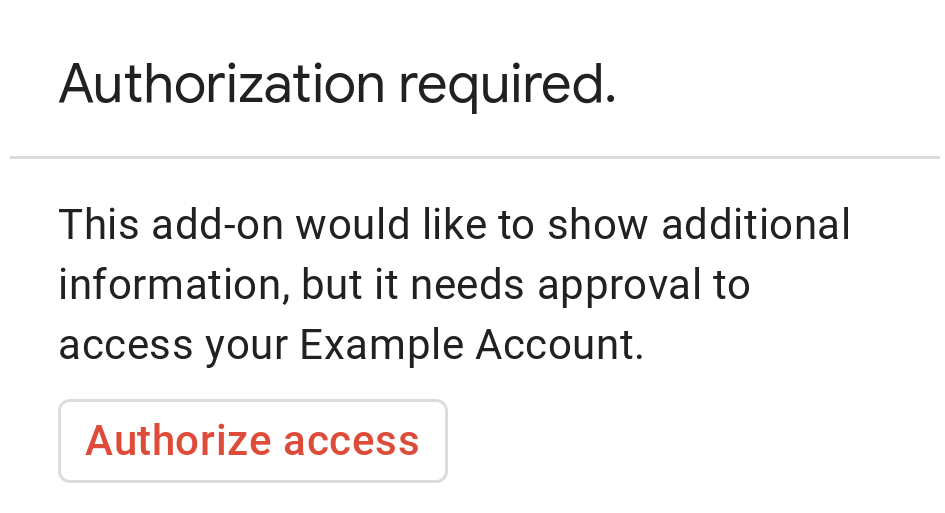
如要向使用者顯示基本授權卡片,請傳回 AuthorizationError 物件。以下程式碼為 AuthorizationError 物件的範例:
Apps Script
CardService.newAuthorizationException()
    .setAuthorizationUrl('AUTHORIZATION_URL')
    .setResourceDisplayName('RESOURCE_DISPLAY_NAME')
    .throwException();
JSON
傳回下列 JSON 回應:
{
  "basic_authorization_prompt": {
    "authorization_url": "AUTHORIZATION_URL",
    "resource": "RESOURCE_DISPLAY_NAME"
  }
}
更改下列內容:
AUTHORIZATION_URL:處理授權的網頁應用程式網址。RESOURCE_DISPLAY_NAME:受保護資源或服務的顯示名稱。授權提示會向使用者顯示這個名稱。舉例來說,如果你的RESOURCE_DISPLAY_NAME是「Example Account」,提示就會顯示「如要讓這個外掛程式顯示更多資訊,請授予你的『Example Account』存取權。」
完成授權後,系統會提示使用者重新整理外掛程式,以存取受保護的資源。
在 Google Chat 中傳回授權卡
如果外掛程式擴充了 Google Chat,且使用者在 Google Chat 中執行外掛程式,使用者即可完成授權程序,無須手動重新整理。如果觸發條件是「訊息」、「已加入聊天室」或「應用程式指令」,Google Chat 支援自動重試先前的執行作業。對於這些觸發條件,外掛程式會在事件酬載中收到 completeRedirectUri。您必須在設定網址中編碼 completeRedirectUri,才能觸發自動重試。重新導向至這個網址,表示 Google Chat 已完成設定要求,並允許 Google Chat 重試先前的執行作業。
使用者成功重新導向至原始訊息中提供的 configCompleteRedirectUrl 時,Google Chat 會執行下列步驟:
- 清除向啟動使用者顯示的提示。
- 將原始事件物件第二次傳送至同一個外掛程式。
如果您未在設定網址中編碼 completeRedirectUri,使用者仍可完成授權流程。不過,Google Chat 不會重試先前的執行作業,使用者必須手動再次叫用外掛程式。
以下程式碼範例說明 Chat 應用程式如何要求離線 OAuth2 憑證、將憑證儲存在資料庫,以及使用憑證透過使用者驗證發出 API 呼叫。
自訂授權卡
如要修改授權提示,您可以為服務的登入體驗建立自訂資訊卡。
如果您要公開發布外掛程式,除了 Chat 以外,所有 Google Workspace 主機應用程式都必須使用自訂授權卡。如要進一步瞭解 Google Workspace Marketplace 的發布規定,請參閱「應用程式審查簡介」。
傳回的資訊卡必須符合下列條件:
- 明確告知使用者,外掛程式要求代表他們存取非 Google 服務的權限。
- 清楚說明授權後,外掛程式可以執行的動作。
- 包含按鈕或類似的小工具,可將使用者帶往服務的授權網址。請確保使用者能清楚瞭解這個小工具的功能。
- 上述小工具必須使用
OpenLink物件中的OnClose.RELOAD設定,確保外掛程式會在收到授權後重新載入。 - 從授權提示開啟的所有連結都必須使用 HTTPS。
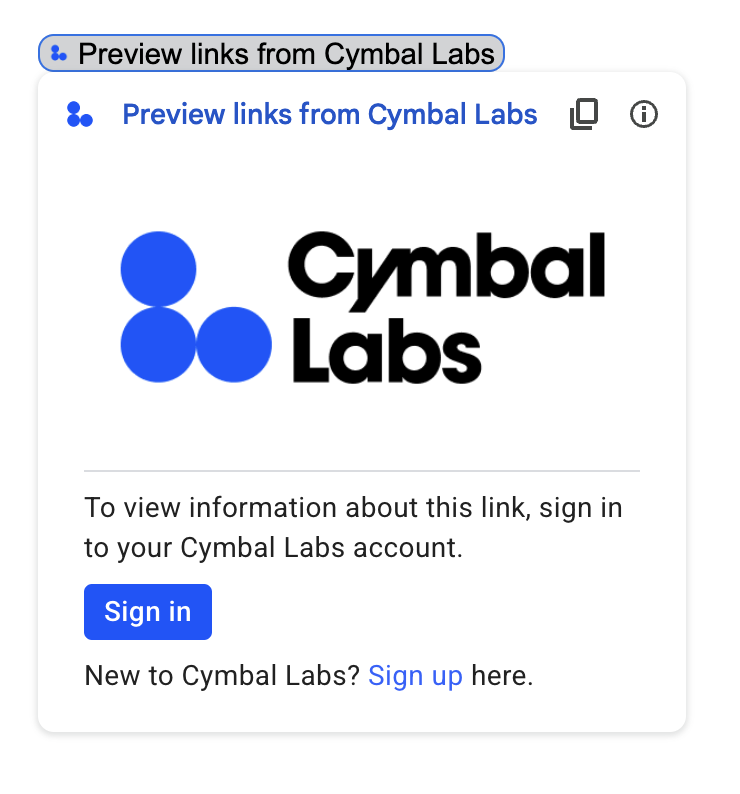
下圖顯示外掛程式首頁的自訂授權卡片範例。資訊卡包含標誌、說明和登入按鈕:
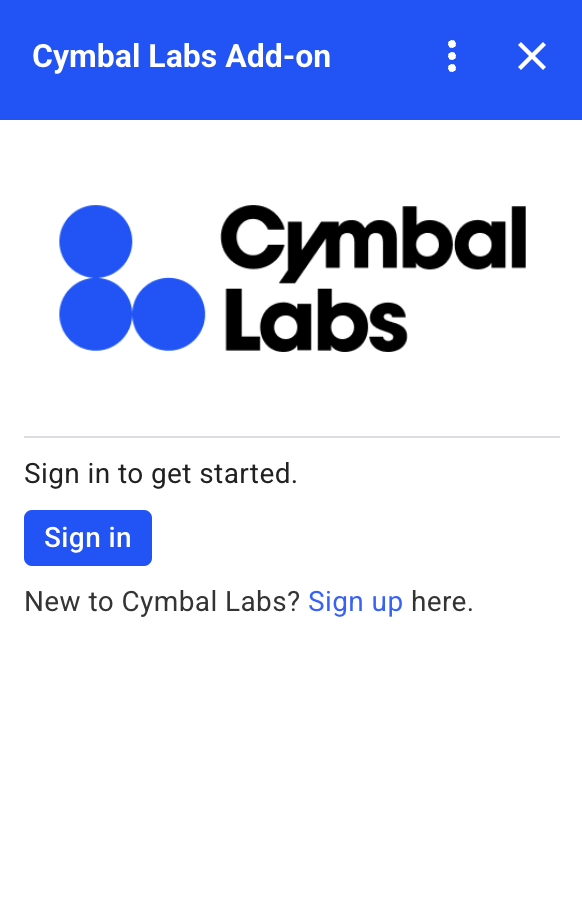
以下程式碼說明如何使用這個自訂資訊卡範例:
Apps Script
function customAuthorizationCard() {
    let cardSection1Image1 = CardService.newImage()
        .setImageUrl('LOGO_URL')
        .setAltText('LOGO_ALT_TEXT');

    let cardSection1Divider1 = CardService.newDivider();

    let cardSection1TextParagraph1 = CardService.newTextParagraph()
        .setText('DESCRIPTION');

    let cardSection1ButtonList1Button1 = CardService.newTextButton()
        .setText('Sign in')
        .setBackgroundColor('#0055ff')
        .setTextButtonStyle(CardService.TextButtonStyle.FILLED)
        .setAuthorizationAction(CardService.newAuthorizationAction()
            .setAuthorizationUrl('AUTHORIZATION_URL'));

    let cardSection1ButtonList1 = CardService.newButtonSet()
        .addButton(cardSection1ButtonList1Button1);

    let cardSection1TextParagraph2 = CardService.newTextParagraph()
        .setText('TEXT_SIGN_UP');

    let cardSection1 = CardService.newCardSection()
        .addWidget(cardSection1Image1)
        .addWidget(cardSection1Divider1)
        .addWidget(cardSection1TextParagraph1)
        .addWidget(cardSection1ButtonList1)
        .addWidget(cardSection1TextParagraph2);

    let card = CardService.newCardBuilder()
        .addSection(cardSection1)
        .build();
    return [card];
}

function startNonGoogleAuth() {
    CardService.newAuthorizationException()
        .setAuthorizationUrl('AUTHORIZATION_URL')
        .setResourceDisplayName('RESOURCE_DISPLAY_NAME')
        .setCustomUiCallback('customAuthorizationCard')
        .throwException();
  }
JSON
傳回下列 JSON 回應:
{
  "custom_authorization_prompt": {
    "action": {
      "navigations": [
        {
          "pushCard": {
            "sections": [
              {
                "widgets": [
                  {
                    "image": {
                      "imageUrl": "LOGO_URL",
                      "altText": "LOGO_ALT_TEXT"
                    }
                  },
                  {
                    "divider": {}
                  },
                  {
                    "textParagraph": {
                      "text": "DESCRIPTION"
                    }
                  },
                  {
                    "buttonList": {
                      "buttons": [
                        {
                          "text": "Sign in",
                          "onClick": {
                            "openLink": {
                              "url": "AUTHORIZATION_URL",
                              "onClose": "RELOAD",
                              "openAs": "OVERLAY"
                            }
                          },
                          "color": {
                            "red": 0,
                            "green": 0,
                            "blue": 1,
                            "alpha": 1,
                          }
                        }
                      ]
                    }
                  },
                  {
                    "textParagraph": {
                      "text": "TEXT_SIGN_UP"
                    }
                  }
                ]
              }
            ]
          }
        }
      ]
    }
  }
}
更改下列內容:
LOGO_URL:標誌或圖片的網址。必須是公開網址。LOGO_ALT_TEXT:標誌或圖片的替代文字,例如Cymbal Labs Logo。DESCRIPTION:供使用者登入的行動號召,例如「登入」Sign in to get started。- 如要更新登入按鈕:
AUTHORIZATION_URL:處理授權的網頁應用程式網址。- 選用:如要變更按鈕顏色,請更新
color欄位的 RGBA 浮點值。如果是 Apps Script,請使用十六進位值更新setBackgroundColor()方法。
TEXT_SIGN_UP:如果使用者沒有帳戶,系統會顯示這段文字,提示他們建立帳戶。例如New to Cymbal Labs? <a href=\"https://www.example.com/signup\">Sign up</a> here。
管理 Google Workspace 應用程式的第三方登入功能
Google Workspace 外掛程式的常見用途之一,是提供介面,讓使用者在 Google Workspace 主機應用程式中與第三方系統互動。
第三方系統通常會要求使用者使用使用者 ID、密碼或其他憑證登入。使用者透過某個 Google Workspace 主機登入第三方服務時,您必須確保他們切換至其他 Google Workspace 主機時,不必再次登入。
如果您使用 Apps Script 建構應用程式,可以透過使用者屬性或 ID 權杖,防止重複登入要求。以下各節將說明這些差異。
使用者屬性
您可以在 Apps Script 的使用者屬性中儲存使用者的登入資料。舉例來說,您可以從登入服務建立自己的 JSON Web Token (JWT),並記錄在使用者屬性中,或是記錄服務的使用者名稱和密碼。
使用者屬性的範圍僅限於該使用者在外掛程式指令碼中存取。其他使用者和其他指令碼無法存取這些屬性。詳情請參閱 PropertiesService。
ID 權杖
您可以將 Google ID 權杖做為服務的登入憑證。這是實現單一登入的方法。使用者已登入 Google,因為他們位於 Google 主機應用程式中。
非 Google OAuth 設定範例
下列 Apps Script 程式碼範例說明如何設定外掛程式,以使用需要 OAuth 的非 Google API。本範例使用 Apps Script 適用的 OAuth2 程式庫,建構用於存取 API 的服務。
Apps Script
/**
* Attempts to access a non-Google API using a constructed service
* object.
*
* If your add-on needs access to non-Google APIs that require OAuth,
* you need to implement this method. You can use the OAuth1 and
* OAuth2 Apps Script libraries to help implement it.
*
* @param {String} url         The URL to access.
* @param {String} method_opt  The HTTP method. Defaults to GET.
* @param {Object} headers_opt The HTTP headers. Defaults to an empty
*                             object. The Authorization field is added
*                             to the headers in this method.
* @return {HttpResponse} the result from the UrlFetchApp.fetch() call.
*/
function accessProtectedResource(url, method_opt, headers_opt) {
  var service = getOAuthService();
  var maybeAuthorized = service.hasAccess();
  if (maybeAuthorized) {
    // A token is present, but it may be expired or invalid. Make a
    // request and check the response code to be sure.

    // Make the UrlFetch request and return the result.
    var accessToken = service.getAccessToken();
    var method = method_opt || 'get';
    var headers = headers_opt || {};
    headers['Authorization'] =
        Utilities.formatString('Bearer %s', accessToken);
    var resp = UrlFetchApp.fetch(url, {
      'headers': headers,
      'method' : method,
      'muteHttpExceptions': true, // Prevents thrown HTTP exceptions.
    });

    var code = resp.getResponseCode();
    if (code >= 200 && code < 300) {
      return resp.getContentText("utf-8"); // Success
    } else if (code == 401 || code == 403) {
      // Not fully authorized for this action.
      maybeAuthorized = false;
    } else {
      // Handle other response codes by logging them and throwing an
      // exception.
      console.error("Backend server error (%s): %s", code.toString(),
                    resp.getContentText("utf-8"));
      throw ("Backend server error: " + code);
    }
  }

  if (!maybeAuthorized) {
    // Invoke the authorization flow using the default authorization
    // prompt card.
    CardService.newAuthorizationException()
        .setAuthorizationUrl(service.getAuthorizationUrl())
        .setResourceDisplayName("Display name to show to the user")
        .throwException();
  }
}

/**
* Create a new OAuth service to facilitate accessing an API.
* This example assumes there is a single service that the add-on needs to
* access. Its name is used when persisting the authorized token, so ensure
* it is unique within the scope of the property store. You must set the
* client secret and client ID, which are obtained when registering your
* add-on with the API.
*
* See the Apps Script OAuth2 Library documentation for more
* information:
*   https://github.com/googlesamples/apps-script-oauth2#1-create-the-oauth2-service
*
*  @return A configured OAuth2 service object.
*/
function getOAuthService() {
  return OAuth2.createService('SERVICE_NAME')
      .setAuthorizationBaseUrl('SERVICE_AUTH_URL')
      .setTokenUrl('SERVICE_AUTH_TOKEN_URL')
      .setClientId('CLIENT_ID')
      .setClientSecret('CLIENT_SECRET')
      .setScope('SERVICE_SCOPE_REQUESTS')
      .setCallbackFunction('authCallback')
      .setCache(CacheService.getUserCache())
      .setPropertyStore(PropertiesService.getUserProperties());
}

/**
* Boilerplate code to determine if a request is authorized and returns
* a corresponding HTML message. When the user completes the OAuth2 flow
* on the service provider's website, this function is invoked from the
* service. In order for authorization to succeed you must make sure that
* the service knows how to call this function by setting the correct
* redirect URL.
*
* The redirect URL to enter is:
* https://script.google.com/macros/d/<Apps Script ID>/usercallback
*
* See the Apps Script OAuth2 Library documentation for more
* information:
*   https://github.com/googlesamples/apps-script-oauth2#1-create-the-oauth2-service
*
*  @param {Object} callbackRequest The request data received from the
*                  callback function. Pass it to the service's
*                  handleCallback() method to complete the
*                  authorization process.
*  @return {HtmlOutput} a success or denied HTML message to display to
*          the user.
*/
function authCallback(callbackRequest) {
  var authorized = getOAuthService().handleCallback(callbackRequest);
  if (authorized) {
    return HtmlService.createHtmlOutput(
      'Success!');
  } else {
    return HtmlService.createHtmlOutput('Denied');
  }
}

/**
* Unauthorizes the non-Google service. This is useful for OAuth
* development/testing.  Run this method (Run > resetOAuth in the script
* editor) to reset OAuth to re-prompt the user for OAuth.
*/
function resetOAuth() {
  getOAuthService().reset();
}