
במדריך הזה מוסבר איך להשתמש בשיטה create() במשאב Message של Google Chat API כדי לבצע את הפעולות הבאות:
- שליחת הודעות שמכילות טקסט, כרטיסים ווידג'טים אינטראקטיביים.
- שליחת הודעות באופן פרטי למשתמש ספציפי ב-Chat.
- להתחיל שרשור או לענות לשרשור.
- לתת שם להודעה, כדי שתוכלו לציין אותה בבקשות אחרות ל-Chat API.
הגודל המקסימלי של ההודעה (כולל טקסט או כרטיסים) הוא 32,000 בייטים. כדי לשלוח הודעה שחורגת מהגודל הזה, אפליקציית Chat צריכה לשלוח כמה הודעות במקום אחת.
בנוסף לקריאה ל-Chat API כדי ליצור הודעות, אפליקציות ל-Chat יכולות ליצור ולשלוח הודעות כדי להגיב לאינטראקציות של משתמשים, כמו פרסום הודעת פתיחה אחרי שמשתמש מוסיף את האפליקציה למרחב. כשמשיבים לאינטראקציות, אפליקציות צ'אט יכולות להשתמש בסוגים אחרים של תכונות העברת הודעות, כולל דיאלוגים אינטראקטיביים וממשקי תצוגה מקדימה של קישורים. כדי להשיב למשתמש, אפליקציית Chat מחזירה את ההודעה באופן סינכרוני, בלי לקרוא ל-Chat API. מידע על שליחת הודעות בתגובה לאינטראקציות זמין במאמר קבלת אינטראקציות ומענה להן באפליקציית Google Chat.
איך הודעות שנוצרו באמצעות Chat API מוצגות ב-Chat ואיך מציינים את המקור שלהן
אפשר להתקשר לשיטת create() באמצעות אימות אפליקציה ואימות משתמש.
ב-Chat, השיוך של שולח ההודעה משתנה בהתאם לסוג האימות שבו אתם משתמשים.
כשמבצעים אימות כאפליקציית Chat, אפליקציית Chat שולחת את ההודעה.

App.כשמבצעים אימות כמשתמש, אפליקציית Chat שולחת את ההודעה בשם המשתמש. ב-Chat, שם האפליקציה מוצג כדי לציין שהיא שלחה את ההודעה.

סוג האימות קובע גם אילו תכונות וממשקים של העברת הודעות אפשר לכלול בהודעה. באמצעות אימות אפליקציות, אפליקציות ל-Chat יכולות לשלוח הודעות שמכילות טקסט מעוצב, ממשקים מבוססי-כרטיסים ווידג'טים אינטראקטיביים. משתמשי Chat יכולים לשלוח רק טקסט בהודעות שלהם, ולכן כשיוצרים הודעות באמצעות אימות משתמשים אפשר לכלול רק טקסט. מידע נוסף על תכונות ההודעות שזמינות ב-Chat API מופיע בסקירה הכללית על הודעות ב-Google Chat.
במדריך הזה מוסבר איך להשתמש בכל אחד מסוגי האימות כדי לשלוח הודעה באמצעות Chat API.
דרישות מוקדמות
Node.js
- חשבון Google Workspace במהדורת Business או Enterprise עם גישה ל-Google Chat.
- מגדירים את הסביבה:
- יוצרים פרויקט ב-Google Cloud.
- הגדרת מסך ההסכמה ל-OAuth.
- מפעילים ומגדירים את Google Chat API עם שם, סמל ותיאור לאפליקציית Chat.
- מתקינים את ספריית הלקוח של Cloud ל-Node.js.
- יוצרים פרטי גישה בהתאם לאופן שבו רוצים לבצע אימות בבקשה של Google Chat API:
- כדי לבצע אימות כמשתמש ב-Chat, צריך ליצור פרטי כניסה של מזהה לקוח OAuth ולשמור אותם כקובץ JSON בשם
credentials.jsonבספרייה המקומית. - כדי לבצע אימות כאפליקציית Chat, יוצרים פרטי כניסה לחשבון שירות ושומרים אותם כקובץ JSON בשם
credentials.json.
- כדי לבצע אימות כמשתמש ב-Chat, צריך ליצור פרטי כניסה של מזהה לקוח OAuth ולשמור אותם כקובץ JSON בשם
- בוחרים היקף הרשאה בהתאם לאופן שבו רוצים לבצע אימות – כמשתמש או כאפליקציית Chat.
- מרחב ב-Google Chat שהמשתמש המאומת או אפליקציית Chat שמתקשרת אליו חברים בו. כדי לאמת את עצמכם כאפליקציית Chat, מוסיפים את אפליקציית Chat למרחב.
Python
- חשבון Google Workspace במהדורת Business או Enterprise עם גישה ל-Google Chat.
- מגדירים את הסביבה:
- יוצרים פרויקט ב-Google Cloud.
- הגדרת מסך ההסכמה ל-OAuth.
- מפעילים ומגדירים את Google Chat API עם שם, סמל ותיאור לאפליקציית Chat.
- מתקינים את ספריית הלקוח של Cloud לשימוש ב-Python.
- יוצרים פרטי גישה בהתאם לאופן שבו רוצים לבצע אימות בבקשה של Google Chat API:
- כדי לבצע אימות כמשתמש ב-Chat, צריך ליצור פרטי כניסה של מזהה לקוח OAuth ולשמור אותם כקובץ JSON בשם
credentials.jsonבספרייה המקומית. - כדי לבצע אימות כאפליקציית Chat, יוצרים פרטי כניסה לחשבון שירות ושומרים אותם כקובץ JSON בשם
credentials.json.
- כדי לבצע אימות כמשתמש ב-Chat, צריך ליצור פרטי כניסה של מזהה לקוח OAuth ולשמור אותם כקובץ JSON בשם
- בוחרים היקף הרשאה בהתאם לאופן שבו רוצים לבצע אימות – כמשתמש או כאפליקציית Chat.
- מרחב ב-Google Chat שהמשתמש המאומת או אפליקציית Chat שמתקשרת אליו חברים בו. כדי לאמת את עצמכם כאפליקציית Chat, מוסיפים את אפליקציית Chat למרחב.
Java
- חשבון Google Workspace במהדורת Business או Enterprise עם גישה ל-Google Chat.
- מגדירים את הסביבה:
- יוצרים פרויקט ב-Google Cloud.
- הגדרת מסך ההסכמה ל-OAuth.
- מפעילים ומגדירים את Google Chat API עם שם, סמל ותיאור לאפליקציית Chat.
- מתקינים את ספריית הלקוח של Cloud ל-Java.
- יוצרים פרטי גישה בהתאם לאופן שבו רוצים לבצע אימות בבקשה של Google Chat API:
- כדי לבצע אימות כמשתמש ב-Chat, צריך ליצור פרטי כניסה של מזהה לקוח OAuth ולשמור אותם כקובץ JSON בשם
credentials.jsonבספרייה המקומית. - כדי לבצע אימות כאפליקציית Chat, יוצרים פרטי כניסה לחשבון שירות ושומרים אותם כקובץ JSON בשם
credentials.json.
- כדי לבצע אימות כמשתמש ב-Chat, צריך ליצור פרטי כניסה של מזהה לקוח OAuth ולשמור אותם כקובץ JSON בשם
- בוחרים היקף הרשאה בהתאם לאופן שבו רוצים לבצע אימות – כמשתמש או כאפליקציית Chat.
- מרחב ב-Google Chat שהמשתמש המאומת או אפליקציית Chat שמתקשרת אליו חברים בו. כדי לאמת את עצמכם כאפליקציית Chat, מוסיפים את אפליקציית Chat למרחב.
Apps Script
- חשבון Google Workspace במהדורת Business או Enterprise עם גישה ל-Google Chat.
- מגדירים את הסביבה:
- יוצרים פרויקט ב-Google Cloud.
- הגדרת מסך ההסכמה ל-OAuth.
- מפעילים ומגדירים את Google Chat API עם שם, סמל ותיאור לאפליקציית Chat.
- יוצרים פרויקט עצמאי של Apps Script ומפעילים את שירות Chat המתקדם.
- במדריך הזה, צריך להשתמש באימות משתמשים או באפליקציה. כדי לבצע אימות כאפליקציית Chat, צריך ליצור פרטי כניסה לחשבון שירות. במאמר אימות והרשאה כאפליקציה ל-Google Chat מוסבר איך לעשות זאת.
- בוחרים היקף הרשאה בהתאם לאופן שבו רוצים לבצע אימות – כמשתמש או כאפליקציית Chat.
- מרחב ב-Google Chat שהמשתמש המאומת או אפליקציית Chat שמתקשרת אליו חברים בו. כדי לאמת את עצמכם כאפליקציית Chat, מוסיפים את אפליקציית Chat למרחב.
שליחת הודעה בשם אפליקציית Chat
בקטע הזה מוסבר איך לשלוח הודעות שמכילות טקסט, כרטיסים ווידג'טים אינטראקטיביים של אביזרים באמצעות אימות אפליקציות.

כדי להתקשר לשיטת CreateMessage() באמצעות אימות אפליקציה, צריך לציין את השדות הבאים בבקשה:
chat.botהיקף ההרשאה.- מקור
Spaceההודעה שרוצים לפרסם. אפליקציית Chat צריכה להיות חברה במרחב. - משאב
Messageשצריך ליצור. כדי להגדיר את תוכן ההודעה, אפשר לכלול טקסט עשיר (text), ממשק כרטיס אחד או יותר (cardsV2) או את שניהם.
אפשר גם לכלול את הפרטים הבאים:
- השדה
accessoryWidgetsשבו אפשר לכלול כפתורים אינטראקטיביים בתחתית ההודעה. - השדה
privateMessageViewerאל שליחת ההודעה באופן פרטי למשתמש ספציפי. - השדה
messageId, שמאפשר לתת שם להודעה כדי להשתמש בה בבקשות אחרות ל-API. - השדות
thread.threadKeyו-messageReplyOptionכדי להתחיל שרשור או לענות לשרשור. אם במרחב אין שרשורים, המערכת מתעלמת מהשדה הזה.
הקוד הבא מראה דוגמה לאופן שבו אפליקציית Chat יכולה לשלוח הודעה שפורסמה כאפליקציית Chat ומכילה טקסט, כרטיס ולחצן שאפשר ללחוץ עליו בחלק התחתון של ההודעה:
Node.js
Python
Java
Apps Script
כדי להריץ את הדוגמה הזו, מחליפים את SPACE_NAME במזהה מהשדה name של המרחב. אפשר לקבל את המזהה באמצעות הפעלת השיטה ListSpaces() או מכתובת ה-URL של המרחב.
הוספת ווידג'טים אינטראקטיביים לחלק התחתון של ההודעה
בדוגמת הקוד הראשונה במדריך הזה, ההודעה באפליקציית הצ'אט כוללת לחצן שאפשר ללחוץ עליו בתחתית ההודעה, שנקרא ווידג'ט של אביזר. ווידג'טים של אביזרים מופיעים אחרי טקסט או כרטיסים בהודעה. אתם יכולים להשתמש בווידג'טים האלה כדי לעודד את המשתמשים ליצור אינטראקציה עם ההודעה שלכם בדרכים רבות, כולל:
- לדרג את הדיוק או את שביעות הרצון מההודעה.
- מדווחים על בעיה בהודעה או באפליקציית Chat.
- פתיחת קישור לתוכן קשור, כמו תיעוד.
- אפשר לסגור או להשהות הודעות דומות מאפליקציית Chat למשך תקופה מסוימת.
כדי להוסיף ווידג'טים של אביזרים, צריך לכלול את השדה accessoryWidgets[] בגוף הבקשה ולציין ווידג'ט אחד או יותר שרוצים לכלול.
בתמונה הבאה מוצגת אפליקציה ל-Chat שמצרפת לווידג'טים של אביזרים להודעות טקסט, כדי שהמשתמשים יוכלו לדרג את החוויה שלהם עם האפליקציה ל-Chat.
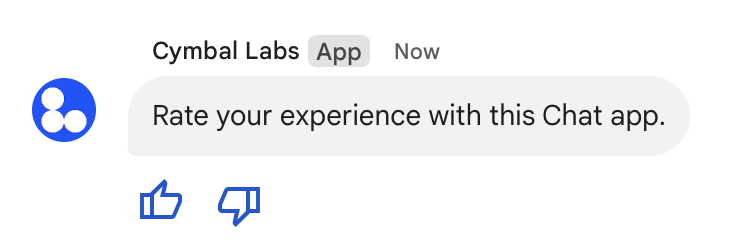
בדוגמה הבאה מוצג גוף הבקשה שיוצרת הודעת טקסט עם שני לחצני אביזרים. כשמשתמש לוחץ על לחצן, הפונקציה המתאימה (למשל doUpvote) מעבדת את האינטראקציה:
{
  text: "Rate your experience with this Chat app.",
  accessoryWidgets: [{ buttonList: { buttons: [{
    icon: { material_icon: {
      name: "thumb_up"
    }},
    color: { red: 0, blue: 255, green: 0 },
    onClick: { action: {
      function: "doUpvote"
    }}
  }, {
    icon: { material_icon: {
      name: "thumb_down"
    }},
    color: { red: 0, blue: 255, green: 0 },
    onClick: { action: {
      function: "doDownvote"
    }}
  }]}}]
}
שליחת הודעה פרטית
אפליקציות ל-Chat יכולות לשלוח הודעות באופן פרטי, כך שההודעה תהיה גלויה רק למשתמש ספציפי במרחב. כששולחים הודעה פרטית באפליקציית Chat, מוצגת לה תווית שמציינת שההודעה גלויה רק למשתמש.
כדי לשלוח הודעה באופן פרטי באמצעות Chat API, צריך לציין את השדה privateMessageViewer בגוף הבקשה. כדי לציין את המשתמש, מגדירים את הערך למשאב User שמייצג את המשתמש בצ'אט. אפשר גם להשתמש בשדה name של מקור User, כמו בדוגמה הבאה:
{
  text: "Hello private world!",
  privateMessageViewer: {
    name: "users/USER_ID"
  }
}
כדי להשתמש בדוגמה הזו, מחליפים את USER_ID במזהה ייחודי של המשתמש, כמו 12345678987654321 או hao@cymbalgroup.com. מידע נוסף על ציון משתמשים זמין במאמר זיהוי וציון של משתמשי Google Chat.
כדי לשלוח הודעה באופן פרטי, צריך להשמיט מהבקשה את הפרטים הבאים:
שליחת הודעת טקסט בשם משתמש
בקטע הזה מוסבר איך לשלוח הודעות בשם משתמש באמצעות אימות משתמש. באימות משתמשים, תוכן ההודעה יכול לכלול רק טקסט ואסור לכלול תכונות של העברת הודעות שזמינות רק באפליקציות ל-Chat, כולל ממשקי כרטיסים ווידג'טים אינטראקטיביים.

כדי לקרוא לשיטה CreateMessage() באמצעות אימות משתמשים, צריך לציין את השדות הבאים בבקשה:
- היקף הרשאה שתומך באימות משתמשים בשיטה הזו. בדוגמה הבאה נעשה שימוש בהיקף
chat.messages.create. - מקור
Spaceההודעה שרוצים לפרסם. המשתמש המאומת צריך להיות חבר במרחב. - משאב
Messageשצריך ליצור. כדי להגדיר את תוכן ההודעה, צריך לכלול את השדהtext.
אפשר גם לכלול את הפרטים הבאים:
- השדה
messageId, שמאפשר לתת שם להודעה כדי להשתמש בה בבקשות אחרות ל-API. - השדות
thread.threadKeyו-messageReplyOptionכדי להתחיל שרשור או לענות לשרשור. אם במרחב אין שרשורים, המערכת מתעלמת מהשדה הזה.
בדוגמת הקוד הבאה אפשר לראות איך אפליקציית Chat יכולה לשלוח הודעת טקסט במרחב נתון בשם משתמש מאומת:
Node.js
Python
Java
Apps Script
כדי להריץ את הדוגמה הזו, מחליפים את SPACE_NAME במזהה מהשדה name של המרחב. אפשר לקבל את המזהה באמצעות הפעלת השיטה ListSpaces() או מכתובת ה-URL של המרחב.
התחלת שרשור או הוספת תשובה לשרשור
במרחבים שבהם השיחות מחולקות לשרשורים, אתם יכולים לציין אם הודעה חדשה תתחיל שרשור או תהיה תשובה לשרשור קיים.
כברירת מחדל, הודעות שיוצרים באמצעות Chat API מתחילות שרשור חדש. כדי שתוכלו לזהות את השרשור ולהשיב לו מאוחר יותר, אתם יכולים לציין מפתח שרשור בבקשה:
- בגוף הבקשה, מציינים את השדה
thread.threadKey. - מציינים את פרמטר השאילתה
messageReplyOptionכדי לקבוע מה קורה אם המפתח כבר קיים.
כדי ליצור הודעה בתגובה לשרשור קיים:
- בגוף הבקשה, כוללים את השדה
thread. אם הגדרתם, אתם יכולים לציין אתthreadKeyשיצרתם. בכל מקרה אחר, צריך להשתמשnameבנושא של השרשור. - מציינים את פרמטר השאילתה
messageReplyOption.
הקוד הבא מראה דוגמה לאופן שבו אפליקציית Chat יכולה לשלוח הודעת טקסט שמתחילה או מגיבה לשרשור מסוים שמזוהה על ידי מפתח של מרחב מסוים, בשם משתמש מאומת:
Node.js
Python
Java
Apps Script
כדי להריץ את הדוגמה הזו, מחליפים את הערכים הבאים:
-
THREAD_KEY: מפתח קיים של השרשור במרחב, או שם ייחודי לשרשור כדי ליצור שרשור חדש. -
SPACE_NAME: המזהה מהשדהnameשל המרחב. אפשר לקבל את המזהה באמצעות הפעלת השיטהListSpaces()או מכתובת ה-URL של המרחב.
איך נותנים שם להודעה
כדי לאחזר או לציין הודעה בקריאות עתידיות ל-API, אפשר לתת שם להודעה על ידי הגדרת השדה messageId בבקשה.
כשנותנים שם להודעה, אפשר לציין את ההודעה בלי לשמור את המזהה שהמערכת הקצתה לה מתוך שם המשאב של ההודעה (שמוצג בשדה name).
לדוגמה, כדי לאחזר הודעה באמצעות השיטה get(), צריך להשתמש בשם המשאב כדי לציין איזו הודעה לאחזר. שם המשאב מעוצב כ-spaces/{space}/messages/{message}, כאשר {message} מייצג את המזהה שהוקצה על ידי המערכת או את השם המותאם אישית שהגדרתם כשנוצר ההודעה.
כדי לתת שם להודעה, מציינים מזהה מותאם אישית בשדה messageId כשיוצרים את ההודעה. הערך בשדה messageId מוגדר בשדה clientAssignedMessageId של המשאב Message.
אפשר לתת שם להודעה רק כשיוצרים אותה. אי אפשר לתת שם למזהה בהתאמה אישית או לשנות אותו בהודעות קיימות. המזהה המותאם אישית צריך לעמוד בדרישות הבאות:
- מתחיל ב-
client-. לדוגמה,client-custom-nameהוא מזהה מותאם אישית תקין, אבלcustom-nameלא. - הוא יכול להכיל עד 63 תווים, רק אותיות קטנות, מספרים ומקפים.
- ייחודי במרחב. אפליקציית Chat לא יכולה להשתמש באותו מזהה מותאם אישית להודעות שונות.
הקוד הבא מראה דוגמה לאופן שבו אפליקציית Chat יכולה לשלוח הודעת טקסט עם מזהה למרחב נתון בשם משתמש מאומת:
Node.js
Python
Java
Apps Script
כדי להריץ את הדוגמה הזו, מחליפים את הערכים הבאים:
-
SPACE_NAME: המזהה מהשדהnameשל המרחב. אפשר לקבל את המזהה באמצעות הפעלת השיטהListSpaces()או מכתובת ה-URL של המרחב. -
MESSAGE-ID: שם ההודעה שמתחיל ב-custom-. השם חייב להיות ייחודי ולא זהה לשמות של הודעות אחרות שנוצרו על ידי אפליקציית Chat במרחב שצוין.
ציטוט הודעה
כדי לצטט הודעה אחרת, צריך להתקשר אל
CreateMessage()
(rpc,
rest)
ולהגדיר את quotedMessageMetadata
(rpc,
rest)
בבקשה.
אפשר לצטט הודעות בשרשור או בשיחה הראשית, אבל אי אפשר לצטט הודעה משרשור אחר.
בדוגמה הבאה אפשר לראות איך יוצרים הודעה עם ציטוט של הודעה אחרת:
Node.js
import {createClientWithUserCredentials} from './authentication-utils.js';

const USER_AUTH_OAUTH_SCOPES = ['https://www.googleapis.com/auth/chat.messages.create'];

// This sample shows how to create a message that quotes another message.
async function main() {

  // Create a client
  const chatClient = await createClientWithUserCredentials(USER_AUTH_OAUTH_SCOPES);

  // Initialize request argument(s)
  const request = {

    // TODO(developer): Replace SPACE_NAME .
    parent: 'spaces/SPACE_NAME',

    message: {
      text: 'I am responding to a quoted message!',

      // quotedMessageMetadata lets chat apps respond to a message by quoting it.
      quotedMessageMetadata: {

        // TODO(developer): Replace QUOTED_MESSAGE_NAME
        // and QUOTED_MESSAGE_LAST_UPDATE_TIME.
        name: 'QUOTED_MESSAGE_NAME',
        lastUpdateTime: 'QUOTED_MESSAGE_LAST_UPDATE_TIME'
      }
    }
  };

  // Make the request
  const response = await chatClient.createMessage(request);

  // Handle the response
  console.log(response);
}

main().catch(console.error);
Python
from authentication_utils import create_client_with_user_credentials
from google.apps import chat_v1 as google_chat
from google.protobuf.timestamp_pb2 import Timestamp

SCOPES = ['https://www.googleapis.com/auth/chat.messages.create']

# This sample shows how to create a message that quotes another message.
def create_message_quote_message():
    '''Creates a message that quotes another message.'''

    # Create a client
    client = create_client_with_user_credentials(SCOPES)

    # Create a timestamp from the RFC-3339 string.
    # TODO(developer): Replace QUOTED_MESSAGE_LAST_UPDATE_TIME.
    last_update_time = Timestamp()
    last_update_time.FromJsonString('QUOTED_MESSAGE_LAST_UPDATE_TIME')

    # Initialize request argument(s)
    request = google_chat.CreateMessageRequest(

        # TODO(developer): Replace SPACE_NAME.
        parent='spaces/SPACE_NAME',

        # Create the message.
        message = google_chat.Message(
            text='I am responding to a quoted message!',

            # quotedMessageMetadata lets chat apps respond to a message by quoting it.
            quoted_message_metadata=google_chat.QuotedMessageMetadata(

                name='QUOTED_MESSAGE_NAME',
                last_update_time=last_update_time
            )
        )
    )

    # Make the request
    response = client.create_message(request)

    # Handle the response
    print(response)

create_message_quote_message()
Java
import com.google.chat.v1.ChatServiceClient;
import com.google.chat.v1.CreateMessageRequest;
import com.google.chat.v1.Message;
import com.google.chat.v1.QuotedMessageMetadata;
import com.google.protobuf.util.Timestamps;
import com.google.workspace.api.chat.samples.utils.AuthenticationUtils;
import java.text.ParseException;

// This sample shows how to create a message that quotes another message.
public class CreateMessageQuoteMessage {
  public static void main(String[] args) throws Exception, ParseException {
    // Create a client.
    ChatServiceClient chatClient = AuthenticationUtils.createClientWithUserCredentials();

    // Initialize request argument(s).
    // TODO(developer): Replace SPACE_NAME, QUOTED_MESSAGE_NAME,
    // and QUOTED_MESSAGE_LAST_UPDATE_TIME here.
    String parent = "spaces/SPACE_NAME";
    String quotedMessageName = "QUOTED_MESSAGE_NAME";
    String lastUpdateTime = "QUOTED_MESSAGE_LAST_UPDATE_TIME";

    QuotedMessageMetadata quotedMessageMetadata =
        QuotedMessageMetadata.newBuilder()
            .setName(quotedMessageName)
            .setLastUpdateTime(Timestamps.parse(lastUpdateTime))
            .build();

    Message message = Message.newBuilder()
        .setText("I am responding to a quoted message!")
        .setQuotedMessageMetadata(quotedMessageMetadata)
        .build();

    CreateMessageRequest request =
        CreateMessageRequest.newBuilder()
            .setParent(parent)
            .setMessage(message)
            .build();

    // Make the request.
    Message response = chatClient.createMessage(request);

    // Handle the response.
    System.out.println(response);
  }
}
Apps Script
/**
 * Creates a message that quotes another message.
 *
 * Relies on the OAuth2 scope 'https://www.googleapis.com/auth/chat.messages.create'
 * referenced in the manifest file (appsscript.json).
 */
function createMessageQuoteMessage() {

  // Initialize request argument(s)
  // TODO(developer): Replace SPACE_NAME here.
  const parent = 'spaces/SPACE_NAME';

  const message = {

    // The text content of the message.
    text: 'I am responding to a quoted message!',

    // quotedMessageMetadata lets chat apps respond to a message by quoting it.
    //
    // TODO(developer): Replace QUOTED_MESSAGE_NAME
    // and QUOTED_MESSAGE_LAST_UPDATE_TIME .
    quotedMessageMetadata: {
      name: 'QUOTED_MESSAGE_NAME',
      lastUpdateTime: 'QUOTED_MESSAGE_LAST_UPDATE_TIME',
    }
  };

  // Make the request
  const response = Chat.Spaces.Messages.create(message, parent);

  // Handle the response
  console.log(response);
}
כדי להריץ את הדוגמה הזו, מחליפים את הערכים הבאים:
-
SPACE_NAME: המזהה מהשדהnameשל המרחב. אפשר לקבל את המזהה באמצעות קריאה לשיטהListSpaces()(rpc,rest) או מכתובת ה-URL של המרחב. -
QUOTED_MESSAGE_NAME: משאב ההודעהname(rpc,rest) של ההודעה שרוצים לצטט בפורמטspaces/{space}/messages/{message}. -
QUOTED_MESSAGE_LAST_UPDATE_TIME: חותמת הזמן של העדכון האחרון של ההודעה שרוצים לצטט. אם ההודעה לא נערכה אף פעם, הערך הזה תואם ל-createTime(rpc, rest). אם ההודעה נערכה, הערך הזה תואם ל-lastUpdateTime(rpc, rest).
פתרון בעיות
כשמוחזרת שגיאה מאפליקציית Google Chat או מכרטיס, מוצגת בממשק של Chat ההודעה 'משהו השתבש'. או 'לא ניתן לעבד את הבקשה שלך'. לפעמים בממשק המשתמש של Chat לא מוצגת הודעת שגיאה, אבל אפליקציית Chat או הכרטיס מפיקים תוצאה לא צפויה. לדוגמה, יכול להיות שהודעה בכרטיס לא תופיע.
יכול להיות שלא תוצג הודעת שגיאה בממשק המשתמש של Chat, אבל אם הפעלתם את רישום השגיאות באפליקציות של Chat, תוכלו לראות הודעות שגיאה ונתוני יומן שיעזרו לכם לתקן את השגיאות. לקבלת עזרה בצפייה בשגיאות, באיתור באגים ובתיקון שלהן, אפשר לעיין במאמר פתרון בעיות ב-Google Chat.
נושאים קשורים
- משתמשים בכלי ליצירת כרטיסים כדי לעצב ולראות תצוגה מקדימה של הודעות כרטיס JSON לאפליקציות ל-Chat.
- עיצוב הודעות
- איך מקבלים פרטים על הודעה
- הצגת רשימה של ההודעות במרחב.
- עדכון הודעה
- מחיקת הודעה
- איך מזהים משתמשים בהודעות ב-Google Chat
- שליחת הודעות ל-Google Chat באמצעות webhooks נכנסים