
این آموزش شما را در مراحل ایجاد و استفاده از یک سبک نقشه با حالت روشن که شبکه جادهها را برجسته میکند، راهنمایی میکند:
یک سبک نقشه ایجاد و منتشر کنید تا قابل استفاده باشد.
یک شناسه نقشه ایجاد و متصل کنید که به شما امکان میدهد از سبک خود در برنامهها و وبسایتها استفاده کنید.
شناسه نقشه را به برنامهها و وبسایتهای خود اضافه کنید تا برنامههای شما از سبک نقشه شما استفاده کنند.
مرحله ۱: ایجاد و انتشار یک سبک نقشه
استایلدهی نقشههای مبتنی بر ابر باز
به کنسول گوگل کلود بروید و Map Styles را انتخاب کنید. در صورت نیاز، یک پروژه را انتخاب یا ایجاد کنید.
ایجاد سبک را انتخاب کنید.
نور را انتخاب کنید.
در پایین کادر محاورهای، گزینهی «سفارشیسازی» را انتخاب کنید.
شبکه جاده را سبک کنید
در زیر «ویژگیهای نقشه» ، بخش «زیرساخت» را باز کنید، سپس «شبکه جادهها» را انتخاب کنید.
در پنل سبک شبکه جاده، در قسمت Polyline و سپس Fill color ، کادر رنگ را انتخاب کنید.
یک رنگ روشن انتخاب کنید. تغییر رنگ به طور خودکار کادر Fill color را علامت میزند.
در قسمت Stroke width ، عرض stroke را روی 5px تنظیم کنید.
روی نقشه، بزرگنمایی و کوچکنمایی کنید تا تأثیر تغییرات خود را ببینید. از آنجا که شما یک عارضه نقشه را انتخاب کردهاید که در سلسله مراتب نسبتاً بالا قرار دارد، تمام انواع جادههای زیر آن تغییرات شما را به ارث بردهاند.

سبک نقشه خود را ذخیره و منتشر کنید
در بالا سمت راست، ذخیره را انتخاب کنید.
در بخش «ذخیره و انتشار سبک نقشه» ، یک نام و در صورت تمایل، توضیحی برای سبک نقشه خود وارد کنید.
ذخیره را انتخاب کنید. سبک نقشه شما ذخیره و منتشر میشود.

مرحله ۲: ایجاد و اتصال یک شناسه نقشه
شناسه نقشه به شما امکان میدهد از سبک نقشه خود در برنامهها و وبسایتها استفاده کنید. اگر تغییراتی در سبک نقشه مرتبط با شناسه نقشه ایجاد کنید، تغییرات سبک شما هنگام انتشار اعمال میشوند، بنابراین نیازی به بهروزرسانی نرمافزار یا برنامه نیست.
ایجاد شناسه نقشه
در کنسول گوگل کلود، گزینه مدیریت نقشه (Map Management) را انتخاب کنید.
در بالا، «ایجاد شناسه نقشه» را انتخاب کنید.

یک نام برای شناسه نقشه خود و در صورت تمایل، یک توضیح اضافه کنید.
بسته به اینکه میخواهید از سبک نقشه خود در کجا استفاده کنید، نوع نقشه را برای شناسه نقشه انتخاب کنید.

در پایین صفحه، گزینه ذخیره را انتخاب کنید. شناسه نقشه شما ایجاد شده است.
شناسه نقشه را به سبک نقشه خود وصل کنید
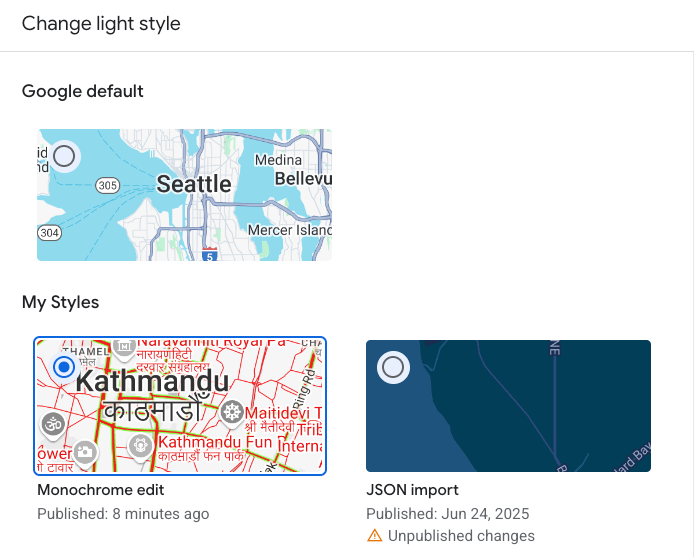
در زیر سبکهای نقشه ، گزینه تغییر سبک حالت نور را برای حالت نور انتخاب کنید.
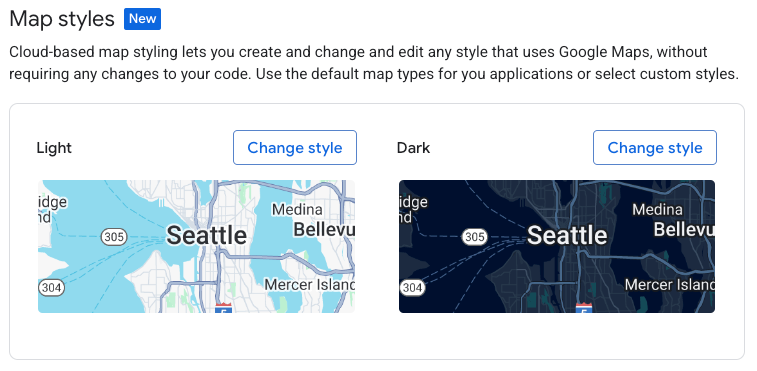
در بخش «تغییر سبک نور» ، سبک نقشهای را که میخواهید برای حالت روشن در برنامههایتان استفاده کنید انتخاب کنید و «تمام» را انتخاب کنید.
ذخیره را انتخاب کنید. شناسه نقشه شما اکنون با سبکهای نقشه شما مرتبط شده است.
مرحله ۳: شناسه نقشه را به برنامهها یا وبسایتهای خود اضافه کنید
حالا که یک شناسه نقشه دارید که با یک سبک نقشه منتشر شده مرتبط است، میتوانید آن را به برنامهها یا وبسایتهای خود اضافه کنید و آزمایش کنید تا مطمئن شوید که مطابق انتظار عمل میکند.
برای اطلاعات بیشتر در مورد افزودن شناسه نقشه، به افزودن شناسه نقشه به نقشه خود مراجعه کنید.
قدم بعدی چیست؟
در اینجا چند مورد وجود دارد که میتوانید بعداً امتحان کنید:
بهروزرسانی یک سبک . برای ایجاد تغییرات در سبک نقشه خود و انتشار آن، به تغییر سبک مراجعه کنید.
درک کنید که چگونه سبک شما در انواع مختلف نقشه اعمال میشود . برای اطلاعات بیشتر، به «یادگیری در مورد حالتها و انواع نقشه» مراجعه کنید.
بهروزرسانیهای سبک نقشه خود را آزمایش کنید . اگر میخواهید تغییرات سبک خود را قبل از انتشار آزمایش کنید، به «آزمایش بهروزرسانیهای سبک نقشه» مراجعه کنید.
سبکهایی را برای سطوح بزرگنمایی خاص ایجاد کنید . به عنوان مثال، میتوانید ظاهر ویژگیهای خاص نقشه را هنگام کوچکنمایی در مقایسه با هنگام بزرگنمایی نقشه، سفارشی کنید. برای اطلاعات بیشتر، به سبک سطوح بزرگنمایی مراجعه کنید.
از سلسله مراتب ویژگیهای نقشه برای دستیابی کارآمد به سبکهای مورد نظر خود استفاده کنید . به عنوان مثال، میتوانید به ویژگی نقشه سطح بالای Natural>Land سبک بدهید و تمام ویژگیهای نقشه زمین زیر آن، سبک را به ارث میبرند. سپس میتوانید سبک سفارشی را فقط روی ویژگیهای نقشه فرزند که میخواهید متفاوت باشند، اعمال کنید. برای اطلاعات بیشتر، به بخش «درک وراثت و سلسله مراتب سبک نقشه» مراجعه کنید.