
本指南說明如何使用 OAuth 2.0 和使用者的 Google 憑證存取 Chat API。透過使用者憑證進行驗證和授權,Chat 應用程式就能存取使用者資料,並代表通過驗證的使用者執行作業。代表使用者進行驗證後,應用程式會取得與該使用者相同的權限,並能執行與該使用者相同的動作。
使用使用者憑證驗證及授權 API 呼叫後,Chat 應用程式可以執行下列操作:
- 建立 Chat 聊天室。
- 將使用者新增至 Chat 聊天室和群組對話。
- 使用其他 Workspace API 處理使用者資料,例如:
當應用程式執行需要使用者驗證的動作 (例如建立聊天室) 時,Google Chat 會顯示出處訊息,告知使用者是哪個應用程式代表授權使用者執行動作。
如要進一步瞭解 Chat 擴充應用程式何時需要驗證,以及應使用哪種驗證方式,請參閱 Chat API 驗證和授權總覽中的「必要驗證類型」。
以 Google Workspace 管理員身分驗證及授權
本節說明 Google Workspace 管理員如何透過使用者驗證,管理機構的 Google Chat 應用程式和空間。
使用全網域委派進行驗證和授權
如果您是網域管理員,可以授予「全網域授權委派」,授權應用程式的服務帳戶存取使用者資料,不必逐一取得使用者的同意。設定全網域委派後,服務帳戶就能模擬使用者帳戶。雖然服務帳戶用於驗證,但全網域委派會模擬使用者,因此視為使用者驗證。如果任何功能需要使用者驗證,您可以使用全網域委派。
使用管理員權限進行驗證和授權
如果您是網域管理員或具備管理員權限的委派管理員,可以透過在適用方法的要求中設定 useAdminAccess 欄位,以管理員權限驗證及授權對 Google Chat API 的呼叫。詳情請參閱 API 參考說明文件。
請注意,如果 Google Chat 應用程式以管理員權限執行動作,Chat 不會向使用者顯示執行動作的 Chat 應用程式名稱,也不會顯示授權管理員的名稱,只會告知使用者該動作是由所屬機構的管理員執行。
必要條件
Java
- 具有 Google Chat 存取權的 Business 或 Enterprise 版 Google Workspace 帳戶。
- 建立 Google Cloud 專案。
- 啟用及設定 Google Chat API,並為 Chat 應用程式命名、設定圖示和說明。
- JDK 1.7 以上版本
- Maven 套件管理工具
-
已初始化的 Maven 專案。如要初始化新專案,請在指令列介面中執行下列指令:
mvn archetype:generate -DgroupId=com.google.chat.app.authsample -DartifactId=auth-sample-app -DarchetypeArtifactId=maven-archetype-quickstart -DarchetypeVersion=1.4 -DinteractiveMode=false
Python
- 具有 Google Chat 存取權的 Business 或 Enterprise 版 Google Workspace 帳戶。
- 建立 Google Cloud 專案。
- 啟用及設定 Google Chat API,並為 Chat 應用程式命名、設定圖示和說明。
- Python 3.6 以上版本
- pip 套件管理工具
Node.js
- 具有 Google Chat 存取權的 Business 或 Enterprise 版 Google Workspace 帳戶。
- 建立 Google Cloud 專案。
- 啟用及設定 Google Chat API,並為 Chat 應用程式命名、設定圖示和說明。
- Node.js 14 以上版本
- npm 套件管理工具
-
已初始化的 Node.js 專案。如要初始化新專案,請建立並切換至新資料夾,然後在指令列介面中執行下列指令:
npm init
Apps Script
- 具有 Google Chat 存取權的 Business 或 Enterprise 版 Google Workspace 帳戶。
- 建立 Google Cloud 專案。
- 啟用及設定 Google Chat API,並為 Chat 應用程式命名、設定圖示和說明。
- 建立獨立的 Apps Script 專案, 並開啟進階 Chat 服務。
步驟 1:設定 OAuth 同意畫面、指定範圍,並註冊應用程式
使用 OAuth 2.0 授權時,Google 會向使用者顯示同意畫面,內容包括專案摘要、政策,以及要求的授權範圍。設定應用程式的 OAuth 同意畫面,可決定 Google 向使用者和應用程式審查人員顯示的內容,並註冊應用程式,以便日後發布。
所有使用 OAuth 2.0 的應用程式都必須設定同意畫面,但您只需要列出 Google Workspace 機構外部人員使用的應用程式範圍。
在 Google Cloud 控制台中,依序前往「Menu」(選單) > Google Auth platform >「Branding」(品牌)。
如果您已設定Google Auth platform,可以在「品牌」、「目標對象」和「資料存取權」中設定下列 OAuth 同意畫面設定。如果看到「Get Started」(尚未設定)Google Auth platform 訊息,請按一下「開始使用」:
- 在「App Information」(應用程式資訊) 下方的「App name」(應用程式名稱) 欄位中,輸入應用程式名稱。
- 在「使用者支援電子郵件」中,選擇支援電子郵件地址,方便使用者在同意聲明方面有任何疑問時與您聯絡。
- 點選 [下一步]。
- 在「目標對象」下方,選取「內部」。如果無法選取「內部」,請選取「外部」。
- 點選 [下一步]。
- 在「聯絡資訊」下方,輸入可接收專案異動通知的電子郵件地址。
- 點選 [下一步]。
- 在「完成」部分,請詳閱《Google API 服務使用者資料政策》,然後選取「我同意《Google API 服務:使用者資料政策》」。
- 按一下「繼續」。
- 點選「建立」。
- 如果為使用者類型選取「外部」,請新增測試使用者:
- 按一下「目標對象」。
- 在「測試使用者」下方,按一下「新增使用者」。
- 輸入您的電子郵件地址和任何其他授權測試使用者,然後按一下「儲存」。
依序按一下「資料存取權」>「新增或移除範圍」。系統會顯示面板,列出您在 Google Cloud 專案中啟用的各項 API 範圍。
- 在「Manually add scopes」(手動新增範圍) 下方,貼上
https://www.googleapis.com/auth/chat.spaces.create,這是執行本指南驗證範例的必要範圍。如要查看 Chat API 的可用範圍,請參閱驗證總覽中的「Chat API 範圍」。 - 按一下「新增至表格」。
- 按一下「更新」。
- 選取應用程式所需的範圍後,在「資料存取」 頁面中,按一下「儲存」。
- 在「Manually add scopes」(手動新增範圍) 下方,貼上
步驟 2:在 Google Cloud 控制台中建立 OAuth 用戶端 ID 憑證
如要以使用者身分驗證,並存取應用程式中的使用者資料,您需要建立一或多個 OAuth 2.0 用戶端 ID。Google 的 OAuth 伺服器會使用用戶端 ID 來識別個別應用程式。如果您的應用程式在多個平台 (例如 Android、iOS 和網頁) 上執行,則必須為每個平台建立專屬的用戶端 ID。
建立 OAuth 用戶端 ID 憑證
請選擇應用程式類型,查看如何建立 OAuth 用戶端 ID 的具體操作說明:
網頁應用程式
- 在 Google Cloud 控制台中,依序前往「Menu」(選單) > Google Auth platform >「Clients」(用戶端)。
- 按一下「Create Client」(建立用戶端)。
- 依序點選「Application type」(應用程式類型) >「Web application」(網頁應用程式)。
- 在「Name」(名稱) 欄位中,輸入憑證名稱。這個名稱只會顯示在 Google Cloud 控制台中。
- 新增與應用程式相關的授權 URI:
- 用戶端應用程式 (JavaScript):在「已授權的 JavaScript 來源」下方,按一下「新增 URI」。然後輸入要用於瀏覽器要求的 URI。這會識別應用程式可從哪些網域將 API 要求傳送至 OAuth 2.0 伺服器。
- 伺服器端應用程式 (Java、Python 等):按一下「已授權的重新導向 URI」下方的「新增 URI」。然後輸入端點 URI,OAuth 2.0 伺服器可將回應傳送至該 URI。
- 按一下 [Create] (建立)。
新建立的憑證會顯示在「OAuth 2.0 Client IDs」(OAuth 2.0 用戶端 ID) 下方。
記下用戶端 ID。網頁應用程式不會使用用戶端密鑰。
Android
- 在 Google Cloud 控制台中,依序前往「Menu」(選單) > Google Auth platform >「Clients」(用戶端)。
- 按一下「Create Client」(建立用戶端)。
- 依序點選「Application type」(應用程式類型) >「Android」。
- 在「名稱」欄位中,輸入憑證名稱。這個名稱只會顯示在 Google Cloud 控制台中。
- 在「套件名稱」欄位中,輸入
AndroidManifest.xml檔案中的套件名稱。 - 在「SHA-1 憑證指紋」欄位中,輸入產生的 SHA-1 憑證指紋。
- 按一下 [Create] (建立)。
新建立的憑證會顯示在「OAuth 2.0 Client IDs」(OAuth 2.0 用戶端 ID) 下方。
iOS
- 在 Google Cloud 控制台中,依序前往「Menu」(選單) > Google Auth platform >「Clients」(用戶端)。
- 按一下「Create Client」(建立用戶端)。
- 依序點選「Application type」(應用程式類型) >「iOS」。
- 在「名稱」欄位中,輸入憑證名稱。這個名稱只會顯示在 Google Cloud 控制台中。
- 在「軟體包 ID」欄位中,輸入應用程式
Info.plist檔案中列出的軟體包 ID。 - 選用:如果您的應用程式在 Apple App Store 中上架,請輸入 App Store ID。
- 選用:在「團隊 ID」欄位中,輸入 Apple 產生並指派給您團隊的專屬字串 (共 10 個字元)。
- 按一下 [Create] (建立)。
新建立的憑證會顯示在「OAuth 2.0 Client IDs」(OAuth 2.0 用戶端 ID) 下方。
Chrome 應用程式
- 在 Google Cloud 控制台中,依序前往「Menu」(選單) > Google Auth platform >「Clients」(用戶端)。
- 按一下「Create Client」(建立用戶端)。
- 依序點選「Application type」(應用程式類型) >「Chrome Extension」(Chrome 擴充功能)。
- 在「名稱」欄位中,輸入憑證名稱。這個名稱只會顯示在 Google Cloud 控制台中。
- 在「項目 ID」欄位中,輸入應用程式的專屬 32 字元 ID 字串。您可以在應用程式的 Chrome 線上應用程式商店網址和 Chrome 線上應用程式商店開發人員資訊主頁中找到這個 ID 值。
- 按一下 [Create] (建立)。
新建立的憑證會顯示在「OAuth 2.0 Client IDs」(OAuth 2.0 用戶端 ID) 下方。
電腦版應用程式
- 在 Google Cloud 控制台中,依序前往「Menu」(選單) > Google Auth platform >「Clients」(用戶端)。
- 按一下「Create Client」(建立用戶端)。
- 依序點選「Application type」(應用程式類型) >「Desktop app」(電腦版應用程式)。
- 在「Name」(名稱) 欄位中,輸入憑證名稱。這個名稱只會顯示在 Google Cloud 控制台中。
- 按一下 [Create] (建立)。
新建立的憑證會顯示在「OAuth 2.0 Client IDs」(OAuth 2.0 用戶端 ID) 下方。
電視和受限制的輸入裝置
- 在 Google Cloud 控制台中,依序前往「Menu」(選單) > Google Auth platform >「Clients」(用戶端)。
- 按一下「Create Client」(建立用戶端)。
- 依序點選「Application type」(應用程式類型) >「TVs & Limited Input devices」(電視和輸入受限的裝置)。
- 在「名稱」欄位中,輸入憑證名稱。這個名稱只會顯示在 Google Cloud 控制台中。
- 按一下 [Create] (建立)。
新建立的憑證會顯示在「OAuth 2.0 Client IDs」(OAuth 2.0 用戶端 ID) 下方。
通用 Windows 平台 (UWP)
- 在 Google Cloud 控制台中,依序前往「Menu」(選單) > Google Auth platform >「Clients」(用戶端)。
- 按一下「Create Client」(建立用戶端)。
- 依序點選「Application type」(應用程式類型) >「Universal Windows Platform (UWP)」(通用 Windows 平台 (UWP))。
- 在「名稱」欄位中,輸入憑證名稱。這個名稱只會顯示在 Google Cloud 控制台中。
- 在「商店 ID」欄位中,輸入應用程式專屬的 12 個字元 Microsoft Store ID 值。您可以在應用程式的 Microsoft Store 網址和合作夥伴中心中找到這個 ID。
- 按一下 [Create] (建立)。
新建立的憑證會顯示在「OAuth 2.0 Client IDs」(OAuth 2.0 用戶端 ID) 下方。
下載用戶端密鑰 JSON 檔案
用戶端密鑰檔案是 OAuth 用戶端 ID 憑證的 JSON 表示法,Chat 應用程式提供憑證時可以參考。
在 Google Cloud 控制台中,依序前往「選單」圖示 >「API 和服務」 >「憑證」。
在「OAuth 2.0 Client IDs」下方,按一下您建立的用戶端 ID。
按一下「Download JSON」(下載 JSON)。
將檔案儲存為
credentials.json。
步驟 3:安裝 Google 用戶端程式庫和其他依附元件
安裝 Google 用戶端程式庫和專案所需的其他依附元件。
Java
如要將 Google 用戶端程式庫和其他必要依附元件新增至 Maven 專案,請編輯專案目錄中的 pom.xml 檔案,並新增下列依附元件:
<dependencies>
  <!-- ... existing dependencies ... -->
  <dependency>
    <groupId>com.google.apis</groupId>
    <artifactId>google-api-services-chat</artifactId>
    <version>v1-rev20230905-2.0.0</version>
  </dependency>
  <dependency>
    <groupId>com.google.auth</groupId>
    <artifactId>google-auth-library-oauth2-http</artifactId>
    <version>1.19.0</version>
  </dependency>
  <dependency>
    <groupId>com.google.oauth-client</groupId>
    <artifactId>google-oauth-client-jetty</artifactId>
    <version>1.34.1</version>
  </dependency>
  <dependency>
      <groupId>com.google.code.gson</groupId>
      <artifactId>gson</artifactId>
      <version>2.10.1</version>
  </dependency>
</dependencies>
Python
如果您尚未安裝 Python 適用的 Google 用戶端程式庫,請在指令列介面中執行下列指令:
pip3 install --upgrade google-api-python-client google-auth-oauthlibNode.js
如要將 Google 用戶端程式庫和其他必要依附元件新增至 Node.js 專案,請切換至專案目錄,並在命令列介面中執行下列指令:
npm install "@googleapis/chat" open server-destroyApps Script
本範例使用進階 Chat 服務呼叫 Google Chat API。如要為 Apps Script 專案啟用這項服務,請按照下列步驟操作:
- 按一下左側的「編輯器」圖示 。
- 在左側,按一下「服務」旁的「新增服務」圖示 。
- 選取「Google Chat API」。
- 在「版本」中選取「v1」。
- 按一下 [新增]。
您可以使用用戶端程式庫支援的任何語言。
步驟 4:編寫呼叫 Chat API 的指令碼
使用 OAuth 授權呼叫 API 的程序有多個步驟。在網頁或桌面應用程式中,這個程序通常如下所示:
- 應用程式會將使用者導向授權頁面,要求存取授權範圍指定的使用者資料。應用程式會使用用戶端 ID 憑證識別自身。
- 使用者會審查應用程式要求的權限,並核准要求。
- Google 的驗證伺服器會將瀏覽器連同授權碼,重新導向至應用程式的 HTTP 端點。
- 應用程式會向 Google 的授權伺服器傳送另一項要求,將授權碼換成存取權杖。
- 應用程式會使用存取權杖,代表使用者呼叫 API。
如要進一步瞭解 OAuth 授權程序,請參閱「使用 OAuth 2.0 存取 Google API 指南」。
下列 Java、Python 和 Node.js 程式碼範例使用用戶端程式庫執行 OAuth 授權流程。這個指令會開啟本機 HTTP 伺服器,從授權伺服器接收授權碼,然後將授權碼換成存取權杖。在 Apps Script 程式碼範例中,這個授權流程是由 Apps Script 處理。
完成驗證流程後,指令碼會使用使用者的存取權杖,透過 Chat API 進行驗證,然後建立聊天室。
Java
- 在專案目錄中,開啟
src/main/java/com/google/chat/app/authsample/App.java檔案。 將
App.java中的內容替換為下列程式碼:package com.google.chat.app.authsample; import com.google.api.client.auth.oauth2.Credential; import com.google.api.client.extensions.java6.auth.oauth2.AuthorizationCodeInstalledApp; import com.google.api.client.extensions.jetty.auth.oauth2.LocalServerReceiver; import com.google.api.client.googleapis.auth.oauth2.GoogleAuthorizationCodeFlow; import com.google.api.client.googleapis.auth.oauth2.GoogleClientSecrets; import com.google.api.client.googleapis.javanet.GoogleNetHttpTransport; import com.google.api.client.http.HttpTransport; import com.google.api.client.json.JsonFactory; import com.google.api.client.json.gson.GsonFactory; import com.google.api.client.util.store.FileDataStoreFactory; import com.google.api.services.chat.v1.HangoutsChat; import com.google.api.services.chat.v1.model.Space; import java.io.InputStreamReader; import java.util.Collection; import java.util.Collections; /** * Authenticates with Chat API via user credentials, then creates a Chat space. */ public class App { // Application OAuth credentials. private static final String KEYS_RESOURCE_URI = "/credentials.json"; // Define your app's authorization scopes. private static final Collection<String> SCOPES = Collections.singleton("https://www.googleapis.com/auth/chat.spaces.create"); // Directory to store user credentials. private static final java.io.File DATA_STORE_DIR = new java.io.File(System.getProperty("user.home"), ".store/auth-sample-app"); // Global instance of the JSON factory. private static final JsonFactory JSON_FACTORY = GsonFactory.getDefaultInstance(); // Global instance of the HTTP transport. private static HttpTransport httpTransport; // Global instance of the DataStoreFactory. The best practice is to make it a single // globally shared instance across your application. private static FileDataStoreFactory dataStoreFactory; public static void main( String[] args ) { try { // Run app. httpTransport = GoogleNetHttpTransport.newTrustedTransport(); dataStoreFactory = new FileDataStoreFactory(DATA_STORE_DIR); Credential userCredential = authorize(); Space response = App.createChatSpace(userCredential); // Print details about the created space. System.out.println(response); } catch (Exception e) { e.printStackTrace(); } } /** * Authorizes the installed application to access user's protected data. */ private static Credential authorize() throws Exception { // Load client secrets. GoogleClientSecrets clientSecrets = GoogleClientSecrets.load(JSON_FACTORY, new InputStreamReader(App.class.getResourceAsStream("/credentials.json"))); // Set up authorization code flow. GoogleAuthorizationCodeFlow flow = new GoogleAuthorizationCodeFlow.Builder( httpTransport, JSON_FACTORY, clientSecrets, SCOPES) .setDataStoreFactory(dataStoreFactory) .build(); // Authorize. return new AuthorizationCodeInstalledApp(flow, new LocalServerReceiver()).authorize("user"); } /** * Creates a Chat space. */ private static Space createChatSpace(Credential userCredential) throws Exception { // Build the Chat API client and authenticate with the user account. HangoutsChat chatService = new HangoutsChat.Builder( httpTransport, JSON_FACTORY, userCredential) .setApplicationName("auth-sample-app") .build(); // Create a Chat space. Space space = new Space() // To create a named space, set spaceType to SPACE. .setSpaceType("SPACE") // The user-visible name of the space. .setDisplayName("API-made"); return chatService.spaces().create(space).execute(); } }在專案目錄中建立名為
resources的新子目錄。將
credentials.json檔案複製到resources子目錄。如要設定 Maven,將用戶端密鑰檔案納入專案套件,請編輯專案目錄中的
pom.xml檔案,並將下列設定新增至<build>區段:<build> <!-- ... existing configurations ... --> <resources> <resource> <directory>resources</directory> </resource> </resources> </build>如要設定 Maven,將依附元件納入專案套件,並執行應用程式的主要類別,請編輯專案目錄中的
pom.xml檔案,並在<plugins>區段中新增下列設定:<plugins> <!-- ... existing configurations ... --> <plugin> <artifactId>maven-assembly-plugin</artifactId> <configuration> <archive> <manifest> <mainClass>com.google.chat.app.authsample.App</mainClass> </manifest> </archive> <descriptorRefs> <descriptorRef>jar-with-dependencies</descriptorRef> </descriptorRefs> </configuration> </plugin> </plugins>
Python
在與
credentials.json相同的目錄中,將下列程式碼儲存為名為chat_space_create_named.py的檔案:from google_auth_oauthlib.flow import InstalledAppFlow from googleapiclient.discovery import build # Define your app's authorization scopes. # When modifying these scopes, delete the file token.json, if it exists. SCOPES = ["https://www.googleapis.com/auth/chat.spaces.create"] def main(): ''' Authenticates with Chat API via user credentials, then creates a Chat space. ''' flow = InstalledAppFlow.from_client_secrets_file( 'credentials.json', SCOPES) creds = flow.run_local_server() # Build a service endpoint for Chat API. service = build('chat', 'v1', credentials=creds) # Use the service endpoint to call Chat API. result = service.spaces().create( # Details about the space to create. body = { # To create a named space, set spaceType to SPACE. 'spaceType': 'SPACE', # The user-visible name of the space. 'displayName': 'API-made' } ).execute() # Prints details about the created space. print(result) if __name__ == '__main__': main()
Node.js
在與 Node.js 專案和
credentials.json相同的目錄中,將下列程式碼儲存到名為chat_space_create_named.js的檔案:const fs = require('fs'); const path = require('path'); const http = require('http'); const url = require('url'); const destroyer = require('server-destroy'); const chat = require('@googleapis/chat'); // Application OAuth credentials. const keys = require('./credentials.json').installed; // Define your app's authorization scopes. // When modifying these scopes, delete the file token.json, if it exists. const scopes = ["https://www.googleapis.com/auth/chat.spaces.create"]; // Create a new OAuth2 client with the configured keys. const oauth2Client = new chat.auth.OAuth2( keys.client_id, keys.client_secret, 'http://localhost:3000' ); /** * Opens an HTTP server to accept the OAuth callback. * In this simple example, the only request to our webserver is to /?code=<code>. */ async function authenticate(scopes) { const opn = (await import('open')).default; return new Promise((resolve, reject) => { // Generate the URL for authorization. const authorizeUrl = oauth2Client.generateAuthUrl({ access_type: 'offline', scope: scopes.join(' '), }); // Start the HTTP server to listen for the callback. const server = http .createServer(async (req, res) => { try { const qs = new url.URL(req.url, 'http://localhost:3000').searchParams; res.end('Authentication successful! Please return to the console.'); server.destroy(); const { tokens } = await oauth2Client.getToken(qs.get('code')); oauth2Client.credentials = tokens; resolve(oauth2Client); } catch (e) { reject(e); } }) .listen(3000, () => { // Open the browser to the authorize URL to start the workflow. opn(authorizeUrl, { wait: false }).then(cp => cp.unref()); }); destroyer(server); }); } /** * Authenticates with Chat API via user credentials, then creates a Chat space. */ async function createSpace() { // Create the Chat API client and authenticate with the authorized user. const chatClient = await chat.chat({ version: 'v1', auth: oauth2Client }); // Call the Chat API to create a space. const result = await chatClient.spaces.create({ // Details about the space to create. requestBody: { // To create a named space, set spaceType to SPACE. 'spaceType': 'SPACE', // The user-visible name of the space. 'displayName': 'API-made' } }); return result; } // Authenticate the user, execute the function, // then print details about the created space. authenticate(scopes) .then(createSpace) .then(console.log);
Apps Script
在 Apps Script 編輯器中,編輯
appsscript.json檔案,並新增呼叫 API 時所需的 OAuth 範圍:"oauthScopes": [ "https://www.googleapis.com/auth/chat.spaces.create" ]在 Apps Script 專案中,將下列程式碼儲存為名為
ChatSpaceCreateNamed.gs的檔案:/** * Authenticates with Chat API via user credentials, then creates a * Chat space. */ function createSpace() { try { // Details about the space to create. // To create a named space, set spaceType to SPACE. // The user-visible name of the space is displayName. const space = {'displayName': 'API-made', 'spaceType': 'SPACE'}; // Call Chat API with user credentials to create the space. const result = Chat.Spaces.create(space); // Log details about the created space. console.log(result); } catch (err) { // TODO (developer) - Handle exception console.log('Failed to create space with error %s', err.message); } }
步驟 5:執行範例指令碼
如要執行範例,請從指令列前往存放專案檔案的目錄,然後執行下列指令:
Java
mvn compile assembly:singlejava -jar target/auth-sample-app-1.0-SNAPSHOT-jar-with-dependencies.jar
Python
python3 chat_space_create_named.pyNode.js
node chat_space_create_named.jsApps Script
在 Apps Script 編輯器中開啟 ChatSpaceCreateNamed.gs 檔案,然後按一下「執行」。
瀏覽器隨即開啟,並提示您登入 Google 帳戶:

登入後,系統會顯示 OAuth 同意畫面,要求您授權給應用程式。
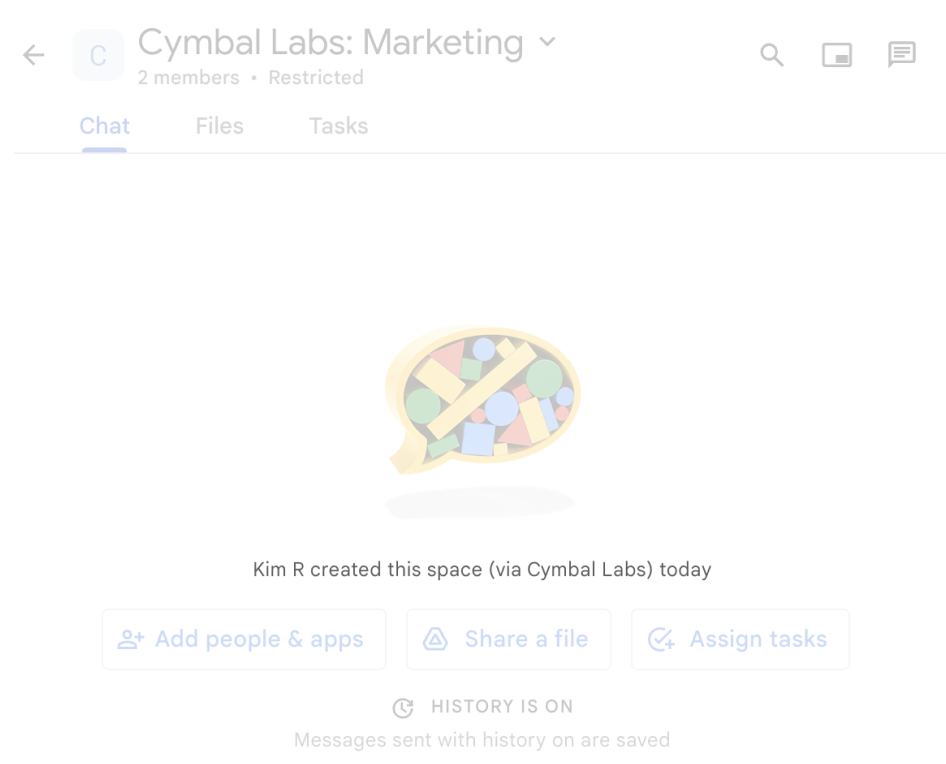
授予權限後,指令碼會呼叫 Chat API,該 API 會建立顯示名稱為 API-made 的 Chat 聊天室,並傳回回應。控制台會列印 API 呼叫的詳細資料。如要尋找聊天室,請前往 Google Chat 的「聊天室」面板。
排解範例問題
執行 chat_space_create_named.py 時,您可能會收到下列錯誤訊息:
Expected a JSON object with a single property for a "web" or "installed" application
這則錯誤訊息表示您從 Google Cloud 控制台下載的 credentials.json 檔案,開頭並非 "web" 或 "installed" 屬性。使用下載的檔案進行驗證後,如果您的程式碼未將存取權杖儲存至 token.json 等新檔案,存取權杖就會寫入 credentials.json,導致後續授權嘗試發生這個錯誤。
如要解決這個錯誤,請再次從 Google Cloud 控制台下載用戶端密鑰檔案,然後將新檔案儲存到目前檔案的位置。
相關主題
如果應用程式需要在單一流程範圍外繼續使用使用者權杖,可以儲存權杖以供日後重複使用。在這種情況下,應用程式必須安全地處理使用者權杖,並處理重新整理權杖的撤銷和到期問題。詳情請參閱「使用 OAuth 2.0 最佳做法指南」和使用者授權應用程式範例:
- Java 使用者授權應用程式範例
- Python 使用者授權應用程式範例
- Node.js 使用者授權應用程式範例
- Apps Script 與 Google Chat 整合後,會自動處理使用者權杖。詳情請參閱「進階即時通訊服務」。如果您為互動式 Chat 應用程式的
appsscript.json檔案新增必要的 OAuth 範圍,Apps Script 整合功能會自動安全地儲存使用者權杖,並在指令碼下次為同一位使用者呼叫 Chat API 時重複使用,過程透明公開。
如要管理精細 OAuth 權限,請參閱「管理 Google Chat 應用程式的精細 OAuth 權限」。
如要瞭解 Chat API 的其他功能,請參閱 Chat API 參考說明文件。