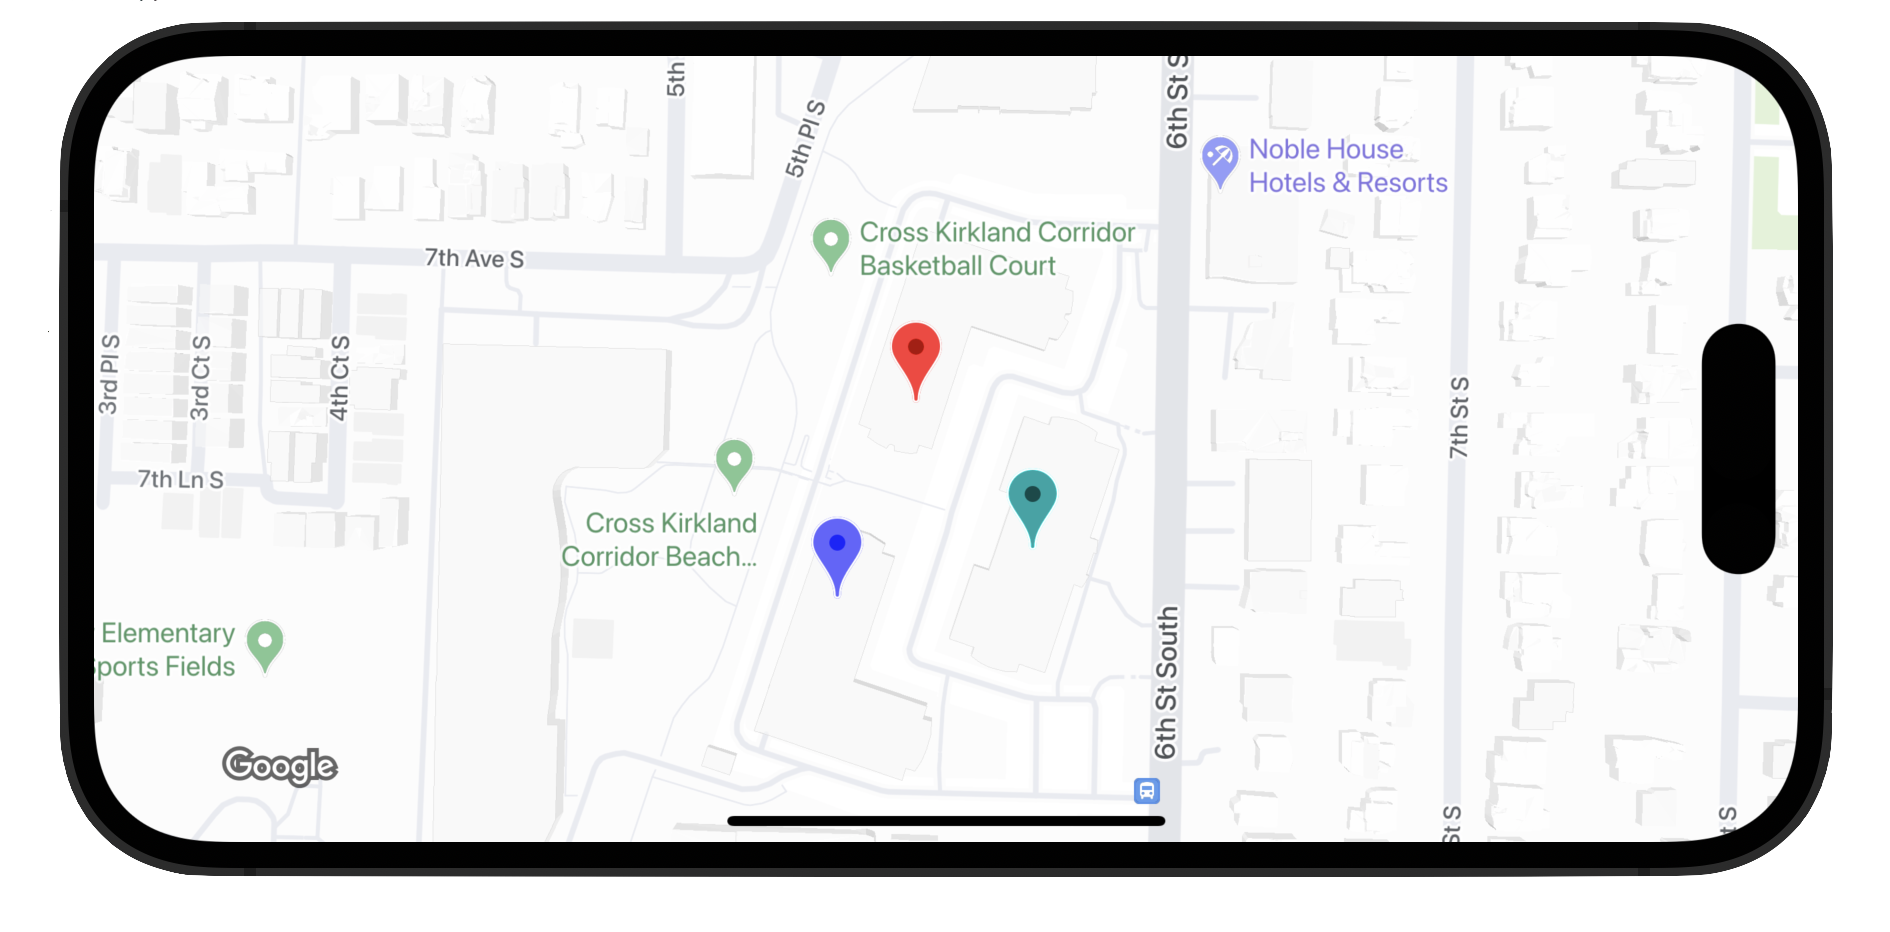
Les repères avancés utilisent deux classes pour définir les repères : la classe GMSAdvancedMarker fournit des fonctionnalités de repère par défaut, et GMSPinImageOptions contient des options de personnalisation plus avancées. Cette page explique comment personnaliser les repères de différentes manières :
- Modifier la couleur d'arrière-plan
- Modifier la couleur de la bordure
- Modifier la couleur du glyphe
- Modifier le texte du glyphe
- Prise en charge des vues et animations personnalisées avec la propriété iconView

Modifier la couleur d'arrière-plan
Utilisez l'option GMSPinImageOptions.backgroundColor pour modifier la couleur d'arrière-plan d'un repère.
Swift
//...

let options = GMSPinImageOptions()
options.backgroundColor = .blue

let pinImage = GMSPinImage(options: options)
advancedMarker.icon = pinImage

advancedMarker.map = mapView
Objective-C
//...

GMSPinImageOptions *options = [[GMSPinImageOptions alloc] init];
options.backgroundColor = [UIColor blueColor];

GMSPinImage *pin = [GMSPinImage pinImageWithOptions:options];
customTextMarker.icon = pin;

customTextMarker.map = mapView;
Modifier la couleur de la bordure
Utilisez l'option GMSPinImageOptions.borderColor pour modifier la couleur d'arrière-plan d'un repère.
Swift
//...

let options = GMSPinImageOptions()
options.borderColor = .blue

let pinImage = GMSPinImage(options: options)
advancedMarker.icon = pinImage

advancedMarker.map = mapView
Objective-C
//...

GMSPinImageOptions *options = [[GMSPinImageOptions alloc] init];
options.backgroundColor = [UIColor blueColor];

GMSPinImage *pin = [GMSPinImage pinImageWithOptions:options];
advancedMarker.icon = pin;

advancedMarker.map = mapView;
Modifier la couleur du glyphe
Utilisez GMSPinImageGlyph.glyphColor pour modifier la couleur d'arrière-plan d'un repère.
Swift
//...

let options = GMSPinImageOptions()

let glyph = GMSPinImageGlyph(glyphColor: .yellow)
options.glyph = glyph

let glyphColor = GMSPinImage(options: options)

advancedMarker.icon = glyphColor
advancedMarker.map = mapView
Objective-C
//...

GMSPinImageOptions *options = [[GMSPinImageOptions alloc] init];

options.glyph = [[GMSPinImageGlyph alloc] initWithGlyphColor:[UIColor yellowColor]];
GMSPinImage *glyphColor = [GMSPinImage pinImageWithOptions:options];

advancedMarker.icon = glyphColor;
advancedMarker.map = mapView;
Modifier le texte du glyphe
Utilisez GMSPinImageGlyph pour modifier le texte du glyphe d'un repère.
Swift
//...

let options = GMSPinImageOptions()

let glyph = GMSPinImageGlyph(text: "ABC", textColor: .white)
options.glyph = glyph

let pinImage = GMSPinImage(options: options)

advancedMarker.icon = pinImage
advancedMarker.map = mapView
Objective-C
//...

GMSPinImageOptions *options = [[GMSPinImageOptions alloc] init];

options.glyph = [[GMSPinImageGlyph alloc] initWithText:@"ABC" textColor:[UIColor whiteColor]];
GMSPinImage *pin = [GMSPinImage pinImageWithOptions:options];

customTextMarker.icon = pin;
customTextMarker.map = mapView;
Prise en charge des vues et animations personnalisées avec la propriété iconView
Comme GMSMarker, GMSAdvancedMarker accepte également les repères avec un iconView.
La propriété iconView est compatible avec l'animation de toutes les propriétés animables de UIView, à l'exception de frame et center. Il n'est pas compatible avec les repères iconViews et icons affichés sur la même carte.
Swift
//...

let advancedMarker = GMSAdvancedMarker(position: coordinate)
advancedMarker.iconView = customView()
advancedMarker.map = mapView

func customView() -> UIView {
// return your custom UIView.
}
Objective-C
//...

GMSAdvancedMarker *advancedMarker = [GMSAdvancedMarker markerWithPosition:kCoordinate];
advancedMarker.iconView = [self customView];
advancedMarker.map = self.mapView;

-   (UIView *)customView {
  // return custom view
}
Contraintes de mise en page
GMSAdvancedMarker n'est pas directement compatible avec les contraintes de mise en page pour ses iconView. Toutefois, vous pouvez définir des contraintes de mise en page pour les éléments de l'interface utilisateur dans le iconView. Lors de la création de votre vue, l'objet frame ou size doit être transmis au repère.
Swift
//do not set advancedMarker.iconView.translatesAutoresizingMaskIntoConstraints = false

let advancedMarker = GMSAdvancedMarker(position: coordinate)
let customView = customView()

//set frame
customView.frame = CGRect(0, 0, width, height)

advancedMarker.iconView = customView
Objective-C
//do not set advancedMarker.iconView.translatesAutoresizingMaskIntoConstraints = NO;

GMSAdvancedMarker *advancedMarker = [GMSAdvancedMarker markerWithPosition:kCoordinate];

CustomView *customView = [self customView];

//set frame
customView.frame = CGRectMake(0, 0, width, height);

advancedMarker.iconView = customView;
