
Hướng dẫn này giải thích cách sử dụng phương thức create() trên tài nguyên Message của Google Chat API để thực hiện một trong những thao tác sau:
- Gửi tin nhắn có chứa văn bản, thẻ và tiện ích tương tác.
- Gửi tin nhắn riêng tư cho một người dùng Chat cụ thể.
- Bắt đầu hoặc trả lời một chuỗi tin nhắn.
- Đặt tên cho một tin nhắn để bạn có thể chỉ định tin nhắn đó trong các yêu cầu khác của Chat API.
Kích thước tối đa của tin nhắn (bao gồm cả văn bản hoặc thẻ) là 32.000 byte. Để gửi một thư vượt quá kích thước này, ứng dụng nhắn tin phải gửi nhiều thư thay vì một thư.
Ngoài việc gọi API Chat để tạo tin nhắn, các ứng dụng nhắn tin có thể tạo và gửi tin nhắn để trả lời các hoạt động tương tác của người dùng, chẳng hạn như đăng thông điệp chào mừng sau khi người dùng thêm ứng dụng nhắn tin vào một không gian. Khi phản hồi các lượt tương tác, các ứng dụng trò chuyện có thể sử dụng những loại tính năng nhắn tin khác, bao gồm cả hộp thoại tương tác và giao diện xem trước đường liên kết. Để trả lời người dùng, ứng dụng nhắn tin sẽ trả về tin nhắn một cách đồng bộ mà không cần gọi Chat API. Để tìm hiểu về cách gửi tin nhắn để phản hồi các lượt tương tác, hãy xem bài viết Nhận và phản hồi các lượt tương tác bằng ứng dụng nhắn tin Google Chat.
Cách Chat hiển thị và ghi nhận tin nhắn được tạo bằng API Chat
Bạn có thể gọi phương thức create() bằng cách sử dụng xác thực ứng dụng và xác thực người dùng.
Chat sẽ gán thuộc tính cho người gửi tin nhắn theo cách khác nhau, tuỳ thuộc vào loại phương thức xác thực mà bạn sử dụng.
Khi bạn xác thực dưới dạng ứng dụng nhắn tin, ứng dụng nhắn tin sẽ gửi thông báo.

App bên cạnh tên của người gửi.Khi bạn xác thực với tư cách là người dùng, ứng dụng nhắn tin sẽ gửi thông báo thay cho người dùng. Chat cũng ghi nhận ứng dụng nhắn tin là nguồn của tin nhắn bằng cách hiển thị tên của ứng dụng này.

Loại xác thực cũng xác định những tính năng và giao diện nhắn tin mà bạn có thể đưa vào thông báo. Với tính năng xác thực ứng dụng, các ứng dụng Chat có thể gửi tin nhắn chứa văn bản đa dạng thức, giao diện dựa trên thẻ và các tiện ích tương tác. Khi xác thực người dùng, bạn có thể gửi tin nhắn văn bản. Trong Bản dùng trước cho nhà phát triển, bạn cũng có thể gửi thẻ, như được ghi lại trong phần Tạo và cập nhật thẻ.
Để tìm hiểu thêm về các tính năng nhắn tin có trong API Chat, hãy xem Tổng quan về tin nhắn trên Google Chat.
Hướng dẫn này giải thích cách sử dụng một trong hai loại xác thực để gửi tin nhắn bằng API Chat.
Điều kiện tiên quyết
Node.js
- Tài khoản Google Workspace Business hoặc Enterprise có quyền truy cập vào Google Chat.
- Thiết lập môi trường:
- Tạo một dự án trên Google Cloud.
- Định cấu hình màn hình xin phép bằng OAuth.
- Bật và định cấu hình Google Chat API bằng tên, biểu tượng và nội dung mô tả cho ứng dụng nhắn tin của bạn.
- Cài đặt Thư viện ứng dụng đám mây Node.js.
- Tạo thông tin đăng nhập để truy cập dựa trên cách bạn muốn xác thực trong yêu cầu Google Chat API:
- Để xác thực với tư cách là người dùng Chat, hãy tạo thông tin xác thực mã ứng dụng khách OAuth và lưu thông tin xác thực dưới dạng tệp JSON có tên
credentials.jsonvào thư mục cục bộ của bạn. - Để xác thực dưới dạng ứng dụng nhắn tin, hãy tạo thông tin đăng nhập tài khoản dịch vụ và lưu thông tin đăng nhập dưới dạng tệp JSON có tên là
credentials.json.
- Để xác thực với tư cách là người dùng Chat, hãy tạo thông tin xác thực mã ứng dụng khách OAuth và lưu thông tin xác thực dưới dạng tệp JSON có tên
- Chọn phạm vi uỷ quyền dựa trên việc bạn muốn xác thực với tư cách là người dùng hay ứng dụng nhắn tin.
- Không gian trong Google Chat là nơi người dùng đã xác thực hoặc ứng dụng Chat gọi là thành viên. Để xác thực dưới dạng ứng dụng nhắn tin, hãy thêm ứng dụng nhắn tin vào không gian.
Python
- Tài khoản Google Workspace Business hoặc Enterprise có quyền truy cập vào Google Chat.
- Thiết lập môi trường:
- Tạo một dự án trên Google Cloud.
- Định cấu hình màn hình xin phép bằng OAuth.
- Bật và định cấu hình Google Chat API bằng tên, biểu tượng và nội dung mô tả cho ứng dụng nhắn tin của bạn.
- Cài đặt Thư viện ứng dụng đám mây Python.
- Tạo thông tin đăng nhập để truy cập dựa trên cách bạn muốn xác thực trong yêu cầu Google Chat API:
- Để xác thực với tư cách là người dùng Chat, hãy tạo thông tin xác thực mã ứng dụng khách OAuth và lưu thông tin xác thực dưới dạng tệp JSON có tên
credentials.jsonvào thư mục cục bộ của bạn. - Để xác thực dưới dạng ứng dụng nhắn tin, hãy tạo thông tin đăng nhập tài khoản dịch vụ và lưu thông tin đăng nhập dưới dạng tệp JSON có tên là
credentials.json.
- Để xác thực với tư cách là người dùng Chat, hãy tạo thông tin xác thực mã ứng dụng khách OAuth và lưu thông tin xác thực dưới dạng tệp JSON có tên
- Chọn phạm vi uỷ quyền dựa trên việc bạn muốn xác thực với tư cách là người dùng hay ứng dụng nhắn tin.
- Không gian trong Google Chat là nơi người dùng đã xác thực hoặc ứng dụng nhắn tin gọi là thành viên. Để xác thực dưới dạng ứng dụng nhắn tin, hãy thêm ứng dụng nhắn tin vào không gian.
Java
- Tài khoản Google Workspace Business hoặc Enterprise có quyền truy cập vào Google Chat.
- Thiết lập môi trường:
- Tạo một dự án trên Google Cloud.
- Định cấu hình màn hình xin phép bằng OAuth.
- Bật và định cấu hình Google Chat API bằng tên, biểu tượng và nội dung mô tả cho ứng dụng nhắn tin của bạn.
- Cài đặt Thư viện ứng dụng đám mây Java.
- Tạo thông tin đăng nhập để truy cập dựa trên cách bạn muốn xác thực trong yêu cầu Google Chat API:
- Để xác thực với tư cách là người dùng Chat, hãy tạo thông tin xác thực mã ứng dụng khách OAuth và lưu thông tin xác thực dưới dạng tệp JSON có tên
credentials.jsonvào thư mục cục bộ của bạn. - Để xác thực dưới dạng ứng dụng nhắn tin, hãy tạo thông tin đăng nhập tài khoản dịch vụ và lưu thông tin đăng nhập dưới dạng tệp JSON có tên là
credentials.json.
- Để xác thực với tư cách là người dùng Chat, hãy tạo thông tin xác thực mã ứng dụng khách OAuth và lưu thông tin xác thực dưới dạng tệp JSON có tên
- Chọn phạm vi uỷ quyền dựa trên việc bạn muốn xác thực với tư cách là người dùng hay ứng dụng nhắn tin.
- Không gian trong Google Chat là nơi người dùng đã xác thực hoặc ứng dụng nhắn tin gọi là thành viên. Để xác thực dưới dạng ứng dụng nhắn tin, hãy thêm ứng dụng nhắn tin vào không gian.
Apps Script
- Tài khoản Google Workspace Business hoặc Enterprise có quyền truy cập vào Google Chat.
- Thiết lập môi trường:
- Tạo một dự án trên Google Cloud.
- Định cấu hình màn hình xin phép bằng OAuth.
- Bật và định cấu hình Google Chat API bằng tên, biểu tượng và nội dung mô tả cho ứng dụng nhắn tin của bạn.
- Tạo một dự án Apps Script độc lập và bật Dịch vụ Chat nâng cao.
- Trong hướng dẫn này, bạn phải sử dụng quy trình xác thực người dùng hoặc ứng dụng. Để xác thực dưới dạng ứng dụng nhắn tin, hãy tạo thông tin đăng nhập tài khoản dịch vụ. Để biết các bước, hãy xem phần Xác thực và uỷ quyền dưới dạng ứng dụng nhắn tin Google Chat.
- Chọn phạm vi uỷ quyền dựa trên việc bạn muốn xác thực với tư cách là người dùng hay ứng dụng nhắn tin.
- Không gian trong Google Chat là nơi người dùng đã xác thực hoặc ứng dụng nhắn tin gọi là thành viên. Để xác thực dưới dạng ứng dụng nhắn tin, hãy thêm ứng dụng nhắn tin vào không gian.
Gửi tin nhắn dưới dạng ứng dụng nhắn tin
Phần này giải thích cách gửi tin nhắn chứa văn bản, thẻ và các tiện ích phụ kiện tương tác bằng cách sử dụng xác thực ứng dụng.

Để gọi phương thức CreateMessage() bằng tính năng xác thực ứng dụng, bạn phải chỉ định các trường sau trong yêu cầu:
chat.botPhạm vi uỷ quyền.- Tài nguyên
Spacemà bạn muốn đăng thông báo. Ứng dụng nhắn tin phải là thành viên của không gian. - Tài nguyên
Messagecần tạo. Để xác định nội dung của thông báo, bạn có thể thêm văn bản đa dạng thức (text), một hoặc nhiều giao diện thẻ (cardsV2) hoặc cả hai.
Bạn có thể thêm các thông tin sau (không bắt buộc):
- Trường
accessoryWidgetsđể thêm các nút tương tác ở cuối tin nhắn. - Trường
privateMessageViewerđể gửi tin nhắn riêng tư cho một người dùng cụ thể. - Trường
messageIdcho phép bạn đặt tên cho thông báo để sử dụng trong các yêu cầu API khác. - Các trường
thread.threadKeyvàmessageReplyOptionđể bắt đầu hoặc trả lời một chuỗi tin nhắn. Nếu không gian không sử dụng tính năng tạo luồng, thì trường này sẽ bị bỏ qua.
Đoạn mã sau đây minh hoạ ví dụ về cách một ứng dụng Chat có thể gửi một thông báo được đăng dưới dạng ứng dụng Chat có chứa văn bản, thẻ và nút có thể nhấp vào ở cuối thông báo:
Node.js
Python
Java
Apps Script
Để chạy mẫu này, hãy thay thế SPACE_NAME bằng mã nhận dạng trong trường name của không gian. Bạn có thể lấy mã nhận dạng bằng cách gọi phương thức ListSpaces() hoặc từ URL của không gian.
Thêm tiện ích tương tác ở cuối thư
Trong mẫu mã đầu tiên của hướng dẫn này, thông báo của ứng dụng nhắn tin sẽ hiển thị một nút có thể nhấp vào ở cuối thông báo, được gọi là tiện ích bổ sung. Các tiện ích phụ kiện sẽ xuất hiện sau mọi văn bản hoặc thẻ trong một tin nhắn. Bạn có thể dùng các tiện ích này để nhắc người dùng tương tác với thông báo của bạn theo nhiều cách, bao gồm cả những cách sau:
- Đánh giá độ chính xác hoặc mức độ hài lòng của một tin nhắn.
- Báo cáo vấn đề liên quan đến ứng dụng Tin nhắn hoặc Chat.
- Mở đường liên kết đến nội dung liên quan, chẳng hạn như tài liệu.
- Loại bỏ hoặc tạm ẩn các tin nhắn tương tự trong ứng dụng nhắn tin trong một khoảng thời gian cụ thể.
Để thêm tiện ích bổ sung, hãy thêm trường accessoryWidgets[] vào nội dung yêu cầu và chỉ định một hoặc nhiều tiện ích mà bạn muốn thêm.
Hình ảnh sau đây cho thấy một ứng dụng nhắn tin có các tiện ích bổ sung cho tin nhắn văn bản để người dùng có thể đánh giá trải nghiệm của họ với ứng dụng nhắn tin.
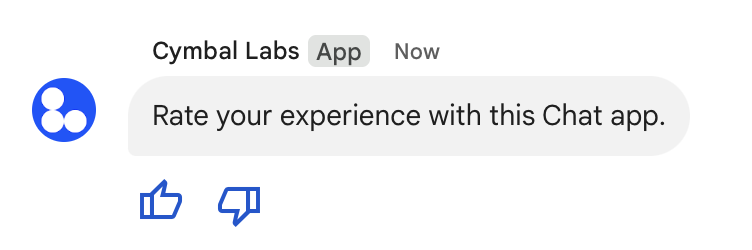
Sau đây là nội dung của yêu cầu tạo một tin nhắn văn bản có 2 nút phụ kiện. Khi người dùng nhấp vào một nút, hàm tương ứng (chẳng hạn như doUpvote) sẽ xử lý hoạt động tương tác:
{
  text: "Rate your experience with this Chat app.",
  accessoryWidgets: [{ buttonList: { buttons: [{
    icon: { material_icon: {
      name: "thumb_up"
    }},
    color: { red: 0, blue: 255, green: 0 },
    onClick: { action: {
      function: "doUpvote"
    }}
  }, {
    icon: { material_icon: {
      name: "thumb_down"
    }},
    color: { red: 0, blue: 255, green: 0 },
    onClick: { action: {
      function: "doDownvote"
    }}
  }]}}]
}
Gửi tin nhắn riêng tư
Các ứng dụng Chat có thể gửi tin nhắn riêng tư để chỉ một người dùng cụ thể trong không gian nhìn thấy tin nhắn. Khi ứng dụng nhắn tin gửi tin nhắn riêng tư, tin nhắn sẽ có nhãn thông báo cho người dùng biết rằng chỉ họ mới thấy được tin nhắn này.
Để gửi tin nhắn riêng tư bằng API Chat, hãy chỉ định trường privateMessageViewer trong nội dung yêu cầu của bạn. Để chỉ định người dùng, bạn đặt giá trị thành tài nguyên User đại diện cho người dùng Chat. Bạn cũng có thể sử dụng trường name của tài nguyên User, như trong ví dụ sau:
{
  text: "Hello private world!",
  privateMessageViewer: {
    name: "users/USER_ID"
  }
}
Để sử dụng mẫu này, hãy thay thế USER_ID bằng một mã nhận dạng duy nhất cho người dùng, chẳng hạn như 12345678987654321 hoặc hao@cymbalgroup.com. Để biết thêm thông tin về cách chỉ định người dùng, hãy xem phần Xác định và chỉ định người dùng Google Chat.
Để gửi tin nhắn riêng tư, bạn phải bỏ qua những thông tin sau trong yêu cầu của mình:
Thay mặt người dùng gửi tin nhắn văn bản
Phần này giải thích cách gửi tin nhắn thay mặt người dùng bằng cách sử dụng xác thực người dùng. Khi xác thực người dùng, nội dung của tin nhắn chỉ được chứa văn bản và phải bỏ qua các tính năng nhắn tin chỉ có trong ứng dụng Chat, bao gồm cả giao diện thẻ và các tiện ích tương tác. Trong Bản dùng trước cho nhà phát triển, bạn có thể tạo tin nhắn có thẻ thay cho người dùng. Để biết thông tin chi tiết, hãy xem phần Tạo và cập nhật thẻ.

Để gọi phương thức CreateMessage() bằng cách xác thực người dùng, bạn phải chỉ định các trường sau trong yêu cầu:
- Một phạm vi uỷ quyền hỗ trợ xác thực người dùng cho phương thức này. Mẫu sau đây sử dụng phạm vi
chat.messages.create. - Tài nguyên
Spacemà bạn muốn đăng thông báo. Người dùng được xác thực phải là thành viên của không gian. - Tài nguyên
Messagecần tạo. Để xác định nội dung của thông báo, bạn phải thêm trườngtext.
Bạn có thể thêm các thông tin sau (không bắt buộc):
- Trường
messageIdcho phép bạn đặt tên cho thông báo để sử dụng trong các yêu cầu API khác. - Các trường
thread.threadKeyvàmessageReplyOptionđể bắt đầu hoặc trả lời một chuỗi tin nhắn. Nếu không gian không sử dụng tính năng tạo luồng, thì trường này sẽ bị bỏ qua.
Đoạn mã sau đây cho thấy ví dụ về cách một ứng dụng nhắn tin có thể gửi tin nhắn văn bản trong một không gian nhất định thay cho người dùng đã xác thực:
Node.js
Python
Java
Apps Script
Để chạy mẫu này, hãy thay thế SPACE_NAME bằng mã nhận dạng trong trường name của không gian. Bạn có thể lấy mã nhận dạng bằng cách gọi phương thức ListSpaces() hoặc từ URL của không gian.
Bắt đầu hoặc trả lời trong một chuỗi
Đối với những không gian sử dụng chuỗi tin nhắn, bạn có thể chỉ định xem một tin nhắn mới có bắt đầu một chuỗi tin nhắn hay không, hoặc có trả lời một chuỗi tin nhắn hiện có hay không.
Theo mặc định, những tin nhắn mà bạn tạo bằng API Chat sẽ bắt đầu một chuỗi tin nhắn mới. Để giúp bạn xác định chuỗi và trả lời sau, bạn có thể chỉ định khoá chuỗi trong yêu cầu:
- Trong phần nội dung của yêu cầu, hãy chỉ định trường
thread.threadKey. - Chỉ định tham số truy vấn
messageReplyOptionđể xác định điều gì sẽ xảy ra nếu khoá đã tồn tại.
Cách tạo một tin nhắn trả lời một chuỗi tin nhắn hiện có:
- Trong nội dung yêu cầu, hãy thêm trường
thread. Nếu đã thiết lập, bạn có thể chỉ địnhthreadKeymà bạn đã tạo. Nếu không, bạn phải sử dụngnamecủa luồng. - Chỉ định tham số truy vấn
messageReplyOption.
Đoạn mã sau đây cho thấy ví dụ về cách ứng dụng Nhắn tin có thể gửi tin nhắn văn bản bắt đầu hoặc trả lời một chuỗi tin nhắn nhất định được xác định bằng khoá của một không gian nhất định thay cho người dùng đã xác thực:
Node.js
Python
Java
Apps Script
Để chạy mẫu này, hãy thay thế các giá trị sau:
THREAD_KEY: khoá luồng hiện có trong không gian hoặc để tạo một luồng mới, một tên duy nhất cho luồng.SPACE_NAME: mã nhận dạng từ trườngnamecủa không gian. Bạn có thể lấy mã nhận dạng bằng cách gọi phương thứcListSpaces()hoặc từ URL của không gian.
Đặt tên cho tin nhắn
Để truy xuất hoặc chỉ định một thông báo trong các lệnh gọi API trong tương lai, bạn có thể đặt tên cho một thông báo bằng cách đặt trường messageId trong yêu cầu của mình.
Việc đặt tên cho thông báo cho phép bạn chỉ định thông báo mà không cần lưu trữ mã nhận dạng do hệ thống chỉ định từ tên tài nguyên của thông báo (được biểu thị trong trường name).
Ví dụ: để truy xuất một thư bằng phương thức get(), bạn sẽ sử dụng tên tài nguyên để chỉ định thư cần truy xuất. Tên tài nguyên được định dạng là spaces/{space}/messages/{message}, trong đó {message} biểu thị mã nhận dạng do hệ thống chỉ định hoặc tên tuỳ chỉnh mà bạn đặt khi tạo thông báo.
Để đặt tên cho một thông báo, hãy chỉ định một mã nhận dạng tuỳ chỉnh trong trường messageId khi bạn tạo thông báo. Trường messageId đặt giá trị cho trường clientAssignedMessageId của tài nguyên Message.
Bạn chỉ có thể đặt tên cho thông báo khi tạo thông báo. Bạn không thể đặt tên hoặc sửa đổi mã nhận dạng tuỳ chỉnh cho các tin nhắn hiện có. Mã nhận dạng tuỳ chỉnh phải đáp ứng các yêu cầu sau:
- Bắt đầu từ
client-. Ví dụ:client-custom-namelà mã nhận dạng tuỳ chỉnh hợp lệ, nhưngcustom-namethì không. - Chứa tối đa 63 ký tự và chỉ có chữ cái viết thường, số và dấu gạch ngang.
- Là duy nhất trong một không gian. Ứng dụng nhắn tin không thể dùng cùng một mã nhận dạng tuỳ chỉnh cho nhiều thông báo.
Đoạn mã sau đây cho thấy ví dụ về cách một ứng dụng nhắn tin có thể gửi tin nhắn văn bản kèm theo mã nhận dạng đến một không gian nhất định thay mặt cho người dùng đã xác thực:
Node.js
Python
Java
Apps Script
Để chạy mẫu này, hãy thay thế các giá trị sau:
SPACE_NAME: mã nhận dạng từ trườngnamecủa không gian. Bạn có thể lấy mã nhận dạng bằng cách gọi phương thứcListSpaces()hoặc từ URL của không gian.MESSAGE-ID: tên của thông báo bắt đầu bằngcustom-. Phải là duy nhất so với mọi tên thông báo khác do ứng dụng nhắn tin tạo trong không gian đã chỉ định.
Trích dẫn tin nhắn
Bạn có thể trích dẫn một tin nhắn khác bằng cách gọi CreateMessage() (rpc, rest) và đặt quotedMessageMetadata (rpc, rest) trong yêu cầu.
Bạn có thể trích dẫn tin nhắn trong một chuỗi tin nhắn hoặc trong cuộc trò chuyện chính, nhưng không thể trích dẫn tin nhắn từ một chuỗi tin nhắn khác.
Đoạn mã sau đây cho biết cách tạo một thông báo trích dẫn một thông báo khác:
Node.js
import {createClientWithUserCredentials} from './authentication-utils.js';

const USER_AUTH_OAUTH_SCOPES = ['https://www.googleapis.com/auth/chat.messages.create'];

// This sample shows how to create a message that quotes another message.
async function main() {

  // Create a client
  const chatClient = await createClientWithUserCredentials(USER_AUTH_OAUTH_SCOPES);

  // Initialize request argument(s)
  const request = {

    // TODO(developer): Replace SPACE_NAME .
    parent: 'spaces/SPACE_NAME',

    message: {
      text: 'I am responding to a quoted message!',

      // quotedMessageMetadata lets chat apps respond to a message by quoting it.
      quotedMessageMetadata: {

        // TODO(developer): Replace QUOTED_MESSAGE_NAME
        // and QUOTED_MESSAGE_LAST_UPDATE_TIME.
        name: 'QUOTED_MESSAGE_NAME',
        lastUpdateTime: 'QUOTED_MESSAGE_LAST_UPDATE_TIME'
      }
    }
  };

  // Make the request
  const response = await chatClient.createMessage(request);

  // Handle the response
  console.log(response);
}

main().catch(console.error);
Python
from authentication_utils import create_client_with_user_credentials
from google.apps import chat_v1 as google_chat
from google.protobuf.timestamp_pb2 import Timestamp

SCOPES = ['https://www.googleapis.com/auth/chat.messages.create']

# This sample shows how to create a message that quotes another message.
def create_message_quote_message():
    '''Creates a message that quotes another message.'''

    # Create a client
    client = create_client_with_user_credentials(SCOPES)

    # Create a timestamp from the RFC-3339 string.
    # TODO(developer): Replace QUOTED_MESSAGE_LAST_UPDATE_TIME.
    last_update_time = Timestamp()
    last_update_time.FromJsonString('QUOTED_MESSAGE_LAST_UPDATE_TIME')

    # Initialize request argument(s)
    request = google_chat.CreateMessageRequest(

        # TODO(developer): Replace SPACE_NAME.
        parent='spaces/SPACE_NAME',

        # Create the message.
        message = google_chat.Message(
            text='I am responding to a quoted message!',

            # quotedMessageMetadata lets chat apps respond to a message by quoting it.
            quoted_message_metadata=google_chat.QuotedMessageMetadata(

                name='QUOTED_MESSAGE_NAME',
                last_update_time=last_update_time
            )
        )
    )

    # Make the request
    response = client.create_message(request)

    # Handle the response
    print(response)

create_message_quote_message()
Java
import com.google.chat.v1.ChatServiceClient;
import com.google.chat.v1.CreateMessageRequest;
import com.google.chat.v1.Message;
import com.google.chat.v1.QuotedMessageMetadata;
import com.google.protobuf.util.Timestamps;
import com.google.workspace.api.chat.samples.utils.AuthenticationUtils;
import java.text.ParseException;

// This sample shows how to create a message that quotes another message.
public class CreateMessageQuoteMessage {
  public static void main(String[] args) throws Exception, ParseException {
    // Create a client.
    ChatServiceClient chatClient = AuthenticationUtils.createClientWithUserCredentials();

    // Initialize request argument(s).
    // TODO(developer): Replace SPACE_NAME, QUOTED_MESSAGE_NAME,
    // and QUOTED_MESSAGE_LAST_UPDATE_TIME here.
    String parent = "spaces/SPACE_NAME";
    String quotedMessageName = "QUOTED_MESSAGE_NAME";
    String lastUpdateTime = "QUOTED_MESSAGE_LAST_UPDATE_TIME";

    QuotedMessageMetadata quotedMessageMetadata =
        QuotedMessageMetadata.newBuilder()
            .setName(quotedMessageName)
            .setLastUpdateTime(Timestamps.parse(lastUpdateTime))
            .build();

    Message message = Message.newBuilder()
        .setText("I am responding to a quoted message!")
        .setQuotedMessageMetadata(quotedMessageMetadata)
        .build();

    CreateMessageRequest request =
        CreateMessageRequest.newBuilder()
            .setParent(parent)
            .setMessage(message)
            .build();

    // Make the request.
    Message response = chatClient.createMessage(request);

    // Handle the response.
    System.out.println(response);
  }
}
Apps Script
/**
 * Creates a message that quotes another message.
 *
 * Relies on the OAuth2 scope 'https://www.googleapis.com/auth/chat.messages.create'
 * referenced in the manifest file (appsscript.json).
 */
function createMessageQuoteMessage() {

  // Initialize request argument(s)
  // TODO(developer): Replace SPACE_NAME here.
  const parent = 'spaces/SPACE_NAME';

  const message = {

    // The text content of the message.
    text: 'I am responding to a quoted message!',

    // quotedMessageMetadata lets chat apps respond to a message by quoting it.
    //
    // TODO(developer): Replace QUOTED_MESSAGE_NAME
    // and QUOTED_MESSAGE_LAST_UPDATE_TIME .
    quotedMessageMetadata: {
      name: 'QUOTED_MESSAGE_NAME',
      lastUpdateTime: 'QUOTED_MESSAGE_LAST_UPDATE_TIME',
    }
  };

  // Make the request
  const response = Chat.Spaces.Messages.create(message, parent);

  // Handle the response
  console.log(response);
}
Để chạy mẫu này, hãy thay thế các giá trị sau:
SPACE_NAME: mã nhận dạng từ trườngnamecủa không gian. Bạn có thể lấy mã nhận dạng bằng cách gọi phương thứcListSpaces()(rpc,rest) hoặc từ URL của không gian.QUOTED_MESSAGE_NAME: tài nguyên thông báoname(rpc,rest) của thông báo cần trích dẫn ở định dạngspaces/{space}/messages/{message}.QUOTED_MESSAGE_LAST_UPDATE_TIME: thời gian cập nhật gần đây nhất của tin nhắn mà bạn muốn trích dẫn. Nếu tin nhắn chưa từng được chỉnh sửa, thì tương ứng vớicreateTime(rpc,rest). Nếu tin nhắn đã được chỉnh sửa, thì tương ứng vớilastUpdateTime(rpc,rest).
Khắc phục sự cố
Khi một ứng dụng nhắn tin Google Chat hoặc thẻ trả về lỗi, giao diện Chat sẽ hiển thị thông báo "Đã xảy ra lỗi". hoặc "Không thể xử lý yêu cầu của bạn". Đôi khi, giao diện người dùng Chat không hiển thị bất kỳ thông báo lỗi nào, nhưng ứng dụng hoặc thẻ Chat lại tạo ra kết quả không mong muốn; ví dụ: thông báo thẻ có thể không xuất hiện.
Mặc dù thông báo lỗi có thể không xuất hiện trong giao diện người dùng Chat, nhưng bạn có thể sử dụng thông báo lỗi mô tả và dữ liệu nhật ký để khắc phục lỗi khi bật tính năng ghi nhật ký lỗi cho ứng dụng Chat. Để được trợ giúp xem, gỡ lỗi và khắc phục lỗi, hãy xem bài viết Khắc phục lỗi trong Google Chat.
Chủ đề có liên quan
- Sử dụng Trình tạo thẻ để thiết kế và xem trước thông báo thẻ JSON cho các ứng dụng Chat.
- Định dạng tin nhắn.
- Xem thông tin chi tiết về một tin nhắn.
- Liệt kê tin nhắn trong một không gian.
- Chỉnh sửa tin nhắn.
- Xoá tin nhắn.
- Xác định người dùng trong tin nhắn trên Google Chat.
- Gửi tin nhắn đến Google Chat bằng webhook đến.