Mantenha tudo organizado com as coleções
Salve e categorize o conteúdo com base nas suas preferências.
Cada app do Google Chat criado precisa de um projeto do Google Cloud próprio com a API Chat ativada e configurada. Esta página mostra como configurar a API Chat.
Escolher um nome de exibição, um avatar e uma descrição para seu app de chat
Ao ativar a API Chat, você configura os detalhes sobre o
app do Chat que aparecem para os usuários no Chat,
incluindo um nome de exibição, avatar e descrição. Esses detalhes só aparecem no Chat. Para publicar seu app de chat no
Marketplace, você também precisa especificar os detalhes que
aparecem na
página do Marketplace do app.
Para chamar a API Chat, configure um
app do Google Chat com as seguintes informações:
Campo
Descrição
Formato
Nome do app
O nome de exibição do app Chat.
Até 25 caracteres alfanuméricos
URL do avatar
A imagem que aparece como avatar do app Chat.
Um URL HTTPS que aponta para uma imagem gráfica quadrada (PNG ou JPEG).
O tamanho recomendado é de 256 x 256 pixels ou mais.
Descrição
Uma breve descrição da finalidade do
app de chat.
Até 40 caracteres alfanuméricos
O nome, o avatar e a descrição do app do Chat são
mostrados aos usuários na interface do Chat. Em algumas solicitações de gravação da API Chat, o Chat usa essas informações para atribuir as ações que um app do Chat realiza no Chat.
Por exemplo, se você chamar o método spaces.create(), o Chat
vai incluir o nome do app na
descrição de quem criou o espaço, conforme mostrado na imagem a seguir:
Figura 1. A mensagem de atribuição que o Chat
mostra quando o método 
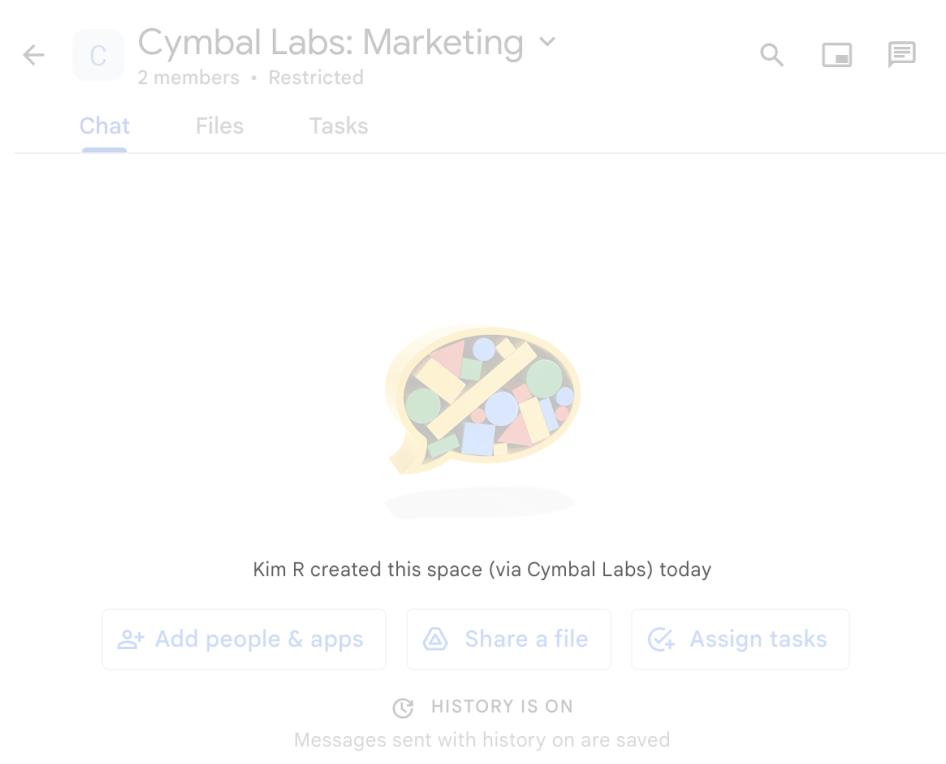
spaces.create() é usado para criar um
espaço em nome de um usuário.
Para interagir com os apps do Chat, os usuários também podem ver ou usar essas informações das seguintes maneiras:
Invoque o app Chat mencionando o nome dele com @.
Encontre e inicie uma mensagem direta com o app Chat.
No menu Apps, as mensagens diretas mostram o nome e o avatar do app Chat.
Na barra de composição, os usuários podem navegar pelos apps do Chat e ver
o nome, o avatar e a descrição deles.
Configurar o app do Chat no console do Google Cloud
Quando tiver os detalhes do app do Chat, abra o projeto do Cloud e configure a API Chat:
No console do Google Cloud, acesse a página da API Chat e clique em Configuração:
Em Informações do aplicativo, preencha os campos Nome do app, URL do avatar e Descrição.
Em "Recursos interativos", clique no botão Ativar recursos interativos para desativar os recursos interativos do app Chat. Você pode configurar isso depois. Para saber como
configurar e criar recursos interativos, consulte
Receber e responder a interações do usuário.
Opcional: em Registros, marque a caixa de seleção Registrar erros no Logging para usar o Google Cloud Logging. Para mais informações, consulte
Consultar registros de erros de apps do Chat.
Clique em Salvar.
Conceder permissão a outras pessoas para configurar a API Chat
É possível conceder acesso a usuários específicos à página de configuração do app Chat concedendo a eles o papel do IAM de proprietário de apps do Chat ou leitor de apps do Chat.
Os usuários com essas funções não podem acessar a página de configuração dos apps do Chat usando o painel APIs e serviços, mas podem acessar a página de configuração navegando até o console do Google Cloud do projeto do Google Cloud host do app do Chat da seguinte maneira:
[null,null,["Última atualização 2025-08-29 UTC."],[[["\u003cp\u003eEvery Google Chat app needs its own Google Cloud project with the Chat API enabled and configured, following specific prerequisites.\u003c/p\u003e\n"],["\u003cp\u003eChat apps require a display name, avatar URL, and description, which are visible to users and used by Chat for attributions.\u003c/p\u003e\n"],["\u003cp\u003eThe Chat API is configured in the Google Cloud console, where you can set the app's details, enable/disable interactive features, and optionally enable error logging.\u003c/p\u003e\n"],["\u003cp\u003eAccess to the Chat app configuration page can be granted to other users via specific Google Cloud IAM roles.\u003c/p\u003e\n"]]],["Each Google Chat app requires a dedicated Google Cloud project with the Chat API enabled. Configuration involves setting up the app's display name (up to 25 characters), avatar URL (square image, 256x256 pixels or more), and description (up to 40 characters). In the Google Cloud console, you must fill out these application details, and optionally, enable or disable interactive features and log errors. Additionally, you can grant specific users access to configure the Chat API by assigning them the \"Chat apps Owner\" or \"Chat apps Viewer\" IAM roles.\n"],null,["# Configure the Google Chat API\n\nEach Google Chat app that you create requires its own\nGoogle Cloud project with the Chat API enabled and configured. This page\nshows you how to configure the Chat API.\n\nPrerequisites\n-------------\n\n- A Business or Enterprise [Google Workspace](https://support.google.com/a/answer/6043576) account with access to [Google Chat](https://workspace.google.com/products/chat/).\n- [Create a Google Cloud project](/workspace/guides/create-project).\n- [Configure the OAuth consent screen](/workspace/guides/configure-oauth-consent).\n- [Enable the Google Chat API](/workspace/guides/enable-apis).\n\nChoose a display name, avatar, and description for your Chat app\n----------------------------------------------------------------\n\nWhen you enable the Chat API, you configure the details about your\nChat app that appear to users in Chat,\nincluding a display name, avatar, and description. These details only appear\nin Chat. To publish your Chat app to the\nMarketplace, you must also specify the details that\nappear in your Chat app's\n[Marketplace listing](/workspace/marketplace/create-listing).\n\nTo call the Chat API, you must set up a\nGoogle Chat app with the following information:\n\n| Field | Description | Format |\n|-------------|-----------------------------------------------------|----------------------------------------------------------------------------------------------------------------|\n| App name | The display name for the Chat app. | Up to 25 alphanumeric characters |\n| Avatar URL | The image that displays as your Chat app's avatar. | An HTTPS URL pointing to a square graphics image (PNG or JPEG). Recommended size is 256 by 256 pixels or more. |\n| Description | A brief description of the purpose of the Chat app. | Up to 40 alphanumeric characters |\n\nThe Chat app's name, avatar, and description are\ndisplayed to users in the Chat UI. For some Chat API\nwrite requests, Chat uses this information to attribute the\nactions that a Chat app takes in Chat.\n\nFor example, if you call the `spaces.create()` method, Chat\nincludes the name of the Chat app in the\ndescription of who created the space, as shown in the following image:\n**Figure 1** . The attribution message that Chat displays when the `spaces.create()` method is used to create a space on behalf of a user.\n\nTo interact with Chat apps, users can also see or use this\ninformation in the following ways:\n\n- Invoke the Chat app by @mentioning its name.\n- Find and start a direct message with the Chat app. In the **Apps** menu, direct messages display the Chat app's name and avatar.\n- From the compose bar, users can browse Chat apps and see their name, avatar, and description.\n\nConfigure your Chat app in the Google Cloud console\n---------------------------------------------------\n\nWhen you have your Chat app details, open your\nCloud project and configure the Chat API:\n\n1. In the Google Cloud console, go to the Chat API page and click the\n **Configuration** page:\n\n [Go to Chat API Configuration page](https://console.cloud.google.com/apis/api/chat.googleapis.com/hangouts-chat)\n2. Under **Application info** , fill out the **App name** , **Avatar URL** ,\n and **Description** fields.\n\n3. Under Interactive features, click the **Enable interactive features** toggle\n to the off position to disable interactive features for the\n Chat app. You can set this up later. To learn about\n configuring and building interactive features, see\n [Receive and respond to user interactions](/workspace/chat/receive-respond-interactions).\n\n4. Optional: Under **Logs** , select the **Log errors to Logging** checkbox to\n use Google Cloud Logging. For more information, see\n [Query error logs for Chat apps](/workspace/chat/query-logs).\n\n5. Click **Save**.\n\nGrant other people permission to configure the Chat API\n-------------------------------------------------------\n\nYou can\n[give specific users access](https://cloud.google.com/iam/docs/granting-changing-revoking-access#single-role)\nto the Chat app configuration page by granting them\nthe **Chat apps Owner** or **Chat apps Viewer**\n[Google Cloud Identity Access Management (IAM) role](https://cloud.google.com/iam/docs/understanding-roles#chat-roles).\nUsers with these roles can't navigate to the Chat apps\nconfiguration page by using the **APIs \\& Services** dashboard, but can\naccess the configuration page by navigating to the Google Cloud console for the\nChat app's host Cloud project as follows: \n\n```\nhttps://console.developers.google.com/apis/api/chat.googleapis.com/hangouts-chat?project=PROJECT_ID\n```\n\nWhere \u003cvar translate=\"no\"\u003ePROJECT_ID\u003c/var\u003e is the project ID of the\nGoogle Cloud project hosting the Chat app.\n| Users with **Project** roles can also access the app configuration page.\n|\n|\n| Users with custom roles containing the\n| `resourcemanager.projects.(get|update)` permissions cannot access\n| the Chat app configuration. For custom roles, use\n| the `chat.bots.(get|update)` permissions instead.\n\nRelated topics\n--------------\n\n- [Choose a Chat app architecture](/workspace/chat/structure)\n- To configure your Chat app for interactive features, see [Receive and respond to user interactions](/workspace/chat/receive-respond-interactions)"]]