
บทความนี้แสดงวิธีสร้างแอป App Engine ใน Python ที่ส่งอีเมลที่มีคำอธิบายประกอบไปยังผู้ใช้เพื่อขอให้ยืนยันการสมัครรับรายชื่ออีเมลจากกล่องจดหมายโดยตรง และรวบรวมการสมัครรับข้อมูลใน Datastore
ข้อกำหนดเบื้องต้นและการตั้งค่าโปรเจ็กต์
คู่มือนี้ถือว่าคุณได้ติดตั้ง App Engine SDK แล้ว และทราบวิธีสร้าง เรียกใช้ และเผยแพร่โปรเจ็กต์ App Engine
ก่อนอื่น ให้สร้างไดเรกทอรีสำหรับโปรเจ็กต์ ใส่ไฟล์ทั้งหมดสำหรับแอปพลิเคชันของคุณในไดเรกทอรีนี้
คัดลอกโค้ดต่อไปนี้ไปยังไฟล์ชื่อ app.yaml และแทนที่ตัวยึดตำแหน่ง {{ APPID }} ด้วยรหัสแอป App Engine ที่ไม่ซ้ำกันของคุณ
application: {{ APPID }}
version: 1
runtime: python27
api_version: 1
threadsafe: true

handlers:
- url: /.*
  script: main.app

libraries:
- name: jinja2
  version: latest
สร้างไฟล์ชื่อ main.py ในโฟลเดอร์โปรเจ็กต์ App Engine แล้วคัดลอกโค้ดต่อไปนี้เพื่อตั้งค่าแฮนเดิลเลอร์สำหรับการรวบรวมและแสดงรายการการสมัครรับข้อมูล รวมถึงสำหรับการส่งอีเมลที่มีคำอธิบายประกอบ
import webapp2

from emailsender import EmailSender
from subscribe import SubscribeHandler

app = webapp2.WSGIApplication([('/', SubscribeHandler), ('/email', EmailSender)], debug=True)
การเพิ่ม Structured Data ลงในอีเมล
มาเริ่มกันด้วยอีเมลที่เรียบง่ายซึ่งขอให้ผู้ใช้ยืนยันการสมัครรับรายชื่ออีเมล
<html>
  <head>
    <title>Please confirm your subscription to Mailing-List XYZ?</title>
  </head>
  <body>
    <p>
      Dear John, please confirm that you wish to be subscribed to the
      mailing list XYZ
    </p>
  </body>
</html>
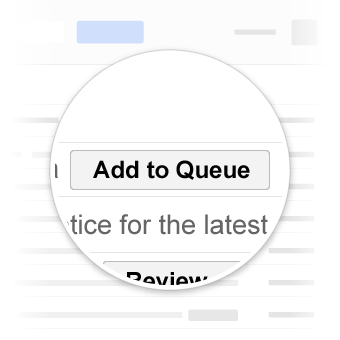
คุณสามารถเพิ่ม Structured Data ในรูปแบบที่รองรับ (JSON-LD หรือ Microdata) ลงใน head ของอีเมลเพื่อกำหนดร้านอาหารและเพิ่ม OneClickAction Gmail รองรับ OneClickAction และแสดง UI เฉพาะต่อผู้ใช้เพื่อให้ผู้ใช้ยืนยันการสมัครรับข้อมูลจากกล่องจดหมายได้
คัดลอกมาร์กอัปต่อไปนี้ลงในไฟล์ชื่อ mail_template.html
JSON-LD
<html>
  <head>
  <title>Please confirm your subscription to Mailing-List XYZ?</title>
  </head>
  <body>
    <script type="application/ld+json">
    {
      "@context": "http://schema.org",
      "@type": "EmailMessage",
      "potentialAction": {
        "@type": "ConfirmAction",
        "name": "Confirm Subscription",
        "handler": {
          "@type": "HttpActionHandler",
          "url": "{{ confirm_url }}",
          "method": "http://schema.org/HttpRequestMethod/POST",
        }
      },
      "description": "Confirm subscription to mailing list XYZ"
    }
    </script>
    <p>
      Dear John, please confirm that you wish to be subscribed to the mailing list XYZ.
    </p>
  </body>
</html>
Microdata
<html>
  <head>
    <title>Please confirm your subscription to Mailing-List XYZ?</title>
  </head>
  <body>
    <div itemscope itemtype="http://schema.org/EmailMessage">
      <div itemprop="potentialAction" itemscope itemtype="http://schema.org/ConfirmAction">
        <meta itemprop="name" content="Approve Expense"/>
        <div itemprop="handler" itemscope itemtype="http://schema.org/HttpActionHandler">
          <link itemprop="url" href="https://myexpenses.com/approve?expenseId=abc123"/>
          <meta itemprop="url" content="{{ confirm_url }}"/>
          <link itemprop="method" href="http://schema.org/HttpRequestMethod/POST"/>
        </div>
      </div>
      <meta itemprop="description" content="Approval request for John's $10.13 expense for office supplies"/>
    </div>
    <p>
      Dear John, please confirm that you wish to be subscribed to the mailing list XYZ.
    </p>
  </body>
</html>
Structured Data ด้านบนอธิบายรายชื่ออีเมลที่ชื่อ "XYZ" และ ConfirmAction ตัวแฮนเดิลสําหรับการดําเนินการคือ HttpActionHandler ที่ส่งคําขอ POST ไปยัง URL ที่ระบุในพร็อพเพอร์ตี้ url
ส่งคำขอติดตามไปยังผู้ใช้
คัดลอกโค้ดต่อไปนี้ลงในไฟล์ชื่อ emailsender.py ในโฟลเดอร์โปรเจ็กต์ App Engine
import jinja2
import os
import webapp2

from google.appengine.api import mail
from google.appengine.api import users

from urlparse import urlparse

class EmailSender(webapp2.RequestHandler):

  def get(self):
    # require users to be logged in to send emails
    user = users.get_current_user()
    if not user:
      self.redirect(users.create_login_url(self.request.uri))
      return

    email = user.email()

    # The confirm url corresponds to the App Engine app url
    pr = urlparse(self.request.url)
    confirm_url = '%s://%s?user=%s' % (pr.scheme, pr.netloc, user.user_id())

    # load the email template and replace the placeholder with the confirm url
    jinja_environment = jinja2.Environment(
        loader=jinja2.FileSystemLoader(os.path.dirname(__file__)))
    template = jinja_environment.get_template('mail_template.html')
    email_body = template.render({'confirm_url': confirm_url})

    message = mail.EmailMessage(
        sender = email,
        to = email,
        subject = 'Please confirm your subscription to Mailing-List XYZ',
        html = email_body)

    try:
      message.send()
      self.response.write('OK')
    except:
      self.error(500)
EmailSender คลาสกำหนดให้ผู้ใช้ต้องเข้าสู่ระบบเพื่อดึงอีเมลของผู้ใช้ได้ จากนั้นจะโหลดเนื้อหาอีเมลจาก mail_template.html แทนที่ตัวยึดตำแหน่ง confirm_url ในเนื้อหาด้วย URL รูทของแอป App Engine (https://APP-ID.appspot.com) และส่งอีเมลไปยังผู้ใช้ที่เข้าสู่ระบบอยู่ในปัจจุบันในนามของผู้ใช้เอง
การรวบรวมและการแสดงการติดตาม
คัดลอกโค้ดต่อไปนี้ลงในไฟล์ชื่อ subscribe.py ในโฟลเดอร์โปรเจ็กต์ App Engine
import webapp2

from emailsender import EmailSender
from google.appengine.ext import db


class SubscribeHandler(webapp2.RequestHandler):

  def post(self):
    user_id = self.request.get('user')

    # insert the subscription into the Datastore
    subscription = Subscription(user_id=user_id)
    subscription.put()

  def get(self):
    # retrieve up to 1000 subscriptions from the Datastore
    subscriptions = Subscription.all().fetch(1000)

    if not subscriptions:
      self.response.write('No subscriptions')
      return

    count = len(subscriptions)

    for s in subscriptions:
      self.response.write('%s subscribed<br/>' % (s.user_id))

    self.response.write('<br/>')
    self.response.write('%d subscriptions.' % (count))


class Subscription(db.Model):
    user_id = db.TextProperty(required=True)
พารามิเตอร์ SubscribeHandlerclass listens to bothPOSTandGETrequests sent to the app root url (https://APP-ID.appspot.com).POSTrequests are used by Gmail to insert new subscriptions including theuser_id` ที่สอดคล้องกับผู้ใช้ ดังตัวอย่างต่อไปนี้
https://subscribe.appspot.com/?user_id=123abcd
ตัวแฮนเดิลคำขอจะตรวจสอบว่ามีการกำหนด user_id ที่จำเป็นหรือไม่ จากนั้นจะจัดเก็บการสมัครใช้บริการใน Datastore ซึ่งจะส่งผลให้ระบบส่งรหัสการตอบกลับ HTTP 200 กลับไปยัง Gmail เพื่อส่งสัญญาณว่าคำขอสำเร็จ ในกรณีที่คำขอไม่มีฟิลด์ที่จำเป็น ตัวแฮนเดิลคำขอจะแสดงโค้ดตอบกลับ HTTP 400 ซึ่งส่งสัญญาณว่าคำขอไม่ถูกต้อง
GET คำขอไปยัง URL รูทของแอปใช้เพื่อแสดงการสมัครใช้บริการที่รวบรวมไว้ ตัวแฮนเดิลคำขอจะดึงข้อมูลการติดตามทั้งหมดจาก Datastore ก่อน จากนั้นจึงพิมพ์ข้อมูลเหล่านั้นในหน้าเว็บพร้อมกับตัวนับอย่างง่าย
การทดสอบแอป
ทำให้แอปใช้งานได้ใน App Engine แล้วไปที่ https://APP-ID.appspot.com/email (แทนที่ APP-ID ด้วยรหัสแอป App Engine ของคุณ) เพื่อส่งอีเมลที่มีคำอธิบายประกอบถึงตัวคุณเอง
เมื่อติดตั้งใช้งานแอปและแทรกการสมัครใช้บริการแล้ว ให้ไปที่แอปของคุณที่ https://APP-ID.appspot.com เพื่อดูหน้าเว็บที่สรุปการสมัครใช้บริการ