Pengantar
Penanda mengidentifikasi lokasi pada peta. Secara default, penanda menggunakan gambar standar. Penanda dapat menampilkan gambar kustom, yang dalam hal ini
biasanya disebut sebagai "ikon". Penanda dan ikon adalah objek dengan jenis
Marker. Anda dapat menetapkan ikon khusus dalam konstruktor penanda, atau dengan memanggil setIcon() pada penanda. Lihat selengkapnya tentang menyesuaikan gambar penanda.
Umumnya, penanda berjenis overlay. Untuk informasi tentang jenis overlay lainnya, lihat Menggambar pada peta.
Penanda didesain agar interaktif. Misalnya, penanda secara default menerima peristiwa 'click', sehingga Anda dapat menambahkan pemroses peristiwa untuk memunculkan jendela info yang menampilkan informasi kustom. Anda dapat mengizinkan pengguna memindahkan penanda pada peta dengan menetapkan properti draggable penanda ke true. Untuk informasi selengkapnya tentang penanda yang dapat ditarik, lihat di bawah.
Menambahkan penanda
Konstruktor google.maps.Marker menggunakan satu literal objek Marker options, yang menentukan properti awal penanda.
Kolom berikut sangat penting dan biasanya ditetapkan saat membuat penanda:
-
position(wajib) menentukanLatLngyang mengidentifikasi lokasi awal penanda. Salah satu cara untuk mengambilLatLngadalah menggunakan layanan Geocoding. -
map(opsional) menetapkanMapuntuk menempatkan penanda. Jika Anda tidak menetapkan peta pada konstruksi penanda, penanda akan dibuat tetapi tidak dilekatkan pada (atau ditampilkan pada) peta. Anda dapat menambahkan penanda nanti dengan memanggil metodesetMap()penanda.
Contoh berikut menambahkan penanda sederhana ke peta di Uluru, di tengah-tengah Australia:
TypeScript
function initMap(): void {
const myLatLng = { lat: -25.363, lng: 131.044 };
const map = new google.maps.Map(
document.getElementById("map") as HTMLElement,
{
zoom: 4,
center: myLatLng,
}
);
new google.maps.Marker({
position: myLatLng,
map,
title: "Hello World!",
});
}
declare global {
interface Window {
initMap: () => void;
}
}
window.initMap = initMap;
JavaScript
function initMap() {
const myLatLng = { lat: -25.363, lng: 131.044 };
const map = new google.maps.Map(document.getElementById("map"), {
zoom: 4,
center: myLatLng,
});
new google.maps.Marker({
position: myLatLng,
map,
title: "Hello World!",
});
}
window.initMap = initMap;
Mencoba Contoh
Pada contoh di atas, penanda ditempatkan di peta pada konstruksi penanda menggunakan properti map pada opsi penanda.
Atau, Anda dapat menambahkan penanda ke peta secara langsung menggunakan metode setMap() penanda, seperti yang ditunjukkan pada contoh di bawah ini:
var myLatlng = new google.maps.LatLng(-25.363882,131.044922);
var mapOptions = {
  zoom: 4,
  center: myLatlng
}
var map = new google.maps.Map(document.getElementById("map"), mapOptions);

var marker = new google.maps.Marker({
    position: myLatlng,
    title:"Hello World!"
});

// To add the marker to the map, call setMap();
marker.setMap(map);
The marker's title will appear as a tooltip.
If you do not wish to pass any Marker options in the
marker's constructor, instead pass an empty object {} in the
last argument of the constructor.
Remove a marker
To remove a marker from the map, call the setMap() method
passing null as the argument.
marker.setMap(null);
Note that the above method does not delete the marker. It removes the
marker from the map. If instead you wish to delete the marker, you should
remove it from the map, and then set the marker itself to
null.
If you wish to manage a set of markers, you should create an array to hold
the markers. Using this array, you can then call setMap() on
each marker in the array in turn when you need to remove the markers. You
can delete the markers by removing them from the map and then setting the
array's length to 0, which removes all
references to the markers.
Customize a marker image
You can customize the visual appearance of markers by specifying an image file or vector-based icon to display instead of the default Google Maps pushpin icon. You can add text with a marker label, and use complex icons to define clickable regions, and set the stack order of markers.
Markers with image icons
In the most basic case, an icon can specify an image to use instead of the
default Google Maps pushpin icon. To specify such an icon, set the
marker's icon property to the URL of an image. The Maps JavaScript API will size the icon automatically.
TypeScript
// This example adds a marker to indicate the position of Bondi Beach in Sydney,
// Australia.
function initMap(): void {
const map = new google.maps.Map(
document.getElementById("map") as HTMLElement,
{
zoom: 4,
center: { lat: -33, lng: 151 },
}
);
const image =
"https://developers.google.com/maps/documentation/javascript/examples/full/images/beachflag.png";
const beachMarker = new google.maps.Marker({
position: { lat: -33.89, lng: 151.274 },
map,
icon: image,
});
}
declare global {
interface Window {
initMap: () => void;
}
}
window.initMap = initMap;
JavaScript
// This example adds a marker to indicate the position of Bondi Beach in Sydney,
// Australia.
function initMap() {
const map = new google.maps.Map(document.getElementById("map"), {
zoom: 4,
center: { lat: -33, lng: 151 },
});
const image =
"https://developers.google.com/maps/documentation/javascript/examples/full/images/beachflag.png";
const beachMarker = new google.maps.Marker({
position: { lat: -33.89, lng: 151.274 },
map,
icon: image,
});
}
window.initMap = initMap;
Mencoba Contoh
Penanda dengan ikon berbasis vektor
Anda dapat menggunakan jalur vektor SVG kustom untuk menetapkan tampilan visual penanda. Untuk melakukannya, teruskan literal objek Symbol dengan jalur yang diinginkan ke properti icon penanda. Anda dapat menentukan jalur kustom menggunakan notasi jalur SVG, atau menggunakan salah satu jalur yang telah ditetapkan di google.maps.SymbolPath. Properti anchor diperlukan agar penanda dapat dirender dengan benar saat tingkat zoom berubah. Pelajari lebih lanjut cara menggunakan Simbol untuk membuat ikon berbasis vektor untuk penanda (dan polyline).
TypeScript
// This example uses SVG path notation to add a vector-based symbol
// as the icon for a marker. The resulting icon is a marker-shaped
// symbol with a blue fill and no border.
function initMap(): void {
const center = new google.maps.LatLng(-33.712451, 150.311823);
const map = new google.maps.Map(
document.getElementById("map") as HTMLElement,
{
zoom: 9,
center: center,
}
);
const svgMarker = {
path: "M-1.547 12l6.563-6.609-1.406-1.406-5.156 5.203-2.063-2.109-1.406 1.406zM0 0q2.906 0 4.945 2.039t2.039 4.945q0 1.453-0.727 3.328t-1.758 3.516-2.039 3.070-1.711 2.273l-0.75 0.797q-0.281-0.328-0.75-0.867t-1.688-2.156-2.133-3.141-1.664-3.445-0.75-3.375q0-2.906 2.039-4.945t4.945-2.039z",
fillColor: "blue",
fillOpacity: 0.6,
strokeWeight: 0,
rotation: 0,
scale: 2,
anchor: new google.maps.Point(0, 20),
};
new google.maps.Marker({
position: map.getCenter(),
icon: svgMarker,
map: map,
});
}
declare global {
interface Window {
initMap: () => void;
}
}
window.initMap = initMap;
JavaScript
// This example uses SVG path notation to add a vector-based symbol
// as the icon for a marker. The resulting icon is a marker-shaped
// symbol with a blue fill and no border.
function initMap() {
const center = new google.maps.LatLng(-33.712451, 150.311823);
const map = new google.maps.Map(document.getElementById("map"), {
zoom: 9,
center: center,
});
const svgMarker = {
path: "M-1.547 12l6.563-6.609-1.406-1.406-5.156 5.203-2.063-2.109-1.406 1.406zM0 0q2.906 0 4.945 2.039t2.039 4.945q0 1.453-0.727 3.328t-1.758 3.516-2.039 3.070-1.711 2.273l-0.75 0.797q-0.281-0.328-0.75-0.867t-1.688-2.156-2.133-3.141-1.664-3.445-0.75-3.375q0-2.906 2.039-4.945t4.945-2.039z",
fillColor: "blue",
fillOpacity: 0.6,
strokeWeight: 0,
rotation: 0,
scale: 2,
anchor: new google.maps.Point(0, 20),
};
new google.maps.Marker({
position: map.getCenter(),
icon: svgMarker,
map: map,
});
}
window.initMap = initMap;
Mencoba Contoh
Label penanda
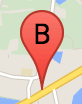
Label penanda adalah huruf atau angka yang muncul di dalam penanda. Gambar penanda di bagian ini menampilkan label penanda dengan huruf 'B'. Anda dapat menentukan label penanda sebagai string atau objek MarkerLabel yang menyertakan string dan properti label lainnya.
Saat membuat penanda, Anda dapat menentukan properti label dalam objek MarkerOptions. Atau, Anda dapat memanggil setLabel() pada objek Penanda untuk menetapkan label pada penanda yang ada.
Contoh berikut menampilkan penanda berlabel saat pengguna mengklik pada peta:
TypeScript
// In the following example, markers appear when the user clicks on the map.
// Each marker is labeled with a single alphabetical character.
const labels = "ABCDEFGHIJKLMNOPQRSTUVWXYZ";
let labelIndex = 0;
function initMap(): void {
const bangalore = { lat: 12.97, lng: 77.59 };
const map = new google.maps.Map(
document.getElementById("map") as HTMLElement,
{
zoom: 12,
center: bangalore,
}
);
// This event listener calls addMarker() when the map is clicked.
google.maps.event.addListener(map, "click", (event) => {
addMarker(event.latLng, map);
});
// Add a marker at the center of the map.
addMarker(bangalore, map);
}
// Adds a marker to the map.
function addMarker(location: google.maps.LatLngLiteral, map: google.maps.Map) {
// Add the marker at the clicked location, and add the next-available label
// from the array of alphabetical characters.
new google.maps.Marker({
position: location,
label: labels[labelIndex++ % labels.length],
map: map,
});
}
declare global {
interface Window {
initMap: () => void;
}
}
window.initMap = initMap;
JavaScript
// In the following example, markers appear when the user clicks on the map.
// Each marker is labeled with a single alphabetical character.
const labels = "ABCDEFGHIJKLMNOPQRSTUVWXYZ";
let labelIndex = 0;
function initMap() {
const bangalore = { lat: 12.97, lng: 77.59 };
const map = new google.maps.Map(document.getElementById("map"), {
zoom: 12,
center: bangalore,
});
// This event listener calls addMarker() when the map is clicked.
google.maps.event.addListener(map, "click", (event) => {
addMarker(event.latLng, map);
});
// Add a marker at the center of the map.
addMarker(bangalore, map);
}
// Adds a marker to the map.
function addMarker(location, map) {
// Add the marker at the clicked location, and add the next-available label
// from the array of alphabetical characters.
new google.maps.Marker({
position: location,
label: labels[labelIndex++ % labels.length],
map: map,
});
}
window.initMap = initMap;
Mencoba Contoh
Ikon rumit
Anda dapat menentukan bentuk rumit untuk menunjukkan wilayah yang dapat diklik, dan menentukan tampilan ikon terkait dengan overlay lain ("urutan tumpukannya"). Ikon yang ditentukan dengan cara ini harus menetapkan properti icon ke objek berjenis Icon.
Objek Icon menentukan gambar. Objek ini juga menentukan size ikon, origin ikon (misalnya, jika gambar yang Anda inginkan adalah bagian dari gambar yang lebih besar dalam sprite), dan anchor tempat hotspot ikon berada (berdasarkan asalnya).
Jika Anda menggunakan label dengan penanda kustom, Anda dapat menempatkan label dengan properti labelOrigin di objek Icon.
TypeScript
// The following example creates complex markers to indicate beaches near
// Sydney, NSW, Australia. Note that the anchor is set to (0,32) to correspond
// to the base of the flagpole.
function initMap(): void {
const map = new google.maps.Map(
document.getElementById("map") as HTMLElement,
{
zoom: 10,
center: { lat: -33.9, lng: 151.2 },
}
);
setMarkers(map);
}
// Data for the markers consisting of a name, a LatLng and a zIndex for the
// order in which these markers should display on top of each other.
const beaches: [string, number, number, number][] = [
["Bondi Beach", -33.890542, 151.274856, 4],
["Coogee Beach", -33.923036, 151.259052, 5],
["Cronulla Beach", -34.028249, 151.157507, 3],
["Manly Beach", -33.80010128657071, 151.28747820854187, 2],
["Maroubra Beach", -33.950198, 151.259302, 1],
];
function setMarkers(map: google.maps.Map) {
// Adds markers to the map.
// Marker sizes are expressed as a Size of X,Y where the origin of the image
// (0,0) is located in the top left of the image.
// Origins, anchor positions and coordinates of the marker increase in the X
// direction to the right and in the Y direction down.
const image = {
url: "https://developers.google.com/maps/documentation/javascript/examples/full/images/beachflag.png",
// This marker is 20 pixels wide by 32 pixels high.
size: new google.maps.Size(20, 32),
// The origin for this image is (0, 0).
origin: new google.maps.Point(0, 0),
// The anchor for this image is the base of the flagpole at (0, 32).
anchor: new google.maps.Point(0, 32),
};
// Shapes define the clickable region of the icon. The type defines an HTML
// <area> element 'poly' which traces out a polygon as a series of X,Y points.
// The final coordinate closes the poly by connecting to the first coordinate.
const shape = {
coords: [1, 1, 1, 20, 18, 20, 18, 1],
type: "poly",
};
for (let i = 0; i < beaches.length; i++) {
const beach = beaches[i];
new google.maps.Marker({
position: { lat: beach[1], lng: beach[2] },
map,
icon: image,
shape: shape,
title: beach[0],
zIndex: beach[3],
});
}
}
declare global {
interface Window {
initMap: () => void;
}
}
window.initMap = initMap;
JavaScript
// The following example creates complex markers to indicate beaches near
// Sydney, NSW, Australia. Note that the anchor is set to (0,32) to correspond
// to the base of the flagpole.
function initMap() {
const map = new google.maps.Map(document.getElementById("map"), {
zoom: 10,
center: { lat: -33.9, lng: 151.2 },
});
setMarkers(map);
}
// Data for the markers consisting of a name, a LatLng and a zIndex for the
// order in which these markers should display on top of each other.
const beaches = [
["Bondi Beach", -33.890542, 151.274856, 4],
["Coogee Beach", -33.923036, 151.259052, 5],
["Cronulla Beach", -34.028249, 151.157507, 3],
["Manly Beach", -33.80010128657071, 151.28747820854187, 2],
["Maroubra Beach", -33.950198, 151.259302, 1],
];
function setMarkers(map) {
// Adds markers to the map.
// Marker sizes are expressed as a Size of X,Y where the origin of the image
// (0,0) is located in the top left of the image.
// Origins, anchor positions and coordinates of the marker increase in the X
// direction to the right and in the Y direction down.
const image = {
url: "https://developers.google.com/maps/documentation/javascript/examples/full/images/beachflag.png",
// This marker is 20 pixels wide by 32 pixels high.
size: new google.maps.Size(20, 32),
// The origin for this image is (0, 0).
origin: new google.maps.Point(0, 0),
// The anchor for this image is the base of the flagpole at (0, 32).
anchor: new google.maps.Point(0, 32),
};
// Shapes define the clickable region of the icon. The type defines an HTML
// <area> element 'poly' which traces out a polygon as a series of X,Y points.
// The final coordinate closes the poly by connecting to the first coordinate.
const shape = {
coords: [1, 1, 1, 20, 18, 20, 18, 1],
type: "poly",
};
for (let i = 0; i < beaches.length; i++) {
const beach = beaches[i];
new google.maps.Marker({
position: { lat: beach[1], lng: beach[2] },
map,
icon: image,
shape: shape,
title: beach[0],
zIndex: beach[3],
});
}
}
window.initMap = initMap;
Mencoba Contoh
Mengonversi objek MarkerImage ke jenis Icon
Hingga Maps JavaScript API versi 3.10, ikon kompleks ditetapkan sebagai objek MarkerImage. Literal objek Icon ditambahkan dalam versi 3.10, dan menggantikan MarkerImage dari versi 3.11 dan seterusnya.
Literal objek Icon mendukung parameter yang sama seperti
MarkerImage, sehingga memudahkan Anda mengonversi
MarkerImage menjadi Icon dengan menghapus
konstruktor, menggabungkan parameter sebelumnya dalam {}, dan
menambahkan nama-nama setiap parameter. Contoh:
var image = new google.maps.MarkerImage(
    place.icon,
    new google.maps.Size(71, 71),
    new google.maps.Point(0, 0),
    new google.maps.Point(17, 34),
    new google.maps.Size(25, 25));
becomes
var image = {
  url: place.icon,
  size: new google.maps.Size(71, 71),
  origin: new google.maps.Point(0, 0),
  anchor: new google.maps.Point(17, 34),
  scaledSize: new google.maps.Size(25, 25)
};
Optimize markers
Optimization enhances performance by rendering many markers as a single static element. This is useful in cases where a large number of markers is required. By default, the Maps JavaScript API will decide whether a marker will be optimized. When there is a large number of markers, the Maps JavaScript API will attempt to render markers with optimization. Not all Markers can be optimized; in some situations, the Maps JavaScript API may need to render Markers without optimization. Disable optimized rendering for animated GIFs or PNGs, or when each marker must be rendered as a separate DOM element. The following example shows creating an optimized marker:
var marker = new google.maps.Marker({
    position: myLatlng,
    title:"Hello World!",
    optimized: true
});
Membuat penanda dapat diakses
Anda dapat membuat penanda dapat diakses dengan menambahkan peristiwa pemroses klik, dan
menetapkan optimized ke false. Pemroses klik membuat penanda memiliki semantik tombol, yang dapat diakses menggunakan navigasi keyboard, pembaca layar, dan sebagainya. Gunakan opsi title untuk menampilkan teks yang dapat diakses bagi penanda.
Pada contoh berikut, penanda pertama menerima fokus saat tab ditekan; Anda kemudian dapat menggunakan tombol panah untuk berpindah di antara penanda. Tekan tab lagi untuk terus berpindah di antara kontrol peta lainnya. Jika penanda memiliki jendela info, Anda dapat membukanya dengan mengklik penanda, atau dengan menekan tombol enter atau spasi saat penanda dipilih. Saat jendela info ditutup, fokus akan kembali ke penanda terkait.
TypeScript
// The following example creates five accessible and
// focusable markers.
function initMap(): void {
const map = new google.maps.Map(
document.getElementById("map") as HTMLElement,
{
zoom: 12,
center: { lat: 34.84555, lng: -111.8035 },
}
);
// Set LatLng and title text for the markers. The first marker (Boynton Pass)
// receives the initial focus when tab is pressed. Use arrow keys to
// move between markers; press tab again to cycle through the map controls.
const tourStops: [google.maps.LatLngLiteral, string][] = [
[{ lat: 34.8791806, lng: -111.8265049 }, "Boynton Pass"],
[{ lat: 34.8559195, lng: -111.7988186 }, "Airport Mesa"],
[{ lat: 34.832149, lng: -111.7695277 }, "Chapel of the Holy Cross"],
[{ lat: 34.823736, lng: -111.8001857 }, "Red Rock Crossing"],
[{ lat: 34.800326, lng: -111.7665047 }, "Bell Rock"],
];
// Create an info window to share between markers.
const infoWindow = new google.maps.InfoWindow();
// Create the markers.
tourStops.forEach(([position, title], i) => {
const marker = new google.maps.Marker({
position,
map,
title: `${i + 1}. ${title}`,
label: `${i + 1}`,
optimized: false,
});
// Add a click listener for each marker, and set up the info window.
marker.addListener("click", () => {
infoWindow.close();
infoWindow.setContent(marker.getTitle());
infoWindow.open(marker.getMap(), marker);
});
});
}
declare global {
interface Window {
initMap: () => void;
}
}
window.initMap = initMap;
JavaScript
// The following example creates five accessible and
// focusable markers.
function initMap() {
const map = new google.maps.Map(document.getElementById("map"), {
zoom: 12,
center: { lat: 34.84555, lng: -111.8035 },
});
// Set LatLng and title text for the markers. The first marker (Boynton Pass)
// receives the initial focus when tab is pressed. Use arrow keys to
// move between markers; press tab again to cycle through the map controls.
const tourStops = [
[{ lat: 34.8791806, lng: -111.8265049 }, "Boynton Pass"],
[{ lat: 34.8559195, lng: -111.7988186 }, "Airport Mesa"],
[{ lat: 34.832149, lng: -111.7695277 }, "Chapel of the Holy Cross"],
[{ lat: 34.823736, lng: -111.8001857 }, "Red Rock Crossing"],
[{ lat: 34.800326, lng: -111.7665047 }, "Bell Rock"],
];
// Create an info window to share between markers.
const infoWindow = new google.maps.InfoWindow();
// Create the markers.
tourStops.forEach(([position, title], i) => {
const marker = new google.maps.Marker({
position,
map,
title: `${i + 1}. ${title}`,
label: `${i + 1}`,
optimized: false,
});
// Add a click listener for each marker, and set up the info window.
marker.addListener("click", () => {
infoWindow.close();
infoWindow.setContent(marker.getTitle());
infoWindow.open(marker.getMap(), marker);
});
});
}
window.initMap = initMap;
Mencoba Contoh
Menganimasikan penanda
Anda dapat menganimasikan penanda agar menampilkan gerakan dinamis dalam berbagai macam situasi. Untuk menetapkan cara penanda dianimasikan, gunakan properti animation penanda, dari jenis google.maps.Animation. Nilai-nilai Animation berikut didukung:
-
DROPmenunjukkan bahwa penanda harus turun dari bagian atas peta ke lokasi akhirnya saat pertama kali ditempatkan di peta. Animasi akan berhenti setelah penanda tidak bergerak dananimationakan kembali kenull. Jenis animasi ini biasanya ditentukan selama pembuatanMarker. -
BOUNCEmenunjukkan bahwa penanda akan memantul-mantul di tempat. Penanda memantul terus-menerus hingga propertianimation-nya ditetapkan secara eksplisit kenull.
Anda dapat memulai animasi pada penanda yang ada dengan memanggil setAnimation() pada objek Marker.
TypeScript
// The following example creates a marker in Stockholm, Sweden using a DROP
// animation. Clicking on the marker will toggle the animation between a BOUNCE
// animation and no animation.
let marker: google.maps.Marker;
function initMap(): void {
const map = new google.maps.Map(
document.getElementById("map") as HTMLElement,
{
zoom: 13,
center: { lat: 59.325, lng: 18.07 },
}
);
marker = new google.maps.Marker({
map,
draggable: true,
animation: google.maps.Animation.DROP,
position: { lat: 59.327, lng: 18.067 },
});
marker.addListener("click", toggleBounce);
}
function toggleBounce() {
if (marker.getAnimation() !== null) {
marker.setAnimation(null);
} else {
marker.setAnimation(google.maps.Animation.BOUNCE);
}
}
declare global {
interface Window {
initMap: () => void;
}
}
window.initMap = initMap;
JavaScript
// The following example creates a marker in Stockholm, Sweden using a DROP
// animation. Clicking on the marker will toggle the animation between a BOUNCE
// animation and no animation.
let marker;
function initMap() {
const map = new google.maps.Map(document.getElementById("map"), {
zoom: 13,
center: { lat: 59.325, lng: 18.07 },
});
marker = new google.maps.Marker({
map,
draggable: true,
animation: google.maps.Animation.DROP,
position: { lat: 59.327, lng: 18.067 },
});
marker.addListener("click", toggleBounce);
}
function toggleBounce() {
if (marker.getAnimation() !== null) {
marker.setAnimation(null);
} else {
marker.setAnimation(google.maps.Animation.BOUNCE);
}
}
window.initMap = initMap;
Mencoba Contoh
Jika Anda memiliki banyak penanda, Anda mungkin tidak ingin menempatkan semuanya di peta sekaligus. Anda dapat menggunakan setTimeout() untuk memberikan ruang pada animasi penanda menggunakan pola seperti yang ditunjukkan di bawah ini:
function drop() {
  for (var i =0; i < markerArray.length; i++) {
    setTimeout(function() {
      addMarkerMethod();
    }, i * 200);
  }
}
Membuat penanda dapat ditarik
Untuk memungkinkan pengguna menarik penanda ke lokasi yang berbeda pada peta, tetapkan draggable ke true dalam opsi penanda.
var myLatlng = new google.maps.LatLng(-25.363882,131.044922);
var mapOptions = {
  zoom: 4,
  center: myLatlng
}
var map = new google.maps.Map(document.getElementById("map"), mapOptions);

// Place a draggable marker on the map
var marker = new google.maps.Marker({
    position: myLatlng,
    map: map,
    draggable:true,
    title:"Drag me!"
});
Penyesuaian Penanda Lebih Lanjut
Untuk penanda yang disesuaikan sepenuhnya, lihat contoh pop-up yang disesuaikan.
Untuk ekstensi class Penanda lebih lanjut, pengelompokan dan pengelolaan penanda, serta penyesuaian overlay, lihat library open source.
Kecuali dinyatakan lain, konten di halaman ini dilisensikan berdasarkan Lisensi Creative Commons Attribution 4.0, sedangkan contoh kode dilisensikan berdasarkan Lisensi Apache 2.0. Untuk mengetahui informasi selengkapnya, lihat Kebijakan Situs Google Developers. Java adalah merek dagang terdaftar dari Oracle dan/atau afiliasinya.
Terakhir diperbarui pada 2024-06-17 UTC.