このページでは、WebXR を使用してシンプルな没入型 AR アプリケーションを作成する方法について説明します。
始めるにあたっては、WebXR 対応の開発環境が必要です。
HTML ページを作成する
WebXR では、セッションを開始するためにユーザー操作が必要です。activateXR() を呼び出すボタンを作成します。ページが読み込まれると、ユーザーはこのボタンを使用して AR を開始できます。
index.html という名前の新しいファイルを作成し、次の HTML コードを追加します。
<!doctype html>
<html>
<head>
  <meta charset="UTF-8">
  <meta name="viewport"
        content="width=device-width, user-scalable=no, initial-scale=1.0, maximum-scale=1.0, minimum-scale=1.0">
  <title>Hello WebXR!</title>

  <!-- three.js -->
  <script src="https://unpkg.com/three@0.126.0/build/three.js"></script>
</head>
<body>

<!-- Starting an immersive WebXR session requires user interaction.
    We start this one with a simple button. -->
<button onclick="activateXR()">Start Hello WebXR</button>
<script>
async function activateXR() {
  // Add a canvas element and initialize a WebGL context that is compatible with WebXR.
  const canvas = document.createElement("canvas");
  document.body.appendChild(canvas);
  const gl = canvas.getContext("webgl", {xrCompatible: true});

  // To be continued in upcoming steps.
}
</script>
</body>
</html>
three.js を初期化する
開始ボタンを押しても、ほとんど何も起こりません。3D 環境をセットアップするには、レンダリング ライブラリを使用してシーンを表示します。
この例では、WebGL レンダラを提供する JavaScript 3D レンダリング ライブラリである three.js を使用します。Three.js は、レンダリング、カメラ、シーングラフを処理し、ウェブ上で 3D コンテンツを簡単に表示できるようにします。
シーンを作成する
3D 環境は通常、シーンとしてモデル化されます。AR 要素を含む THREE.Scene を作成します。次のコードを使用すると、ライトのない色付きのボックスを AR で確認できます。
次のコードを activateXR() 関数の一番下に追加します。
const scene = new THREE.Scene();

// The cube will have a different color on each side.
const materials = [
  new THREE.MeshBasicMaterial({color: 0xff0000}),
  new THREE.MeshBasicMaterial({color: 0x0000ff}),
  new THREE.MeshBasicMaterial({color: 0x00ff00}),
  new THREE.MeshBasicMaterial({color: 0xff00ff}),
  new THREE.MeshBasicMaterial({color: 0x00ffff}),
  new THREE.MeshBasicMaterial({color: 0xffff00})
];

// Create the cube and add it to the demo scene.
const cube = new THREE.Mesh(new THREE.BoxBufferGeometry(0.2, 0.2, 0.2), materials);
cube.position.set(1, 1, 1);
scene.add(cube);
three.js を使用してレンダリングを設定する
このシーンを AR で表示するには、レンダラとカメラが必要です。レンダラは WebGL を使用してシーンを画面に描画します。カメラは、シーンを表示するビューポートを記述します。
次のコードを activateXR() 関数の一番下に追加します。
// Set up the WebGLRenderer, which handles rendering to the session's base layer.
const renderer = new THREE.WebGLRenderer({
  alpha: true,
  preserveDrawingBuffer: true,
  canvas: canvas,
  context: gl
});
renderer.autoClear = false;

// The API directly updates the camera matrices.
// Disable matrix auto updates so three.js doesn't attempt
// to handle the matrices independently.
const camera = new THREE.PerspectiveCamera();
camera.matrixAutoUpdate = false;
XRSession を作成する
WebXR へのエントリポイントは XRSystem.requestSession() を使用します。immersive-ar モードを使用して、レンダリングされたコンテンツを実際の環境で表示できるようにします。
XRReferenceSpace は、仮想世界内のオブジェクトに使用される座標系を表します。'local' モードは、ビューアの近くに原点があり、安定したトラッキングが行われる基準空間を使用した AR エクスペリエンスに最適です。
XRSession と XRReferenceSpace を作成するには、activateXR() 関数の末尾に次のコードを追加します。
// Initialize a WebXR session using "immersive-ar".
const session = await navigator.xr.requestSession("immersive-ar");
session.updateRenderState({
  baseLayer: new XRWebGLLayer(session, gl)
});

// A 'local' reference space has a native origin that is located
// near the viewer's position at the time the session was created.
const referenceSpace = await session.requestReferenceSpace('local');
シーンをレンダリングする
これでシーンをレンダリングできます。XRSession.requestAnimationFrame() は、ブラウザがフレームの描画準備が整うと実行されるコールバックをスケジュールします。
アニメーション フレーム コールバック中に XRFrame.getViewerPose() を呼び出して、ローカル座標空間を基準としたビューアの姿勢を取得します。これを使用してシーン内カメラを更新し、更新されたカメラを使用してレンダラがシーンを描画する前に、ユーザーの仮想世界の表示方法を変更します。
次のコードを activateXR() 関数の一番下に追加します。
// Create a render loop that allows us to draw on the AR view.
const onXRFrame = (time, frame) => {
  // Queue up the next draw request.
  session.requestAnimationFrame(onXRFrame);

  // Bind the graphics framebuffer to the baseLayer's framebuffer
  gl.bindFramebuffer(gl.FRAMEBUFFER, session.renderState.baseLayer.framebuffer)

  // Retrieve the pose of the device.
  // XRFrame.getViewerPose can return null while the session attempts to establish tracking.
  const pose = frame.getViewerPose(referenceSpace);
  if (pose) {
    // In mobile AR, we only have one view.
    const view = pose.views[0];

    const viewport = session.renderState.baseLayer.getViewport(view);
    renderer.setSize(viewport.width, viewport.height)

    // Use the view's transform matrix and projection matrix to configure the THREE.camera.
    camera.matrix.fromArray(view.transform.matrix)
    camera.projectionMatrix.fromArray(view.projectionMatrix);
    camera.updateMatrixWorld(true);

    // Render the scene with THREE.WebGLRenderer.
    renderer.render(scene, camera)
  }
}
session.requestAnimationFrame(onXRFrame);
Hello WebXR を実行する
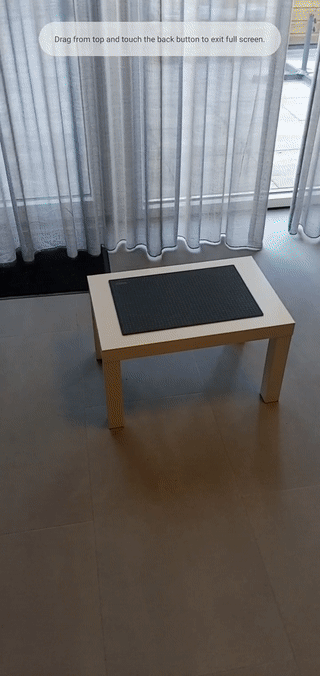
デバイスで WebXR ファイルを開きます。色付きの立方体がすべての側から見えるはずです。
ヒットテストを追加する
AR の世界でよく使われる方法として、ヒットテストがあります。これは、直線と実世界のジオメトリの交差を検出します。Hello WebXR では、ヒットテストを使用して仮想世界にヒマワリを配置します。
デモキューブを削除する
照明のない立方体を削除し、照明があるシーンに置き換えます。
const scene = new THREE.Scene();

const directionalLight = new THREE.DirectionalLight(0xffffff, 0.3);
directionalLight.position.set(10, 15, 10);
scene.add(directionalLight);
hit-test 機能を使用する
ヒットテスト機能を初期化するには、hit-test 機能を使用してセッションをリクエストします。前の requestSession() フラグメントを見つけて、hit-test を追加します。
const session = await navigator.xr.requestSession("immersive-ar", {requiredFeatures: ['hit-test']});
モデルローダを追加する
現在、シーンには色付きのキューブのみが含まれています。エクスペリエンスをより魅力的なものにするためには、モデル ローダを追加して GLTF モデルを読み込むようにします。
ドキュメントの <head> タグに three.js の GLTFLoader を追加します。
<!-- three.js -->
<script src="https://unpkg.com/three@0.126.0/build/three.js"></script>

<script src="https://unpkg.com/three@0.126.0/examples/js/loaders/GLTFLoader.js"></script>
GLTF モデルを読み込む
前の手順のモデル ローダーを使用して、ターゲティング レチクルとひまわりをウェブから読み込みます。
onXRFrame の上に次のコードを追加します。
const loader = new THREE.GLTFLoader();
let reticle;
loader.load("https://immersive-web.github.io/webxr-samples/media/gltf/reticle/reticle.gltf", function(gltf) {
  reticle = gltf.scene;
  reticle.visible = false;
  scene.add(reticle);
})

let flower;
loader.load("https://immersive-web.github.io/webxr-samples/media/gltf/sunflower/sunflower.gltf", function(gltf) {
  flower = gltf.scene;
});

// Create a render loop that allows us to draw on the AR view.
const onXRFrame = (time, frame) => {
ヒットテスト ソースを作成する
現実世界のオブジェクトとの交差を計算するには、XRSession.requestHitTestSource() を使用して XRHitTestSource を作成します。ヒットテストに使用されるレイは、原点として viewer 参照空間を持ちます。つまり、ヒットテストはビューポートの中心から行われます。
ヒットテスト ソースを作成するには、local 参照スペースの作成後に次のコードを追加します。
// A 'local' reference space has a native origin that is located
// near the viewer's position at the time the session was created.
const referenceSpace = await session.requestReferenceSpace('local');

// Create another XRReferenceSpace that has the viewer as the origin.
const viewerSpace = await session.requestReferenceSpace('viewer');
// Perform hit testing using the viewer as origin.
const hitTestSource = await session.requestHitTestSource({ space: viewerSpace });
ターゲティング レチクルを描画する
ヒマワリを配置する場所を明確にするため、シーンにターゲティング レチクルを追加します。このレチクルは、ヒマワリを固定する場所を示すように、実際のサーフェスに貼り付いているように表示されます。
XRFrame.getHitTestResults は XRHitTestResult の配列を返します。また、実際のジオメトリとの交差を公開します。これらの交点を使用して、ターゲティング レチクルをすべてのフレームに配置します。
camera.projectionMatrix.fromArray(view.projectionMatrix);
camera.updateMatrixWorld(true);

const hitTestResults = frame.getHitTestResults(hitTestSource);
if (hitTestResults.length > 0 && reticle) {
  const hitPose = hitTestResults[0].getPose(referenceSpace);
  reticle.visible = true;
  reticle.position.set(hitPose.transform.position.x, hitPose.transform.position.y, hitPose.transform.position.z)
  reticle.updateMatrixWorld(true);
}
タップ操作の追加
XRSession は、ユーザーがプライマリ アクションを完了したときに select イベントを受信します。AR セッションでは、これは画面のタップに対応します。
初期化時に次のコードを追加して、ユーザーが画面をタップしたときに新しいひまわりを表示します。
let flower;
loader.load("https://immersive-web.github.io/webxr-samples/media/gltf/sunflower/sunflower.gltf", function(gltf) {
  flower = gltf.scene;
});

session.addEventListener("select", (event) => {
  if (flower) {
    const clone = flower.clone();
    clone.position.copy(reticle.position);
    scene.add(clone);
  }
});
ヒットテストをテストする
モバイル デバイスを使用してページに移動します。WebXR が環境を認識すると、実世界のサーフェスにレチクルが表示されます。画面をタップしてヒマワリを配置します。ヒマワリはどの角度からでも見ることができます。
次のステップ
- WebXR Device API の仕様を確認する。
- MDN Web Docs の WebXR リファレンス ドキュメントをご覧ください。
- WebXR サンプルを試す。
- WebXR Device API を使用して拡張現実(AR)アプリを作成する(Codelab)。