AI-generated Key Takeaways
-
This guide explains how to use C# scripts with Geospatial Creator in Unity to programmatically create and manage
ARGeospatialCreatorAnchorobjects in Edit mode. -
Programmatically creating anchors is useful for generating multiple anchors from predefined lists, offering an alternative to using the Unity Editor UI.
-
You need to set up an
ARGeospatialCreatorOriginand get a reference to theARAnchorManagerbefore creating anchors. -
Different altitude types (Terrain, Rooftop, WGS84) are available for anchors, allowing placement at ground level, on buildings, or at a specific WGS84 altitude.
-
Editor-only altitude override properties are available to adjust anchor positions in the Scene view without affecting the runtime behavior.
This guide describes how to use Geospatial Creator to write C# scripts
to quickly accomplish common tasks such as creating and moving
ARGeospatialCreatorAnchor objects in Unity's Edit mode. This can be useful for
creating multiple anchors from a predefined list such as a spreadsheet or a KML
file.
Geospatial Creator in Unity lets you preview Geospatial content in the Unity Editor. Our Quickstart Guide introduces Geospatial Creator and walks you through how to build your first Geospatial-enabled AR experience with minimal programming, using the Unity Editor UI. For more advanced projects, you may want to create and manipulate Geospatial Creator GameObjects programmatically instead of using the Unity Editor UI.
This guide assumes that you are familiar with basic Geospatial Creator concepts introduced in the Quickstart, and you are ready to start adding Geospatial Creator anchors to a scene. You will need to have Geospatial Creator enabled and configured with your API keys, as well as initial AR session objects in your scene. If starting from scratch, follow the Quickstart guide through and including the "Enable Geospatial Creator" section before continuing.
Getting started
For this example, suppose you have a set of known locations around City Hall in San Francisco, California, USA, at which you want to place AR content. You will need to create anchor objects at each of these locations, and then attach basic geometry to those anchors.
Before you can create anchors, you should specify an
ARGeospatialCreatorOrigin, which is a reference point for converting
latitudes, longitudes, and altitudes to and from Unity world coordinates.
The origin also will contain a CesiumGeoreference subcomponent and a
Cesium3DTileset child object, which allows Cesium to render the surrounding
area in the Scene view of the Unity editor. For this, you need a Google Map
Tiles API key as described in the
the Quickstart
Create an Origin
The API for Geospatial Creator includes a factory method to create an
ARGeospatialCreatorOrigin in the scene and add the required Cesium components.
The following code creates the origin at a nearby latitude, longitude, and
altitude, and using the given Map Tiles API key:
ARGeospatialCreatorOrigin origin =
  GeospatialCreatorCesiumAdapter.CreateOriginWithCesiumGeoreference(
    37.77954, -122.417581, 0.0, "<MAP_TILES_KEY>");
By default, this object is placed at (0, 0, 0) in Unity world coordinates, which works well for this example.
Get the ARAnchorManager Reference
An ARAnchorManager
is required to resolve geospatial anchors at runtime, so you
also need a reference to the ARAnchorManager in the scene. If you started with
the Geospatial Sample application bundled with ARCore Extensions, the Anchor
Manager is attached to the "AR Session Origin" GameObject. Assuming you have
exactly one anchor manager in your scene, you can get a reference to it like
this:
ARAnchorManager anchorManager =
    Resources.FindObjectsOfTypeAll<ARAnchorManager>()[0];
Now that you have an origin and an anchor manager, you can start creating the
ARGeospatialCreatorAnchor objects.
Create Terrain anchors
Consider the following two-dimensional array of double values, representing
the precise latitude and longitude at three points on the east-facing side of
City Hall in San Francisco, California, USA:
double[,] _cityHallEastPoints = {
    { 37.77936, -122.418617 }, // in front of city hall
    { 37.77965, -122.418680 }, // right of city hall
    { 37.77917, -122.418577 }}; // left of city hall
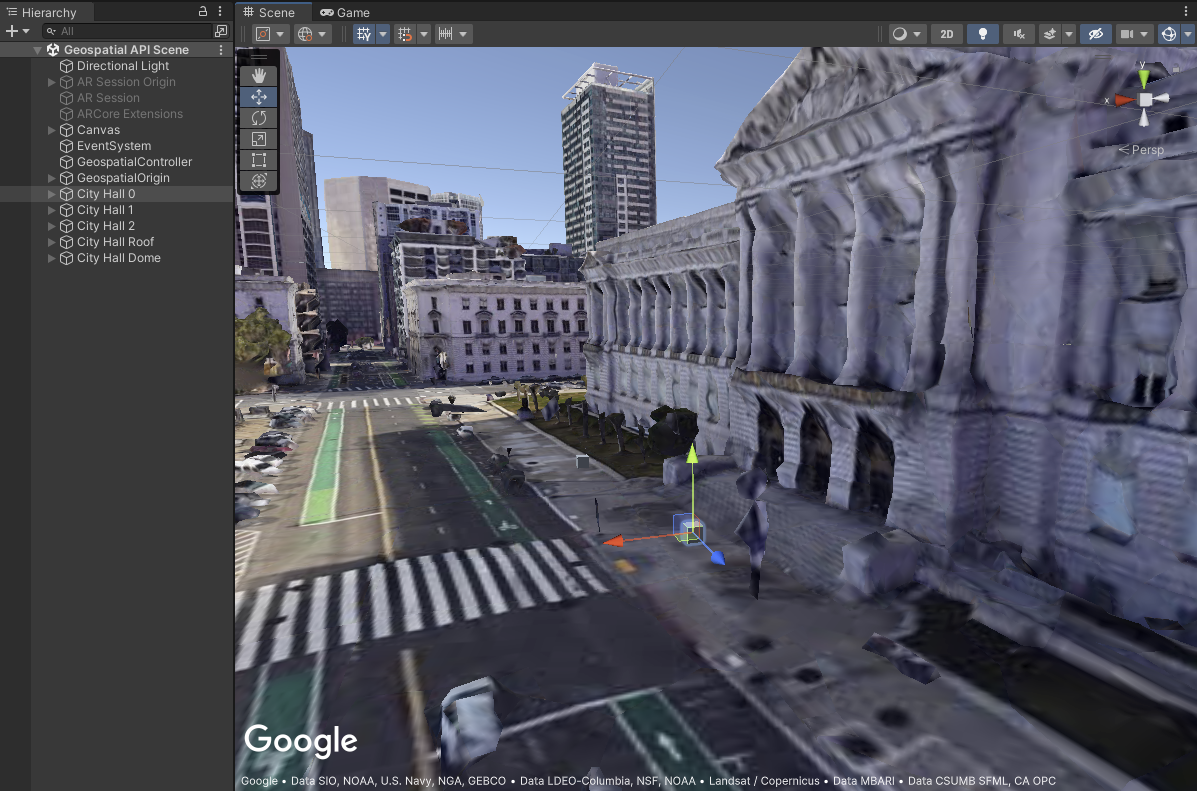
Suppose you want to place a one meter cube at each of these locations, at ground
level, in our AR application. The following code creates
ARGeospatialCreatorAnchor objects and assigns their properties to the
appropriate values:
for (int i = 0; i < _cityHallEastPoints.GetLength(0); i++)
{
  ARGeospatialCreatorAnchor anchor =
    new GameObject("City Hall " + i).AddComponent<ARGeospatialCreatorAnchor>();
  anchor.Origin = origin;
  anchor.AnchorManager = anchorManager;
  anchor.Latitude = _cityHallEastPoints[i, 0];
  anchor.Longitude = _cityHallEastPoints[i, 1];
  anchor.AltitudeType = AnchorAltitudeType.Terrain;

  GameObject cube = GameObject.CreatePrimitive(PrimitiveType.Cube);
  cube.transform.parent = anchor.transform;
}
This creates terrain anchors at each point. Geospatial Creator automatically
places the anchors at appropriate Unity world coordinates, by calculating their
location relative to the ARGeospatialCreatorOrigin object. To adjust the
altitude of a terrain anchor, set the Altitude property in meters above or
below the terrain surface.
At runtime, terrain anchors will resolve at ground level for the running app,
offset by the Altitude property. In the Editor's scene view, though, they
render at a WGS84 altitude of 0 by default, not relative to the 3d tile
geometry. This often isn't where you'd like to see them, so you can override the
default altitude of the anchor in the Editor's scene view by setting the
UseEditorAltitudeOverride property to true and specifying the altitude in
WGS84 meters using the EditorAltitudeOverride property:
anchor.UseEditorAltitudeOverride = true;
anchor.EditorAltitudeOverride = -13.5; // WGS84 altitude at ground level for City Hall plaza
These two properties have no effect outside of Editor mode, and are not compiled into the running app.

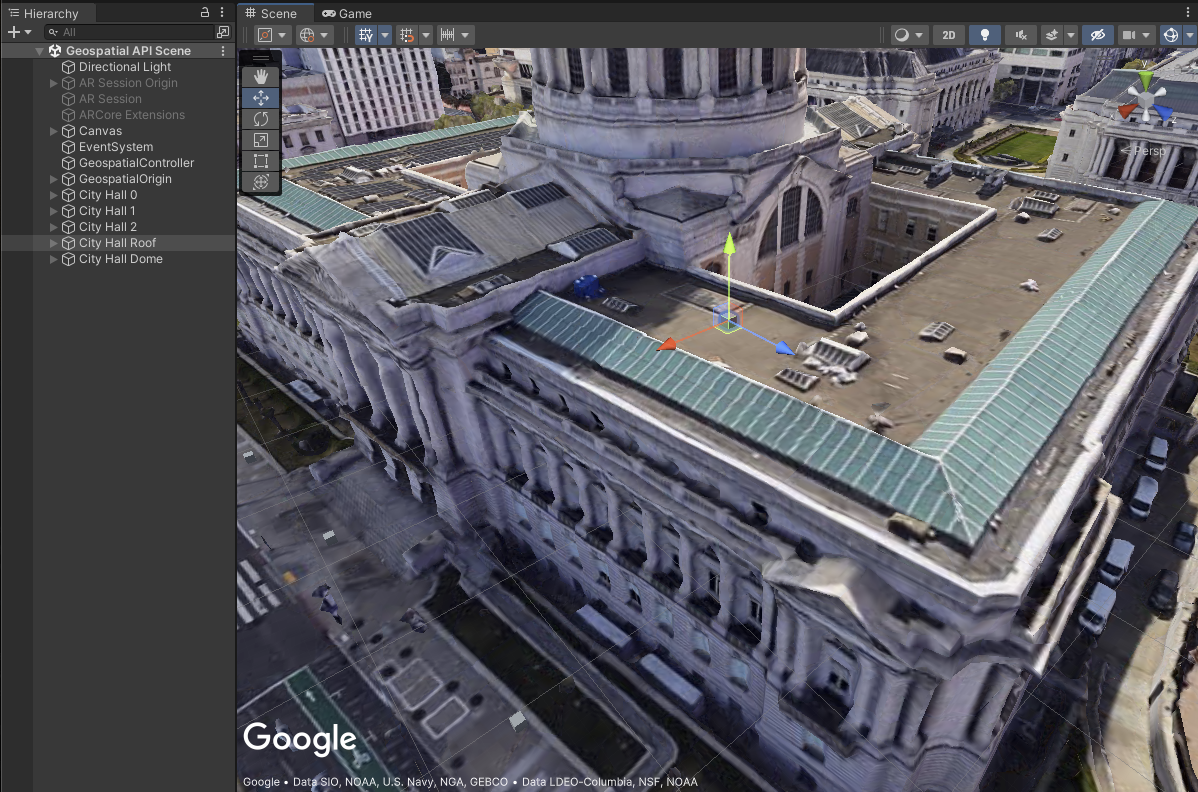
Create a rooftop anchor
For our next anchor, suppose you want to place an anchor on the rooftop of City
Hall. The anchor can be created in the exact same way, except the AltitudeType
property is set to AnchorAltitudeType.Rooftop:
ARGeospatialCreatorAnchor cityHallRoofAnchor =
  new GameObject("City Hall Roof").AddComponent<ARGeospatialCreatorAnchor>();
cityHallRoofAnchor.Origin = origin;
cityHallRoofAnchor.AnchorManager = anchorManager;
cityHallRoofAnchor.Latitude = 37.77959;
cityHallRoofAnchor.Longitude = -122.419006;
cityHallRoofAnchor.AltitudeType = AnchorAltitudeType.Rooftop;

GameObject roofCube = GameObject.CreatePrimitive(PrimitiveType.Cube);
roofCube.transform.parent = cityHallRoofAnchor.transform;
Similar to the terrain anchors, you can fine-tune the altitude of a rooftop
anchor in the Editor's scene view using the UseEditorAltitudeOverride and
EditorAltitudeOverride properties. For this example, the WGS84 altitude of the
roof is roughly 10.7 meters.

Create an anchor at a specific altitude
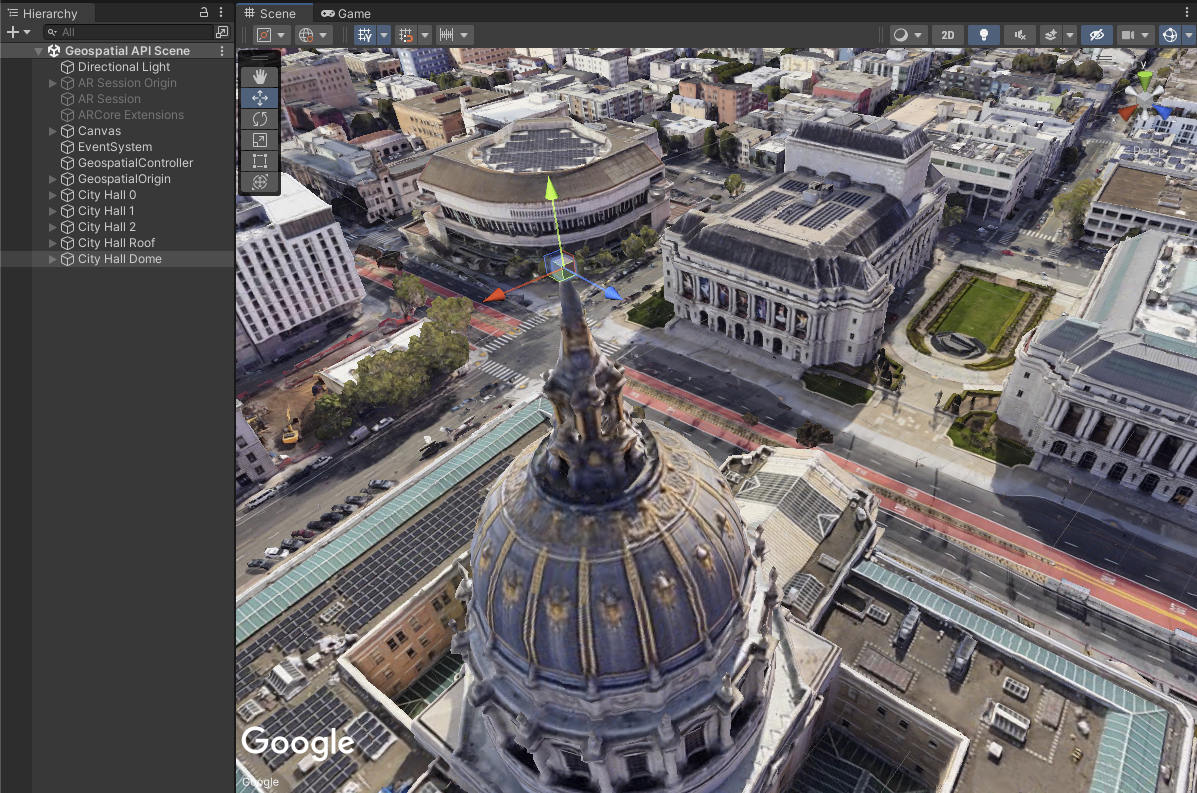
Our final anchor will be placed at the very top of the dome of City Hall. For this anchor, the precise altitude is important, so you'll set it explicitly by using a WGS84 anchor, instead of terrain or rooftop anchor:
ARGeospatialCreatorAnchor cityHallDomeAnchor =
  new GameObject("City Hall Dome").AddComponent<ARGeospatialCreatorAnchor>();
cityHallDomeAnchor.Origin = origin;
cityHallDomeAnchor.AnchorManager = anchorManager;
cityHallDomeAnchor.Latitude = 37.77928;
cityHallDomeAnchor.Longitude = -122.419241;
cityHallDomeAnchor.AltitudeType = AnchorAltitudeType.WGS84;
cityHallDomeAnchor.Altitude = 73;

GameObject domeCube = GameObject.CreatePrimitive(PrimitiveType.Cube);
domeCube.transform.parent = cityHallDomeAnchor.transform;
There is no need to use the editor-only altitude override, as the altitude is already specified according to WGS84. Of course, if the height of the Map Tiles geometry in the editor turned out to be incorrect compared to the real world, you could still use the editor override to reposition the anchor in the scene view.

