マーカーの概要
コレクションでコンテンツを整理
必要に応じて、コンテンツの保存と分類を行います。
各マーカーを使って地図上に場所を表示します。このガイドでは、高度なマーカーの使用方法について説明します。「高度なマーカー」機能では、パフォーマンスに優れたマーカーの作成とカスタマイズが可能です。DOM クリック イベントやキーボード入力に反応するマーカーを作成できる点も特長です。高度なマーカーはカスタム HTML および CSS を使ったさらなるカスタマイズに対応しており、完全なカスタム マーカーの作成も可能です。3D アプリケーションでマーカーを表示する高度も制御できます。高度なマーカーはラスター地図とベクター地図の両方に対応しています(だたし、一部の対象物はラスターマップでは利用できません)。高度なマーカーを使用するにはマップ ID が必要です(DEMO_MAP_ID
を使用できます)。
高度なマーカーを導入する
色、スケール、アイコン画像をカスタマイズする
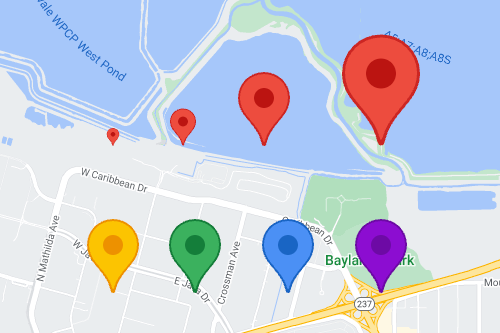
マーカーのデフォルトの背景の色、グリフの色、輪郭線の色をカスタマイズできるほか、マーカーのサイズも調整できます。
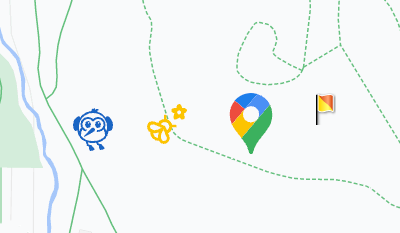
デフォルトのマーカー アイコンを、SVG または PNG 形式のカスタム画像に差し替えることも可能です。
カスタム HTML マーカーを作成する
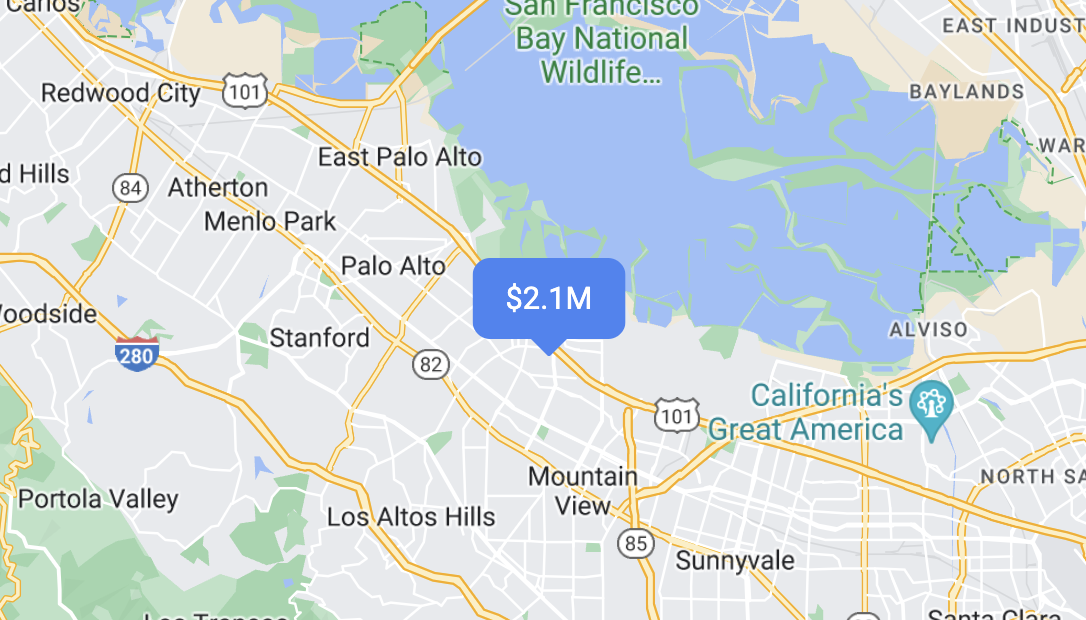
カスタム HTML および CSS を使って、視覚的に特徴のあるマーカーや、アニメーション表示するマーカーを作成できます。
マーカーをクリックやキーボード イベントに反応させる
click
イベント リスナーを追加すれば、マーカーをクリックやキーボード イベントに反応させることができます。
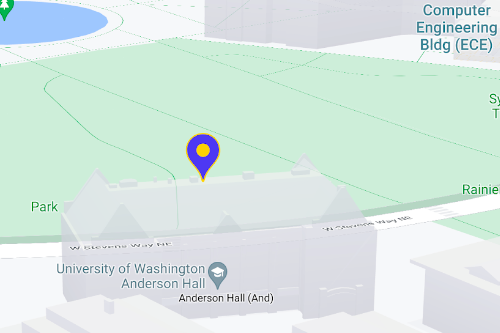
function initMap() {
const map = new google.maps.Map(document.getElementById('map'), {
center: {lat: 37.4239163, lng: -122.0947209},
zoom: 17,
mapId: 'DEMO_MAP_ID',
});
const marker = new google.maps.marker.AdvancedMarkerElement({
map,
position: {lat: 37.4239163, lng: -122.0947209},
});
marker.addListener('click', ({domEvent, latLng}) => {
const {target} = domEvent;
// Handle the click event.
// ...
});
}
マーカーの表示高度と重なった場合の動作を設定する
3D 地図要素に合わせて正しく表示されるよう、マーカーの表示高度を設定できます。また、別のマーカーや地図ラベルと表示位置が重なった場合の動作を指定可能です。マーカーの表示高度の指定は、ベクター地図専用の機能です。
次のステップ
特に記載のない限り、このページのコンテンツはクリエイティブ・コモンズの表示 4.0 ライセンスにより使用許諾されます。コードサンプルは Apache 2.0 ライセンスにより使用許諾されます。詳しくは、Google Developers サイトのポリシーをご覧ください。Java は Oracle および関連会社の登録商標です。
最終更新日 2025-08-17 UTC。
[null,null,["最終更新日 2025-08-17 UTC。"],[[["\u003cp\u003eAdvanced markers offer highly performant and customizable options for displaying single locations on Google Maps, including custom HTML and CSS for unique designs.\u003c/p\u003e\n"],["\u003cp\u003eThey are accessible, responding to DOM click events and keyboard input for enhanced user interaction.\u003c/p\u003e\n"],["\u003cp\u003eCustomization options include changing color, scale, icon image, and creating custom HTML markers with interactive elements and animations.\u003c/p\u003e\n"],["\u003cp\u003eAltitude control is available for 3D applications, enabling precise marker placement in three-dimensional spaces, although this feature is limited to vector maps.\u003c/p\u003e\n"],["\u003cp\u003eAdvanced markers are compatible with both raster and vector maps, requiring a map ID for implementation, and offer improved performance compared to legacy markers.\u003c/p\u003e\n"]]],["Advanced markers allow customization of map markers, including color, scale, and icons (SVG/PNG). Users can employ custom HTML and CSS for unique designs and animations. Markers can be made interactive via `click` event listeners, handling user clicks and keyboard input. Altitude and collision behavior can be defined for 3D maps. A map ID, like `DEMO_MAP_ID`, is needed, and these advanced markers are available on Android, iOS, and JavaScript platforms, supporting both raster and vector maps.\n"],null,["Select platform: [Android](/maps/documentation/android-sdk/advanced-markers/overview \"View this page for the Android platform docs.\") [iOS](/maps/documentation/ios-sdk/advanced-markers/overview \"View this page for the iOS platform docs.\") [JavaScript](/maps/documentation/javascript/advanced-markers/overview \"View this page for the JavaScript platform docs.\")\n\n\u003cbr /\u003e\n\nUse markers to display single locations on a map. This guide shows you how to\nuse advanced markers. With\nadvanced markers you can create and customize highly\nperformant markers, and make accessible markers that respond to DOM click events\nand keyboard input. For even deeper customization,\nadvanced markers supports the use of custom HTML and CSS,\nincluding the ability to create completely custom markers. For 3D applications\nyou can control the altitude at which a marker appears.\nAdvanced markers are supported on both raster and vector maps (though some features are not available on raster maps).\nA map ID is required to use Advanced Markers (the `DEMO_MAP_ID` can be used).\n| **Tip:** If your map uses [legacy markers](/maps/documentation/javascript/markers), consider [migrating to advanced markers](/maps/documentation/javascript/advanced-markers/migration).\n\n[Get started with advanced markers](/maps/documentation/javascript/advanced-markers/start)\n\nCustomize color, scale, and icon image\n\nCustomize the default marker's background, glyph, and border\ncolor, and adjust marker size.\n\nReplace the default marker icon with a custom SVG or PNG image.\n\nCreate custom HTML markers\n\nUse custom HTML and CSS to create visually distinctive\ninteractive markers, and create animations.\n\nMake markers respond to click and keyboard events\n\nMake a marker respond to clicks and keyboard events by adding a\n`click` event listener. \n\n```javascript\nfunction initMap() {\n const map = new google.maps.Map(document.getElementById('map'), {\n center: {lat: 37.4239163, lng: -122.0947209},\n zoom: 17,\n mapId: 'DEMO_MAP_ID',\n });\n\n const marker = new google.maps.marker.AdvancedMarkerElement({\n map,\n position: {lat: 37.4239163, lng: -122.0947209},\n });\n\n marker.addListener('click', ({domEvent, latLng}) =\u003e {\n const {target} = domEvent;\n // Handle the click event.\n // ...\n });\n}\n```\n\nSet marker altitude and collision behavior\n\nSet the altitude for a marker to make it appear correctly with\n3D map elements, and specify how a marker should behave when it collides with\nanother marker or map label. Marker altitude is only supported on vector maps.\n\nNext step\n\n- [Get started with advanced markers](/maps/documentation/javascript/advanced-markers/start)"]]