
Einführung
Eine Markierung kennzeichnet einen Standort auf einer Karte. Standardmäßig wird für eine Markierung eine Standardgrafik verwendet. Wird ein benutzerdefiniertes Bild verwendet, wird die entsprechende Markierung in der Regel als Symbol bezeichnet. Markierungen und Symbole sind Objekte des Typs Marker. Sie können ein benutzerdefiniertes Symbol im Konstruktor der Markierung festlegen oder setIcon() für die Markierung aufrufen. Weitere Informationen zum Anpassen von Markierungsbildern
Im Grunde sind Markierungen eine Art Overlay. Informationen zu anderen Arten von Overlays finden Sie unter Auf Karten zeichnen.
Die Markierungen sind interaktiv konzipiert. Da sie standardmäßig 'click'-Ereignisse empfangen, können Sie z. B. einen Event-Listener hinzufügen, um ein Infofenster mit benutzerdefinierten Informationen einblenden zu lassen. Wenn Sie die draggable-Eigenschaft der Markierung auf true setzen, kann sie von Nutzern verschoben werden. Weitere Informationen finden Sie unter Markierungen ziehbar machen weiter unten.
Markierung hinzufügen
Der google.maps.Marker-Konstruktor verwendet ein einzelnes Marker options-Objektliteral mit den anfänglichen Eigenschaften der Markierung.
Die folgenden Felder sind besonders wichtig. Sie werden häufig beim Erstellen einer Markierung definiert.
-
positionist erforderlich und gibt einenLatLng-Wert für die Anfangsposition der Markierung an. Eine Methode zum Abrufen vonLatLngist die Verwendung des Geocoding-Dienstes. -
mapist optional und gibt dieMap(Karte) an, auf der die Markierung platziert werden soll. Wenn Sie keine Karte beim Erstellen der Markierung angeben, wird sie zwar erstellt, aber mit keiner Karte verknüpft bzw. auf keiner Karte angezeigt. Sie können die Markierung später über ihresetMap()-Methode hinzufügen.
Im folgenden Beispiel wird einer Karte eine einfache Markierung am Uluru im Zentrum von Australien hinzugefügt:
TypeScript
function initMap(): void { const myLatLng = { lat: -25.363, lng: 131.044 }; const map = new google.maps.Map( document.getElementById("map") as HTMLElement, { zoom: 4, center: myLatLng, } ); new google.maps.Marker({ position: myLatLng, map, title: "Hello World!", }); } declare global { interface Window { initMap: () => void; } } window.initMap = initMap;
JavaScript
function initMap() { const myLatLng = { lat: -25.363, lng: 131.044 }; const map = new google.maps.Map(document.getElementById("map"), { zoom: 4, center: myLatLng, }); new google.maps.Marker({ position: myLatLng, map, title: "Hello World!", }); } window.initMap = initMap;
Testbeispiel
Im Beispiel oben wird die Eigenschaft map in den Markierungsoptionen verwendet, um die Markierung beim Erstellen auf der Karte zu platzieren.
Alternativ können Sie die Markierung auch über ihre setMap()-Methode direkt auf der Karte einfügen, wie im folgenden Beispiel gezeigt:
var myLatlng = new google.maps.LatLng(-25.363882,131.044922);
var mapOptions = {
  zoom: 4,
  center: myLatlng
}
var map = new google.maps.Map(document.getElementById("map"), mapOptions);

var marker = new google.maps.Marker({
    position: myLatlng,
    title:"Hello World!"
});

// To add the marker to the map, call setMap();
marker.setMap(map);
Der title der Markierung wird als Kurzinfo angezeigt.
Wenn Sie keine Marker options im Konstruktor der Markierung übergeben möchten, übergeben Sie stattdessen ein leeres Objekt {} im letzten Argument des Konstruktors.
Markierung entfernen
Um eine Markierung von der Karte zu entfernen, rufen Sie die setMap()-Methode auf und übergeben dabei null als Argument.
marker.setMap(null);
Die Markierung wird mit der Methode oben nicht gelöscht. Sie wird lediglich aus der Karte entfernt. Wenn Sie sie löschen möchten, müssen Sie sie aus der Karte entfernen und dann auf null setzen.
Wenn Sie mehrere Markierungen verwalten möchten, erstellen Sie ein Array für die Markierungen. Sie können dann setMap() für jede Markierung im Array aufrufen, um sie zu entfernen. Sie können die Markierungen löschen, indem Sie sie von der Karte entfernen und length für das Array auf 0 setzen. Dadurch werden alle Verweise auf die Markierungen entfernt.
Markierungsbilder anpassen
Sie können die visuelle Darstellung von Markierungen anpassen, indem Sie eine Bilddatei oder ein vektorbasiertes Symbol angeben, das anstelle der standardmäßigen Stecknadel von Google Maps angezeigt werden soll. Sie können ein Markierungslabel hinzufügen und komplexe Symbole verwenden, um anklickbare Bereiche zu definieren und die Stapelreihenfolge von Markierungen festzulegen.
Markierungen mit Bildsymbolen
Grundsätzlich kann ein Bild definiert werden, das anstelle der standardmäßigen Stecknadel von Google Maps verwendet werden soll. Dazu wird die Eigenschaft icon der Markierung auf die URL des Bildes gesetzt. Die Maps JavaScript API passt die Größe des Symbols automatisch an.
TypeScript
// This example adds a marker to indicate the position of Bondi Beach in Sydney, // Australia. function initMap(): void { const map = new google.maps.Map( document.getElementById("map") as HTMLElement, { zoom: 4, center: { lat: -33, lng: 151 }, } ); const image = "https://developers.google.com/maps/documentation/javascript/examples/full/images/beachflag.png"; const beachMarker = new google.maps.Marker({ position: { lat: -33.89, lng: 151.274 }, map, icon: image, }); } declare global { interface Window { initMap: () => void; } } window.initMap = initMap;
JavaScript
// This example adds a marker to indicate the position of Bondi Beach in Sydney, // Australia. function initMap() { const map = new google.maps.Map(document.getElementById("map"), { zoom: 4, center: { lat: -33, lng: 151 }, }); const image = "https://developers.google.com/maps/documentation/javascript/examples/full/images/beachflag.png"; const beachMarker = new google.maps.Marker({ position: { lat: -33.89, lng: 151.274 }, map, icon: image, }); } window.initMap = initMap;
Testbeispiel
Markierungen mit vektorbasierten Symbolen
Sie können benutzerdefinierte Pfade zu SVG-Dateien verwenden, um die visuelle Darstellung von Markierungen zu definieren. Dazu übergeben Sie ein Symbol-Objektliteral mit dem gewünschten Pfad zur icon-Eigenschaft der Markierung. Sie können einen benutzerdefinierten Pfad mit der Notation für SVG-Pfade definieren oder einen der vordefinierten Pfade in google.maps.SymbolPath verwenden. Die Eigenschaft anchor ist erforderlich, damit die Markierung korrekt gerendert wird, wenn sich die Zoomstufe ändert. Weitere Informationen zum Verwenden von Symbolen zum Erstellen von vektorbasierten Symbolen für Markierungen (und Polylinien)
TypeScript
// This example uses SVG path notation to add a vector-based symbol // as the icon for a marker. The resulting icon is a marker-shaped // symbol with a blue fill and no border. function initMap(): void { const center = new google.maps.LatLng(-33.712451, 150.311823); const map = new google.maps.Map( document.getElementById("map") as HTMLElement, { zoom: 9, center: center, } ); const svgMarker = { path: "M-1.547 12l6.563-6.609-1.406-1.406-5.156 5.203-2.063-2.109-1.406 1.406zM0 0q2.906 0 4.945 2.039t2.039 4.945q0 1.453-0.727 3.328t-1.758 3.516-2.039 3.070-1.711 2.273l-0.75 0.797q-0.281-0.328-0.75-0.867t-1.688-2.156-2.133-3.141-1.664-3.445-0.75-3.375q0-2.906 2.039-4.945t4.945-2.039z", fillColor: "blue", fillOpacity: 0.6, strokeWeight: 0, rotation: 0, scale: 2, anchor: new google.maps.Point(0, 20), }; new google.maps.Marker({ position: map.getCenter(), icon: svgMarker, map: map, }); } declare global { interface Window { initMap: () => void; } } window.initMap = initMap;
JavaScript
// This example uses SVG path notation to add a vector-based symbol // as the icon for a marker. The resulting icon is a marker-shaped // symbol with a blue fill and no border. function initMap() { const center = new google.maps.LatLng(-33.712451, 150.311823); const map = new google.maps.Map(document.getElementById("map"), { zoom: 9, center: center, }); const svgMarker = { path: "M-1.547 12l6.563-6.609-1.406-1.406-5.156 5.203-2.063-2.109-1.406 1.406zM0 0q2.906 0 4.945 2.039t2.039 4.945q0 1.453-0.727 3.328t-1.758 3.516-2.039 3.070-1.711 2.273l-0.75 0.797q-0.281-0.328-0.75-0.867t-1.688-2.156-2.133-3.141-1.664-3.445-0.75-3.375q0-2.906 2.039-4.945t4.945-2.039z", fillColor: "blue", fillOpacity: 0.6, strokeWeight: 0, rotation: 0, scale: 2, anchor: new google.maps.Point(0, 20), }; new google.maps.Marker({ position: map.getCenter(), icon: svgMarker, map: map, }); } window.initMap = initMap;
Testbeispiel
Markierungslabels
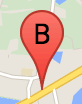
Ein Markierungslabel ist ein Buchstabe oder eine Zahl, der bzw. die innerhalb einer Markierung angezeigt wird. Für das Markierungsbild in diesem Abschnitt wird der Buchstabe „B“ als Label angezeigt. Sie können ein Markierungslabel als String oder als MarkerLabel-Objekt angeben, das einen String oder andere Labeleigenschaften enthält.
Beim Erstellen einer Markierung können Sie eine label-Eigenschaft im MarkerOptions-Objekt angeben. Alternativ können Sie setLabel() für das Markierungsobjekt aufrufen, um das Label einer vorhandenen Markierung festzulegen.
Im folgenden Beispiel werden Markierungen mit Labels eingeblendet, wenn Nutzer auf die Karte klicken:
TypeScript
// In the following example, markers appear when the user clicks on the map. // Each marker is labeled with a single alphabetical character. const labels = "ABCDEFGHIJKLMNOPQRSTUVWXYZ"; let labelIndex = 0; function initMap(): void { const bangalore = { lat: 12.97, lng: 77.59 }; const map = new google.maps.Map( document.getElementById("map") as HTMLElement, { zoom: 12, center: bangalore, } ); // This event listener calls addMarker() when the map is clicked. google.maps.event.addListener(map, "click", (event) => { addMarker(event.latLng, map); }); // Add a marker at the center of the map. addMarker(bangalore, map); } // Adds a marker to the map. function addMarker(location: google.maps.LatLngLiteral, map: google.maps.Map) { // Add the marker at the clicked location, and add the next-available label // from the array of alphabetical characters. new google.maps.Marker({ position: location, label: labels[labelIndex++ % labels.length], map: map, }); } declare global { interface Window { initMap: () => void; } } window.initMap = initMap;
JavaScript
// In the following example, markers appear when the user clicks on the map. // Each marker is labeled with a single alphabetical character. const labels = "ABCDEFGHIJKLMNOPQRSTUVWXYZ"; let labelIndex = 0; function initMap() { const bangalore = { lat: 12.97, lng: 77.59 }; const map = new google.maps.Map(document.getElementById("map"), { zoom: 12, center: bangalore, }); // This event listener calls addMarker() when the map is clicked. google.maps.event.addListener(map, "click", (event) => { addMarker(event.latLng, map); }); // Add a marker at the center of the map. addMarker(bangalore, map); } // Adds a marker to the map. function addMarker(location, map) { // Add the marker at the clicked location, and add the next-available label // from the array of alphabetical characters. new google.maps.Marker({ position: location, label: labels[labelIndex++ % labels.length], map: map, }); } window.initMap = initMap;
Testbeispiel
Komplexe Symbole
Sie können komplexe Formen definieren, um anklickbare Regionen anzugeben, und festlegen, wie die Symbole im Verhältnis zu anderen Overlays angezeigt werden sollen (Stapelreihenfolge). Für Symbole, die so definiert werden, sollte für die icon-Eigenschaften ein Objekt des Typs Icon festgelegt werden.
Icon-Objekte definieren ein Bild. Außerdem werden die Größe (size) und der Ursprung (origin) des Symbols (wenn das Bild beispielsweise Teil eines größeren Bildes in einem Sprite ist) sowie der Anker (anchor) für den Hotspot des Symbols (basierend auf dem Ursprung) definiert.
Wenn Sie ein Label für eine benutzerdefinierte Markierung verwenden, können Sie es mit der Eigenschaft labelOrigin im Icon-Objekt positionieren.
TypeScript
// The following example creates complex markers to indicate beaches near // Sydney, NSW, Australia. Note that the anchor is set to (0,32) to correspond // to the base of the flagpole. function initMap(): void { const map = new google.maps.Map( document.getElementById("map") as HTMLElement, { zoom: 10, center: { lat: -33.9, lng: 151.2 }, } ); setMarkers(map); } // Data for the markers consisting of a name, a LatLng and a zIndex for the // order in which these markers should display on top of each other. const beaches: [string, number, number, number][] = [ ["Bondi Beach", -33.890542, 151.274856, 4], ["Coogee Beach", -33.923036, 151.259052, 5], ["Cronulla Beach", -34.028249, 151.157507, 3], ["Manly Beach", -33.80010128657071, 151.28747820854187, 2], ["Maroubra Beach", -33.950198, 151.259302, 1], ]; function setMarkers(map: google.maps.Map) { // Adds markers to the map. // Marker sizes are expressed as a Size of X,Y where the origin of the image // (0,0) is located in the top left of the image. // Origins, anchor positions and coordinates of the marker increase in the X // direction to the right and in the Y direction down. const image = { url: "https://developers.google.com/maps/documentation/javascript/examples/full/images/beachflag.png", // This marker is 20 pixels wide by 32 pixels high. size: new google.maps.Size(20, 32), // The origin for this image is (0, 0). origin: new google.maps.Point(0, 0), // The anchor for this image is the base of the flagpole at (0, 32). anchor: new google.maps.Point(0, 32), }; // Shapes define the clickable region of the icon. The type defines an HTML // <area> element 'poly' which traces out a polygon as a series of X,Y points. // The final coordinate closes the poly by connecting to the first coordinate. const shape = { coords: [1, 1, 1, 20, 18, 20, 18, 1], type: "poly", }; for (let i = 0; i < beaches.length; i++) { const beach = beaches[i]; new google.maps.Marker({ position: { lat: beach[1], lng: beach[2] }, map, icon: image, shape: shape, title: beach[0], zIndex: beach[3], }); } } declare global { interface Window { initMap: () => void; } } window.initMap = initMap;
JavaScript
// The following example creates complex markers to indicate beaches near // Sydney, NSW, Australia. Note that the anchor is set to (0,32) to correspond // to the base of the flagpole. function initMap() { const map = new google.maps.Map(document.getElementById("map"), { zoom: 10, center: { lat: -33.9, lng: 151.2 }, }); setMarkers(map); } // Data for the markers consisting of a name, a LatLng and a zIndex for the // order in which these markers should display on top of each other. const beaches = [ ["Bondi Beach", -33.890542, 151.274856, 4], ["Coogee Beach", -33.923036, 151.259052, 5], ["Cronulla Beach", -34.028249, 151.157507, 3], ["Manly Beach", -33.80010128657071, 151.28747820854187, 2], ["Maroubra Beach", -33.950198, 151.259302, 1], ]; function setMarkers(map) { // Adds markers to the map. // Marker sizes are expressed as a Size of X,Y where the origin of the image // (0,0) is located in the top left of the image. // Origins, anchor positions and coordinates of the marker increase in the X // direction to the right and in the Y direction down. const image = { url: "https://developers.google.com/maps/documentation/javascript/examples/full/images/beachflag.png", // This marker is 20 pixels wide by 32 pixels high. size: new google.maps.Size(20, 32), // The origin for this image is (0, 0). origin: new google.maps.Point(0, 0), // The anchor for this image is the base of the flagpole at (0, 32). anchor: new google.maps.Point(0, 32), }; // Shapes define the clickable region of the icon. The type defines an HTML // <area> element 'poly' which traces out a polygon as a series of X,Y points. // The final coordinate closes the poly by connecting to the first coordinate. const shape = { coords: [1, 1, 1, 20, 18, 20, 18, 1], type: "poly", }; for (let i = 0; i < beaches.length; i++) { const beach = beaches[i]; new google.maps.Marker({ position: { lat: beach[1], lng: beach[2] }, map, icon: image, shape: shape, title: beach[0], zIndex: beach[3], }); } } window.initMap = initMap;
Testbeispiel
MarkerImage-Objekte in den Typ Icon konvertieren
Bis Version 3.10 der Maps JavaScript API wurden komplexe Symbole als MarkerImage-Objekte definiert. Das Objektliteral Icon wurde in Version 3.10 hinzugefügt und ersetzt MarkerImage ab Version 3.11.
Icon-Objektliterale unterstützen dieselben Parameter wie MarkerImage. Daher lässt sich ein MarkerImage ganz einfach in ein Icon konvertieren. Dazu entfernen Sie den Konstruktor, setzen die früheren Parameter in {} und fügen die Namen der einzelnen Parameter hinzu. Beispiel:
var image = new google.maps.MarkerImage(
    place.icon,
    new google.maps.Size(71, 71),
    new google.maps.Point(0, 0),
    new google.maps.Point(17, 34),
    new google.maps.Size(25, 25));
wird
var image = {
  url: place.icon,
  size: new google.maps.Size(71, 71),
  origin: new google.maps.Point(0, 0),
  anchor: new google.maps.Point(17, 34),
  scaledSize: new google.maps.Size(25, 25)
};
Markierungen optimieren
Durch die Optimierung wird die Leistung verbessert, weil viele Markierungen als einzelnes statisches Element gerendert werden. Das ist in Fällen nützlich, in denen eine große Anzahl von Markierungen erforderlich ist. Standardmäßig entscheidet die Maps JavaScript API, ob eine Markierung optimiert wird. Wenn eine große Anzahl von Markierungen vorhanden ist, versucht die Maps JavaScript API, Markierungen mit Optimierung zu rendern. Nicht alle Markierungen können optimiert werden. In einigen Fällen muss die Maps JavaScript API die Markierungen ohne Optimierung rendern. Deaktivieren Sie das optimierte Rendering für animierte GIFs oder PNGs oder wenn jede Markierung als separates DOM-Element gerendert werden muss. Im folgenden Beispiel wird eine optimierte Markierung erstellt:
var marker = new google.maps.Marker({
    position: myLatlng,
    title:"Hello World!",
    optimized: true
});
Markierungen barrierefrei machen
Sie können eine Markierung barrierefrei machen, indem Sie ein Listener-Ereignis für Klicks hinzufügen und optimized auf false setzen. Durch den Klick-Listener wird die Markierung semantisch zu einer Schaltfläche, auf die über die Tastaturnavigation, Screenreader usw. zugegriffen werden kann. Mit der Option title können Sie barrierefreien Text für eine Markierung einblenden lassen.
Im folgenden Beispiel erhält die erste Markierung den Fokus, wenn die Tabulatortaste gedrückt wird. Sie können dann mit den Pfeiltasten zwischen den einzelnen Markierungen wechseln. Drücken Sie wieder die Tabulatortaste, um schrittweise den Fokus auf die restlichen Kartensteuerelemente zu legen. Um das Infofenster einer Markierung zu öffnen, können Sie auf die Markierung klicken oder die Eingabe- oder Leertaste drücken, wenn die Markierung ausgewählt ist. Wird das Infofenster geschlossen, wird wieder die zugehörige Markierung fokussiert.
TypeScript
// The following example creates five accessible and // focusable markers. function initMap(): void { const map = new google.maps.Map( document.getElementById("map") as HTMLElement, { zoom: 12, center: { lat: 34.84555, lng: -111.8035 }, } ); // Set LatLng and title text for the markers. The first marker (Boynton Pass) // receives the initial focus when tab is pressed. Use arrow keys to // move between markers; press tab again to cycle through the map controls. const tourStops: [google.maps.LatLngLiteral, string][] = [ [{ lat: 34.8791806, lng: -111.8265049 }, "Boynton Pass"], [{ lat: 34.8559195, lng: -111.7988186 }, "Airport Mesa"], [{ lat: 34.832149, lng: -111.7695277 }, "Chapel of the Holy Cross"], [{ lat: 34.823736, lng: -111.8001857 }, "Red Rock Crossing"], [{ lat: 34.800326, lng: -111.7665047 }, "Bell Rock"], ]; // Create an info window to share between markers. const infoWindow = new google.maps.InfoWindow(); // Create the markers. tourStops.forEach(([position, title], i) => { const marker = new google.maps.Marker({ position, map, title: `${i + 1}. ${title}`, label: `${i + 1}`, optimized: false, }); // Add a click listener for each marker, and set up the info window. marker.addListener("click", () => { infoWindow.close(); infoWindow.setContent(marker.getTitle()); infoWindow.open(marker.getMap(), marker); }); }); } declare global { interface Window { initMap: () => void; } } window.initMap = initMap;
JavaScript
// The following example creates five accessible and // focusable markers. function initMap() { const map = new google.maps.Map(document.getElementById("map"), { zoom: 12, center: { lat: 34.84555, lng: -111.8035 }, }); // Set LatLng and title text for the markers. The first marker (Boynton Pass) // receives the initial focus when tab is pressed. Use arrow keys to // move between markers; press tab again to cycle through the map controls. const tourStops = [ [{ lat: 34.8791806, lng: -111.8265049 }, "Boynton Pass"], [{ lat: 34.8559195, lng: -111.7988186 }, "Airport Mesa"], [{ lat: 34.832149, lng: -111.7695277 }, "Chapel of the Holy Cross"], [{ lat: 34.823736, lng: -111.8001857 }, "Red Rock Crossing"], [{ lat: 34.800326, lng: -111.7665047 }, "Bell Rock"], ]; // Create an info window to share between markers. const infoWindow = new google.maps.InfoWindow(); // Create the markers. tourStops.forEach(([position, title], i) => { const marker = new google.maps.Marker({ position, map, title: `${i + 1}. ${title}`, label: `${i + 1}`, optimized: false, }); // Add a click listener for each marker, and set up the info window. marker.addListener("click", () => { infoWindow.close(); infoWindow.setContent(marker.getTitle()); infoWindow.open(marker.getMap(), marker); }); }); } window.initMap = initMap;
Testbeispiel
Markierung animieren
Sie können Marker so animieren, dass unter bestimmten Bedingungen dynamische Bewegungen ausgeführt werden. Um festzulegen, wie eine Markierung animiert wird, verwenden Sie die Eigenschaft animation der Markierung mit dem Typ google.maps.Animation. Folgende Animation-Werte werden unterstützt:
-
DROPgibt an, dass die Markierung vom oberen Kartenrand an ihre endgültige Position bewegt werden soll, wenn sie zum ersten Mal auf der Karte platziert wird. Die Animation wird beendet, sobald die Markierung ihre Position erreicht hat, undanimationwird aufnullzurückgesetzt. Diese Art von Animation wird normalerweise bei der Erstellung der Markierung (Marker) definiert. -
BOUNCEgibt an, dass die Markierung auf einer Stelle „hüpfen“ soll. Sie hüpft so lange weiter, bis ihreanimation-Eigenschaft explizit aufnullgesetzt wird.
Sie können eine Animation auf einer vorhandenen Markierung initiieren, indem Sie setAnimation() auf dem Marker-Objekt aufrufen.
TypeScript
// The following example creates a marker in Stockholm, Sweden using a DROP // animation. Clicking on the marker will toggle the animation between a BOUNCE // animation and no animation. let marker: google.maps.Marker; function initMap(): void { const map = new google.maps.Map( document.getElementById("map") as HTMLElement, { zoom: 13, center: { lat: 59.325, lng: 18.07 }, } ); marker = new google.maps.Marker({ map, draggable: true, animation: google.maps.Animation.DROP, position: { lat: 59.327, lng: 18.067 }, }); marker.addListener("click", toggleBounce); } function toggleBounce() { if (marker.getAnimation() !== null) { marker.setAnimation(null); } else { marker.setAnimation(google.maps.Animation.BOUNCE); } } declare global { interface Window { initMap: () => void; } } window.initMap = initMap;
JavaScript
// The following example creates a marker in Stockholm, Sweden using a DROP // animation. Clicking on the marker will toggle the animation between a BOUNCE // animation and no animation. let marker; function initMap() { const map = new google.maps.Map(document.getElementById("map"), { zoom: 13, center: { lat: 59.325, lng: 18.07 }, }); marker = new google.maps.Marker({ map, draggable: true, animation: google.maps.Animation.DROP, position: { lat: 59.327, lng: 18.067 }, }); marker.addListener("click", toggleBounce); } function toggleBounce() { if (marker.getAnimation() !== null) { marker.setAnimation(null); } else { marker.setAnimation(google.maps.Animation.BOUNCE); } } window.initMap = initMap;
Testbeispiel
Falls Sie viele Markierungen verwenden, ist es vielleicht nicht sinnvoll, wenn alle auf einmal auf der Karte eingeblendet werden. Sie können setTimeout() verwenden, um die Animationen Ihrer Markierungen nach einem Muster wie im Beispiel unten einzublenden:
function drop() {
  for (var i =0; i < markerArray.length; i++) {
    setTimeout(function() {
      addMarkerMethod();
    }, i * 200);
  }
}
Markierungen ziehbar machen
Damit Nutzer eine Markierung an eine andere Position auf der Karte ziehen können, setzen Sie draggable in den Optionen der Markierung auf true.
var myLatlng = new google.maps.LatLng(-25.363882,131.044922);
var mapOptions = {
  zoom: 4,
  center: myLatlng
}
var map = new google.maps.Map(document.getElementById("map"), mapOptions);

// Place a draggable marker on the map
var marker = new google.maps.Marker({
    position: myLatlng,
    map: map,
    draggable:true,
    title:"Drag me!"
});
Weitere Markierungsanpassung
Eine vollständig angepasste Markierung finden Sie im Beispiel für benutzerdefinierte Pop-ups.
Weitere Erweiterungen der Klasse „Markierung“, von Markierungsclustern, Markierungsverwaltung und Overlay-Anpassung finden Sie unter Open-Source-Bibliotheken.